For 1990-2009 cars only
- Inspect the rear control valve body (410) casting for the following conditions:
- Inspect all valves, springs, bushings, and clean all components in clean solvent.
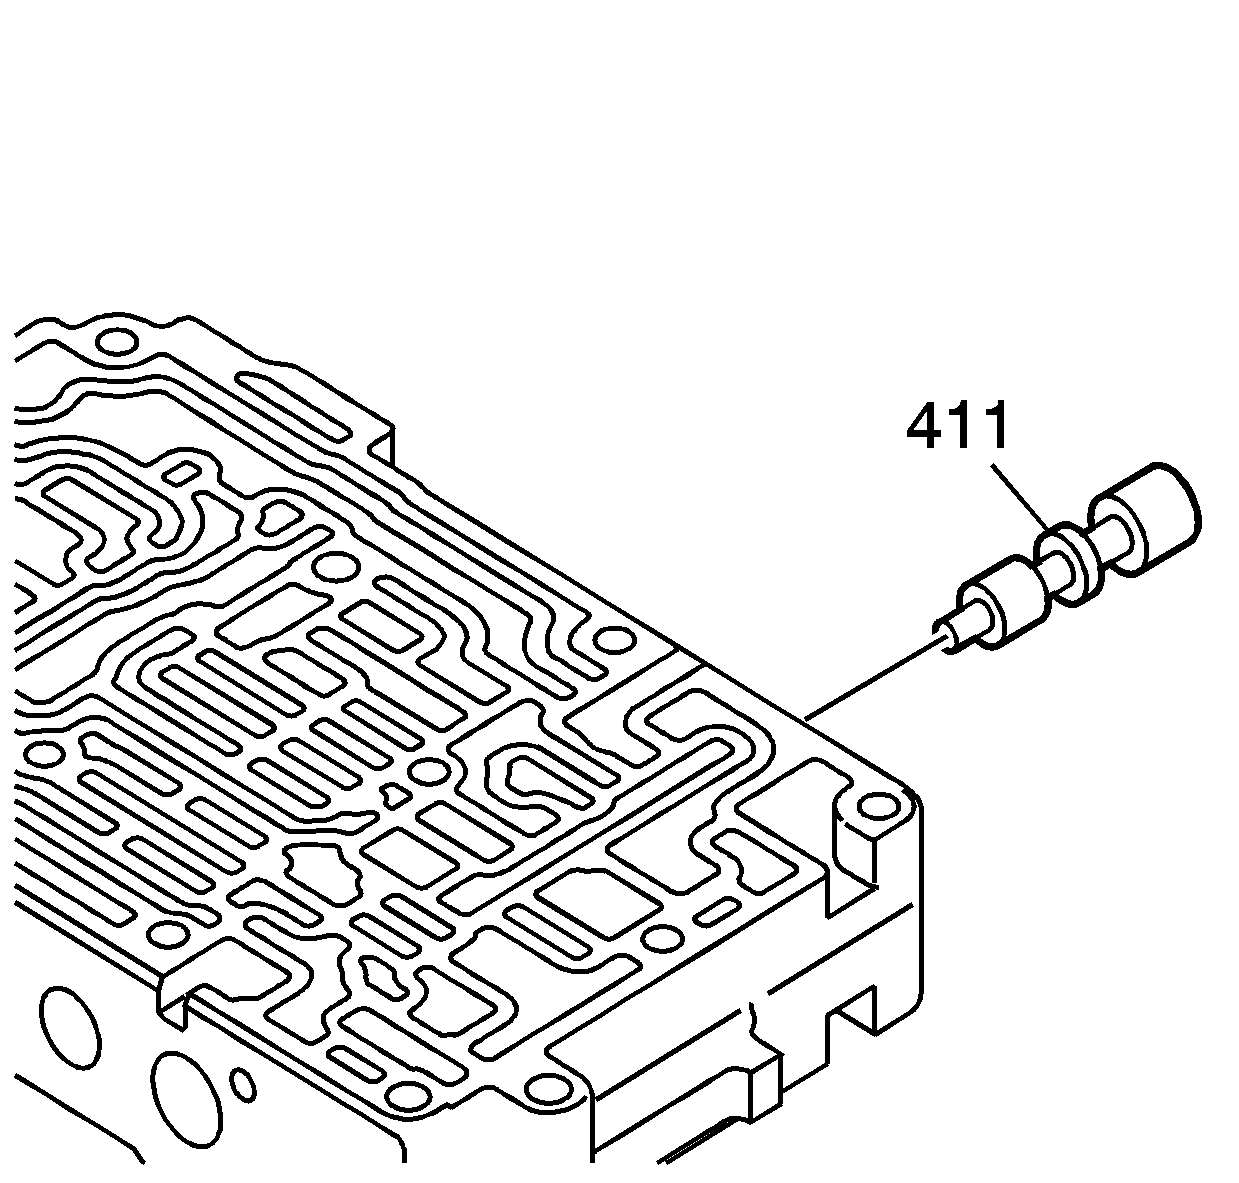
- Install the 1-2 reverse clutch (B5) control valve (411).
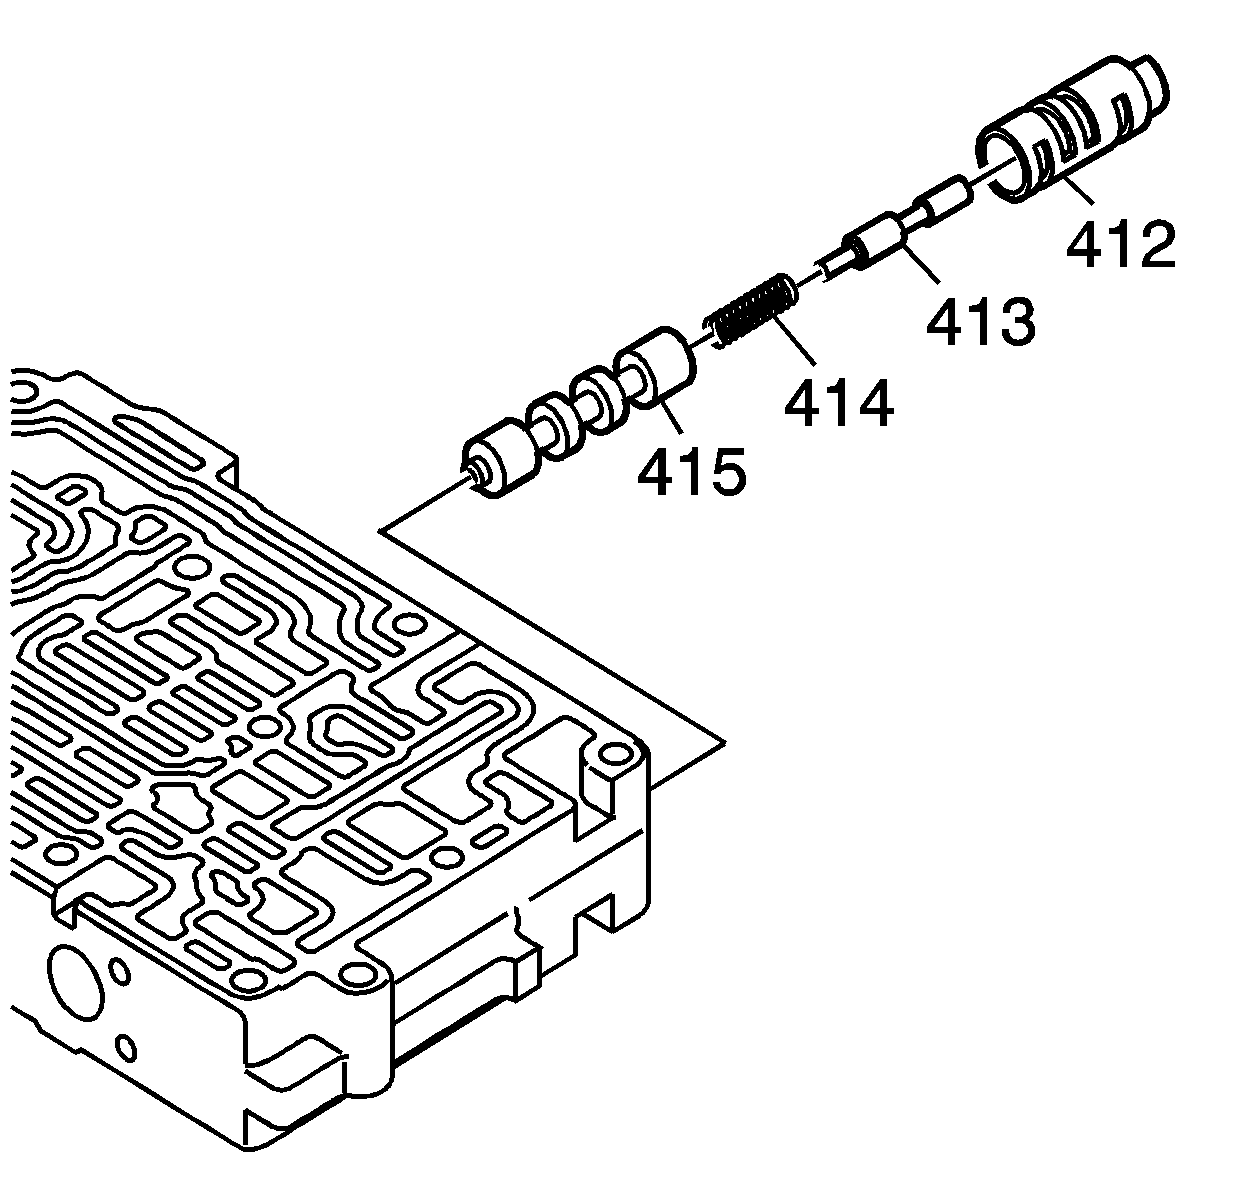
- Install the lock up relay valve (415).
- Install the lock up relay valve spring (414).
- Install the lock up relay control valve plunger (413).
- Install the lock up relay control valve sleeve (412).
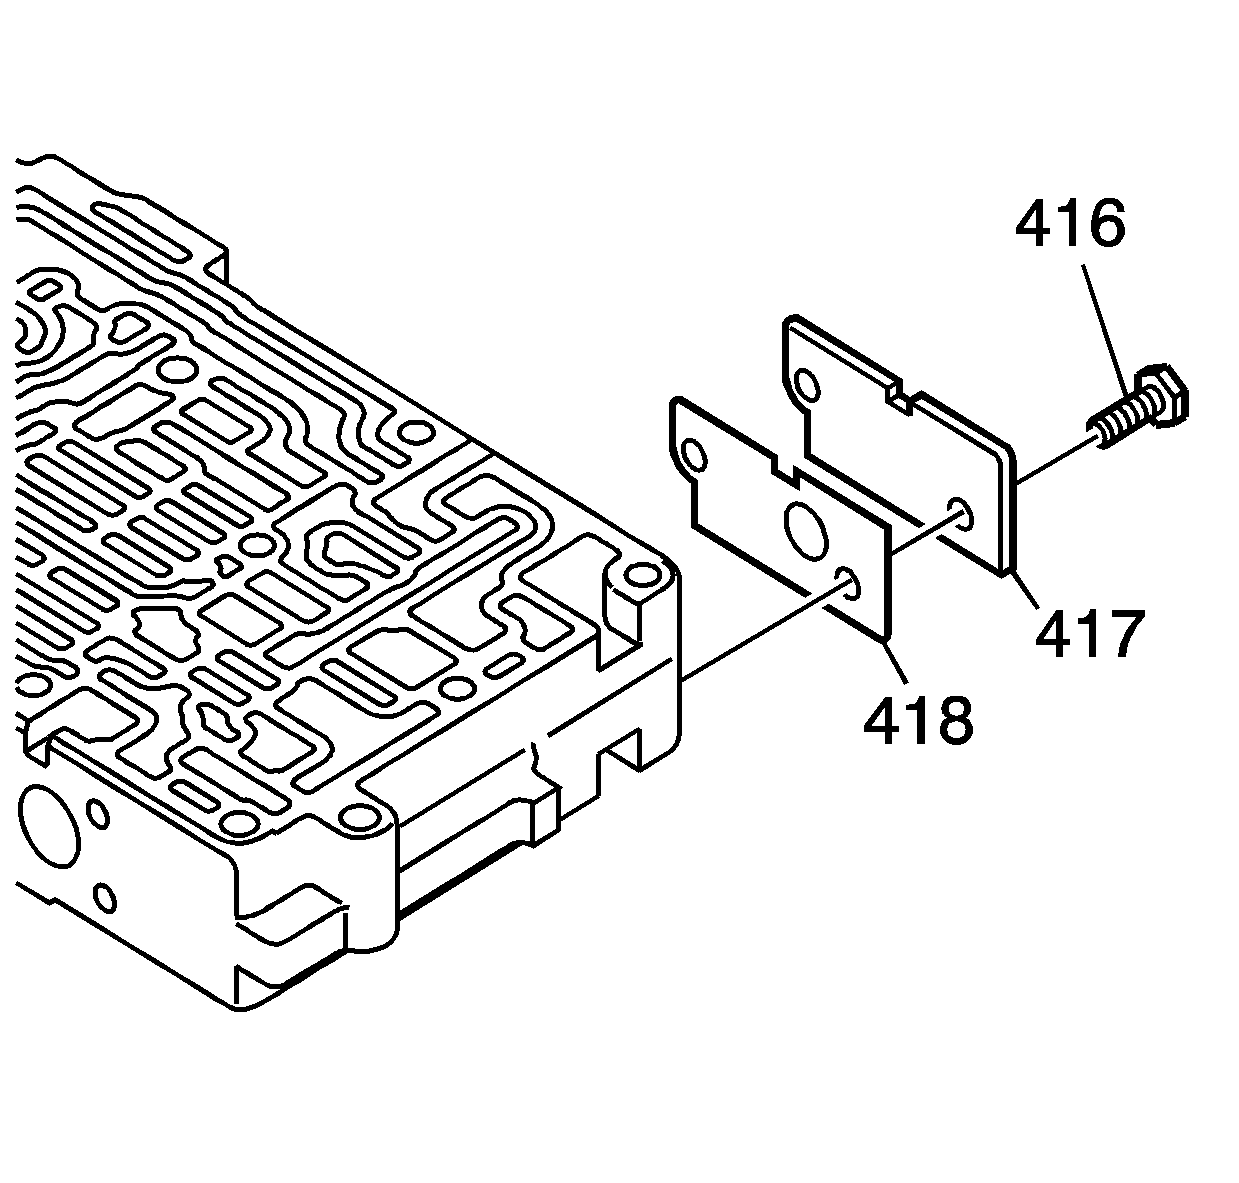
- Install the rear valve body cover plate gasket (418).
- Install the rear valve body cover plate (417).
- Install the 2 - M5 x 0.8 x 13 mm rear valve body cover plate bolts (416) and tighten to 7 N·m (62 lb in).
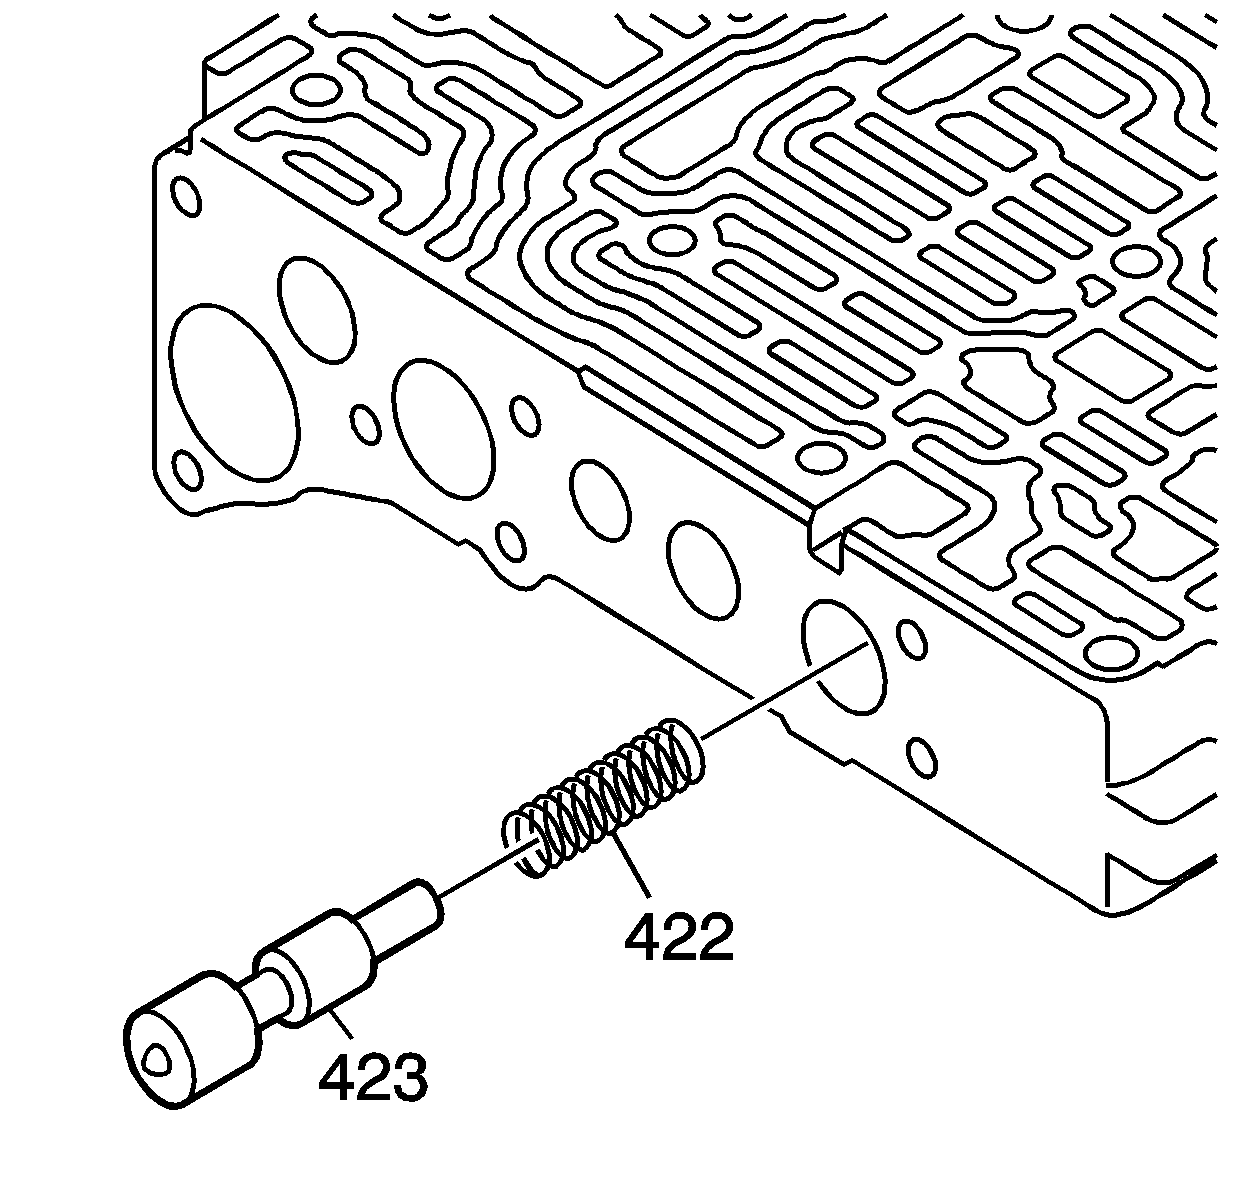
- Install the third gear band (B4) control valve spring (422).
- Install the third gear band (B4) control valve (423).
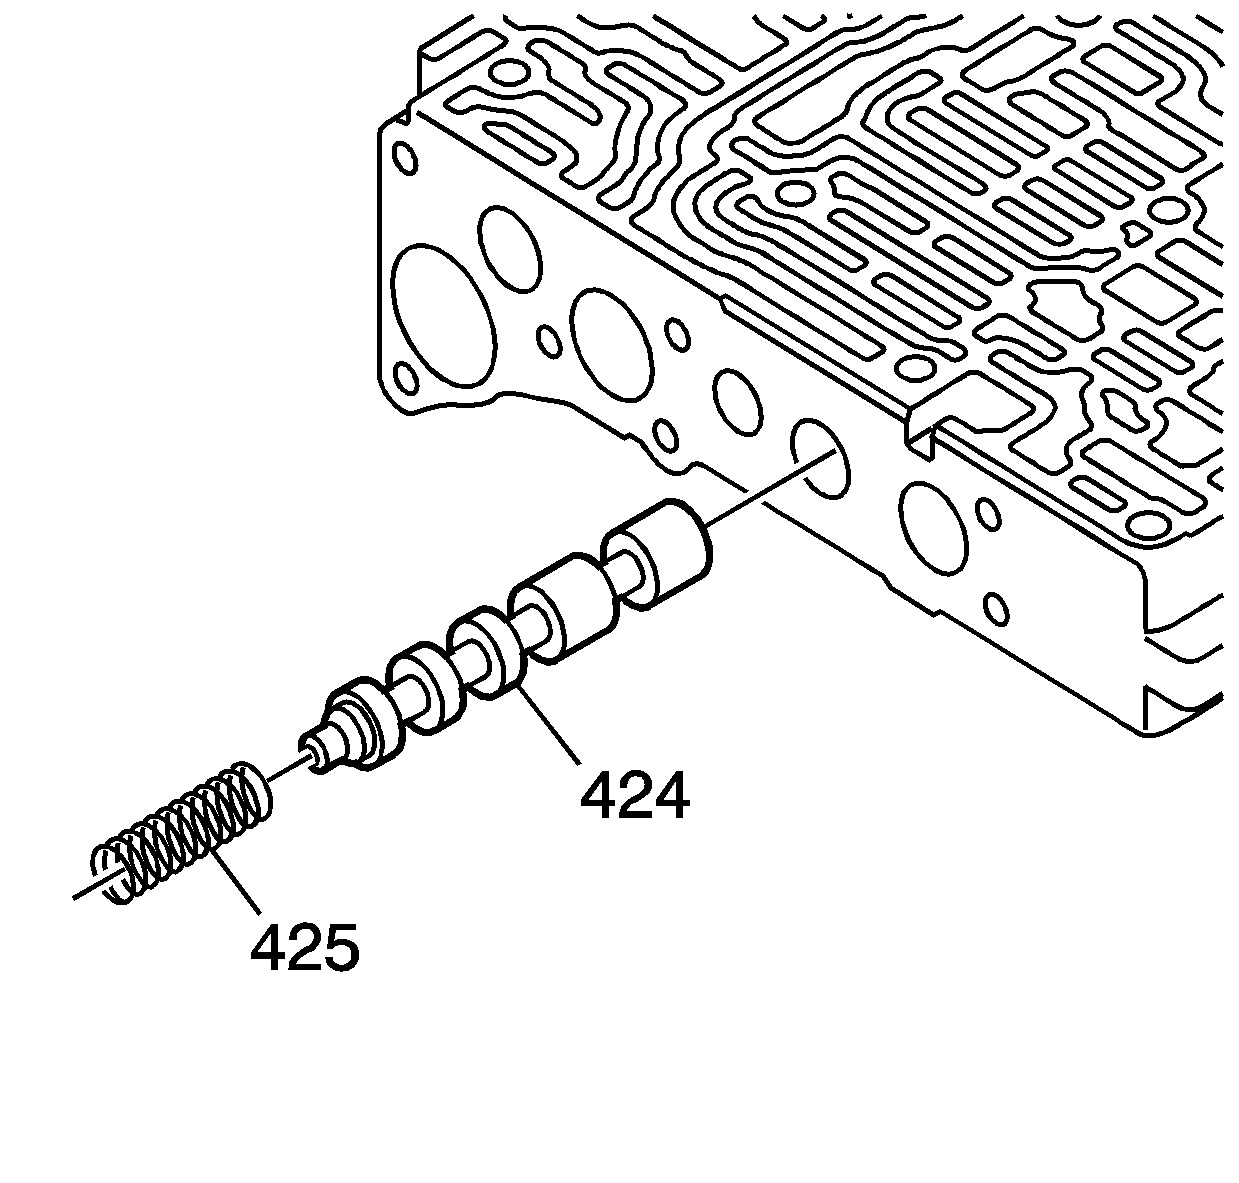
- Install the shift pressure relay valve (424).
- Install the shift pressure relay valve spring (425).
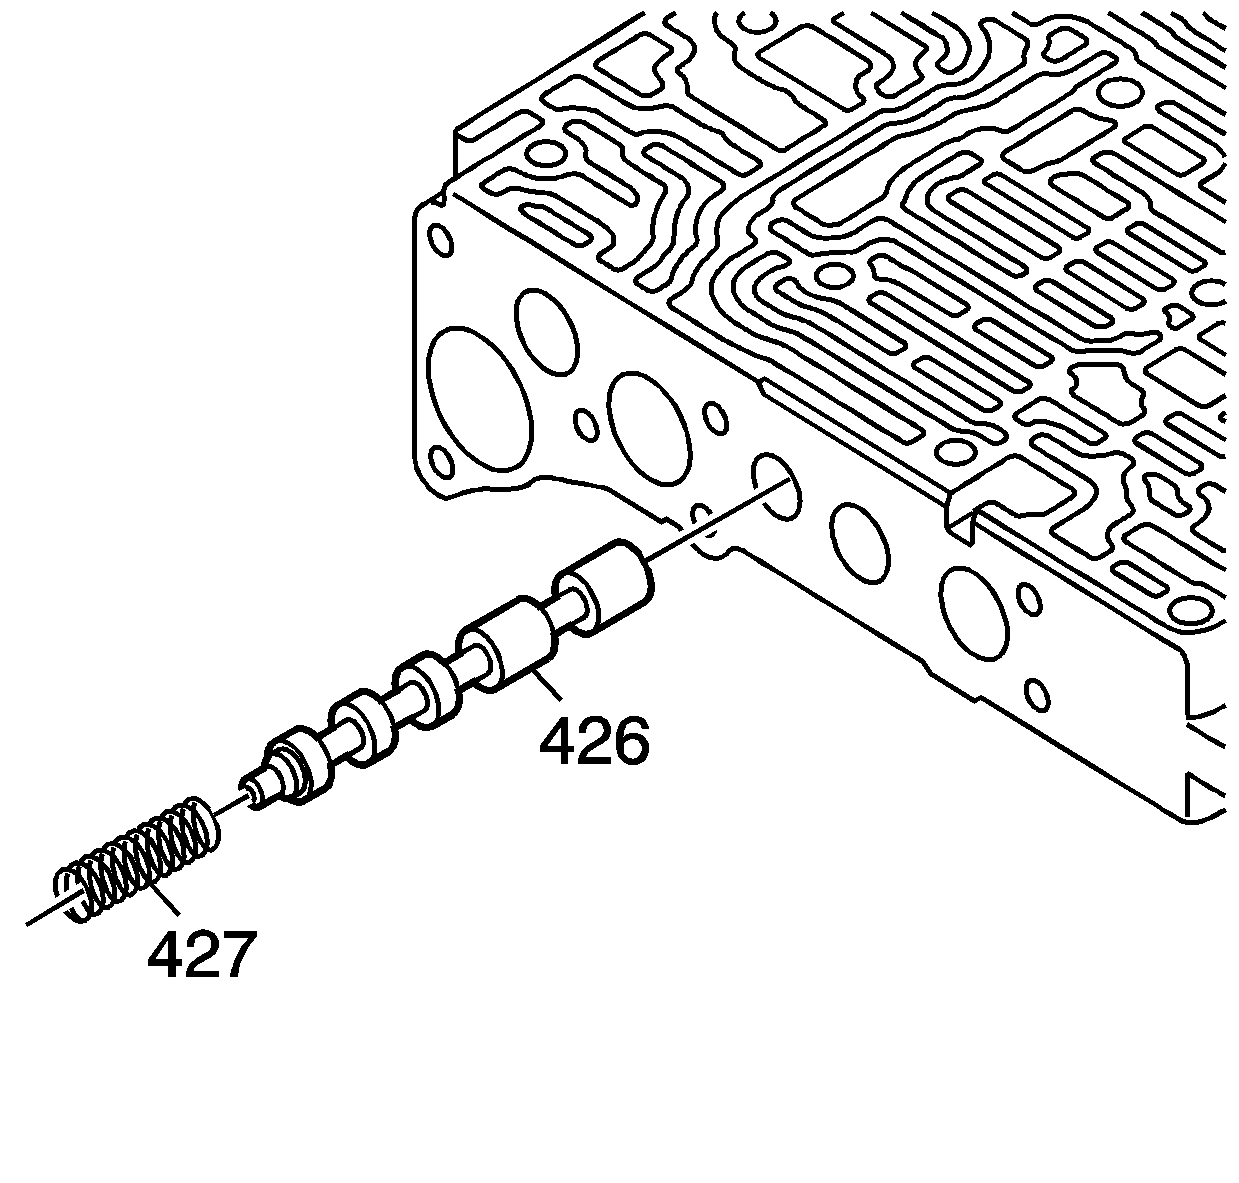
- Install the M2 shift valve (426).
- Install the M2 shift valve spring (427).
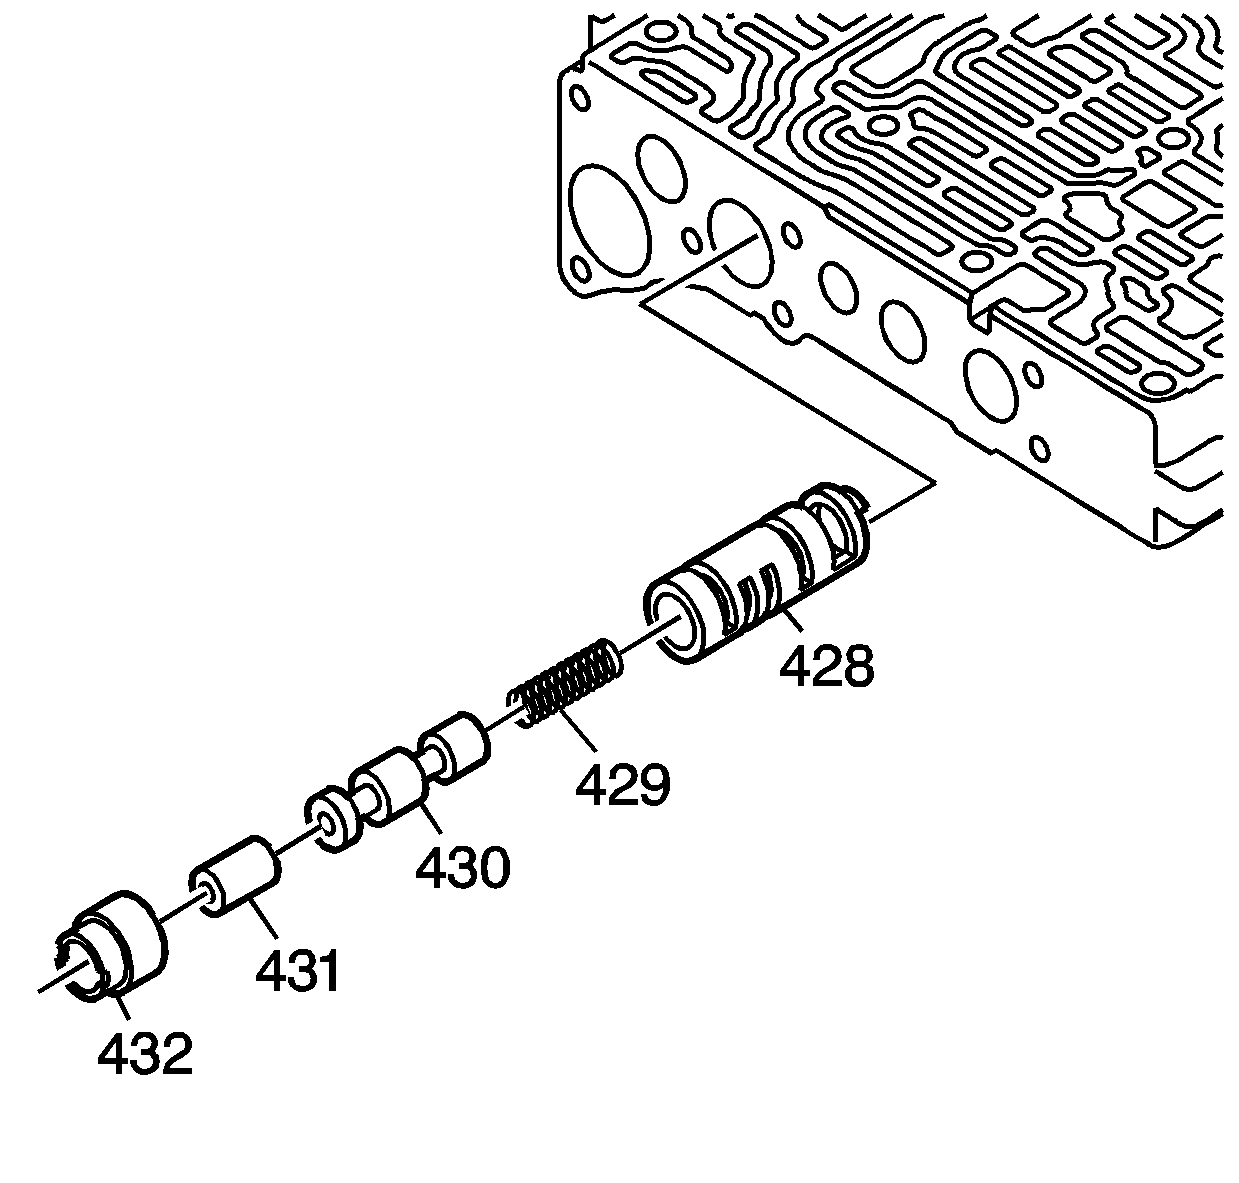
- Install the shift pressure control valve sleeve (428).
- Install the shift pressure control valve spring (429).
- Install the shift pressure control valve (430).
- Install the shift pressure control valve plunger (431).
- Install the shift pressure control valve plunger sleeve (432).
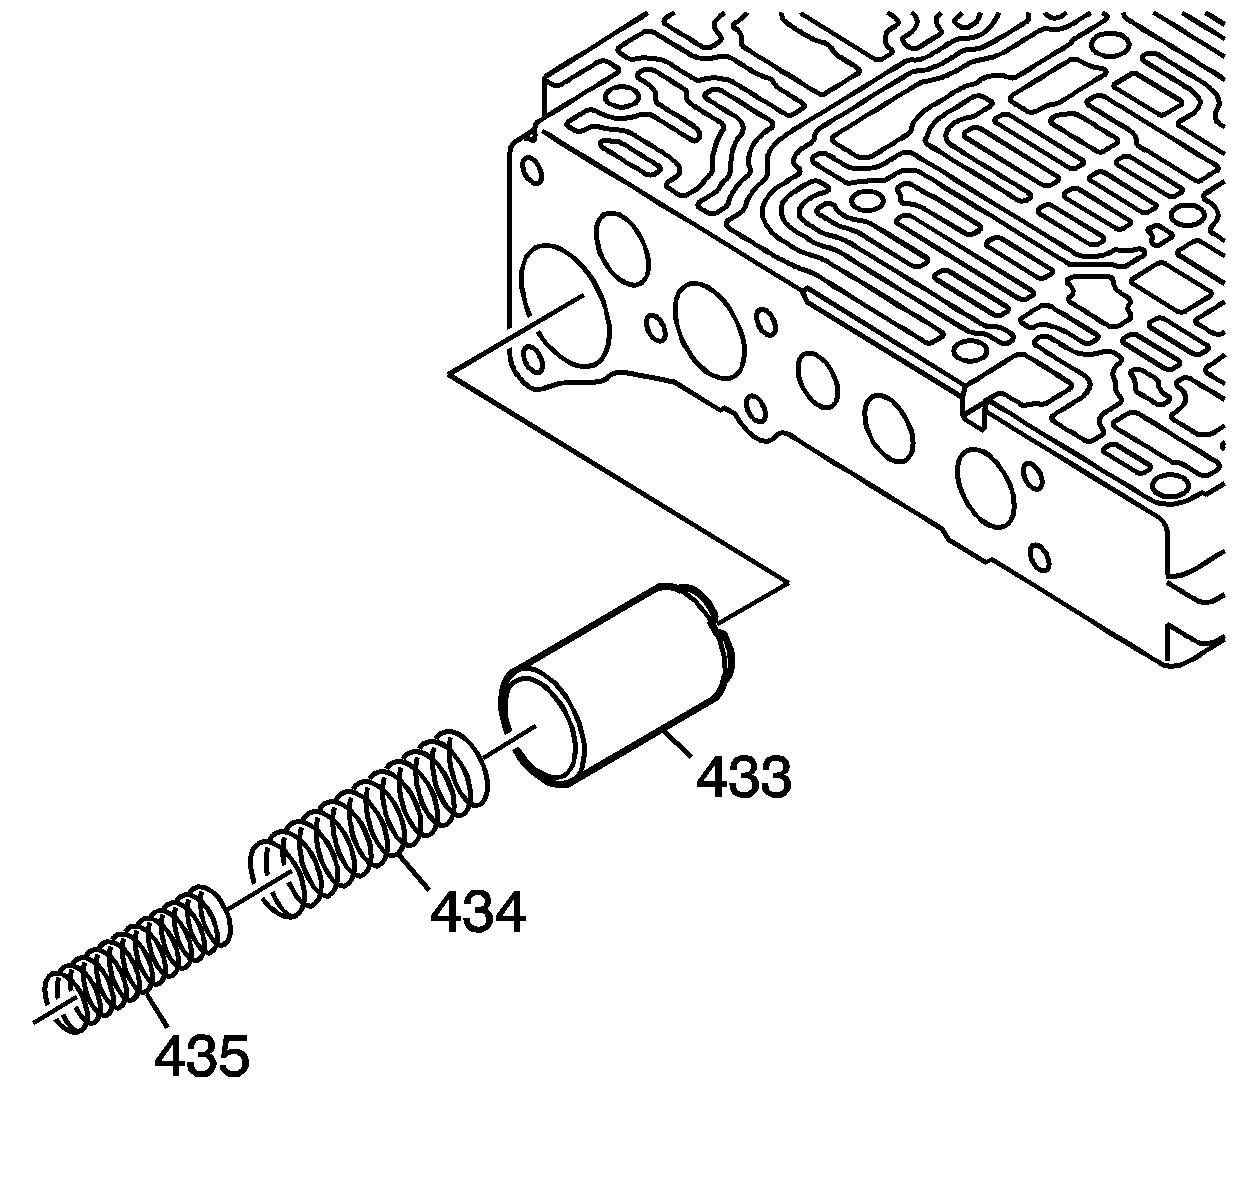
- Install the line pressure control (SLT) accumulator piston (433).
- Install the line pressure control (SLT) accumulator piston spring - outer (434).
- Install the line pressure control (SLT) accumulator piston spring - inner (435).
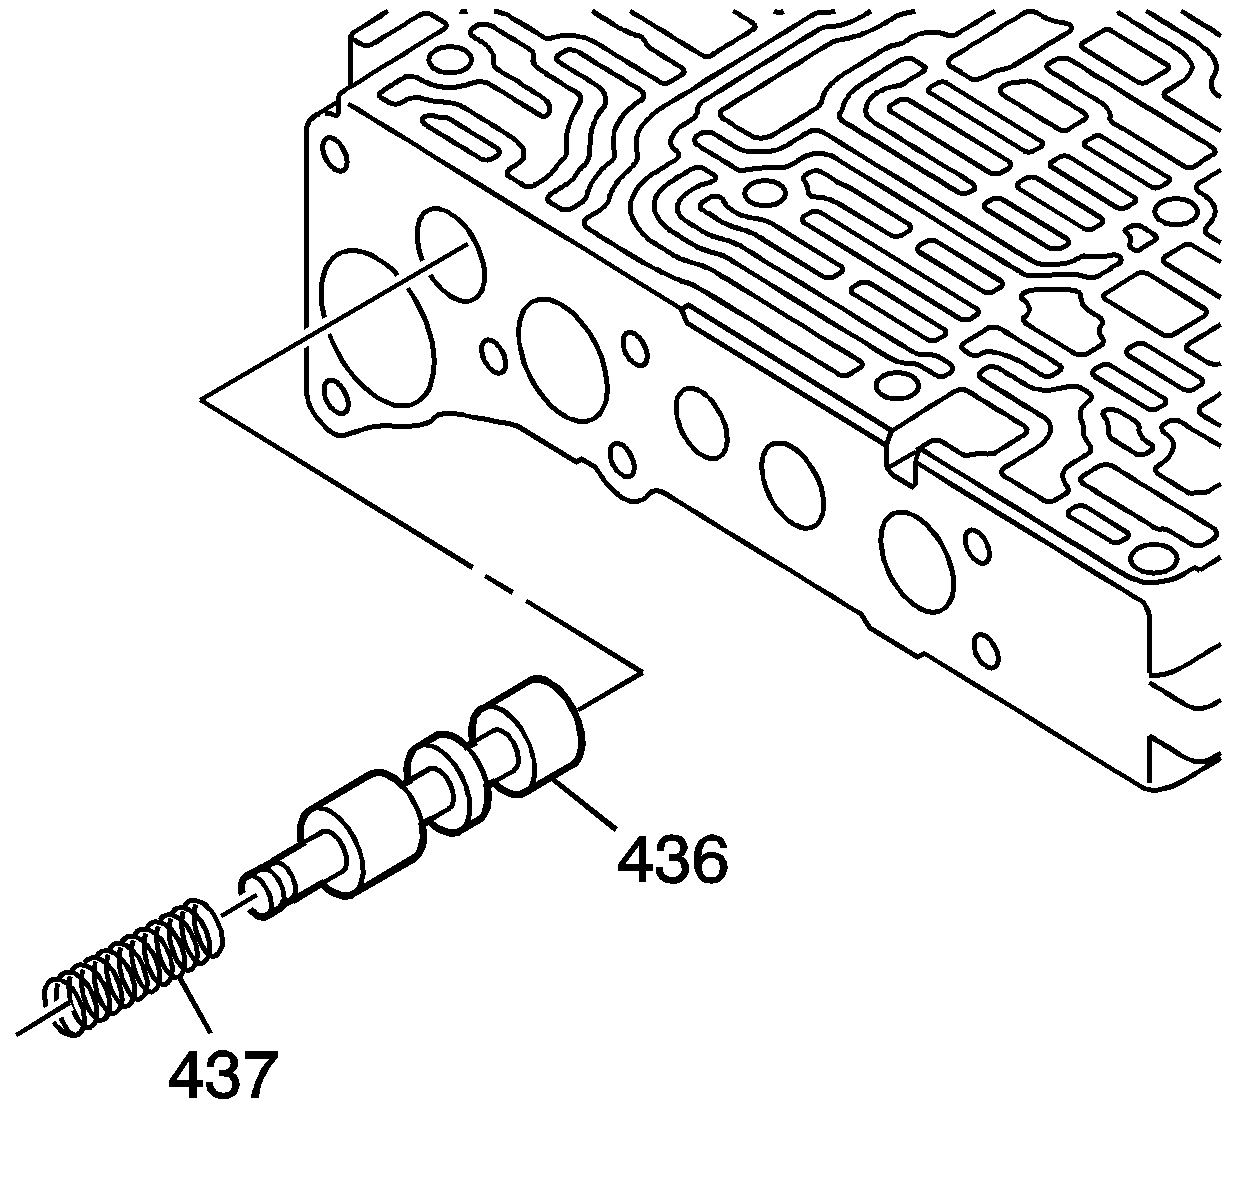
- Install the secondary regulator valve (436).
- Install the secondary regulator valve spring (437).
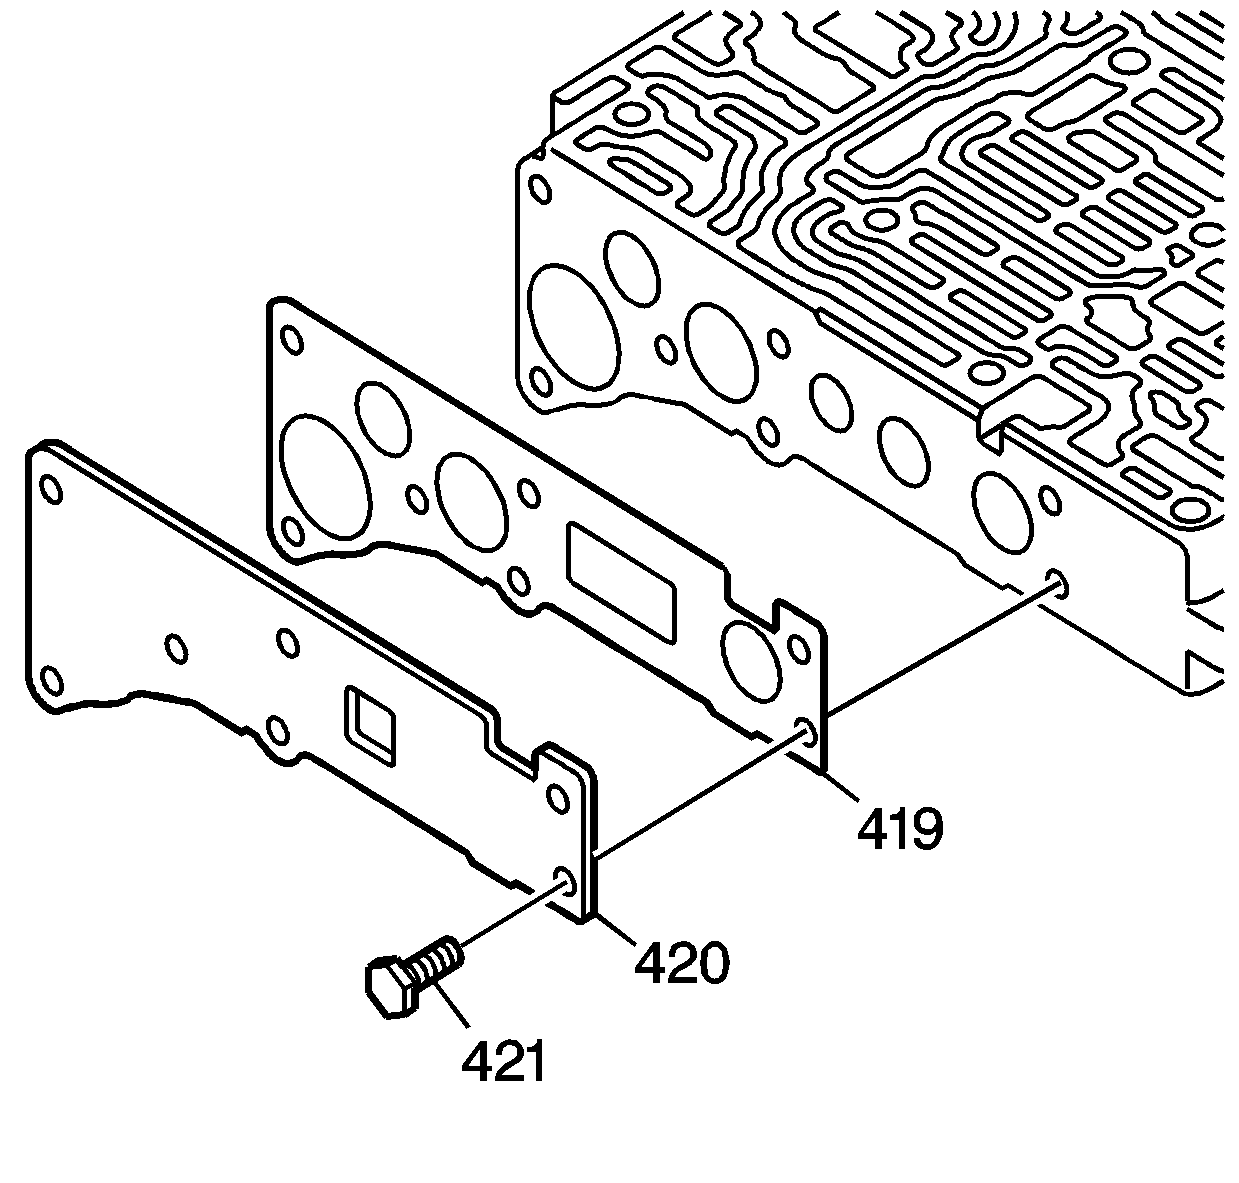
- Install the rear valve body cover plate gasket (419).
- Install the rear valve body cover plate (420).
- Install the 7 - M5 x 0.8 x 13 mm rear valve body cover plate bolts (421) and tighten to 7 N·m (62 lb in).
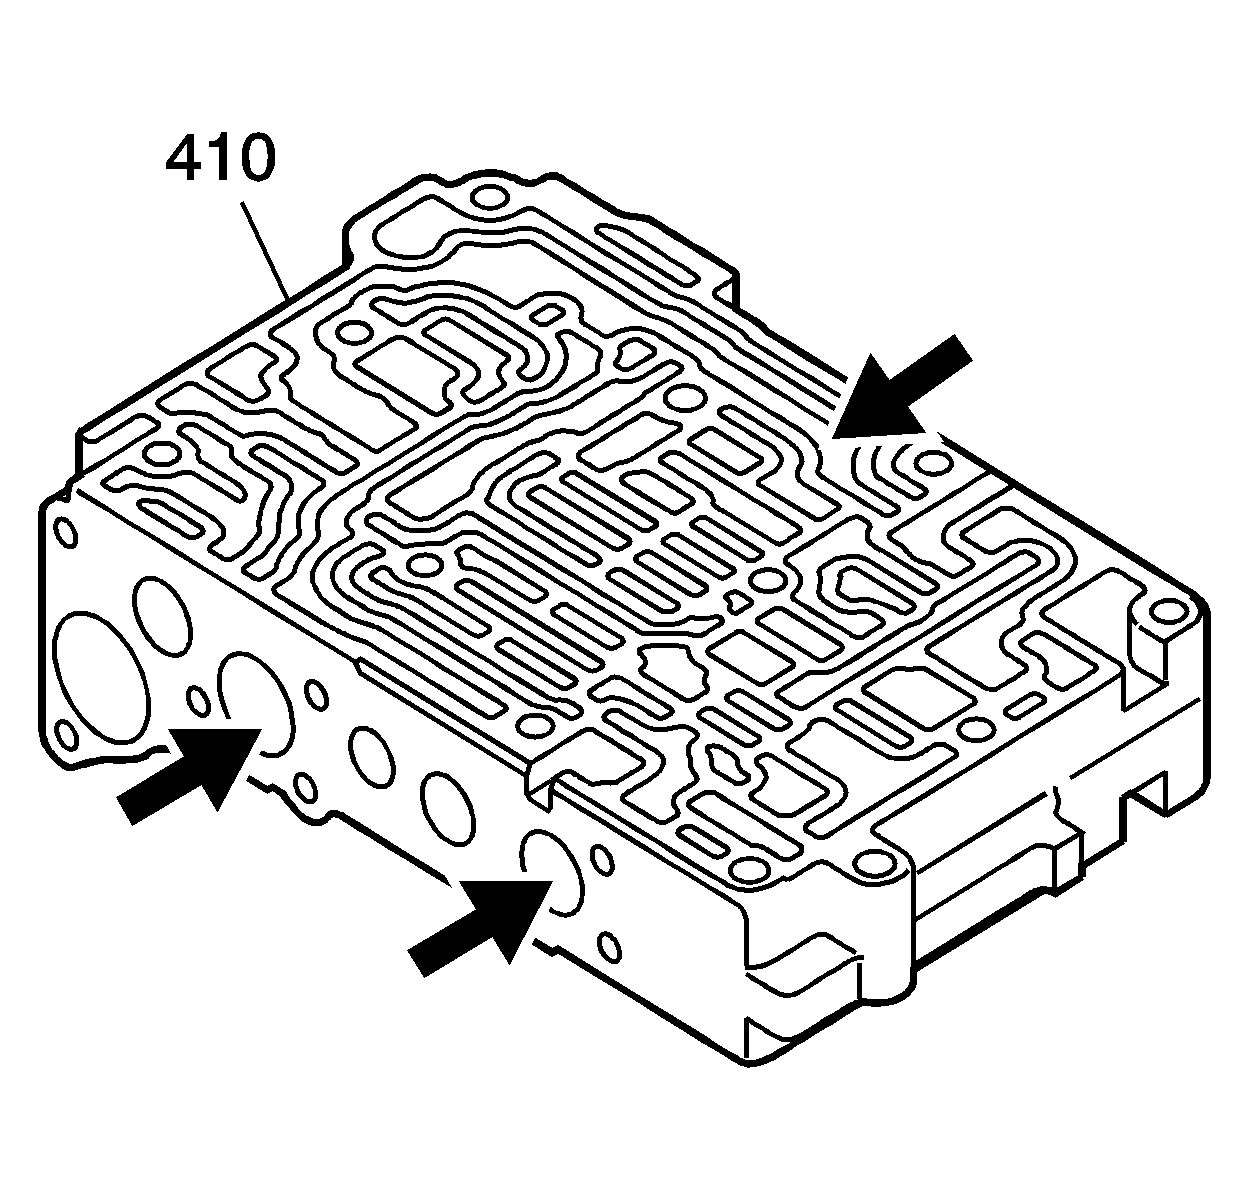
| • | Porosity |
| • | Cracks |
| • | Damaged machine surface |
| • | Chips or debris |
| • | Damage to valve bores |
Caution: Refer to Fastener Caution in the Preface section.
