For 1990-2009 cars only
Removal Procedure
- Remove the control valve body cover. Refer to Control Valve Body Cover Replacement.
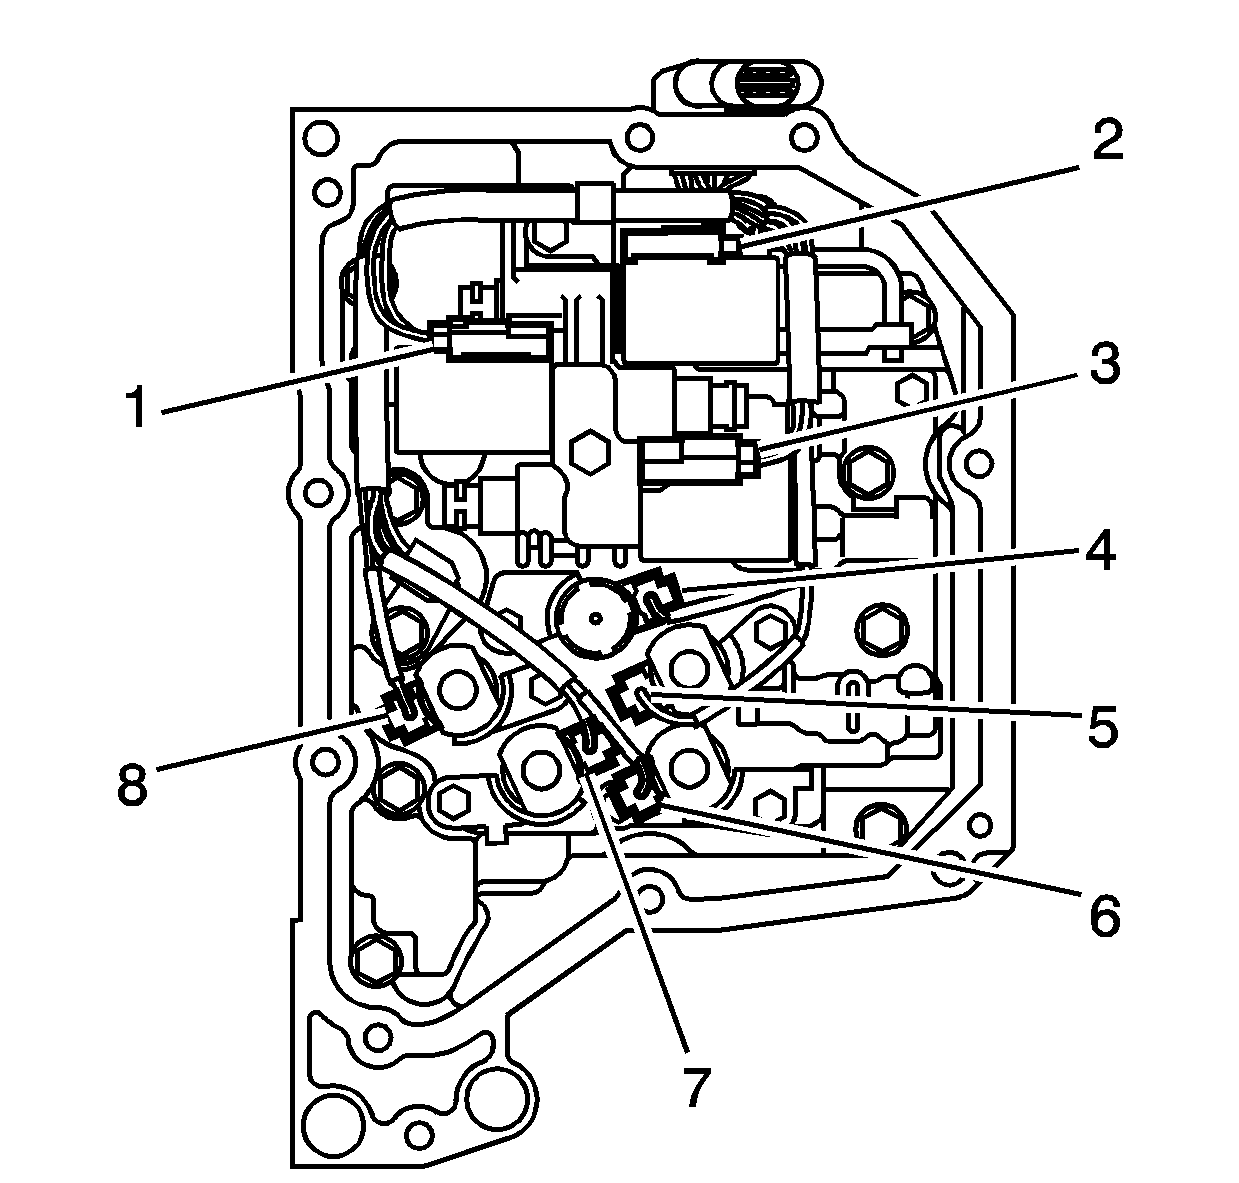
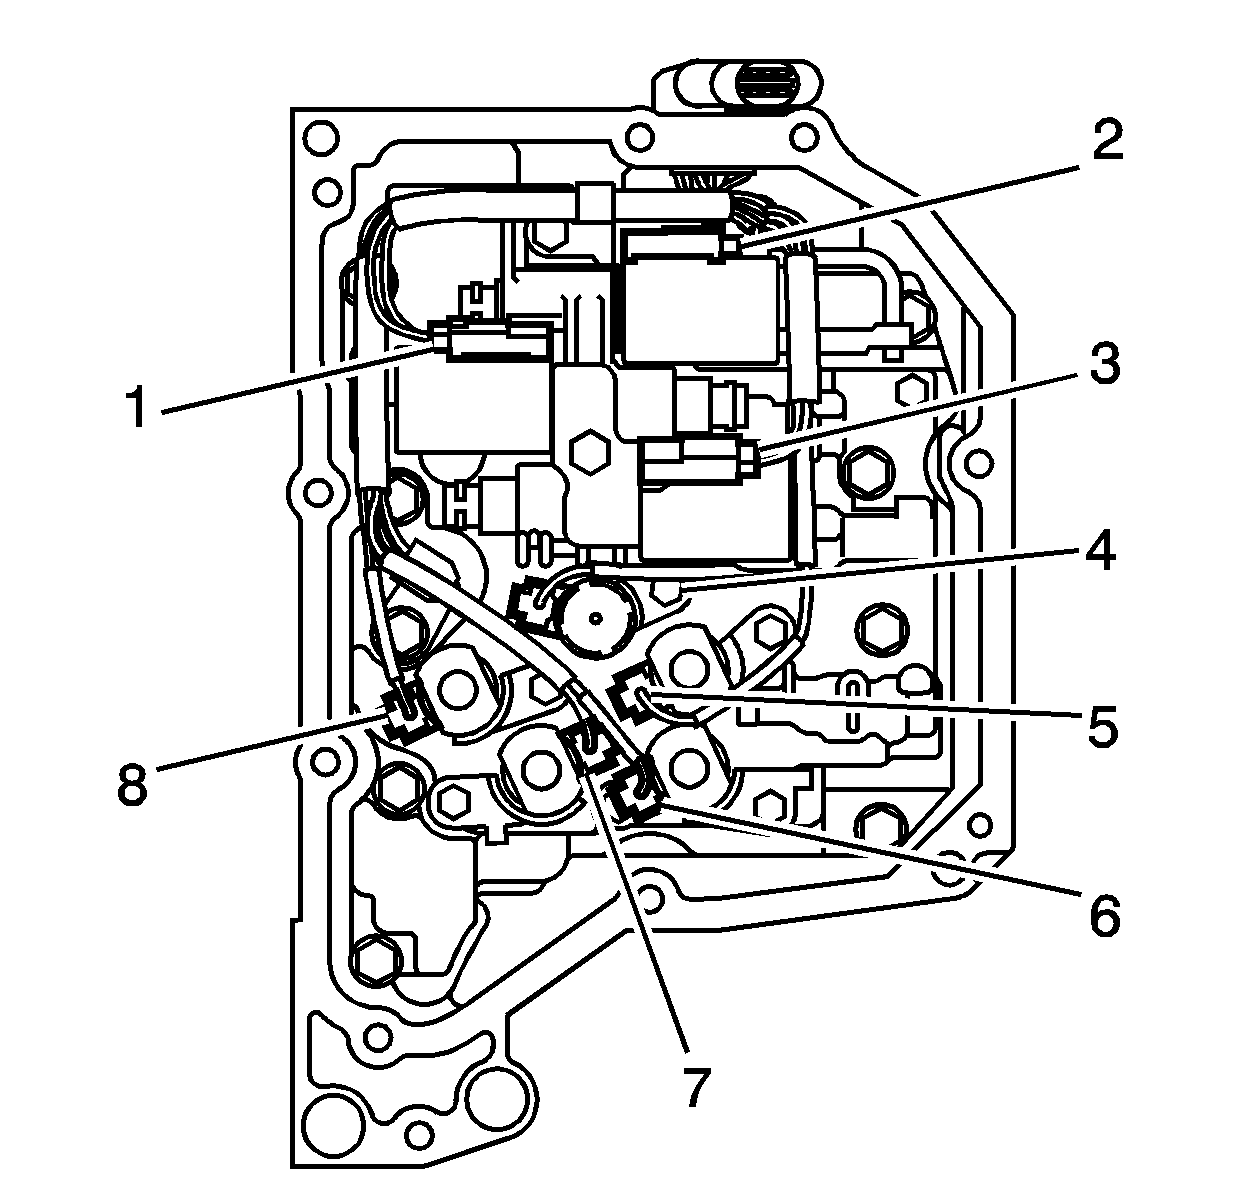
- Disconnect the wiring harness connectors (1-8).
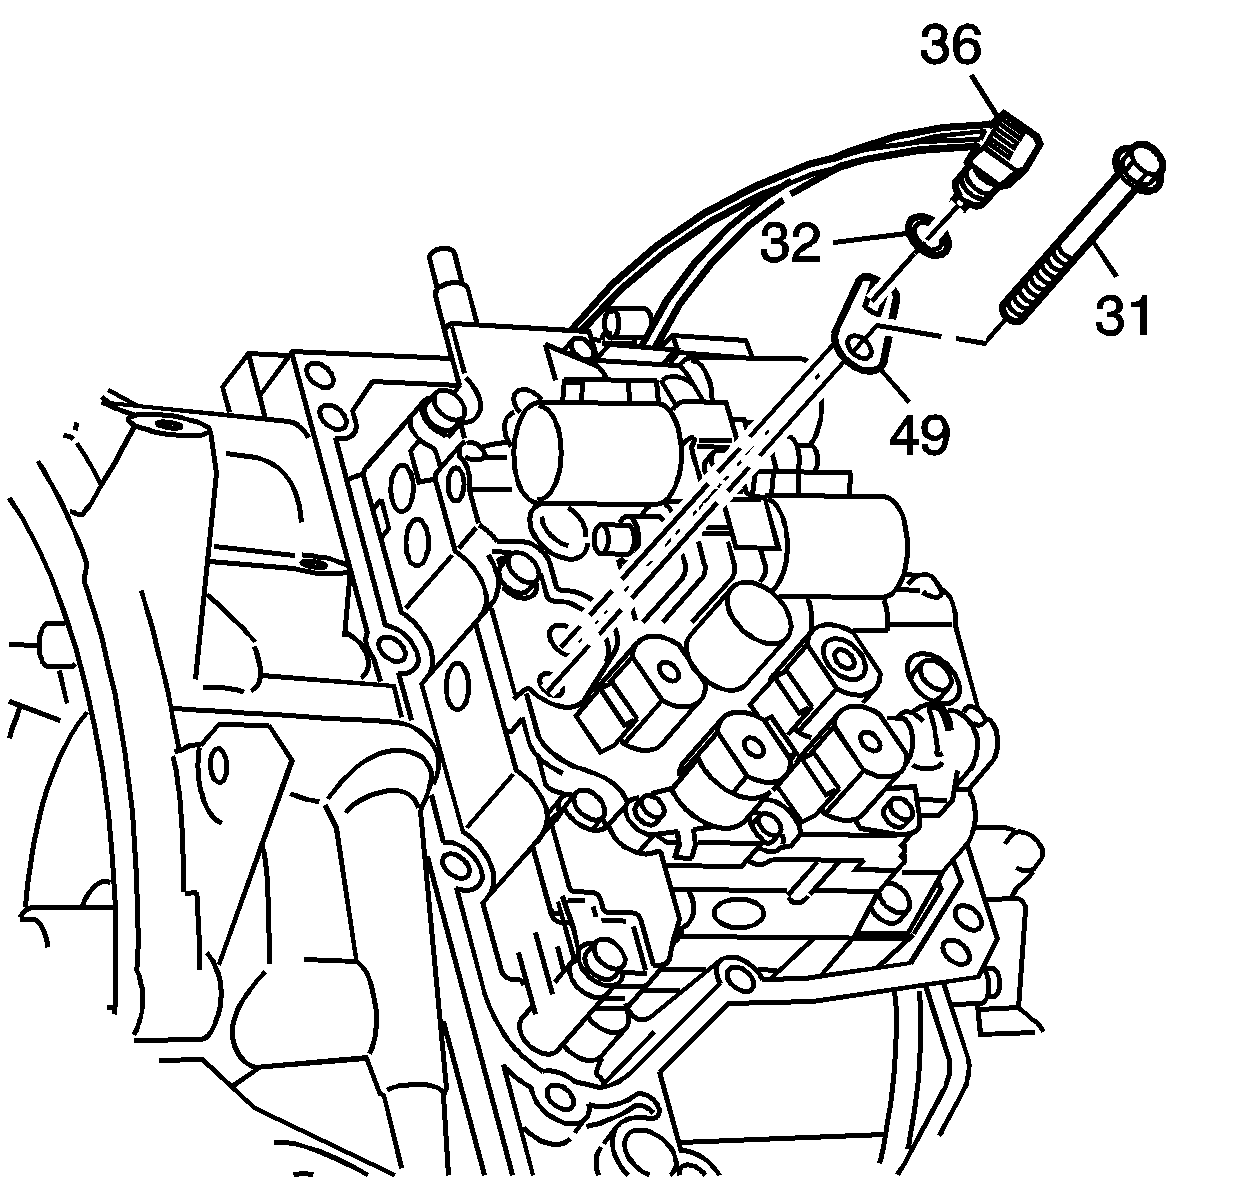
- Remove the fluid temperature sensor bolt (31).
- Remove the fluid temperature sensor clamp (49).
- Remove the fluid temperature sensor (36) and the O-ring (32) from the control valve body.
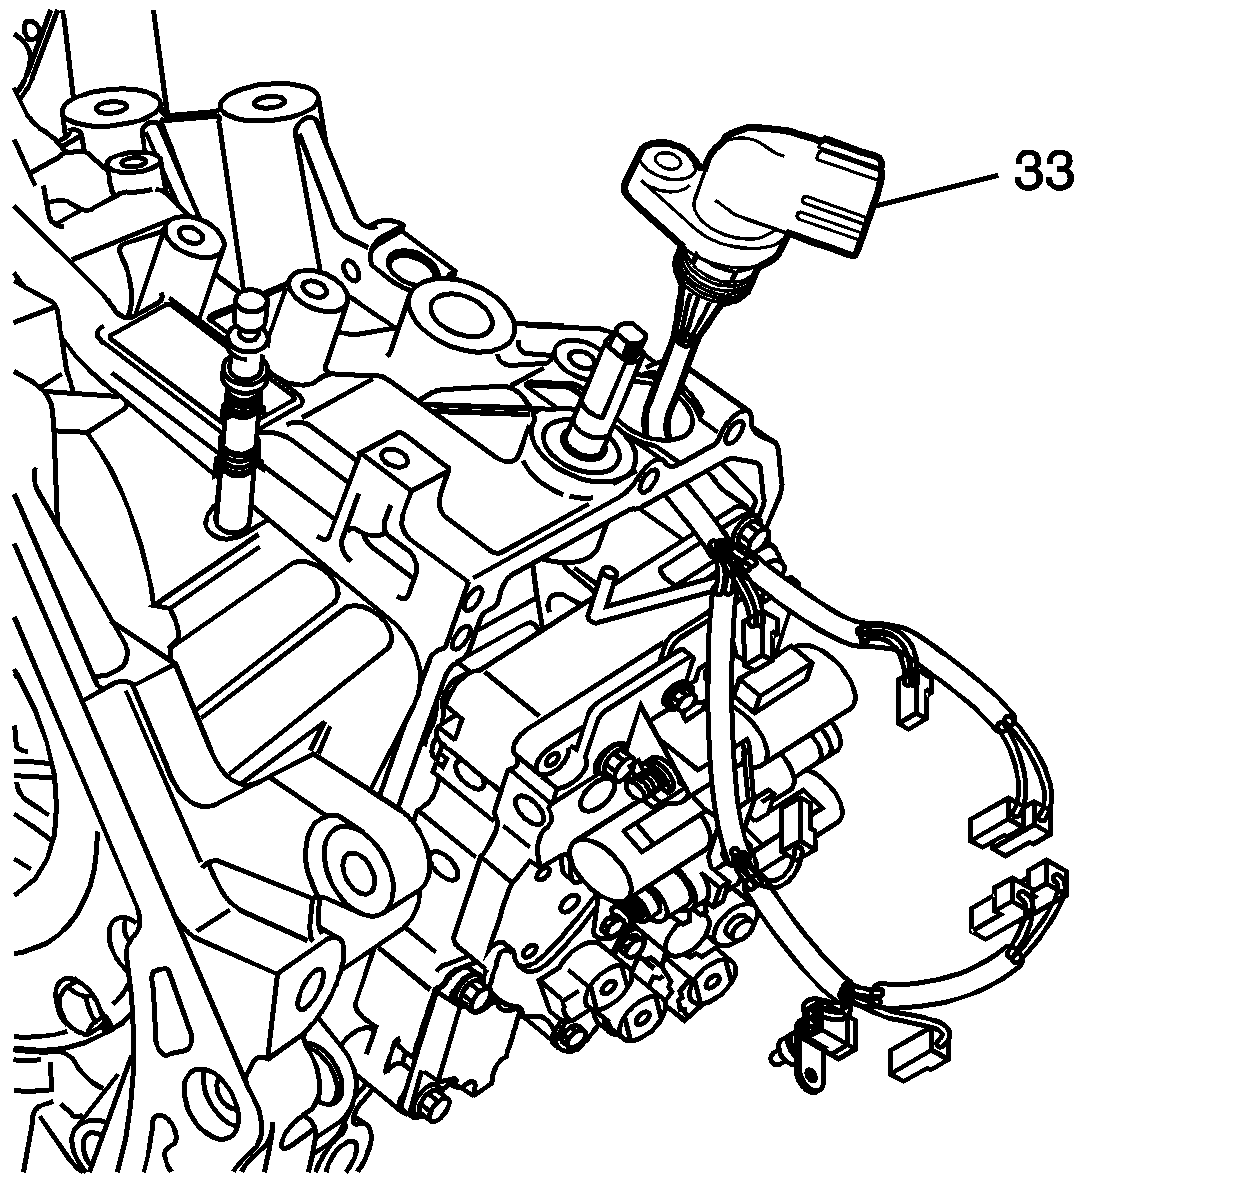
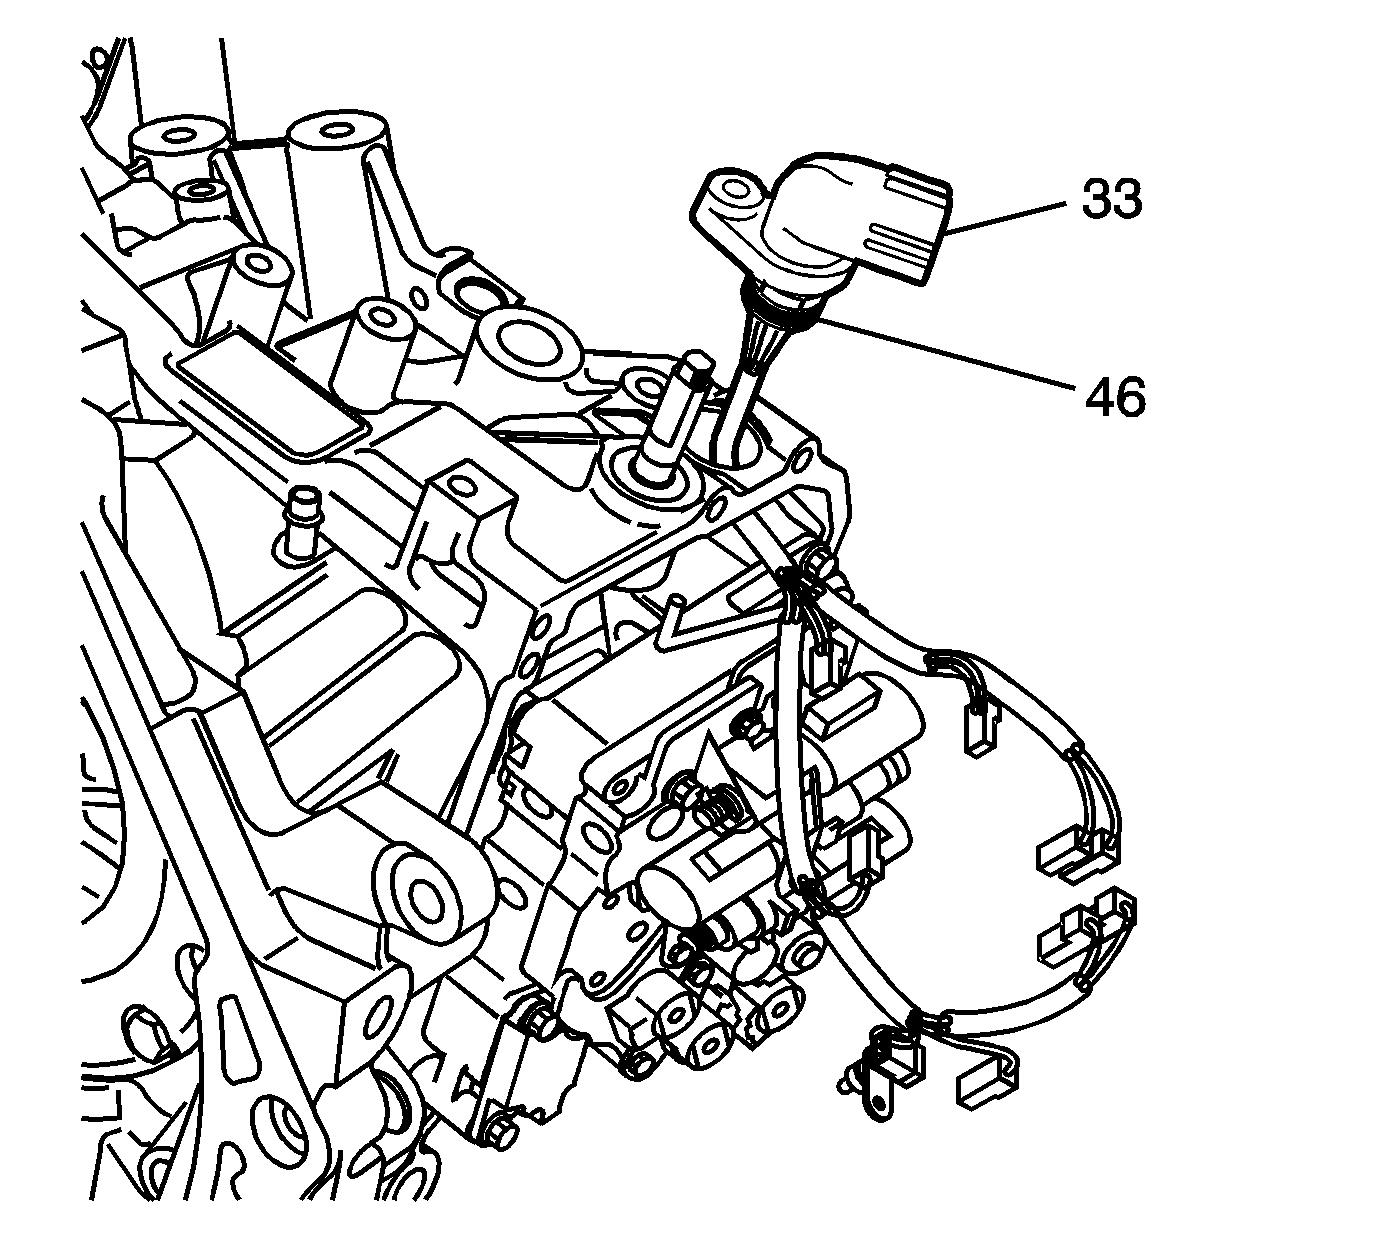
- Remove the wiring harness (33) from the automatic transaxle wiring harness clip.
- With a twisting motion remove the complete wiring harness assembly.
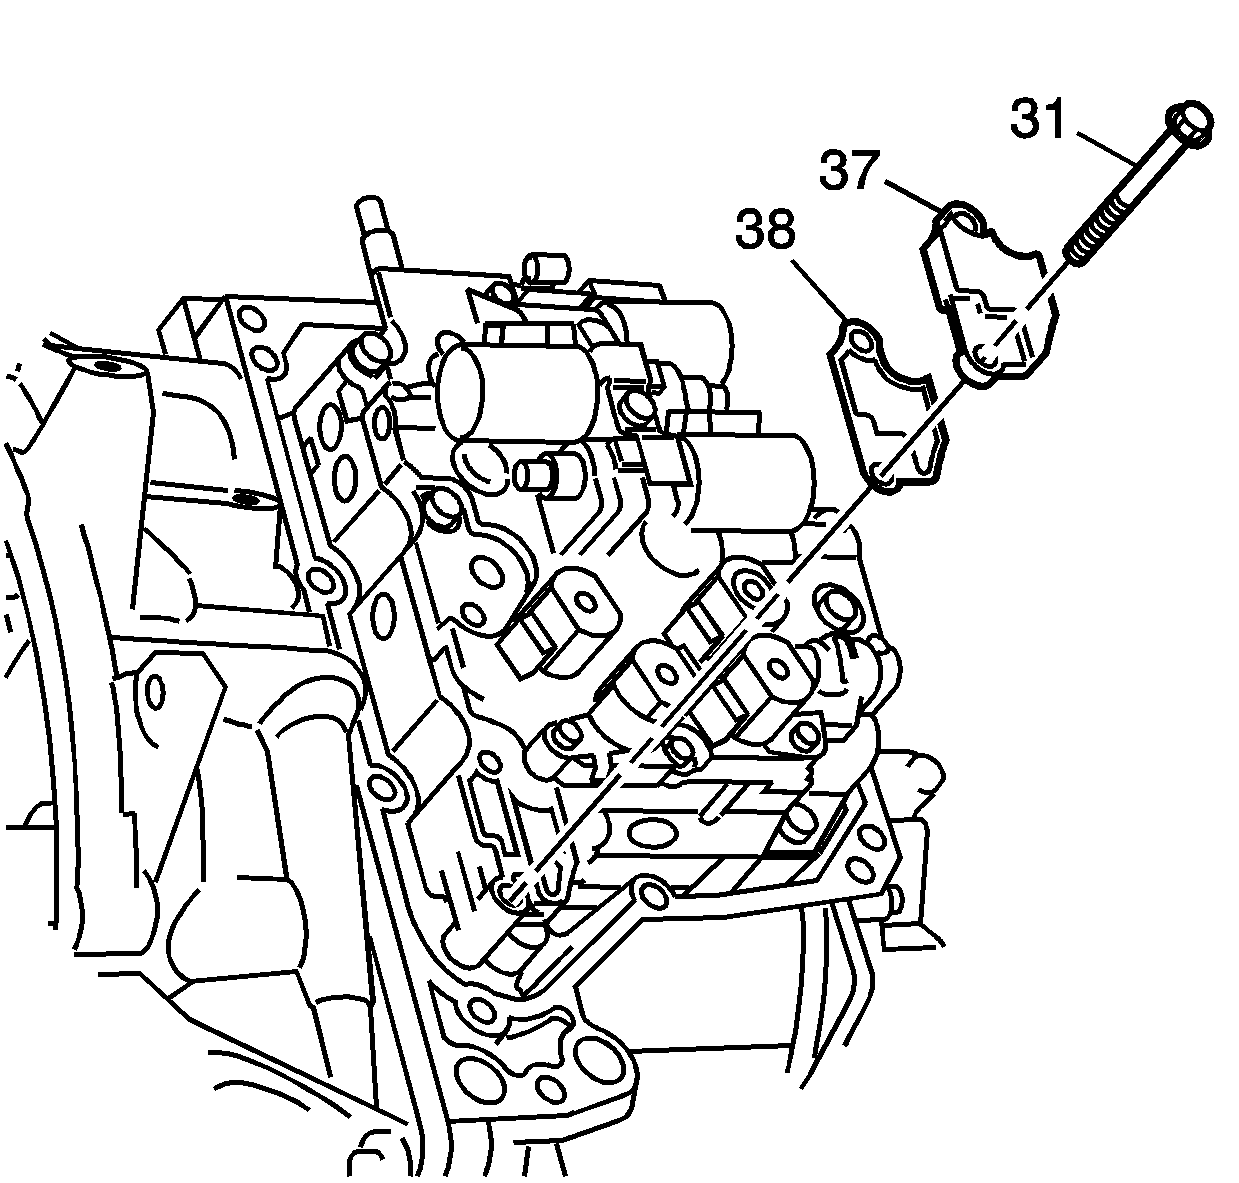
- Remove the 2 control valve body bolts/screws (31), control valve body fluid passage cover (37) and gasket (38).
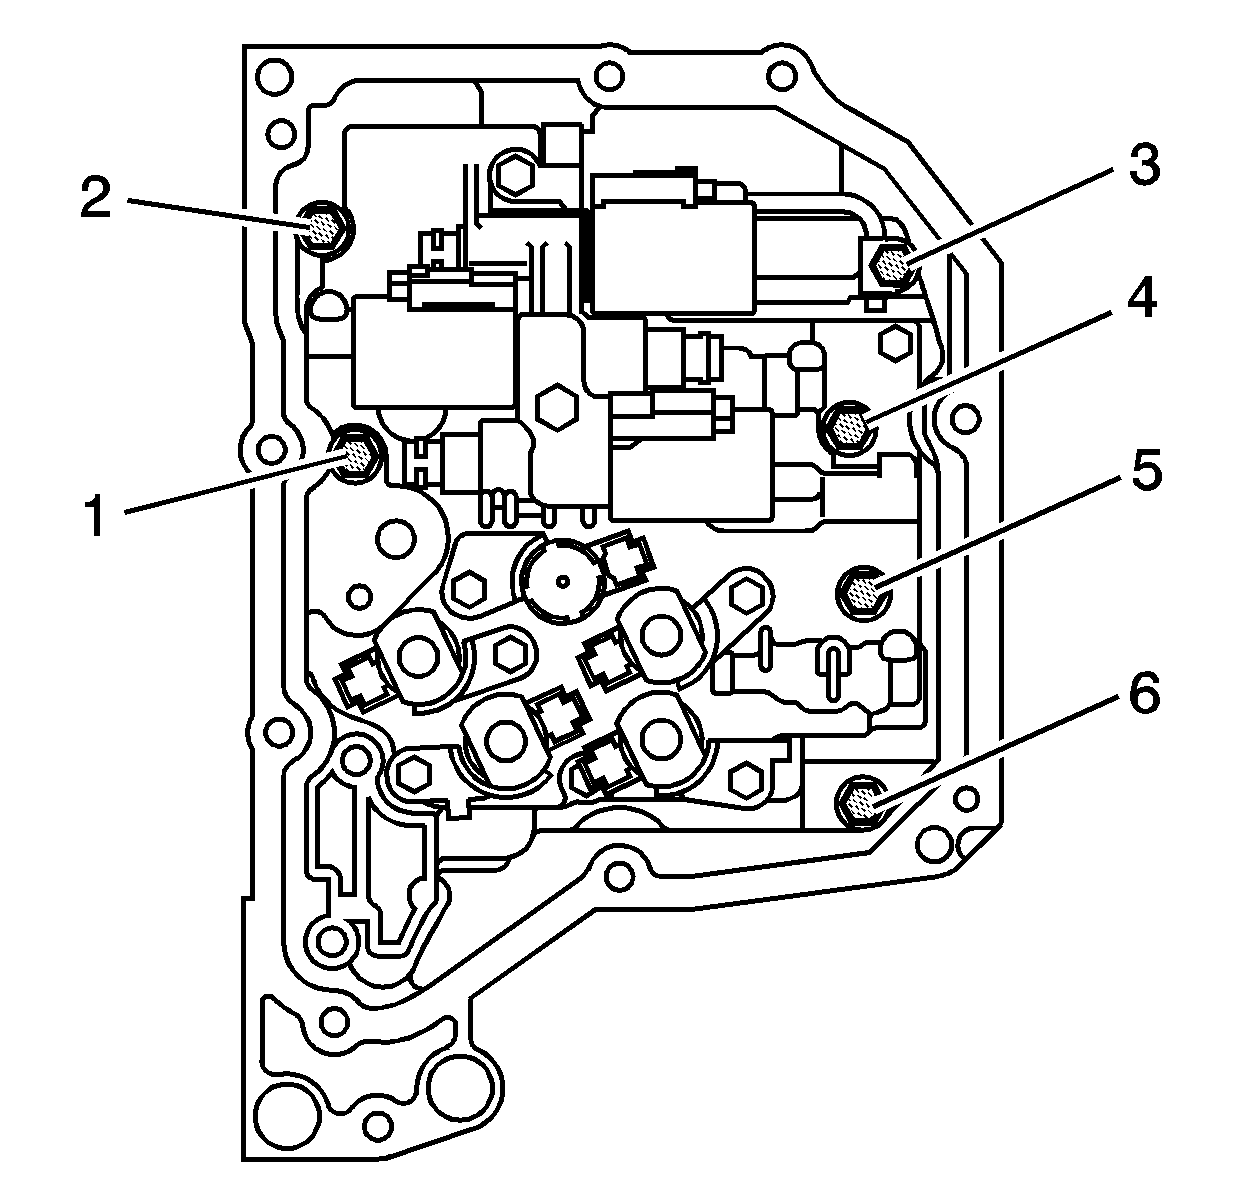
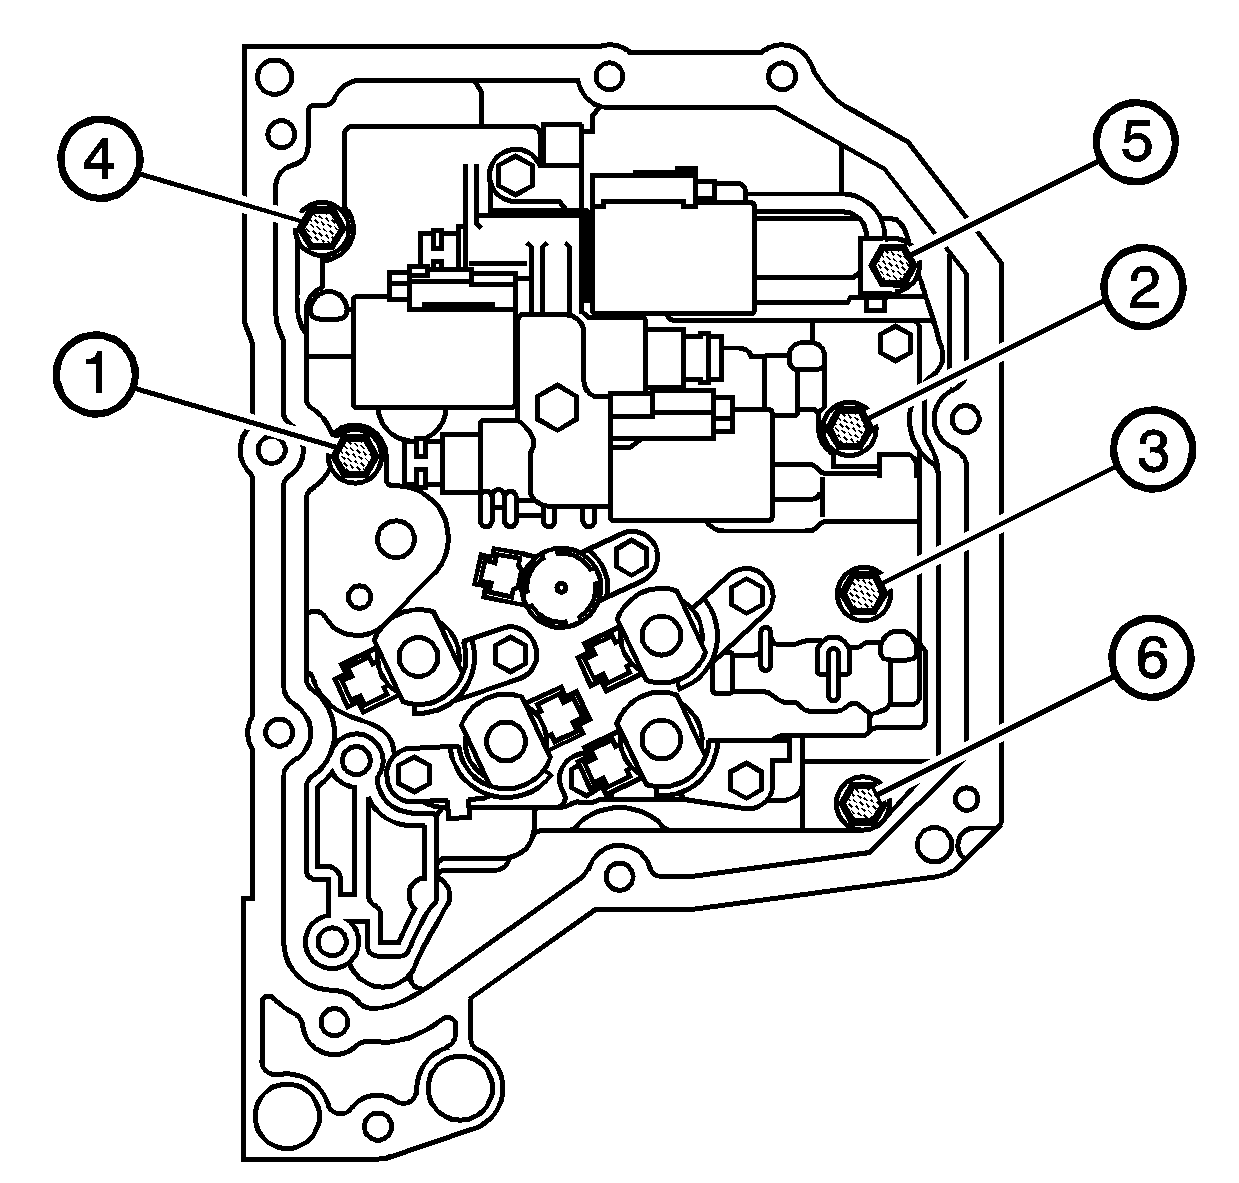
- Remove the 6 control valve body mounting bolts/screws (1-6).
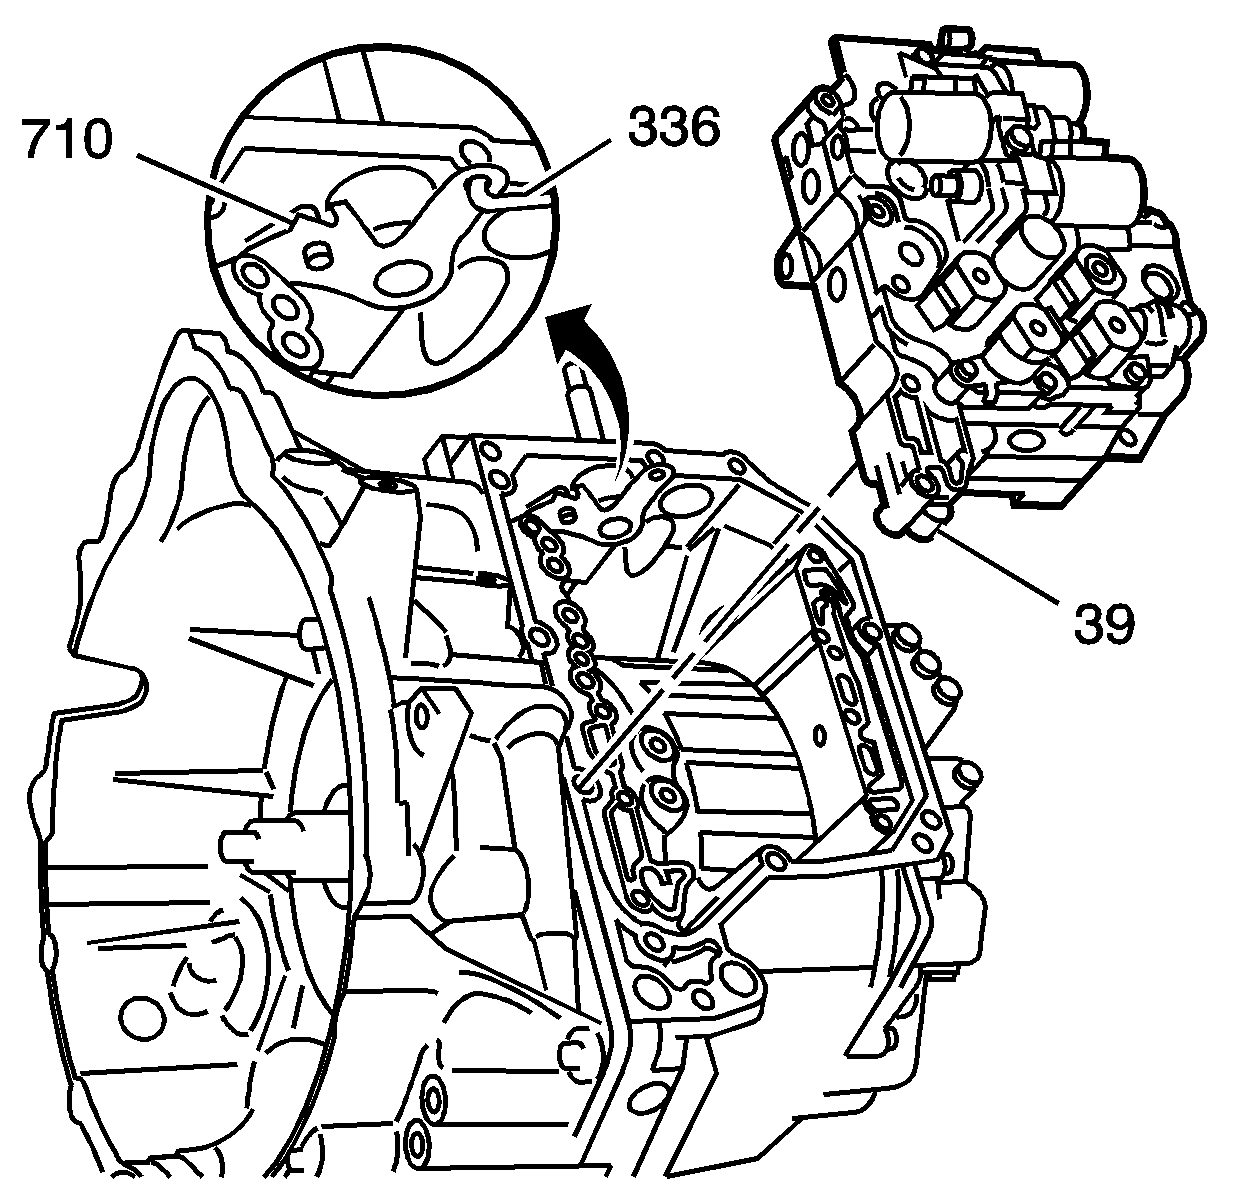
- While holding the control valve body assembly, disconnect the manual shift detent lever assembly (710) from the manual valve link (336).
- Move the detent lever assembly clockwise for ease of removing the manual valve.
- Remove the control valve body assembly (39).
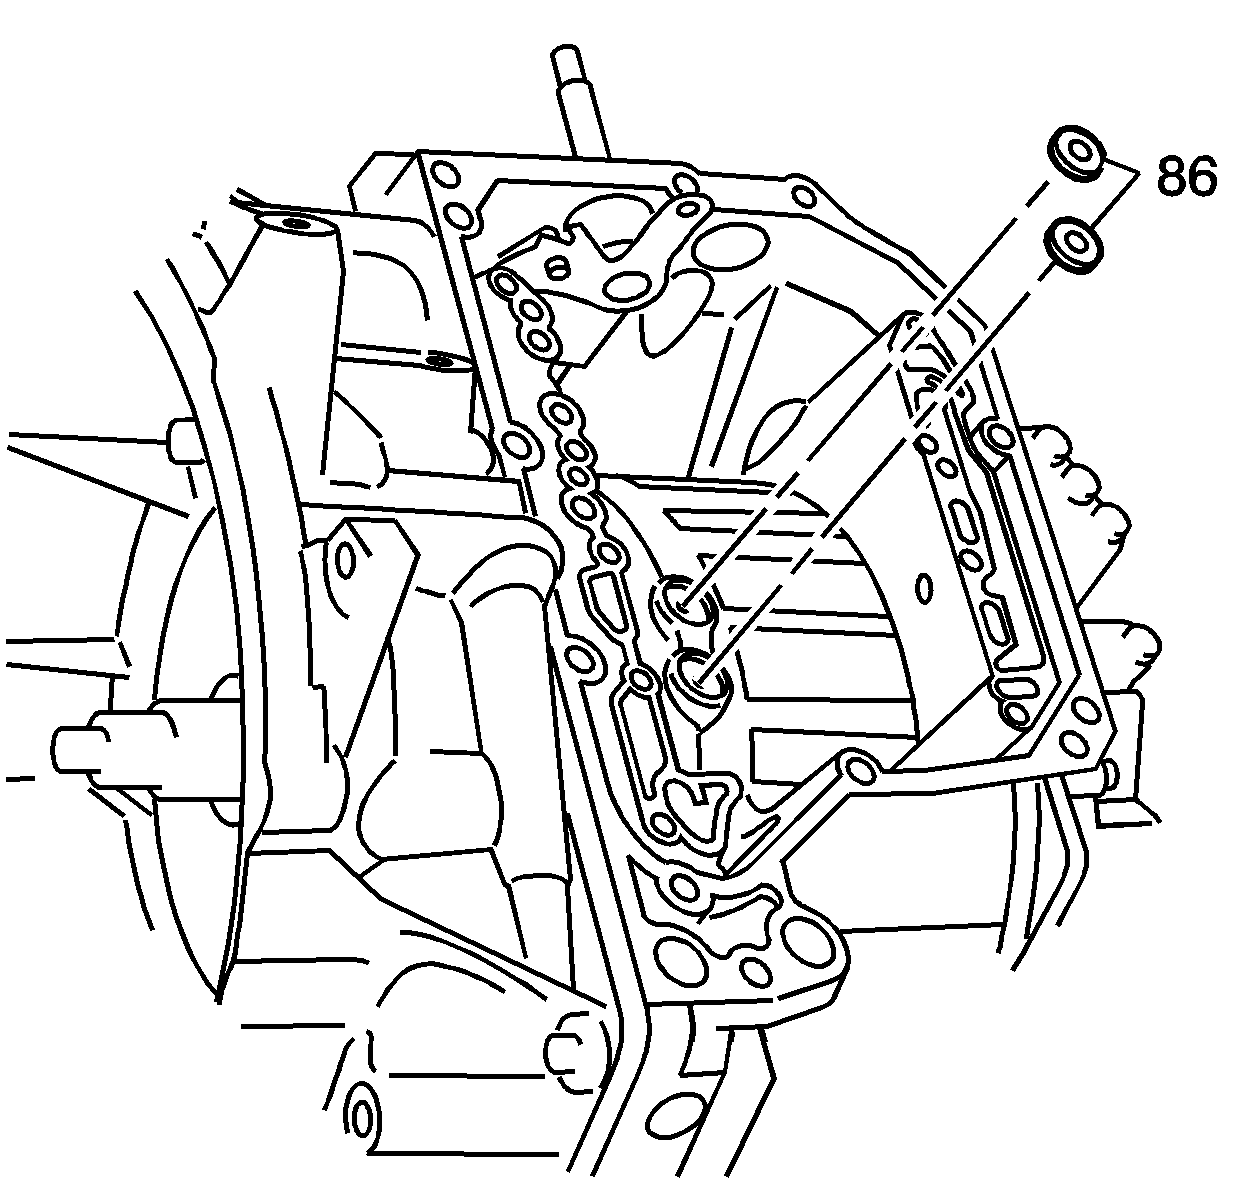
- Remove the 2 transaxle case fluid passage seals (86).
Note: Place the transaxle in neutral (N).
Installation Procedure
- Install 2 new transaxle case fluid passage seals (86) into the transaxle case fluid ports.
- While holding the control valve body assembly (39), connect the manual valve link (336) to the manual shift detent lever assembly (710).
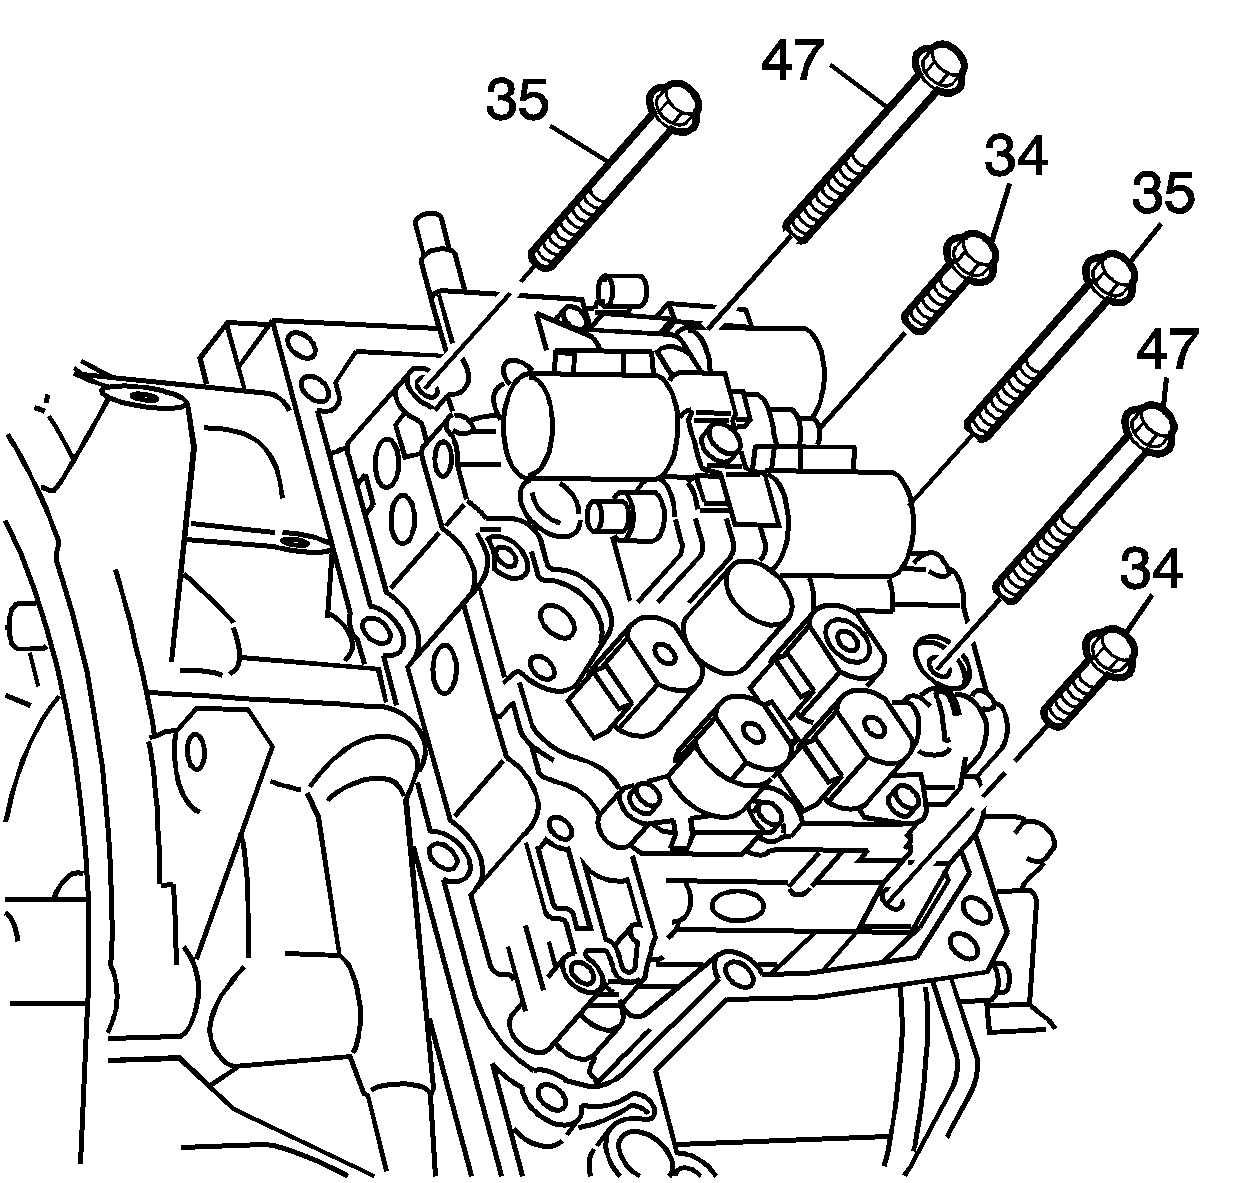
- Install the 6 control valve body assembly to transaxle case bolts and hand tighten.
- Tighten the control valve body assembly-to-transaxle case bolts in sequence and tighten to 10 N·m (89 lb in).
- Install a new control valve body fluid passage cover gasket (38).
- Install the control valve body fluid passage cover (37).
- Install the 2 control valve body bolts (31) and tighten to 10 N·m (89 lb in).
- Apply automatic transaxle fluid to a new transaxle wiring connector O-ring seal (46).
- Install a new transaxle wiring connector O-ring seal (46) onto the transaxle wiring harness assembly (33).
- Install the transaxle wiring harness assembly (33) into the transaxle case through the wiring harness bore.
- Apply automatic transaxle fluid to a new transaxle fluid temperature sensor O-ring seal (32).
- Install a new transaxle fluid temperature sensor O-ring seal (32) into the groove of the transaxle fluid temperature sensor (36).
- Install the transaxle fluid temperature sensor (36) into the front control valve body fluid temperature sensor bore.
- Install the transaxle fluid temperature sensor clip (49).
- Install the fluid temperature sensor bolt (31) and tighten to 10 N·m (89 lb in).
- Connect the 8 solenoid wire connectors as follows:
- Install the control valve body cover. Refer to Control Valve Body Cover Replacement.
- Perform the transmission adaptive learn procedure. Refer to Transmission Adaptive Learn.


Caution: Refer to Fastener Caution in the Preface section.


| • | 1 |
| • | 2 |
| • | 3 |
| • | 4 |
| • | 5 |
| • | 6 |
| • | 7 |
| • | 8 |
