Tools Required
J 39400-A Halogen Leak Detector
Removal Procedures
- Recover the refrigerant. Refer to Refrigerant Recovery and Recharging .
- Remove the left headlamp. Refer to Headlamp Assembly or Headlamp Bulb and/or Cornering, Sidemarker, Park, Turn Signal Bulb Replacement in Lighting Systems.
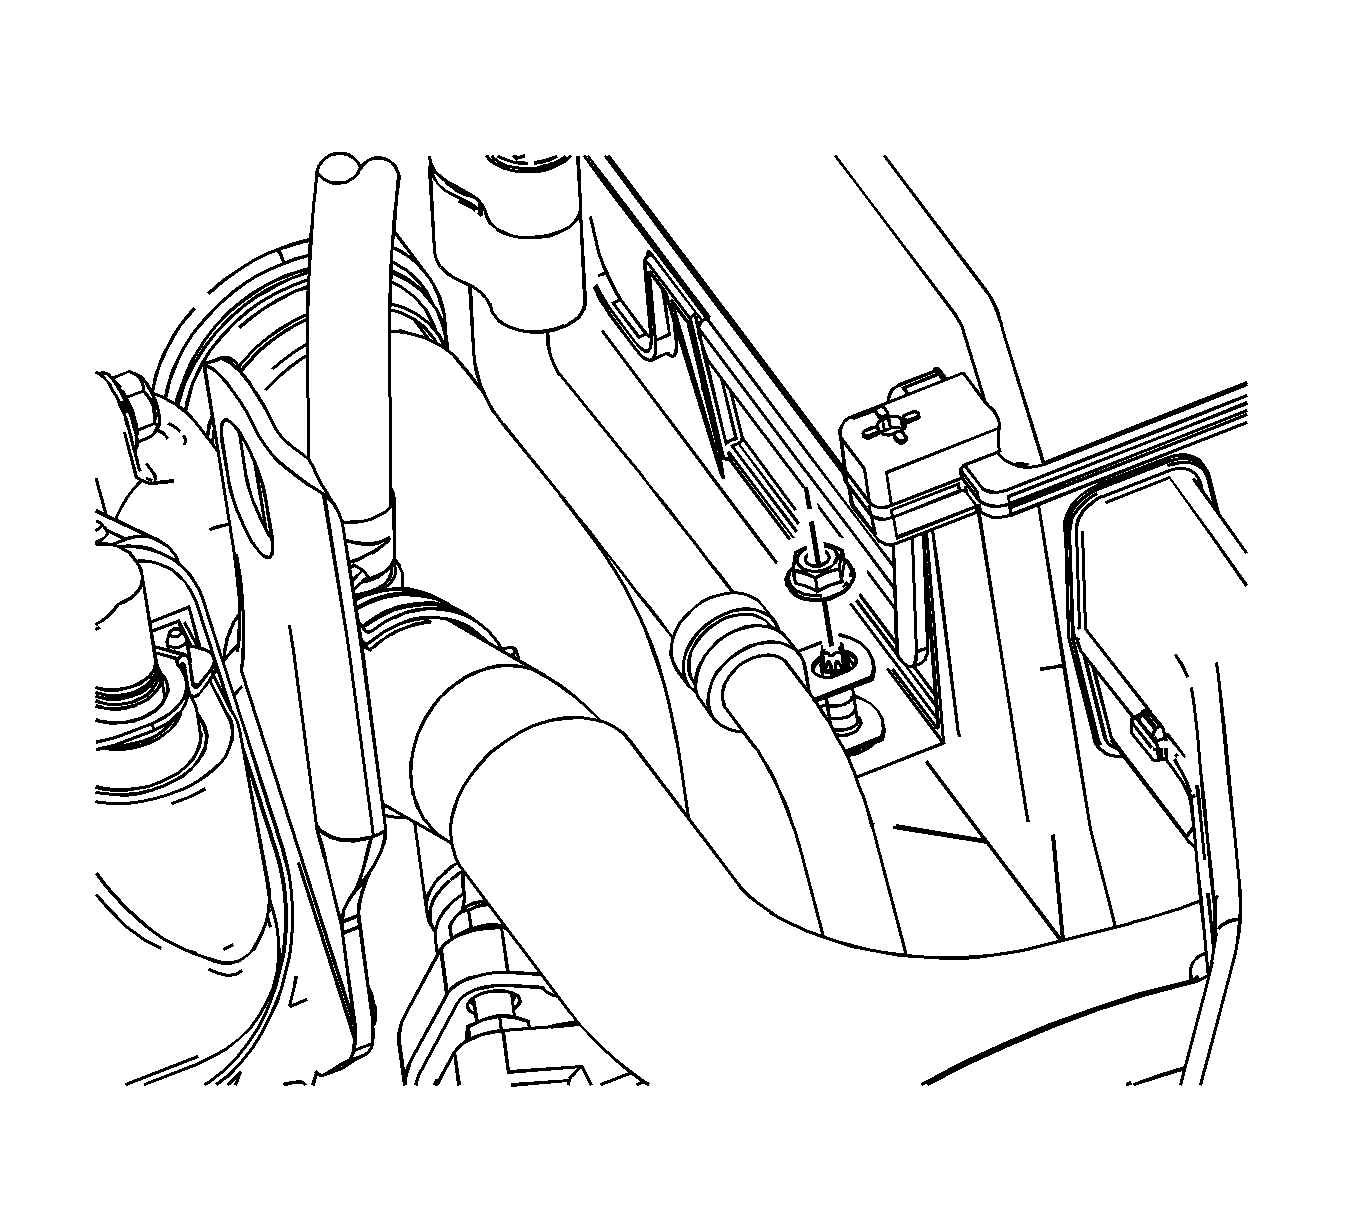
- Remove the compressor hose retainer nut from the battery box.
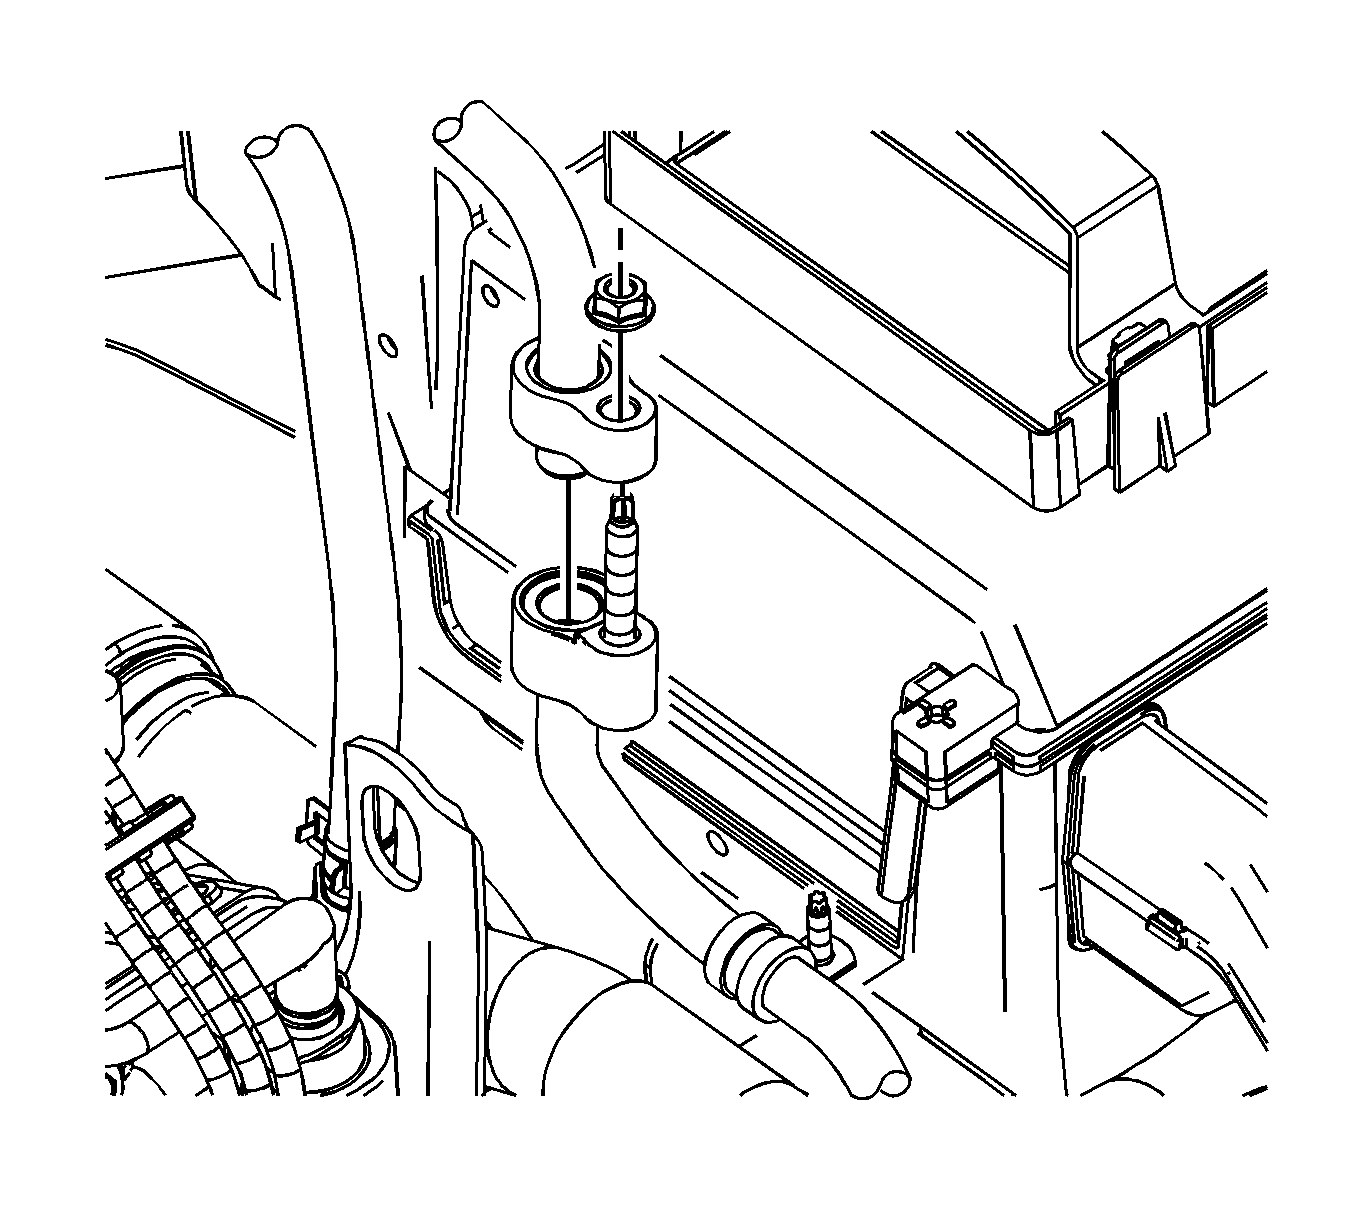
- Remove the evaporator outlet hose nut from the evaporator outlet hose.
- Remove the evaporator outlet hose from the compressor hose.
- Install a protective cap to the evaporator outlet hose to prevent contamination and desiccant saturation.
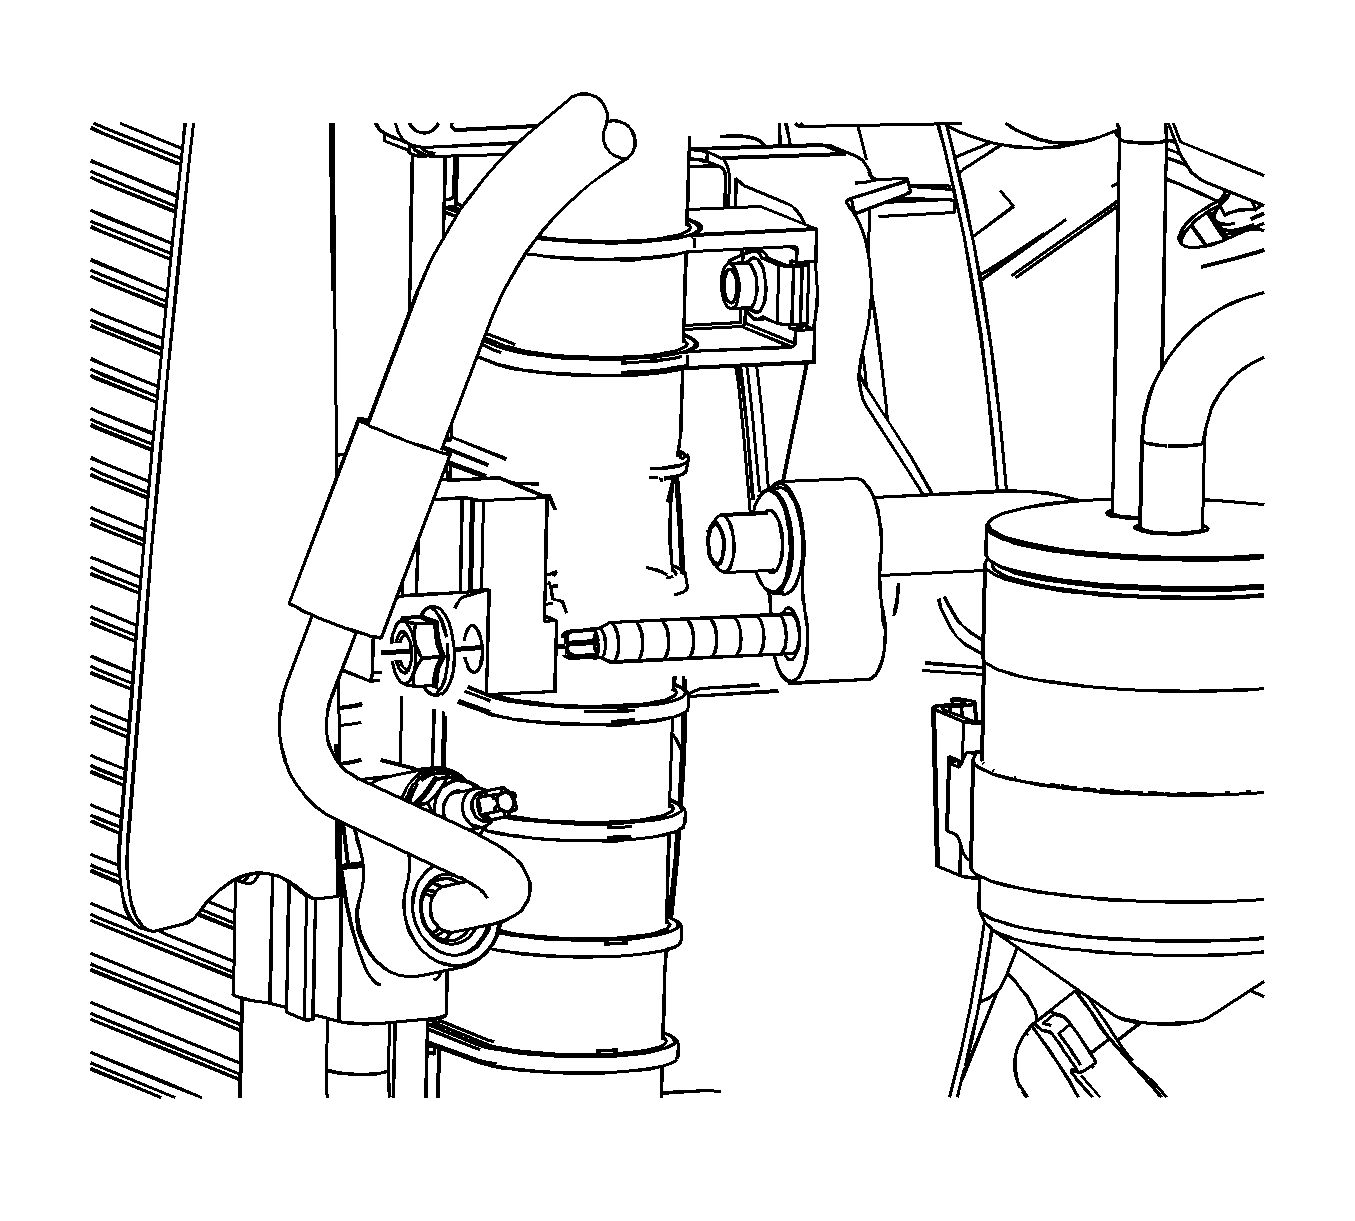
- Remove the compressor hose nut from the condenser.
- Remove the compressor hose from the condenser.
- Install a protective cap to the condenser to prevent contamination and desiccant saturation.
- Raise and support the vehicle. Refer to Lifting and Jacking the Vehicle in General Information.
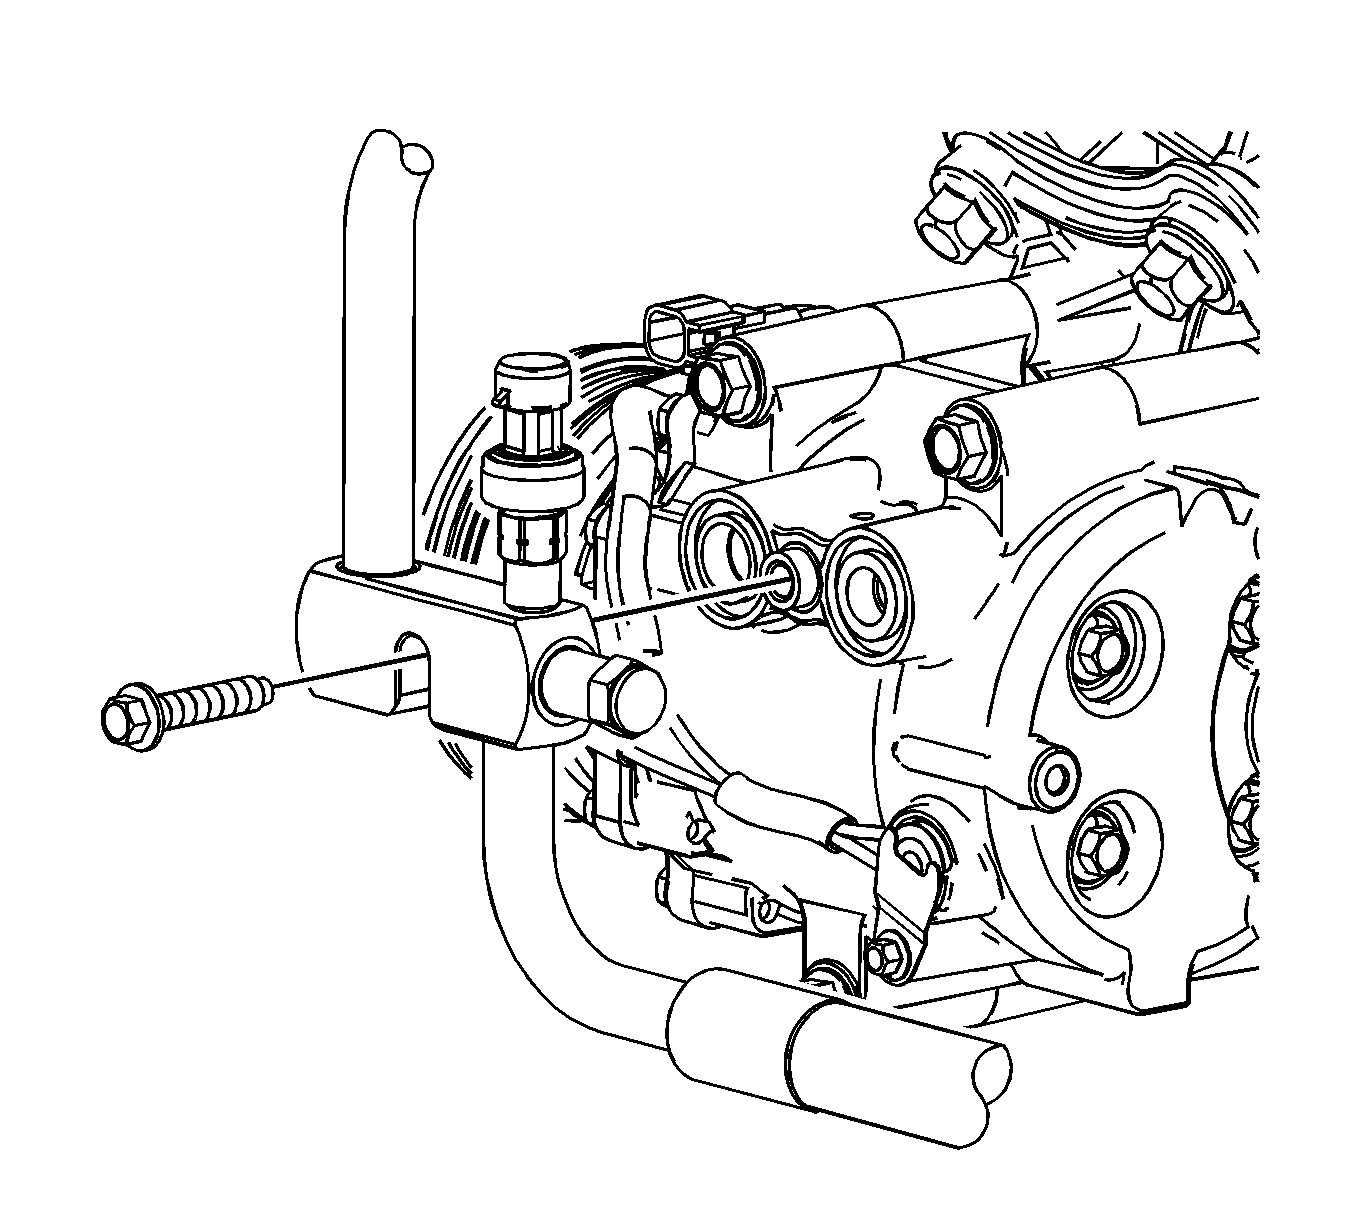
- Disconnect the electrical connector from the pressure transducer.
- Remove the compressor hose bolt at the compressor.
- Remove the compressor hose from the compressor.
- Install a protective cap to the compressor to prevent contamination and desiccant saturation.
- Remove the compressor hose from the vehicle.
- Remove and discard the sealing washer from the compressor hose. Refer to Sealing Washer Replacement .
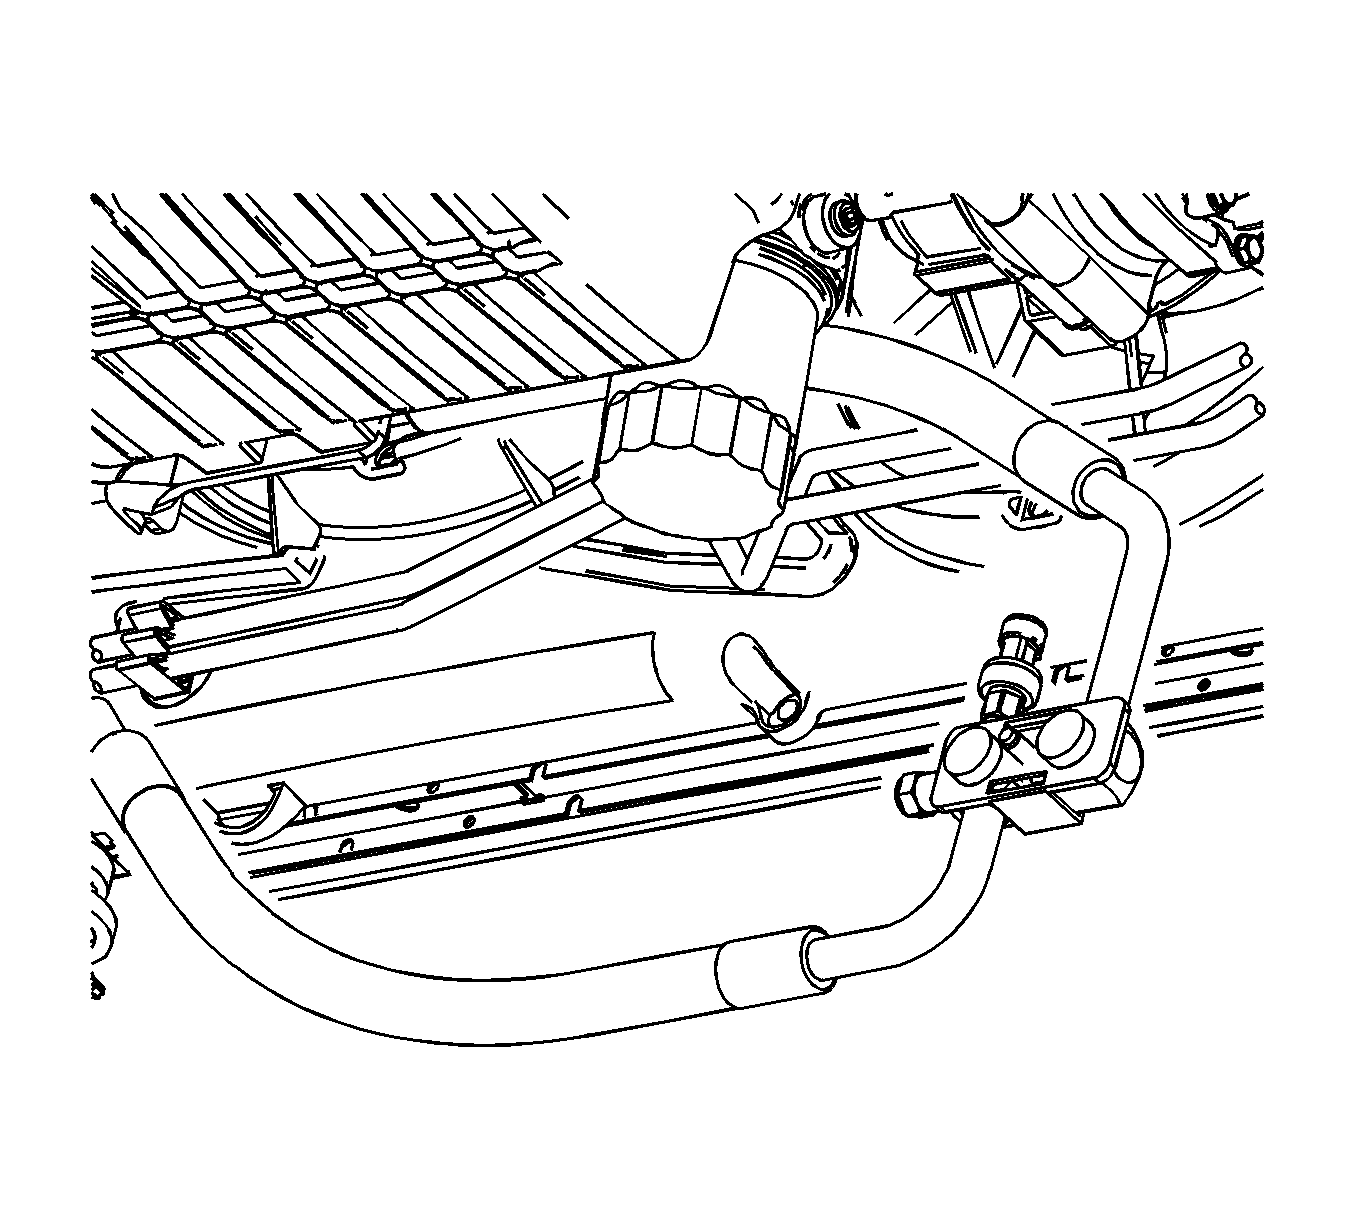
Installation Procedure
- Remove protective cap from compressor end of the compressor hose and the compressor.
- Install new seal washers to the compressor hose. Refer to Sealing Washer Replacement .
- Position the compressor hose in the vehicle.
- Install the compressor hose to the compressor.
- Install the compressor hose bolt to the compressor.
- Connect the electrical connector to the pressure transducer.
- Lower the vehicle.
- Install a new sealing washer to the evaporator outlet hose. Refer to Sealing Washer Replacement .
- Install the evaporator outlet hose to the compressor hose.
- Install the evaporator outlet hose nut to the evaporator outlet hose.
- Install a new sealing washer to the compressor hose at the condenser.
- Install the compressor hose to the condenser.
- Install the compressor hose nut to the condenser.
- Install the compressor hose retainer nut to the battery box.
- Install the left headlamp. Refer to Headlamp Assembly or Headlamp Bulb and/or Cornering, Sidemarker, Park, Turn Signal Bulb Replacement in Lighting Systems.
- Recharge the A/C system. Refer to Refrigerant Recovery and Recharging .
- Test the affected A/C joints for leaks using J 39400-A .


Notice: Use the correct fastener in the correct location. Replacement fasteners must be the correct part number for that application. Fasteners requiring replacement or fasteners requiring the use of thread locking compound or sealant are identified in the service procedure. Do not use paints, lubricants, or corrosion inhibitors on fasteners or fastener joint surfaces unless specified. These coatings affect fastener torque and joint clamping force and may damage the fastener. Use the correct tightening sequence and specifications when installing fasteners in order to avoid damage to parts and systems.
Tighten
Tighten the bolt to 27 N·m (20 lb ft).
Notice: The compressor hose must maintain a minimum clearance of 20 mm (0.8 in) from the exhaust gas recirculation (EGR) pipe. If this minimum clearance is not maintained, damage to the compressor hose may result.

Tighten
Tighten the nut to 16 N·m (12 lb ft).

Tighten
Tighten the nut to 16 N·m (12 lb ft).

Tighten
Tighten the nut to 8 N·m (71 lb in).
