Growl, Groan, Moan Noise and/or Shudder, Binding During Parking Lot Maneuvers (Replace Rear Axle Differential Drum/Clutch Pack Assembly)

| Subject: | Growl, Groan, Moan Noise and/or Shudder, Binding During Parking Lot Maneuvers (Replace Rear Axle Differential Drum / Clutch Pack Assembly) |
| Models: | 2005 Chevrolet Equinox |
| with All Wheel Drive (AWD) |
| Built Prior To VIN Breakpoint 56090271 |
Condition
Some customers may comment on a growl, groan, moan noise and/or binding from the rear of the vehicle while making low speed parking lot maneuvers.
Do This | Don't Do This |
|---|---|
Replace the rear differential Drum Assembly / Clutch Assembly P/N 15235312. | DO NOT replace the Complete Differential Module / Rear Drive Module (RDM) P/N 15224698. |
Correction
Follow the service procedure below to correct this condition.
- Raise and support the vehicle. Refer to Lifting and Jacking the Vehicle in General Information. Refer to SI Document ID #995301.
- Remove the propeller shaft underbody guard loop bolts.
- Remove the guard loop.
- Reference mark the propeller shaft flange-to-pinion flange relationship at the rear drive module (RDM).
- Remove the propeller shaft flange mounting bolts at the RDM pinion flange.
- Position the end of the propeller shaft away from the RDM and secure with heavy mechanics wire, or equivalent.
- Place a container under the RDM housing.
- Remove the RDM drain plug.
- Drain the RDM fluid.
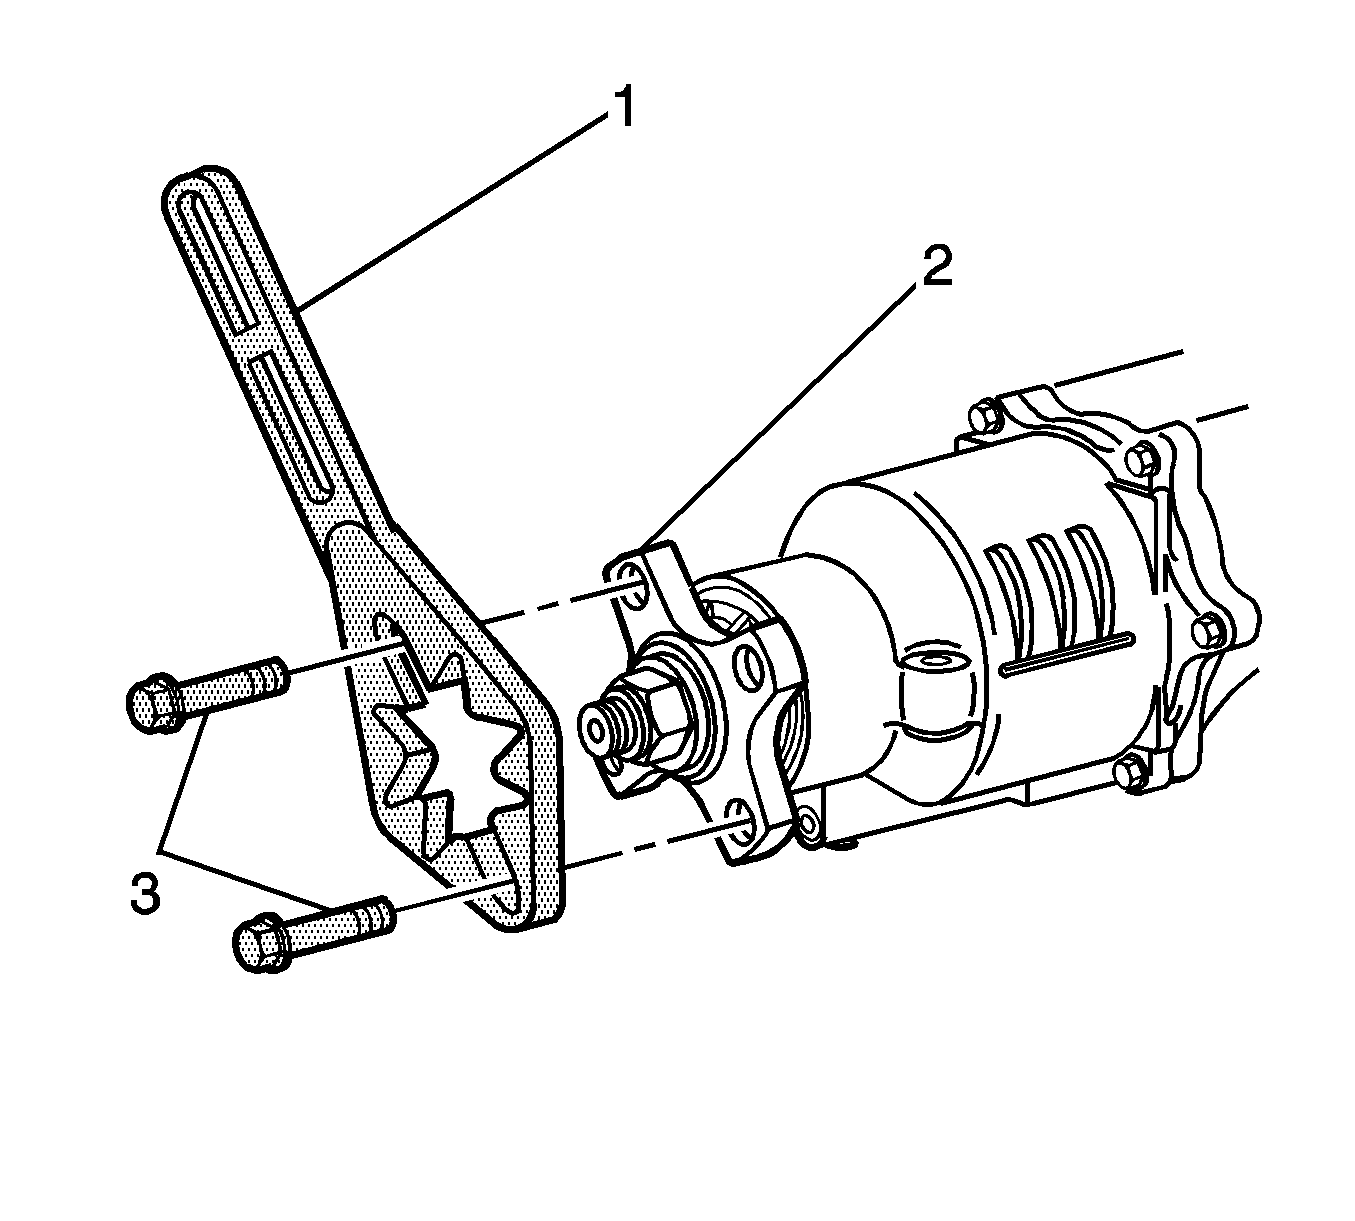
- Install the J 08614-A (1) to the pinion flange (2) using the J 44873-2 shoulder bolts (3).
- Loosen the pinion flange nut.
- Remove the pinion flange nut.
- Remove the J 08614-A from the pinion flange.
- Remove the pinion flange.
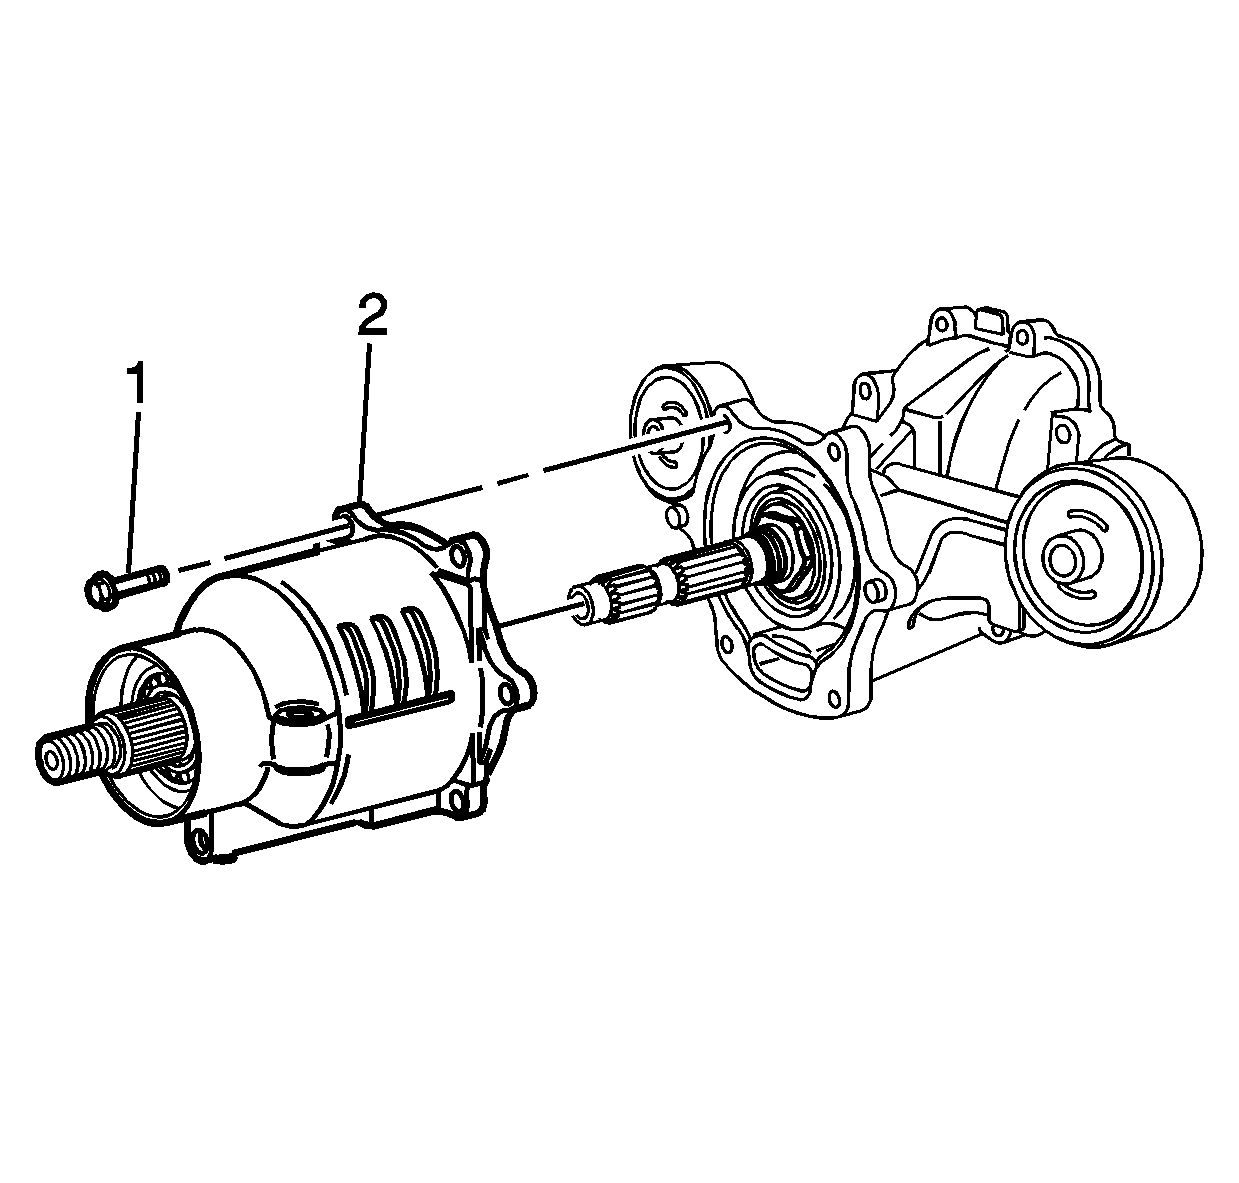
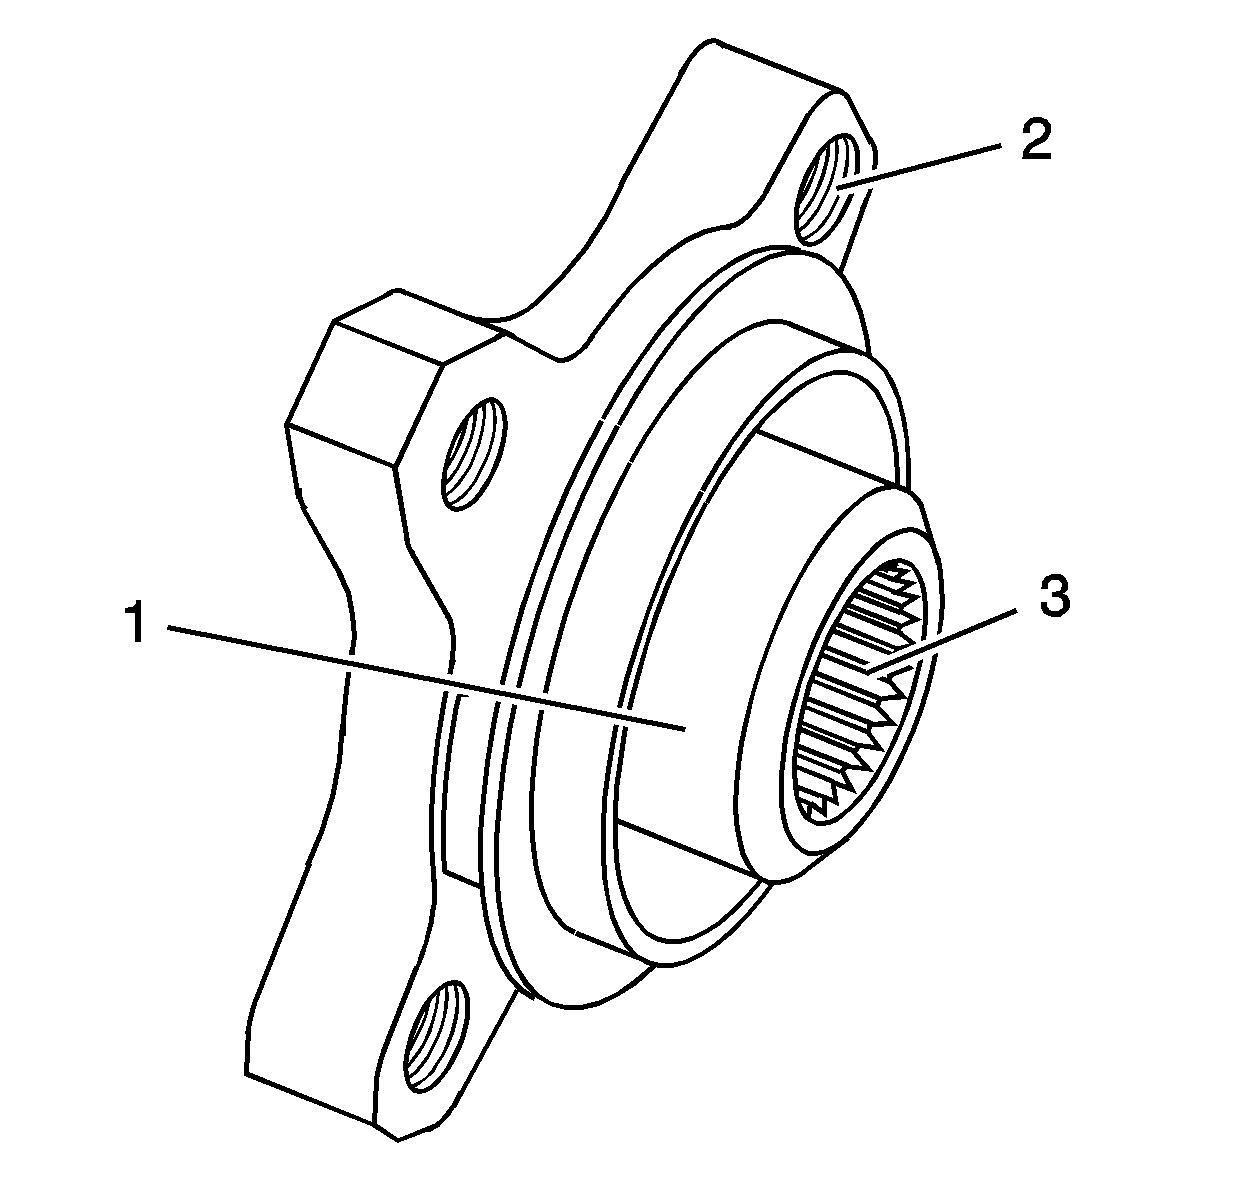
- Remove the RDM housing cover bolts (1).
- Carefully remove the housing cover (2) from the RDM.
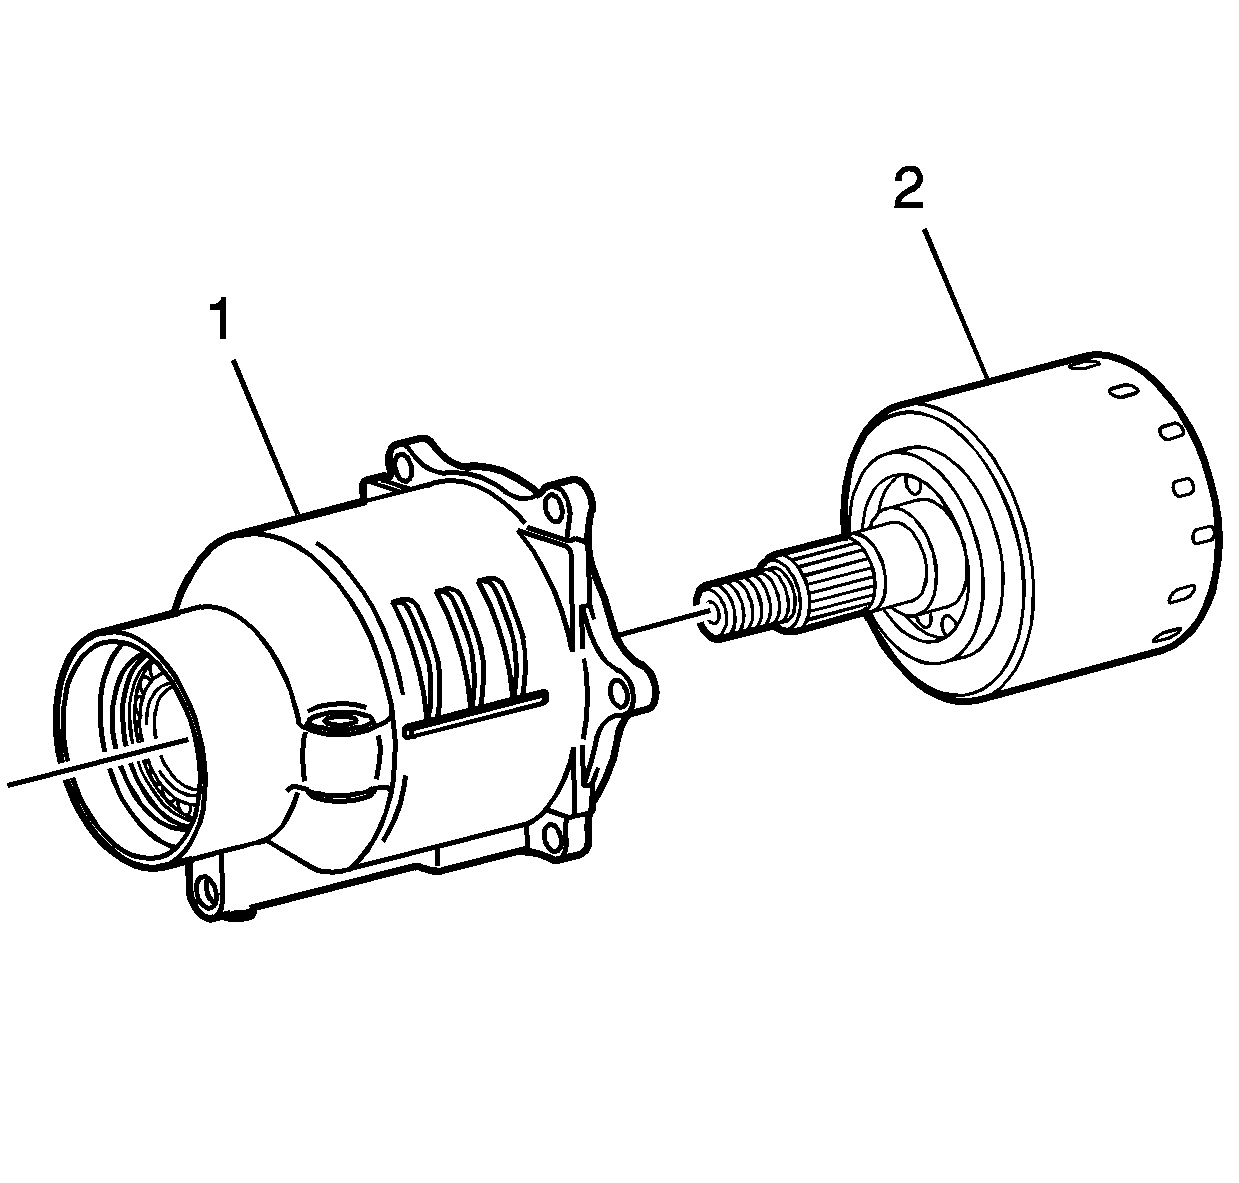
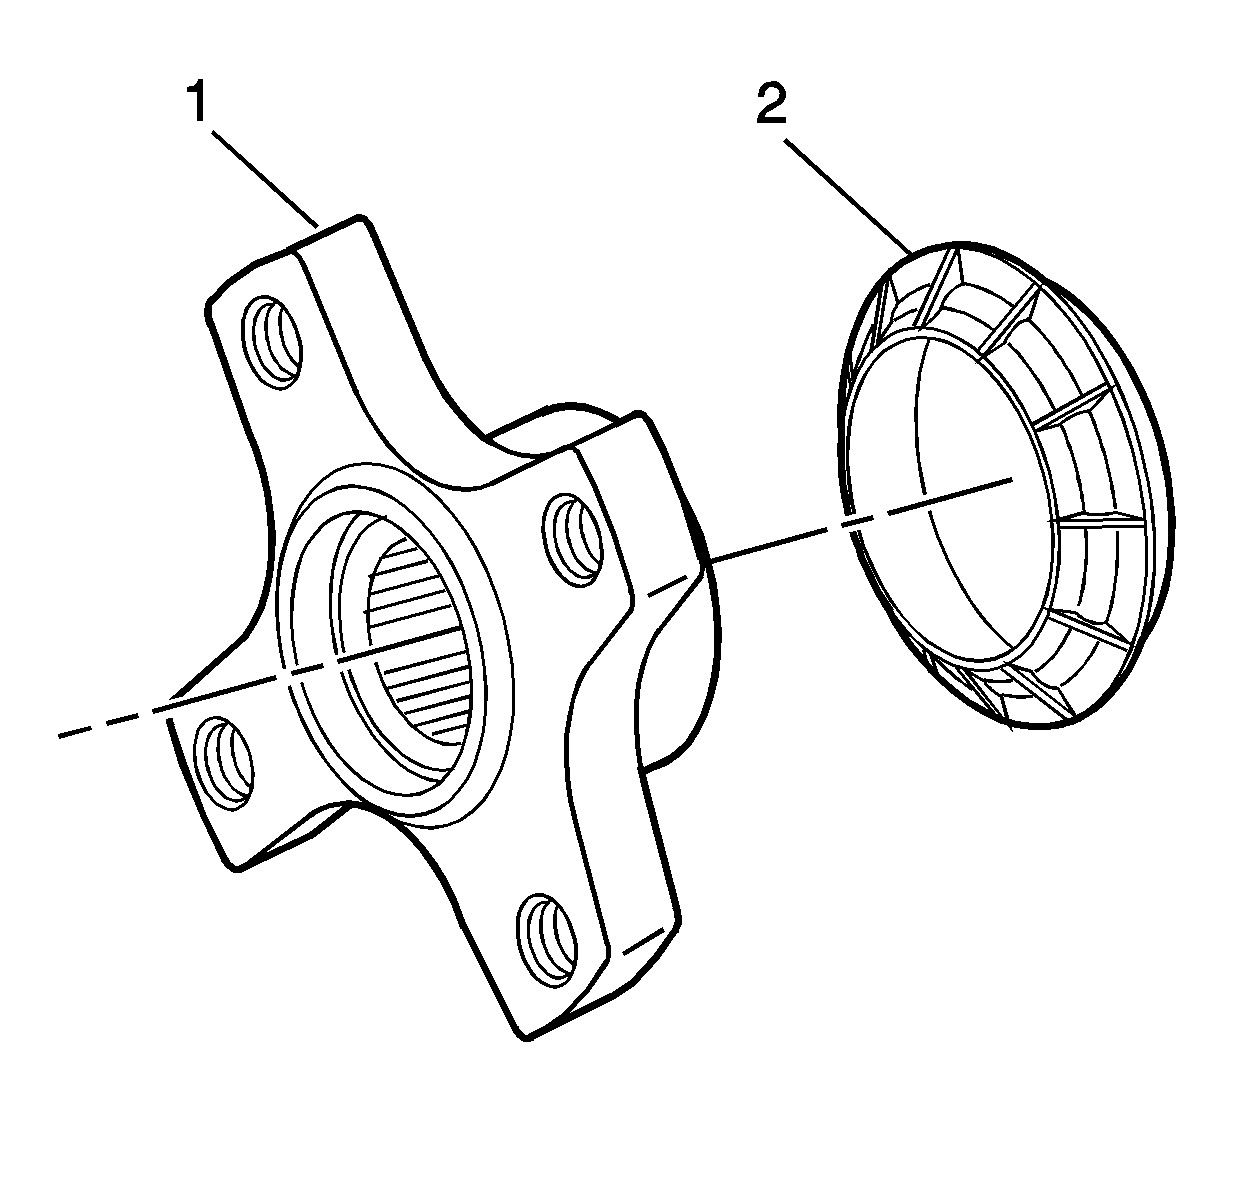
- Remove the clutch drum (2) from the housing cover (1).
- Remove the filter assembly.
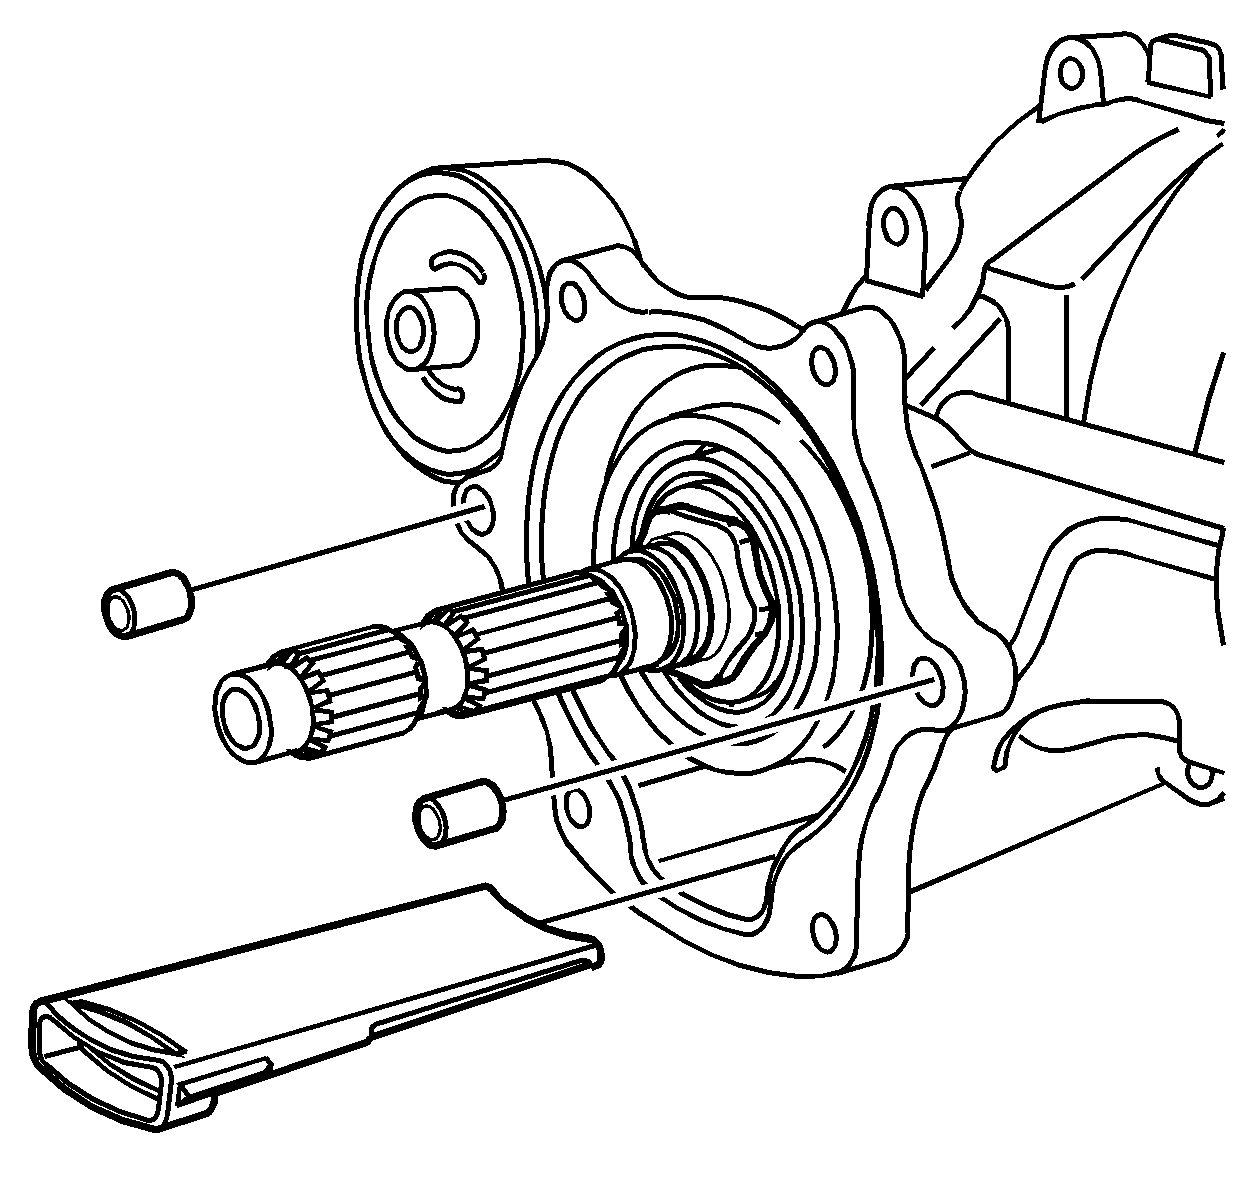
- Remove the locating pins.
- Remove all traces of sealer from the housing cover and RDM sealing surfaces.
- Clean the housing cover and RDM sealing surfaces with denatured alcohol, or equivalent, and dry with a clean, lint free cloth.
- Check the pinion flange sealing surface (1) for wear or gouges, the bolt threads (2) for damage and the pinion splines (3) for worn or damaged splines.
- Inspect the dust deflector (2) for cracks.
- Inspect the pinion flange seal (1), the front seal (2) and the rear seal (3) for tears, cuts, and gouges on the seals and sealing surfaces.
- Install a new filter assembly, P/N 12569934.
- Install the locating pins.
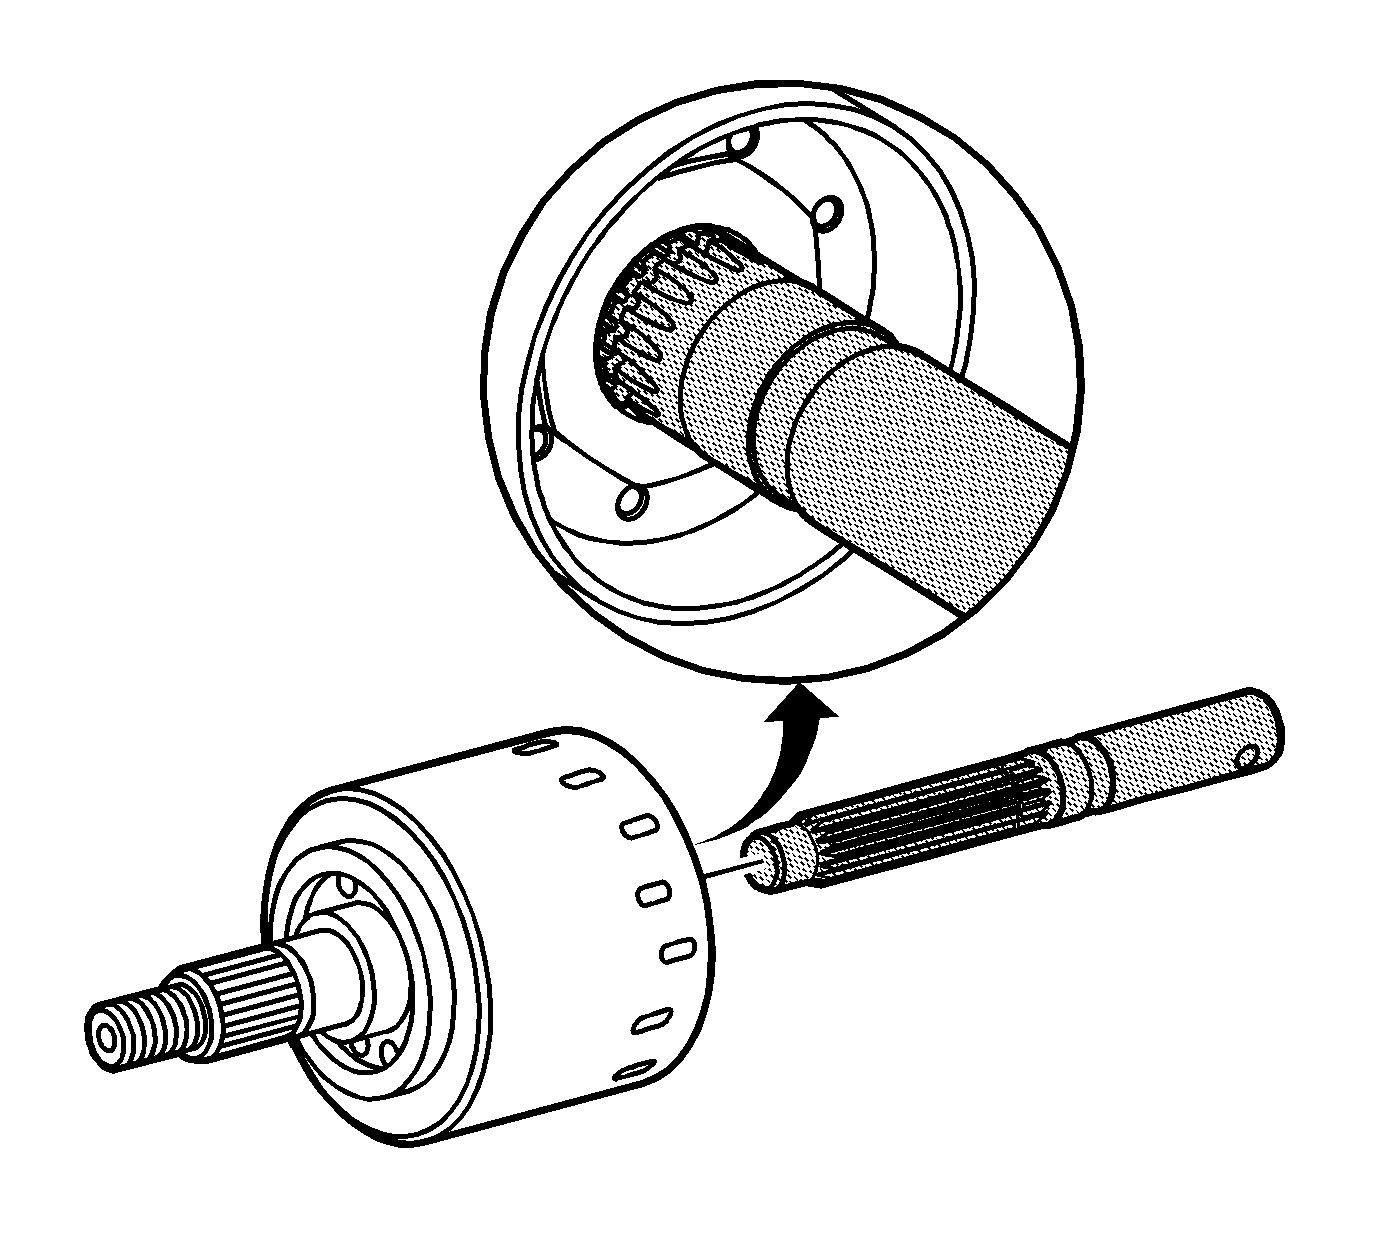
- Align the new drum, P/N 15235312, clutches with the pump and pump bushing. Place the J 46607 in the splines of the clutch. Twist the alignment tool back and forth to align the pump and bushing. With a properly aligned clutch, the groove on the J 46607 will be flush with the drum as shown. Remove the tool by pulling straight out.
- Install the clutch drum to the pinion shaft.
- Apply a continuous bead of sealer, P/N 12346286 (Canadian P/N 10953472), of equal height and width to the RDM housing sealing surface.
- Install the clutch housing cover to the RDM.
- Install the clutch housing cover bolts.
- Install the input flange to the clutch shaft.
- Replace the pinion flange nut, P/N 12569951 to the clutch shaft.
- Install the J 08614-A to the pinion flange.
- Thoroughly clean the drain plug threads and apply thread sealer, GM P/N 12346004 (Canadian P/N 10953480), to the plug threads.
- Install the drain plug.
- Remove the RDM fill plug.
- Fill the RDM with Versatrak fluid, P/N 12378514 (Canada P/N 88901045).
- Thoroughly clean the fill plug threads and apply thread sealer, GM P/N 12346004 (Canadian P/N 10953480), to the plug threads.
- Install the fill plug.
- Inspect the rear differential fluid level. Refer to Lubricant Level Inspection - Rear Drive Axle (SI Document ID #1410570).
- Road test the vehicle and verify the repair.
Important: Do not gouge the housing cover and RDM sealing surfaces.
Important: When properly engaged, the clutch drum will be fully seated against the clutch drum oil seal.
Notice: The clutch cover housing must be fully seated to the rear drive module (RDM). Do Not use the mounting bolts to draw the cover to the RDM. If the cover does not fully seat to the RDM, the clutch drum assembly splines must be realigned to the pinion shaft splines before proceeding. Failure to follow these instructions will result in damage to the clutch assembly.
Specification
Apply sealer to a height and width of 2.5 mm (0.098 in).
Important: Before installing the clutch housing cover, allow the sealer to "skin" for 5 minutes prior to assembly.
Tighten
Tighten the bolts to 26 N·m (19 lb ft).
Tighten
Tighten the nut to 203 N·m (150 lb ft).
Tighten
Tighten the plug to 30 N·m (22 lb ft).
Tighten
Tighten the plug to 35 N·m (26 lb ft).
Important: In order to obtain an accurate indication of the fluid level, the rear drive module priming procedure must be performed prior to fluid level inspection.
Parts Information
Part Number | Description | Qty |
|---|---|---|
15235312 | Drum / Clutch Assembly | 1 |
12378514 (in Canada use 88901045) | Versatrak All Wheel Drive (AWD) Fluid | 2 |
12346286 (in Canada use 10953472) | Sealer, RTV Silicone | 1 |
12346004 (in Canada use 10953480) | Sealant, Pipe With Teflon | 1 |
12569934 | Filter, Rear Differential | 1 |
12569951 | Nut, Pinion Flange | 1 |
Parts are currently available from GMSPO.
Warranty Information
For vehicles repaired under warranty, use:
Labor Operation | Description | Labor Time |
|---|---|---|
F2240 | Plates, Limited Slip Clutch - Replace | 1.3 hrs |
Add A | Road Test | 0.1 hr |
Add B | Fluid Level Checking Procedure | 0.1 hr |
The labor time guide has been changed to reflect the times in this bulletin.
