Driver or Passenger Seat Back Cushion Frame Replacement Non-Fold Flat
Removal Procedure
- Remove the front seat from the vehicle. Refer to Front Seat Replacement - Bucket .
- Remove the seat back trim cover and pad. Refer to Front Seat Back Cushion Cover and Cushion Pad Replacement .
- If the seat is equipped with lumbar support, perform the following procedure:
- From the rear of the seat, adjust the rear seat back until the notches in the seat back frame line up with the hook end of the springs on the seat back frame.
- Using a pair of channel lock® pliers, slide the spring into the notches on both sides of the seat back frame.
- Adjust the seat back forward to ensure that the springs are fully seated in the notches.
- Remove the recliner handle screw and spring. Remove the recliner handle.
- Remove the nuts from the outboard seat back frame.
- If equipped, remove the teardrop washer bolt and washer.
- Remove the nuts from the inboard seat back frame.
- Remove the seat back frame from between the adjusters.
| 3.1. | Adjust the knob until the lumbar basket is in the position of least support. |
| 3.2. | Pull back on the lumbar cable sleeve. |
| 3.3. | Remove the barrel end of the cable from the lumbar actuator. |
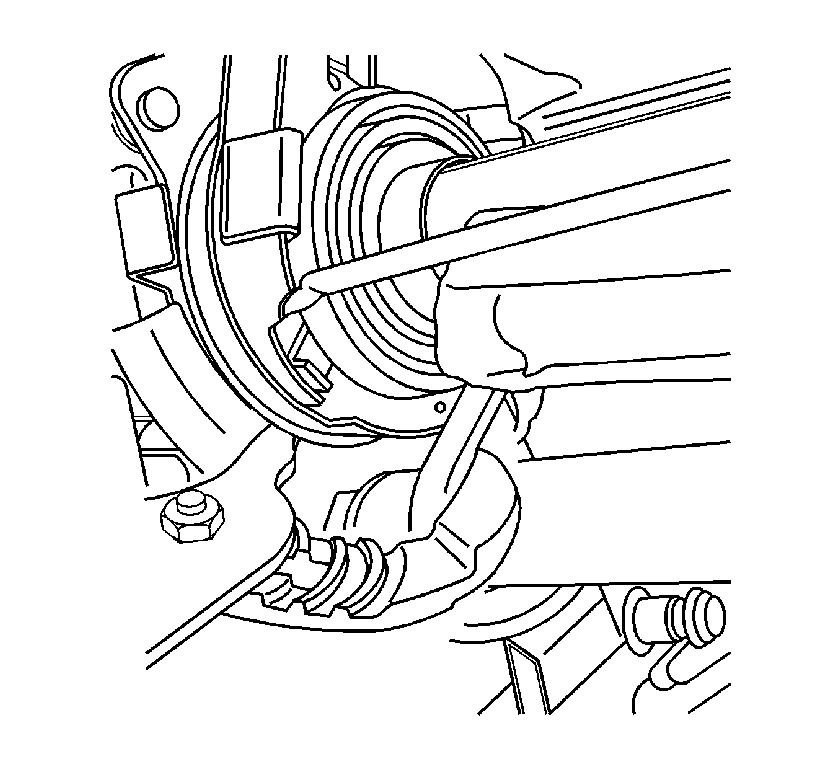
Caution: The seat back frame springs are under tension. To avoid personal injury, use care when removing or installing the frame.
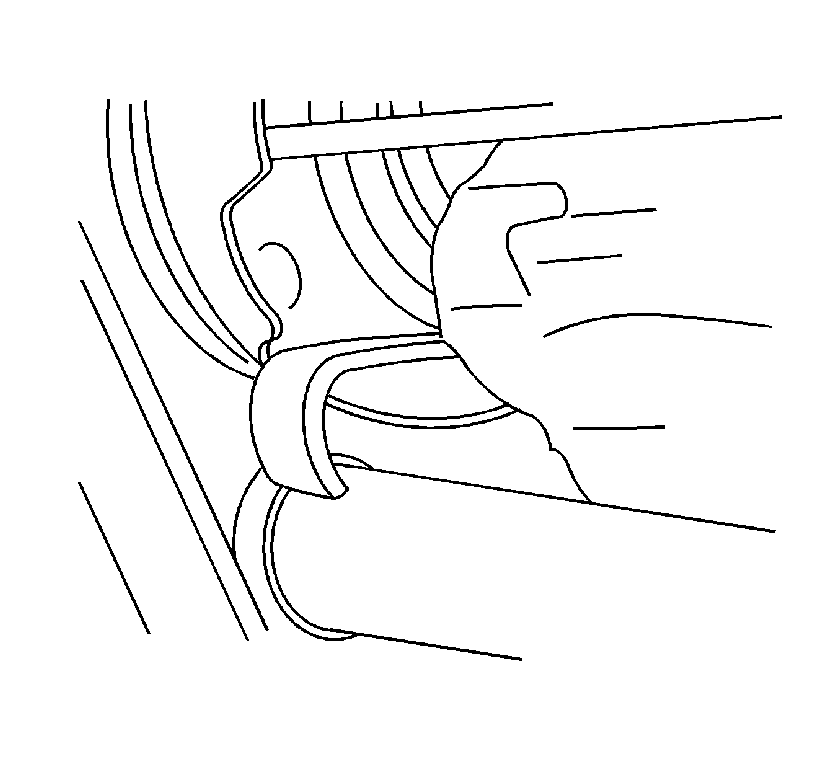
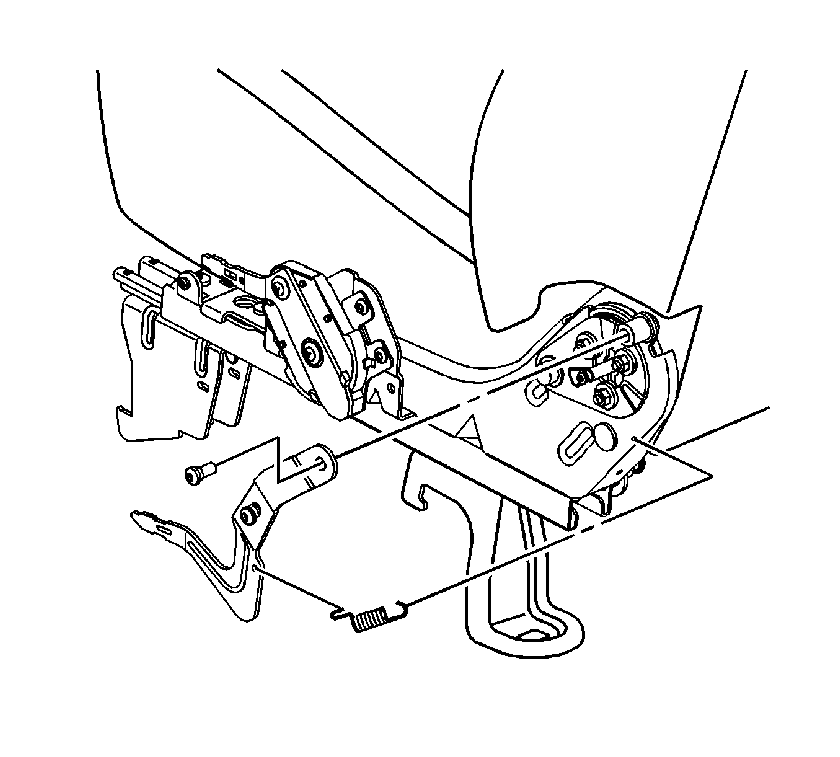
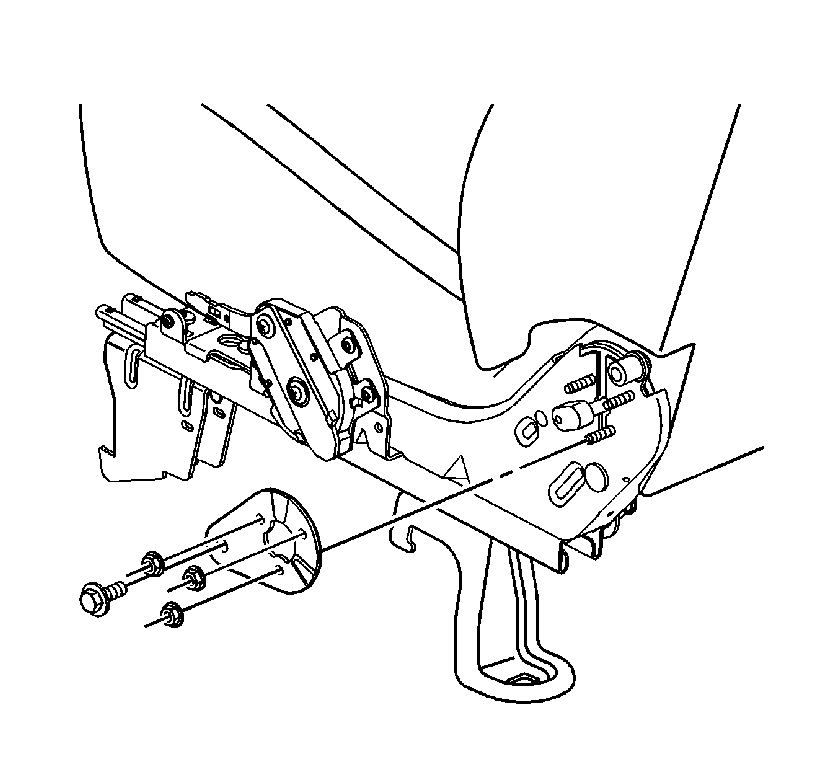
Important: To provide additional clearance, you may loosen, but do NOT remove, the bolts on the rear seat cushion frame.
Installation Procedure
- Position the seat back frame between the adjusters.
- If you loosened the bolts on the rear seat cushion frame during removal, secure the bolts at this time.
- Install the outboard teardrop washer and bolt.
- Install the nut to the outboard seat back frame.
- Install the nuts to the inboard seat back frame.
- Position the recliner handle and spring. Install the recliner handle bolt.
- Adjust the seat back until the hook end of the springs are adjacent to the adjuster pins.
- Using a pair of channel lock® pliers, slide the springs from the notches in the frame to the pin.
- Adjust the seat back to ensure proper operation.
- If the seat is equipped with lumbar support, perform the following procedure:
- Install the seat back trim cover and pad. Refer to Front Seat Back Cushion Cover and Cushion Pad Replacement .
- Install the front seat to the vehicle. Refer to Front Seat Replacement - Bucket .
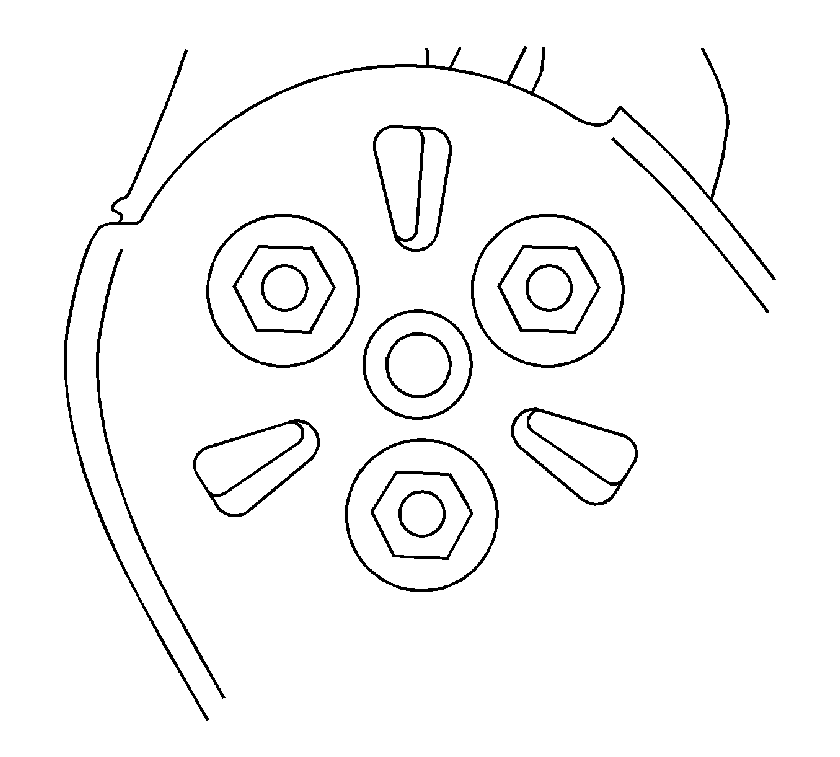
Assure that the locating triangles on the seat back frame are properly seated in the mating holes in the adjusters.
Notice: Refer to Fastener Notice in the Preface section.
Tighten
Tighten the bolts to 12 N·m (9 lb ft).

Tighten
Tighten the bolt to 35 N·m (26 lb ft).
Tighten
Tighten the nut to 17 N·m (13 lb ft).
Tighten
Tighten the nuts to 17 N·m (13 lb ft).

Caution: The seat back frame springs are under tension. To avoid personal injury, use care when removing or installing the frame.
Tighten
Tighten the bolt to 10 N·m (89 lb in).


| 10.1. | Pull back on the lumbar cable sleeve. |
| 10.2. | Install the barrel end of the cable from the lumbar actuator. |
| 10.3. | Adjust the knob to ensure that the cable is properly installed. |
Driver or Passenger Seat Back Cushion Frame Replacement Fold Flat
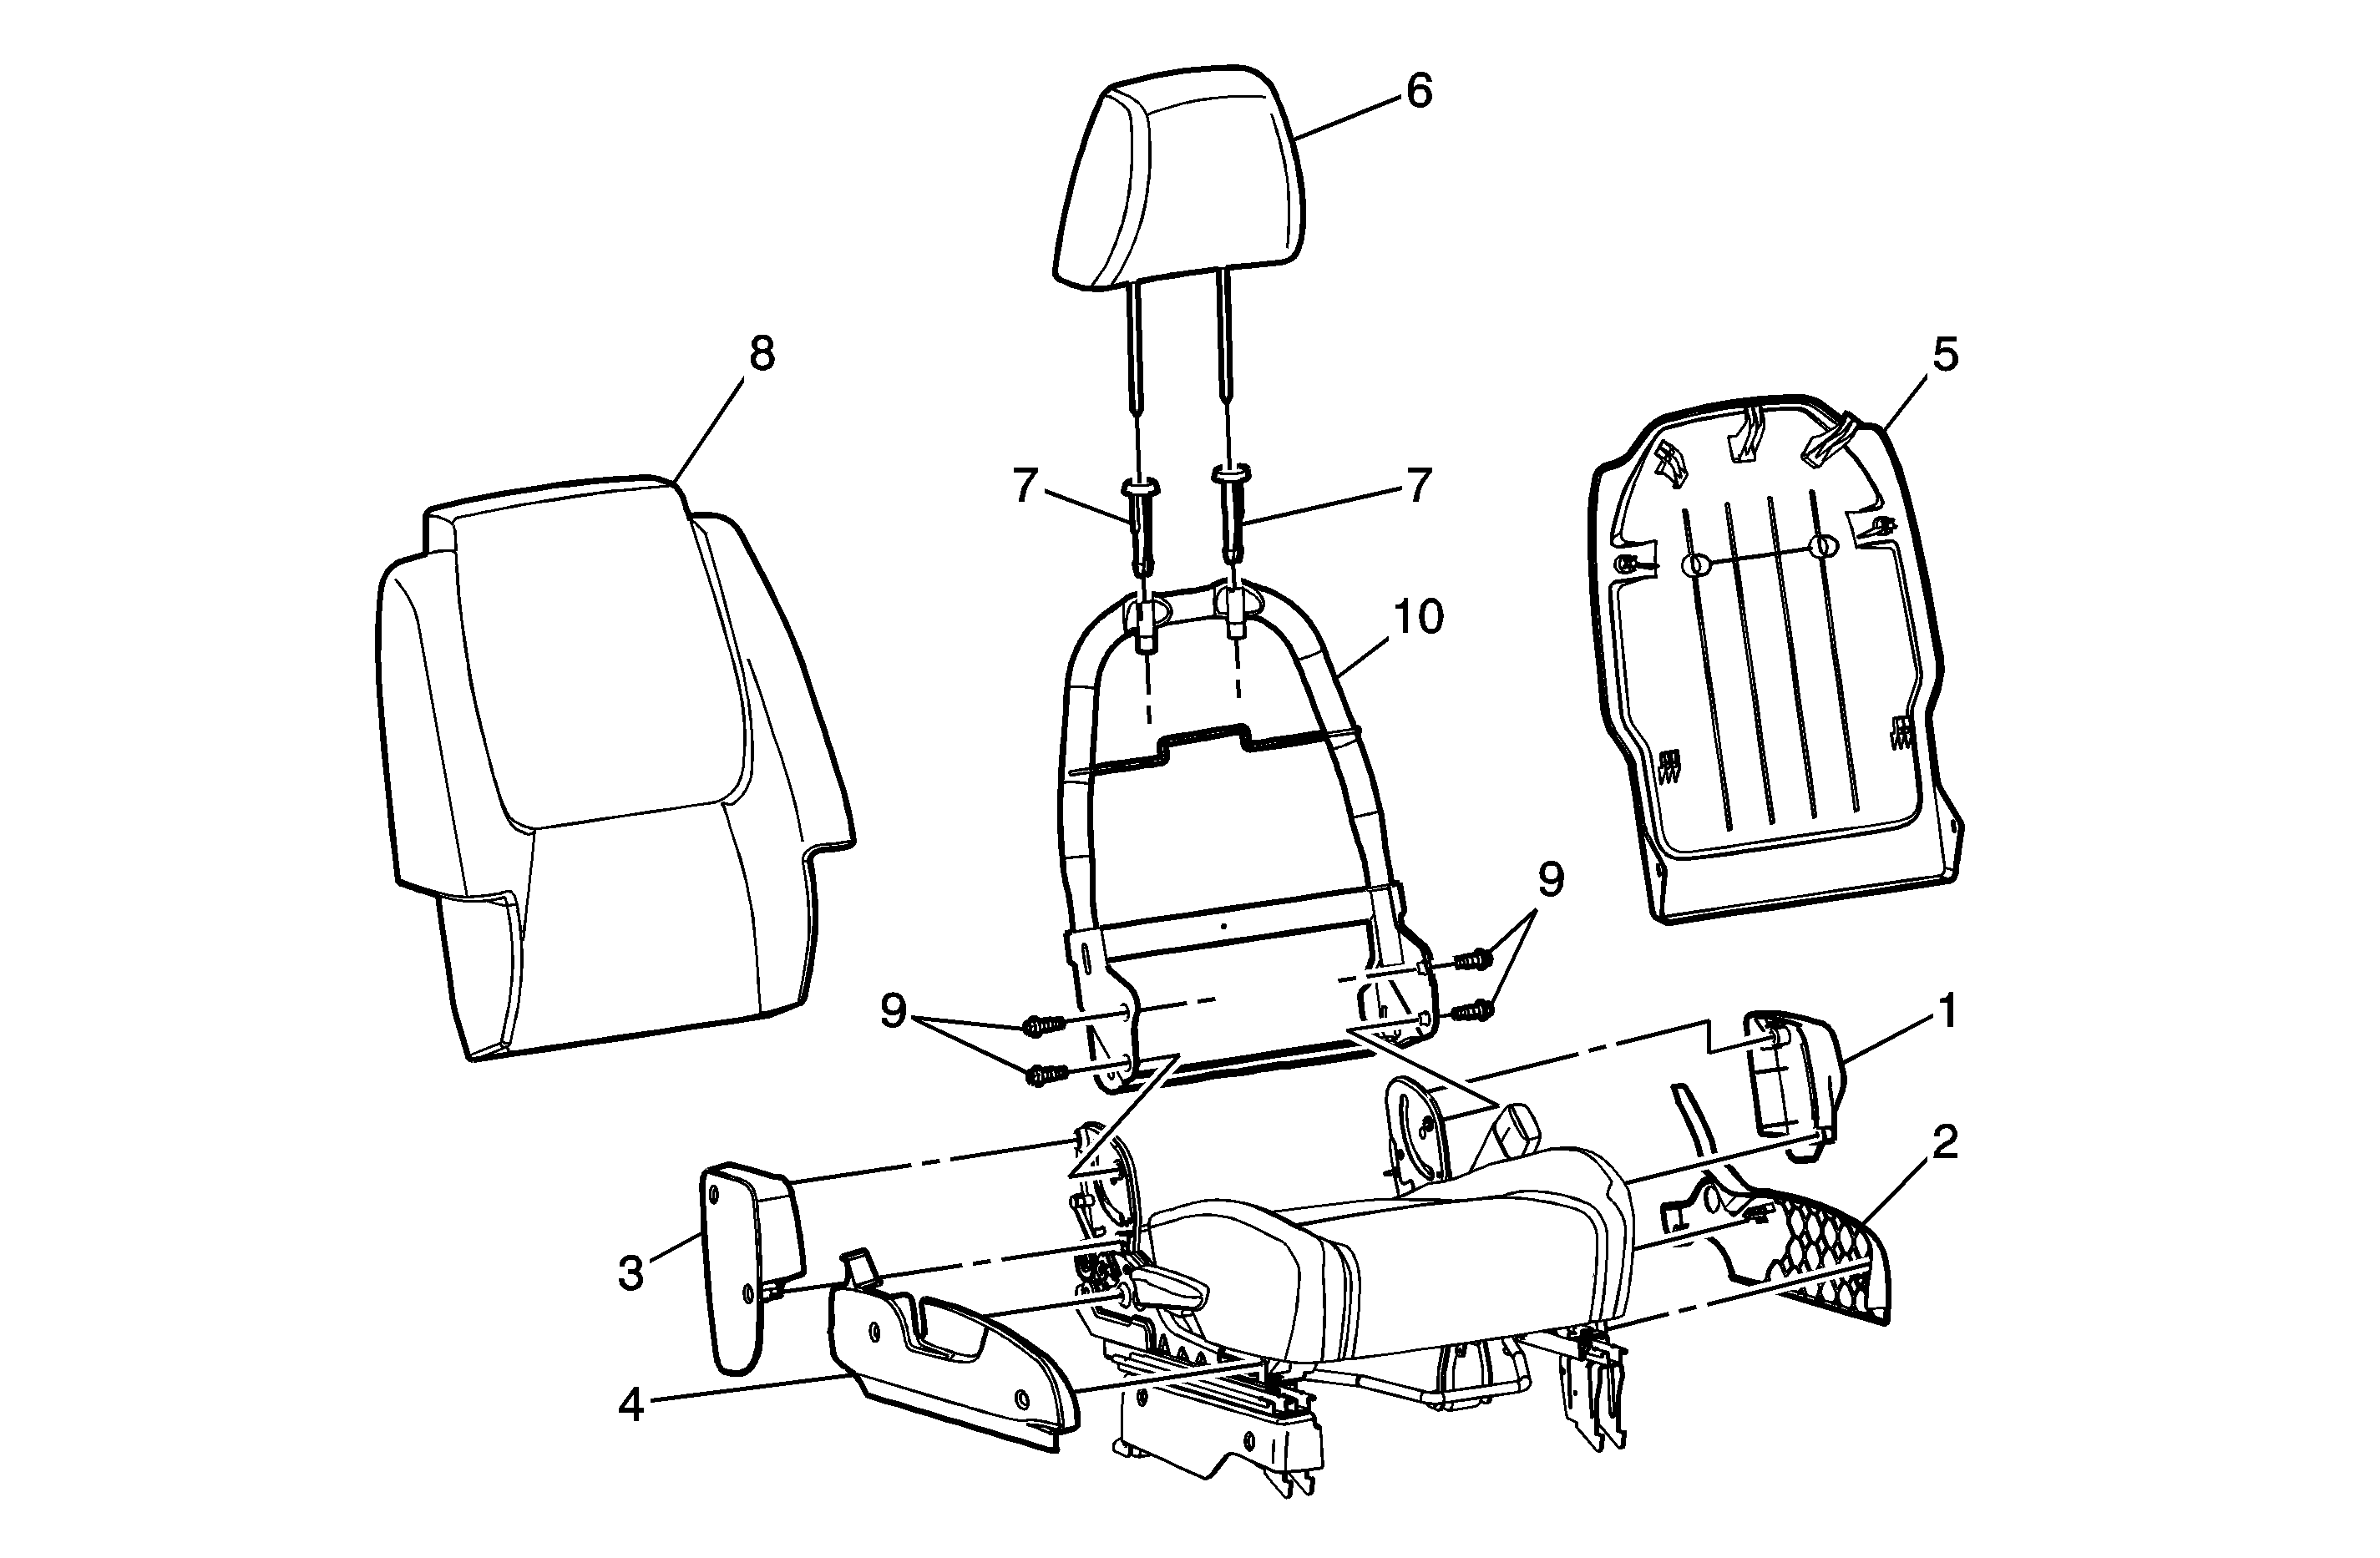
Callout | Component Name |
|---|---|
Fastener Tightening Specifications: Refer to Fastener Tightening Specifications. Preliminary ProcedureRemove the front seat. Refer to Front Seat Replacement - Bucket. | |
1 | Front Seat Outer Recliner Finish Cover Refer to Front Seat Back Recliner Outer Trim Panel Replacement. |
2 | Front Seat Outer Adjuster Finish Cover |
3 | Front Seat Inner Recliner Finish Cover Refer to Front Seat Back Recliner Inner Trim Panel Replacement. |
4 | Front Seat Inner Adjuster Finish Panel |
5 | Front Seat Back Finish Panel Refer to Driver Seat and Passenger Seat Back Cushion Finish Panel Replacement. |
6 | Front Seat Head Restraint Refer to Front Seat Head Restraint Replacement. |
7 | Front Seat Head Restraint Guides Tip |
8 | Front Seat Back Cushion Cover and Pad
|
9 | Front Seat Back Cushion Frame Bolt (Qty: 4) Tighten |
10 | Front Seat Back Cushion Frame |
