For 1990-2009 cars only
Air Conditioning Compressor Hose Replacement LNJ
Special Tools
J 39400-A Halogen Leak Detector
Removal Procedures
- Recover the refrigerant. Refer to Refrigerant Recovery and Recharging .
- Remove the left headlamp. Refer to Headlamp Replacement .
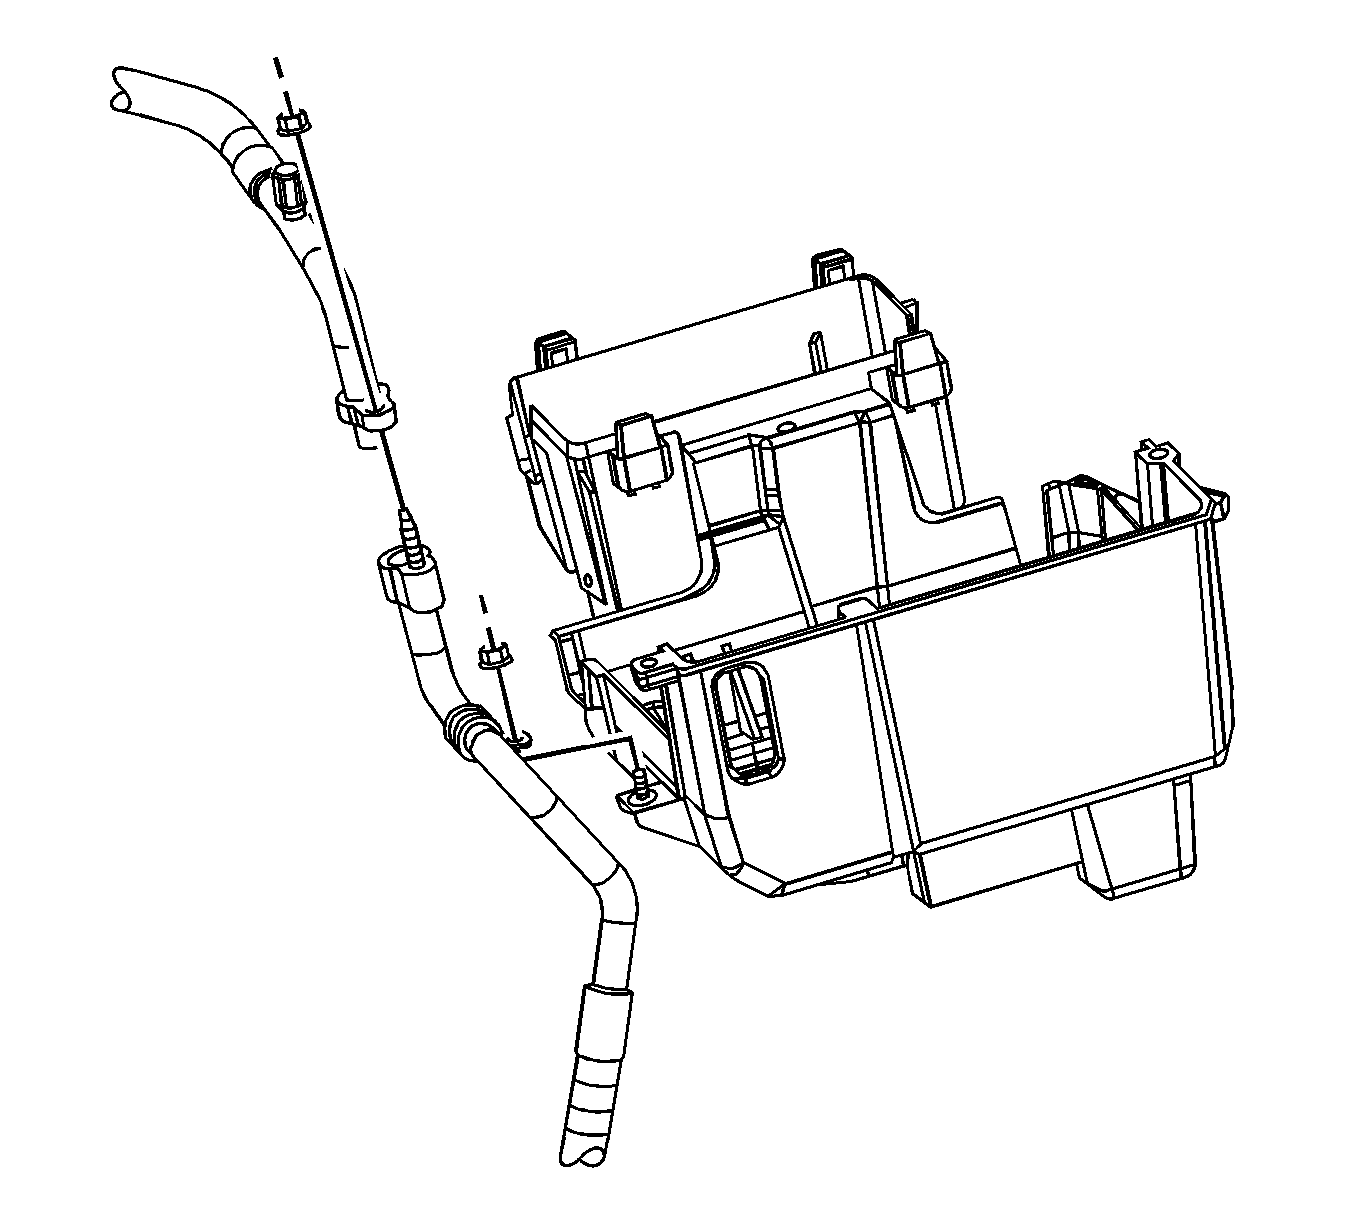
- Remove the compressor hose retainer nut from the battery box.
- Remove the evaporator outlet hose nut from the evaporator outlet hose.
- Remove the evaporator outlet hose from the compressor hose.
- Install a protective cap to the evaporator outlet hose to prevent contamination and desiccant saturation.
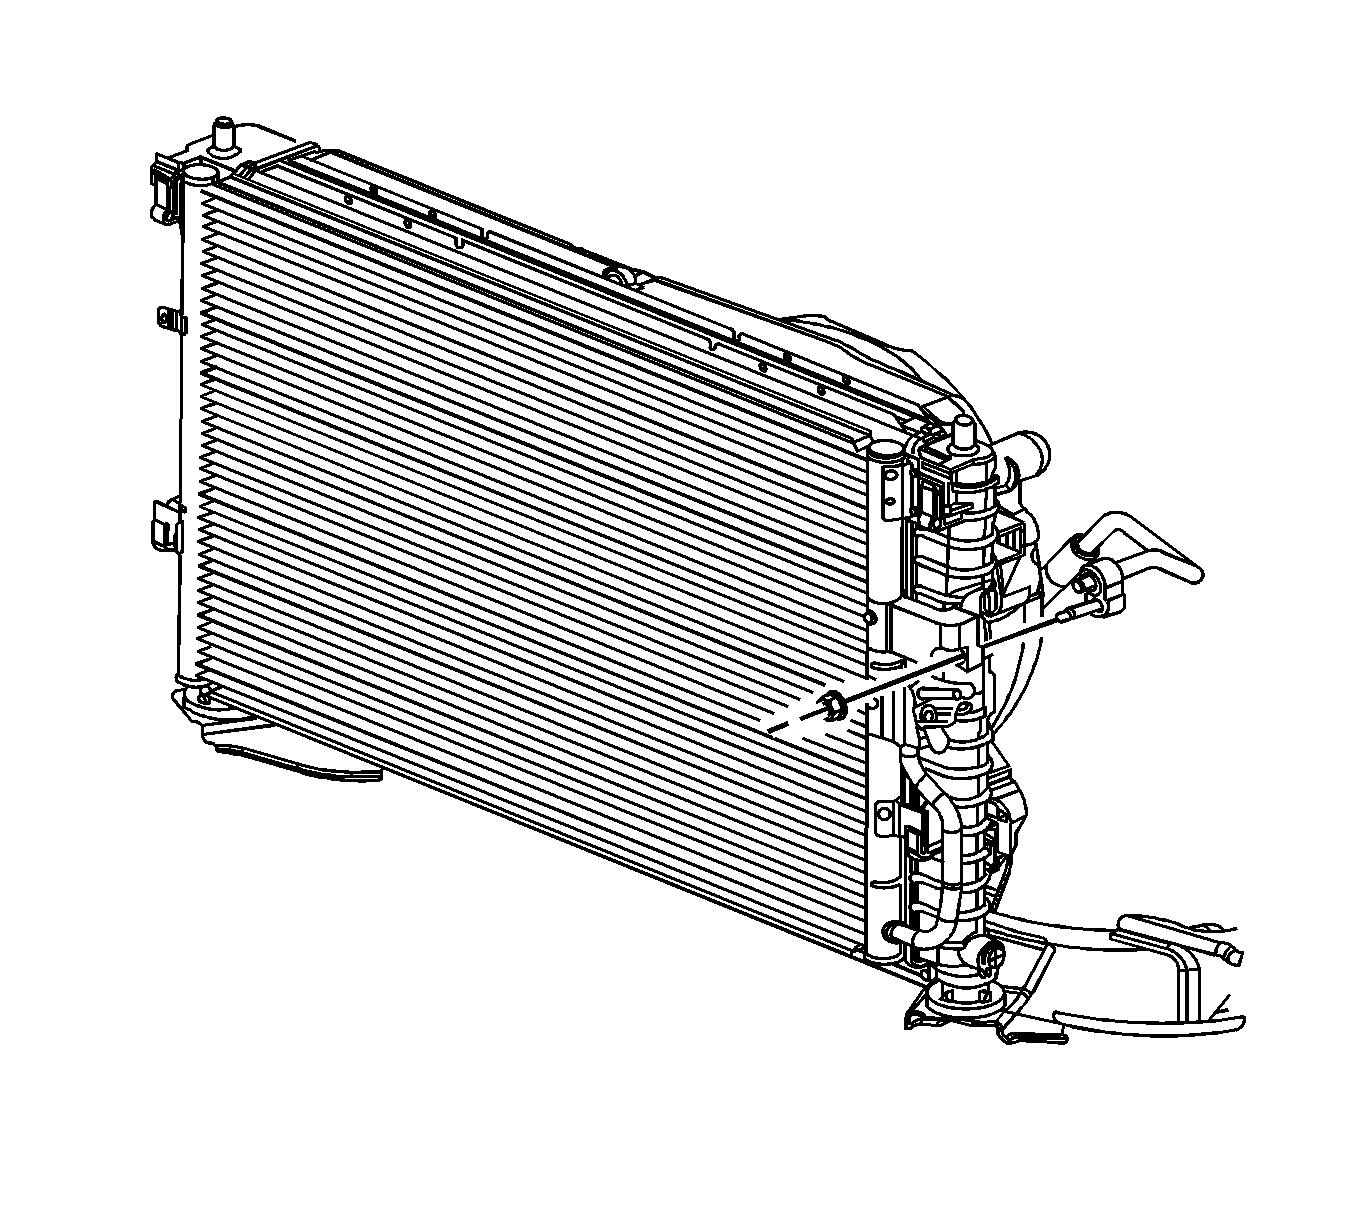
- Remove the compressor hose nut from the condenser.
- Remove the compressor hose from the condenser.
- Install a protective cap to the condenser to prevent contamination and desiccant saturation.
- Raise and support the vehicle. Refer to Lifting and Jacking the Vehicle .
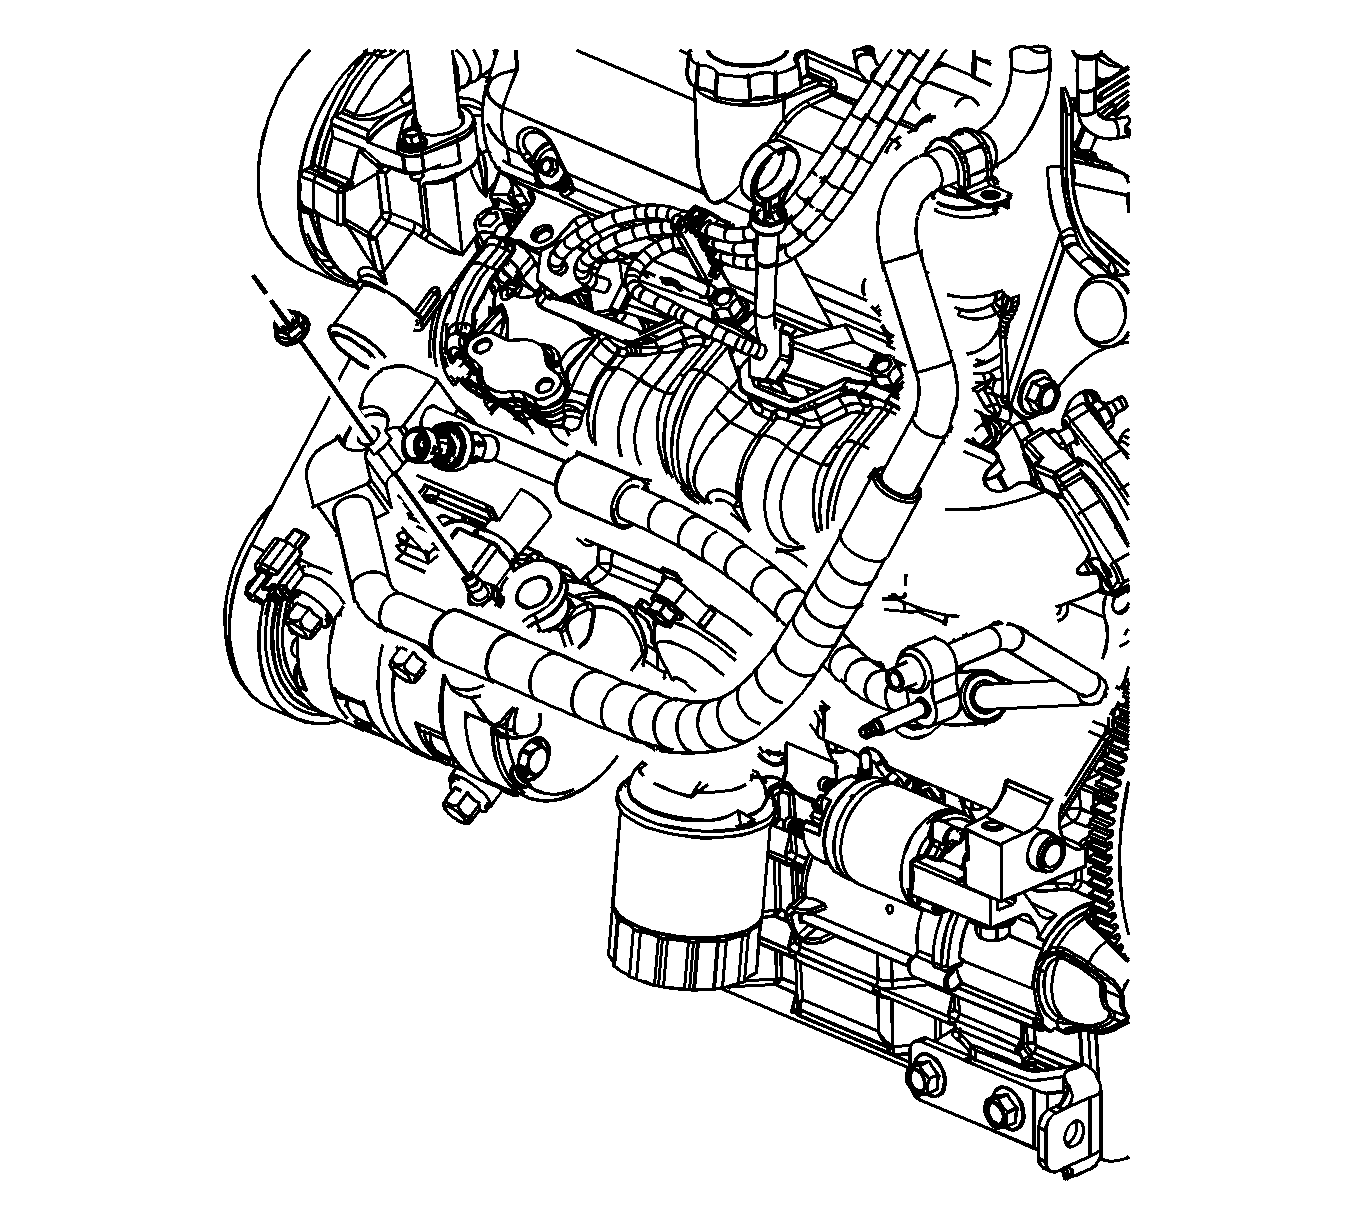
- Disconnect the electrical connector from the pressure transducer.
- Remove the compressor hose nut at the compressor.
- Remove the compressor hose from the compressor.
- Install a protective cap to the compressor to prevent contamination and desiccant saturation.
- Remove the compressor hose from the vehicle.
- Remove and discard the sealing washers from the compressor hose. Refer to Sealing Washer Replacement .
Installation Procedure
- Remove protective cap from compressor end of the compressor hose and the compressor.
- Install new seal washers to the compressor hose. Refer to Sealing Washer Replacement .
- Install the compressor hose to the compressor.
- Install the compressor hose nut to the compressor.
- Connect the electrical connector to the pressure transducer.
- Lower the vehicle.
- Position the compressor hose in the vehicle.
- Install a new sealing washer to the evaporator outlet hose. Refer to Sealing Washer Replacement .
- Install the evaporator outlet hose to the compressor hose.
- Install the evaporator outlet hose nut to the evaporator outlet hose.
- Install a new sealing washer to the compressor hose at the condenser.
- Install the compressor hose to the condenser.
- Install the compressor hose nut to the condenser.
- Install the compressor hose retainer nut to the battery box.
- Install the left headlamp. Refer to Headlamp Replacement .
- Recharge the A/C system. Refer to Refrigerant Recovery and Recharging .
- Test the affected A/C joints for leaks using J 39400-A .
Notice: Refer to Fastener Notice in the Preface section.
Tighten
Tighten the nut to 20 N·m (15 lb ft).
Tighten
Tighten the nut to 20 N·m (15 lb ft).
Tighten
Tighten the nut to 20 N·m (15 lb ft).
Tighten
Tighten the nut to 9 N·m (80 lb in).
Air Conditioning Compressor Hose Replacement LY7
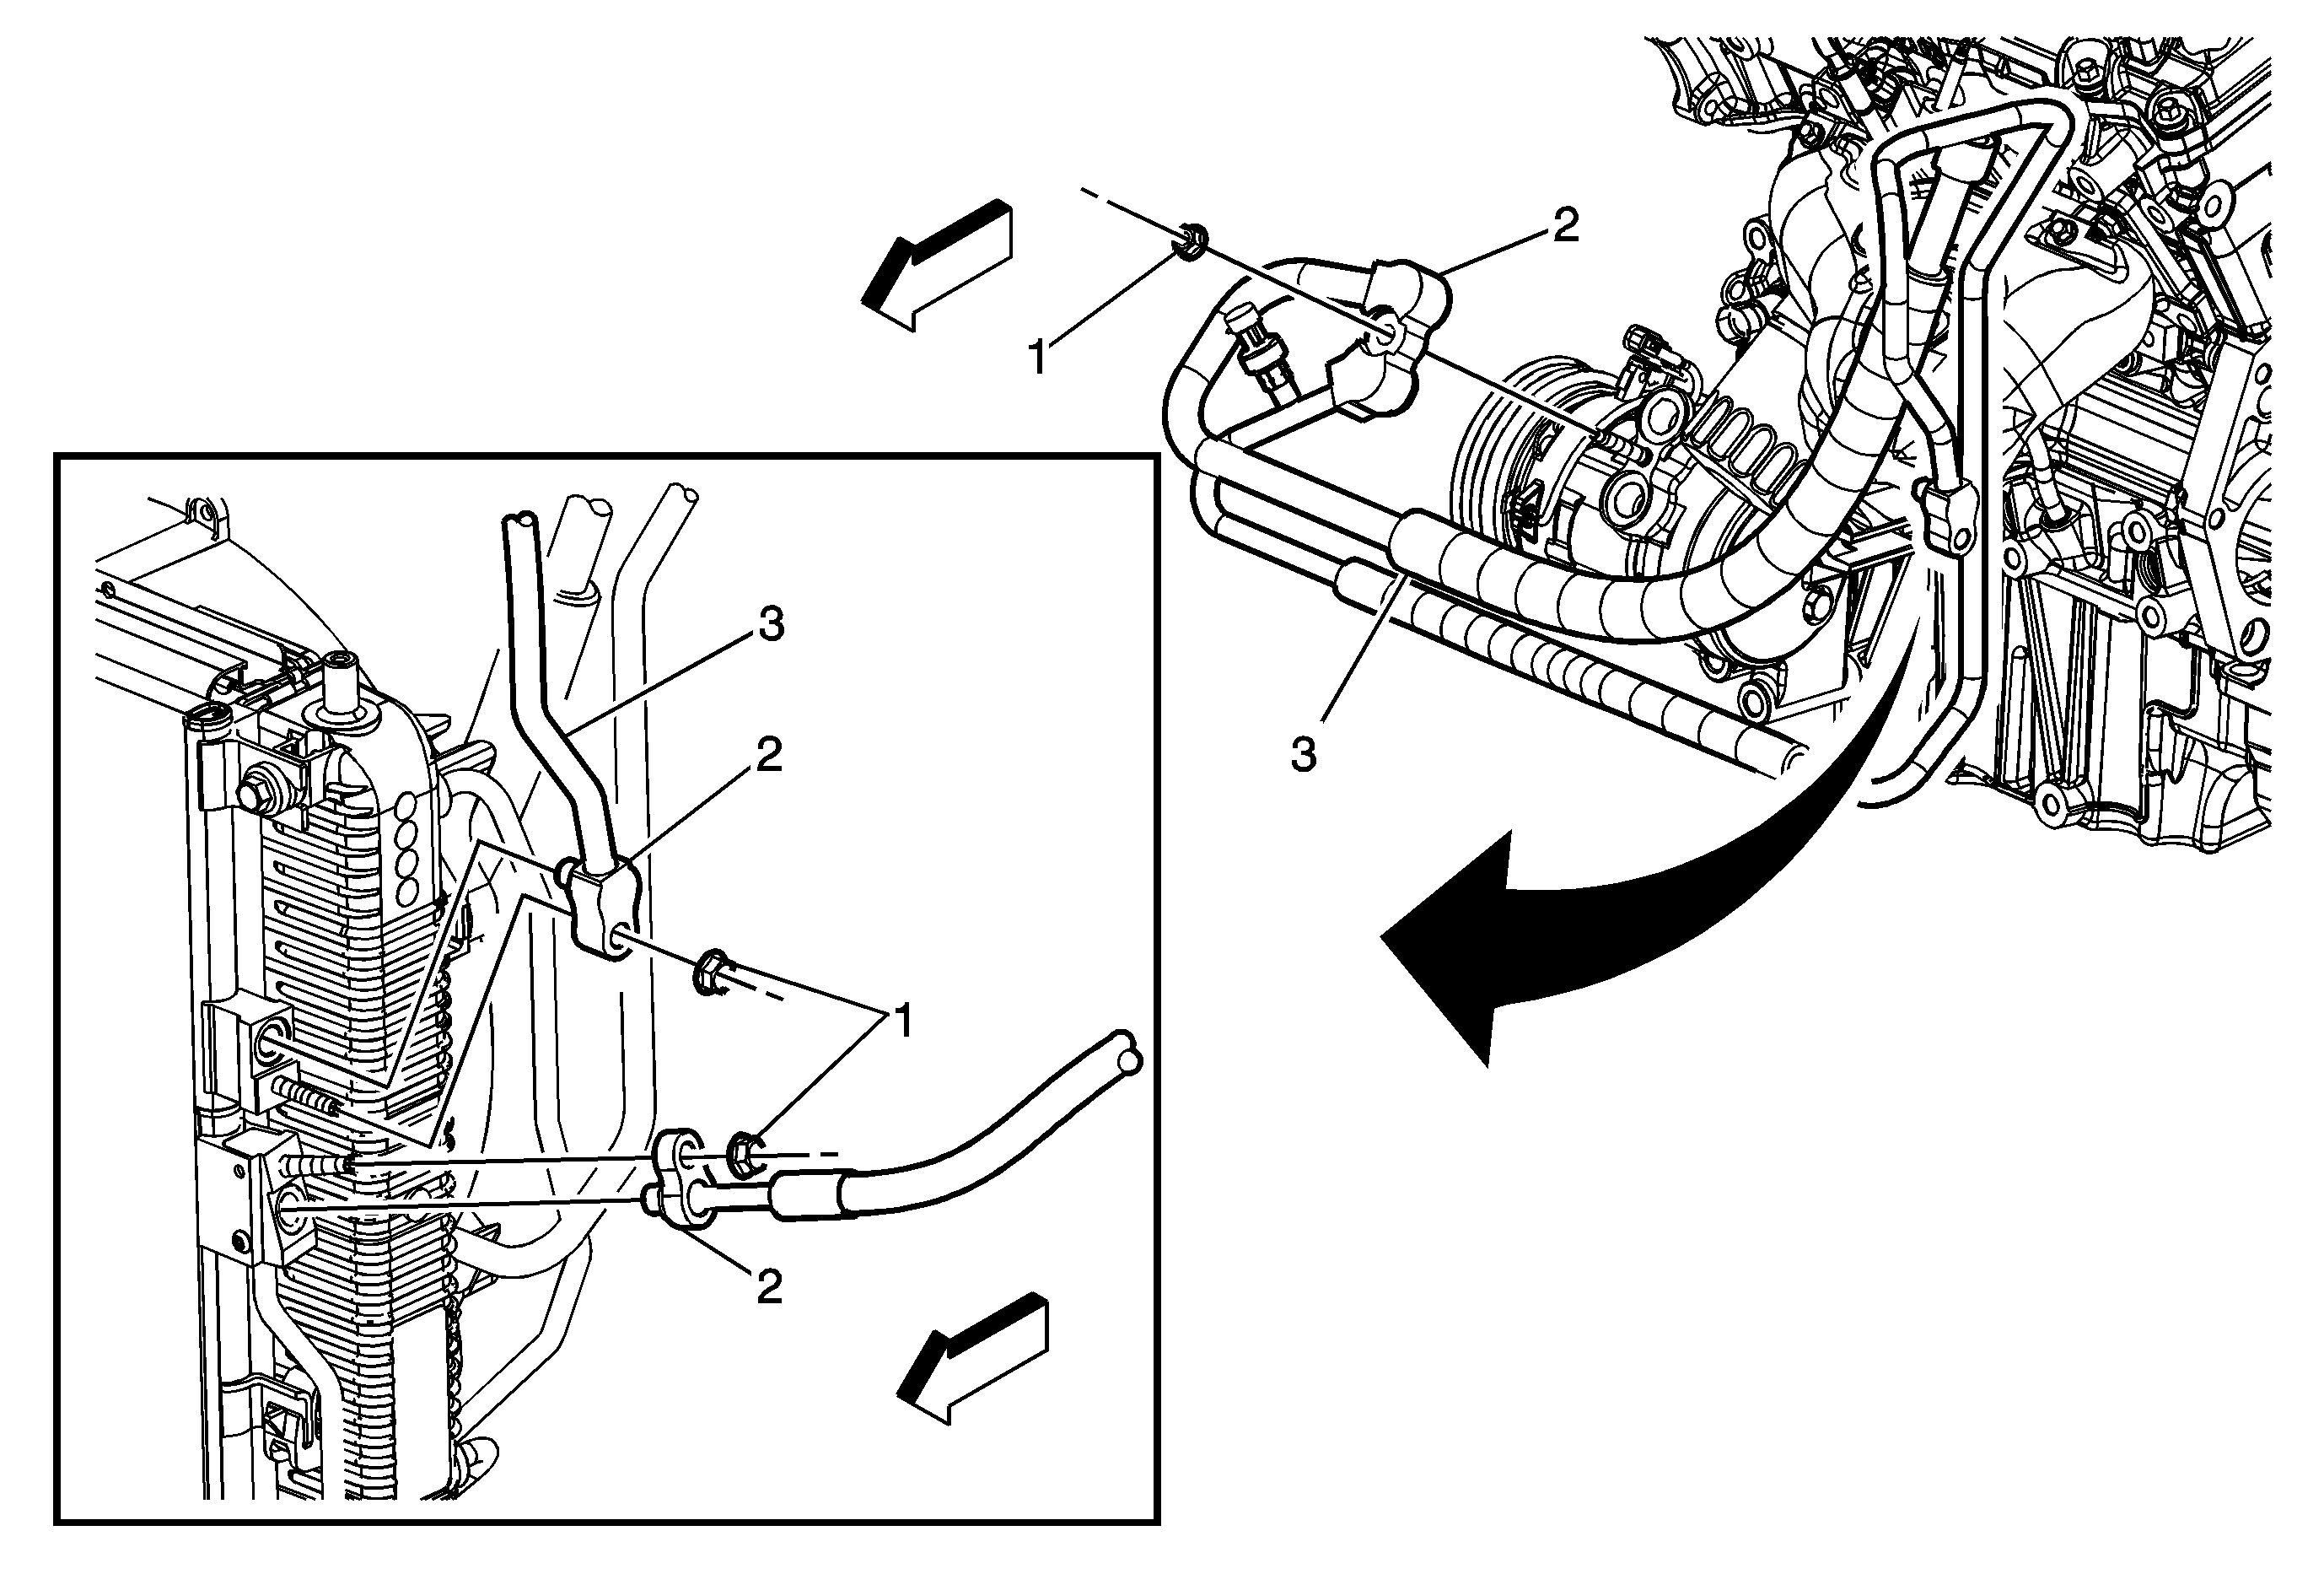
Callout | Component Name |
|---|---|
Preliminary Procedure
| |
1 | Compressor Hose Assembly Nut (Qty: 2) Notice: Refer to Fastener Notice in the Preface section. Tighten |
2 | Sealing Washer Tip |
3 | A/C Compressor Assembly Hose, ProcedureRemove hose through radiator core support. |
