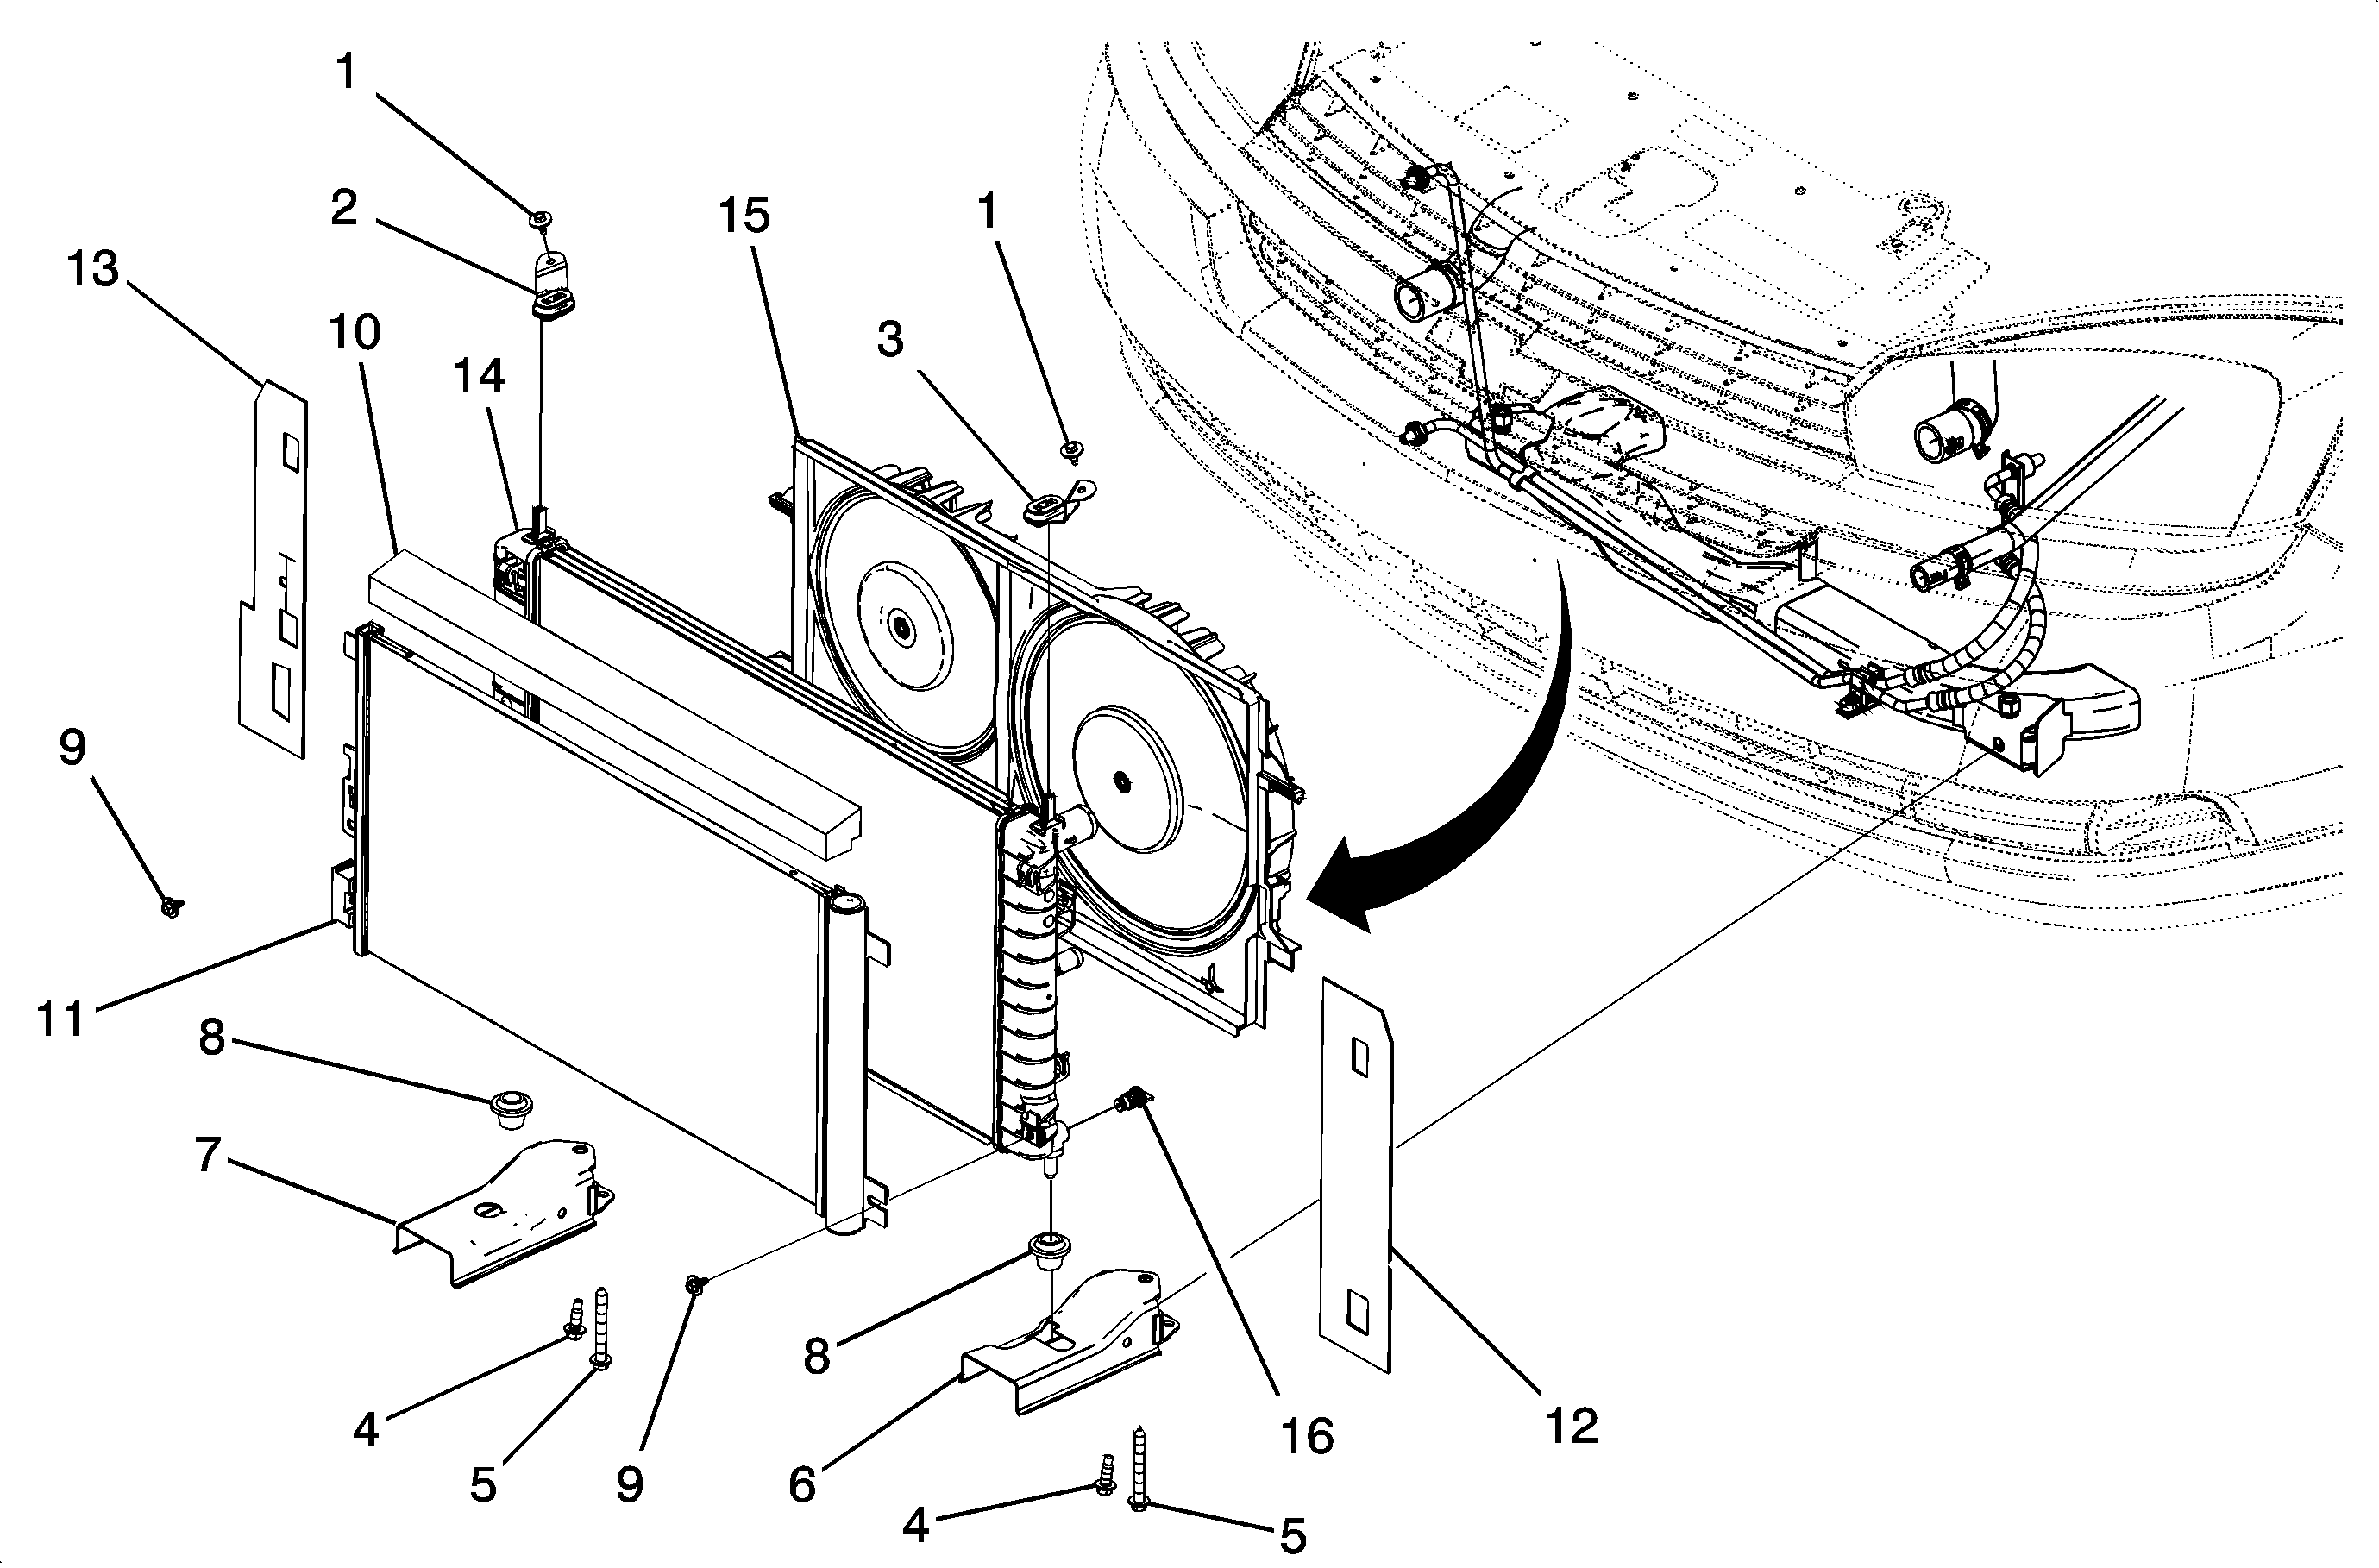
Callout | Component Name |
|---|---|
Fastener Tightening Specifications. Refer to Fastener Tightening Specifications . Raise and suitably support the vehicle. Refer to Lifting and Jacking in General Information. (Link disabled for test). Drain and fill the cooling system. Refer to Cooling System Draining and Filling . | |
1 | Screw, Radiator Upper Bracket Tighten: to 10 N·m (89 lb in) |
2 | Bracket Assembly, Radiator Upper Right |
3 | Bracket Assembly, Radiator Upper Left |
4 | Bolt, Radiator Lower Bracket Tighten: to 60 N·m (44 lb ft) |
5 | Radiator Lower Bracket Bolt Tighten: to 60 N·m (44 lb ft) |
6 | Bracket, Radiator Lower Left |
7 | Bracket, Radiator Lower Right |
8 | Mount, Radiator Lower |
9 | Screw, Air Conditioning (A/C) Condenser NOTICE: The A/C condenser screw is an M6x1x16. Failure to use this size screw could cause damage to the radiator. Tighten: to 7 N·m (62 lb in) |
10 | Seal, Radiator Air Upper |
11 | Condenser Assembly, Air Conditioning (A/C) TIP: When servicing the radiator, remove the condenser to radiator screw and position the condenser. The A/C lines do not need to be connected. |
12 | Baffle, Radiator Air Left Side TIP: Ensure proper air flow by inserting the radiator air side baffle into the slot in the fascia. |
13 | Baffle, Radiator Air Right Side TIP: Ensure proper air flow by inserting the radiator air side seal into the slot in the fascia. |
14 | Radiator Assembly TIP: Remove the radiator from beneath the vehicle. Position the condenser aside in the vehicle. You do not need to disconnect the A/C lines. The headlamps and the right inner fender must be removed to access the radiator bracket bolts. Tools Required:J 38185 Hose Clamp Pliers |
15 | Fan Assembly, Engine Cooling TIP: Support the radiator/condenser to the upper tie bar when removing the fan. Front Fender Liner. Refer to Front Fender Liner Replacement - Right. in Body Front End. (Link disabled for test). |
16 | Cock Assembly, Radiator Drain |
