For 1990-2009 cars only
Removal Procedure
- Open the hood.
- Remove the engine cover from the vehicle. Refer to Engine Cover Replacement in Interior Trim.
- Disconnect the battery negative cable from the battery.
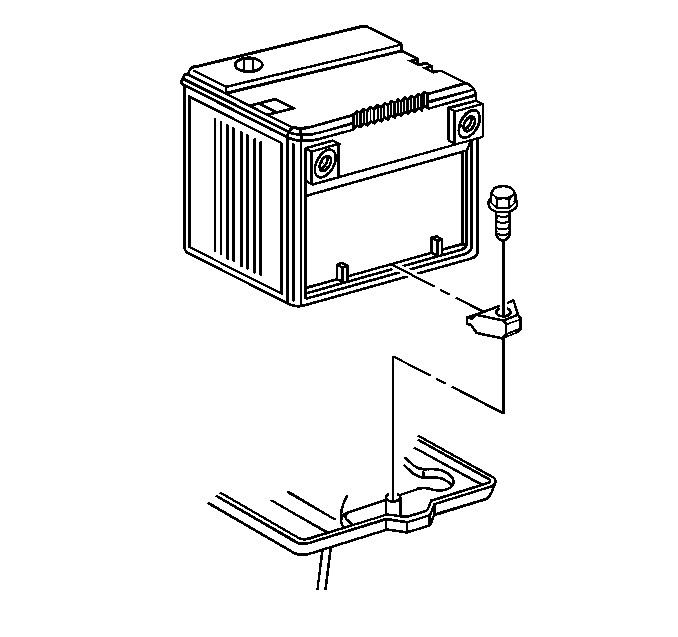
- Remove the battery from the vehicle. Refer to Battery Replacement .
- Remove the air intake duct from the throttle body. Refer to Air Cleaner Inlet Duct Replacement in Engine Controls.
- Remove the air cleaner assembly. Refer to Air Cleaner Assembly Replacement in Engine Controls.
- Drain the cooling system. Refer to Cooling System Draining and Filling .
- Remove the coolant reservoir. Refer to Coolant Recovery Reservoir Replacement .
- Remove the front bumper from the vehicle.
- Remove the grill and park light assembly from the vehicle. Refer to Sheet Metal Front End.
- Evacuate the air conditioning system. Refer toRefrigerant Recovery and Recharging in HVAC.
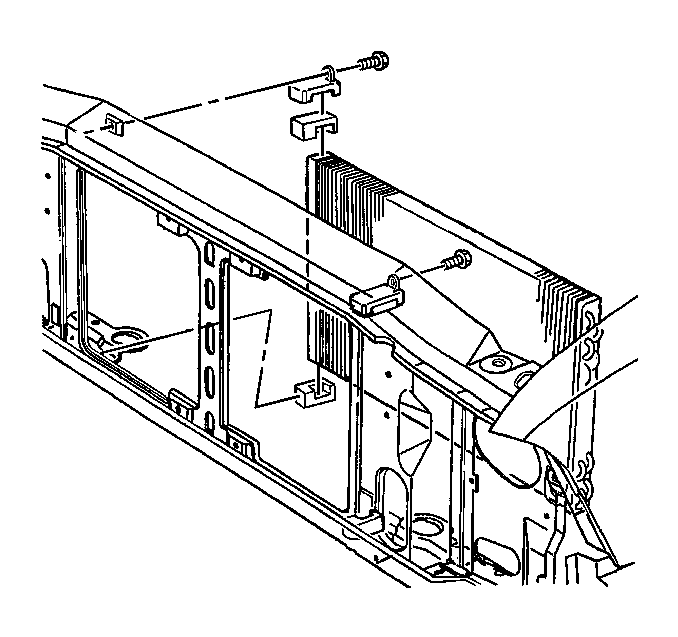
- Remove the radiator support from the vehicle.
- Remove the radiator from the vehicle. Refer to Radiator Replacement
- Remove the air conditioning condenser from the vehicle. Refer to Air Conditioning Condenser Replacement in HVAC.
- Remove the drive belt from the vehicle. Refer to Drive Belt Replacement .
- Remove the fan clutch from the water pump. Refer to Fan Clutch Replacement
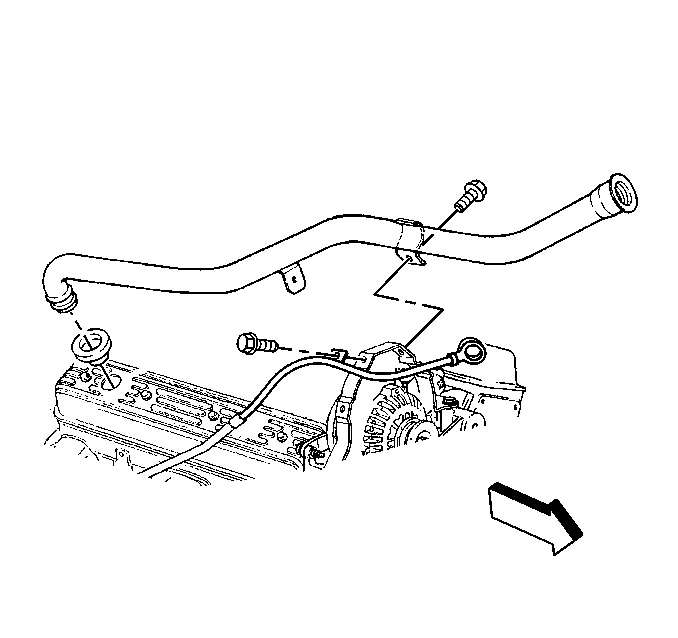
- Remove the radiator hoses from the engine. Refer to Radiator Hose Replacement .
- Remove the engine wiring harness and the connectors.
- Remove the engine oil fill tube.
- Remove the engine oil level indicator and tube. Refer to Oil Level Indicator and Tube Replacement .
- Remove the air conditioning compressor from the mounting bracket. Refer to Air Conditioning Compressor Replacement in HVAC.
- Remove the power steering pump from the mounting bracket. Refer to Power Steering Pump Replacement in Steering.
- Remove the A/C mounting bracket from the engine block. Refer to Air Conditioning Compressor mounting Bracket Replacement in HVAC.
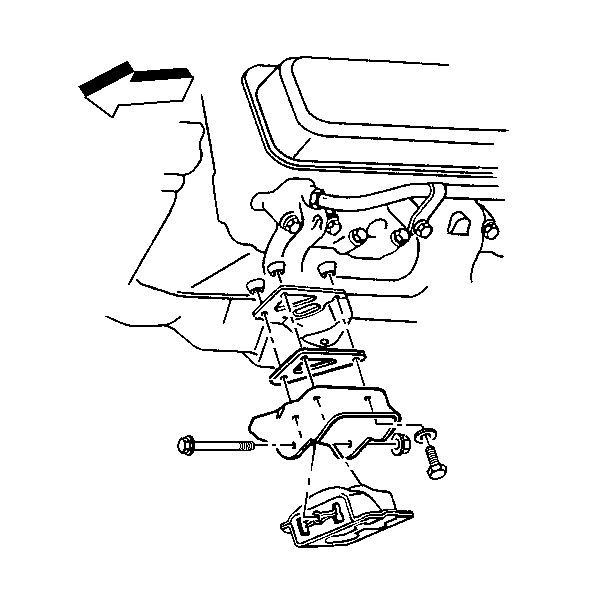
- Remove the generator from the mounting bracket. Refer to Generator Replacement .
- Remove the generator mounting bracket from the engine block. Refer to Generator Bracket Replacement .
- Remove the throttle body from the upper intake manifold. Refer to Throttle Body Assembly Replacement in Engine Controls.
- Remove the upper intake manifold from the lower intake manifold. Refer to Intake Manifold Replacement .
- Remove the lower intake manifold from the cylinder head. Refer to Intake Manifold Replacement .
- Remove the transmission oil level and indicator tube. Refer to Transmission Fluid Filler Tube and Seal Replacement
- Remove the transmission shift cable connector.
- Disconnect the fuel supply lines at the rear of the engine. Refer to Fuel Hose/Pipes Assembly Replacement in Engine Controls.
- Raise the vehicle and support with safety stands. Refer to Lifting and Jacking the Vehicle in General Information.
- Remove the starter motor from the engine block. Refer to Starter Motor Replacement .
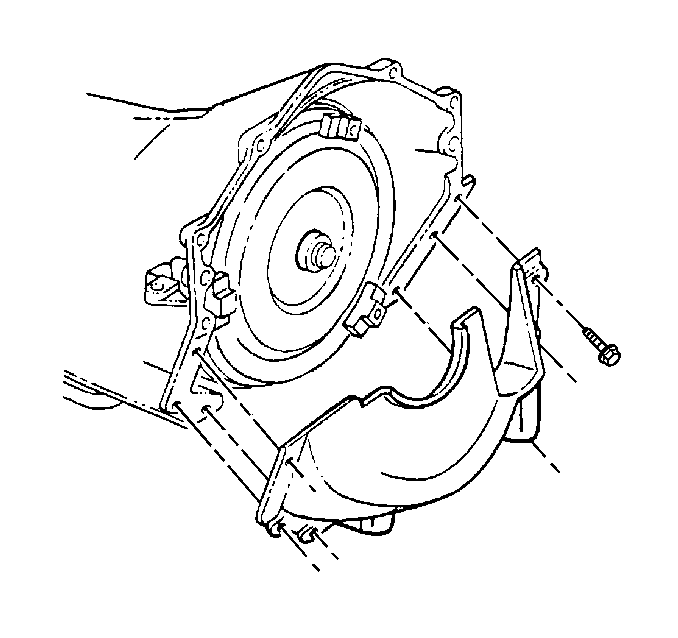
- Remove the flywheel inspection cover.
- Remove the exhaust pipes at the exhaust manifolds. Refer to Catalytic Converter Replacement in Engine Exhaust.
- Remove the engine cooler lines from the retaining brackets. Refer to Engine Oil Cooler Hose/Pipe Replacement .
- Remove the torque converter to flywheel bolts. Refer to Flywheel to Torque Converter Bolt Replacement in Automatic Transmission.
- Remove the transmission to engine bolts.
- Remove the safety stands and lower the vehicle. Refer to Lifting and Jacking the Vehicle in General Information.
- Install a length of chain, using GM P/N 23503910 or equivalent attaching bolt, to the rear of the right cylinder head and the front of the left cylinder head.
- Support the transmission with a strap between the frame rails.
- Install the suitable lifting device to the engine.
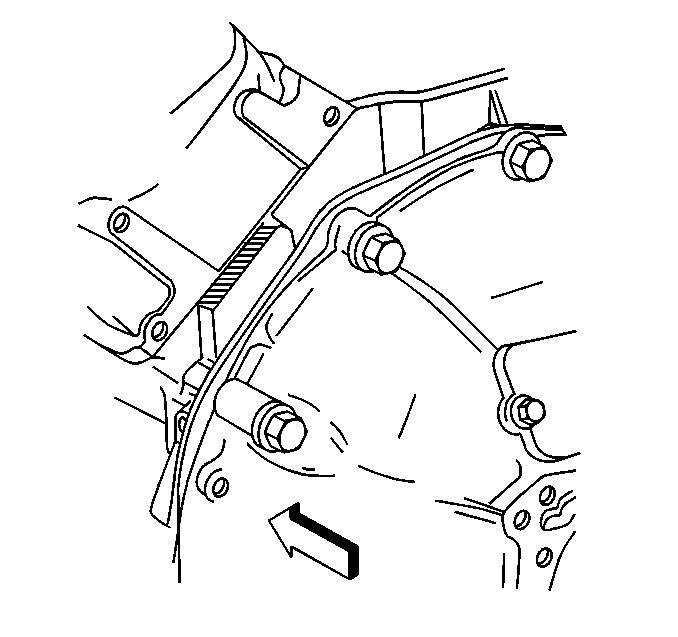
- Remove the front engine mount through bolts.
- Remove the engine from the vehicle.
Caution: Before servicing any electrical component, the ignition and start switch must be in the OFF or LOCK position and all electrical loads must be OFF, unless instructed otherwise in these procedures. If a tool or equipment could easily come in contact with a live exposed electrical terminal, also disconnect the negative battery cable. Failure to follow these precautions may cause personal injury and/or damage to the vehicle or its components.
Installation Procedure
- Install the engine from the vehicle.
- Install the front engine mount through bolts.
- Remove the lifting device to the engine.
- Remove the support from the transmission.
- Remove the chain and attaching bolts from the cylinder heads.
- Raise the vehicle and support with safety stands. Refer to Lifting and Jacking the Vehicle in General Information.
- Install the bolts from the transmission to engine.
- Install the bolts from the flywheel to the torque convertor. Refer to Flywheel to Torque Converter Bolt Replacement in Automatic Transmission.
- Install the engine cooler lines to the retaining brackets. Refer to Engine Oil Cooler Hose/Pipe Replacement .
- Install the exhaust pipes to the exhaust manifolds. Refer to Catalytic Converter Replacement in Engine Exhaust.
- Install the flywheel inspection cover.
- Install the starter motor to the engine block. Refer to Starter Motor Replacement .
- Remove the safety stands and lower the vehicle. Refer to Lifting and Jacking the Vehicle in General Information.
- Connect the fuel supply lines at the rear of the engine. Refer to Fuel Hose/Pipes Assembly Replacement in Engine Controls.
- Connect the transmission shift cable connector.
- Install the lower intake manifold to the cylinder head. Refer to Intake Manifold Replacement .
- Install the upper intake manifold to the lower intake manifold. Refer to Intake Manifold Replacement
- Install the throttle body to the upper intake manifold. Refer to Throttle Body Assembly Replacement in Engine Controls.
- Install the generator mounting bracket to the engine block. Refer to Generator Bracket Replacement .
- Install the generator to the mounting bracket. Refer to Generator Replacement .
- Install the transmission oil level and indicator tube. Refer to Transmission Fluid Filler Tube and Seal Replacement
- Install the A/C mounting bracket to the engine block. Refer to Air Conditioning Compressor mounting Bracket Replacement in HVAC.
- Install the power steering pump to the mounting bracket. Refer to Power Steering Pump Replacement in Steering.
- Install the air conditioning compressor to the mounting bracket. Refer to Air Conditioning Compressor Replacement in HVAC.
- Install the engine oil level indicator and tube. Refer to Oil Level Indicator and Tube Replacement .
- Install the engine oil fill tube to the engine block.
- Install the engine wiring harness and the connectors.
- Install the radiator hoses to the engine. Refer to Radiator Hose Replacement .
- Install the fan clutch to the water pump. Refer to Fan Clutch Replacement .
- Install the drive belt to the vehicle. Refer to Drive Belt Replacement .
- Install the air conditioning condenser to the vehicle. Refer to Air Conditioning Condenser Replacement in HVAC.
- Install the radiator to the vehicle. Refer to Radiator Replacement
- Install the radiator support to the vehicle.
- Install the grill and park light assembly to the vehicle. Refer to Sheet Metal.
- Install the front bumper to the vehicle.
- Install the coolant reservoir in the vehicle. Refer to Cooling System Draining and Filling .
- Install the air intake duct to the throttle body. Refer to Air Cleaner Inlet Duct Replacement in Engine Mechanical.
- Install the air cleaner assembly. Refer to Air Cleaner Assembly Replacement in Engine Controls.
- Install the battery in the vehicle. Refer to Battery Replacement .
- Fill the cooling system. Refer to Cooling System Draining and Filling .
- Recharge the air conditioning system. Refer to Refrigerant Recovery and Recharging in HVAC.
- Install the engine cover in the vehicle. Refer to Engine Cover Replacement in Interior Trim.
- Install the proper quantity and grade of engine oil.
- Close the hood.