Input Rod Seal

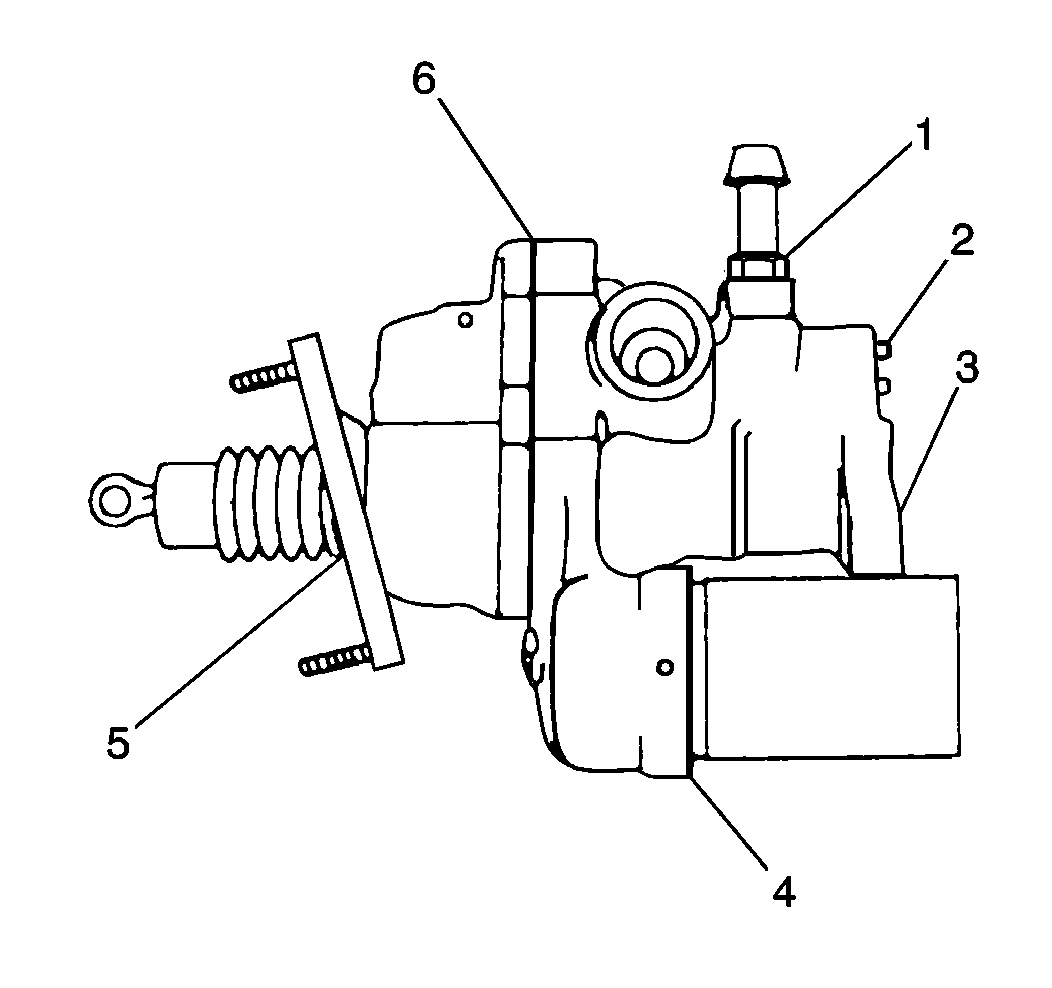
A fluid leak from inside of the driver's compartment at the power brake booster vent hole indicates a damaged input rod seal (5). Remove and disassemble the power brake booster. Check the input rod bore for any scratches that may cause the leak. If scratches are present, replace the housing cover. If no excessive scratches are present, replace all the seals using the power brake booster seal kit. Refer to Hydraulic Brake Booster Overhaul in Hydraulic Brakes.
Power Piston Seal
Fluid leaking between the brake master cylinder and the power brake booster indicates damage of the power piston seal (3). This can possibly reduce the power assist. Remove and disassemble the power brake booster. Check the piston for any scratches that may be the cause of the leak. If no scratches are present, replace all of the seals using the power brake booster seal kit. Refer to Hydraulic Brake Booster Overhaul in Hydraulic Brakes.
Housing Seal
A fluid leak between the two housings indicates a damaged housing seal (6). Remove and disassemble the power brake booster. Replace the housing seal (6), input rod seal (5), and the power piston seal (3) using the power brake booster seal kit. Refer to Hydraulic Brake Booster Overhaul in Hydraulic Brakes.
Spool Valve Plug Seal
Damage to the spool valve plug seal (2) causes fluid to leak past the accumulator cap. Replace the spool valve plug seal (2) with the power brake booster on the vehicle.
Accumulator Seal
Damage to the accumulator seal (4) causes the fluid to leak past the accumulator cap. Replace the accumulator seal (4) with the power brake booster on the vehicle. Refer to Hydraulic Brake Booster Overhaul .
Return Port Fitting
Notice: Use the correct fastener in the correct location. Replacement fasteners must be the correct part number for that application. Fasteners requiring replacement or fasteners requiring the use of thread locking compound or sealant are identified in the service procedure. Do not use paints, lubricants, or corrosion inhibitors on fasteners or fastener joint surfaces unless specified. These coatings affect fastener torque and joint clamping force and may damage the fastener. Use the correct tightening sequence and specifications when installing fasteners in order to avoid damage to parts and systems.
Tighten the reurn port fitting (3) to 10 N·m (88 lb in). If the leak continues, replace the seal ring under the return port fitting.
