Battery Positive Cable Replacement 4.8L /5.3L /6.0L
Removal Procedure
- On all models, remove the bolt retaining the coolant recovery reservoir or surge tank.
- Position the coolant recovery reservoir or the surge tank aside.
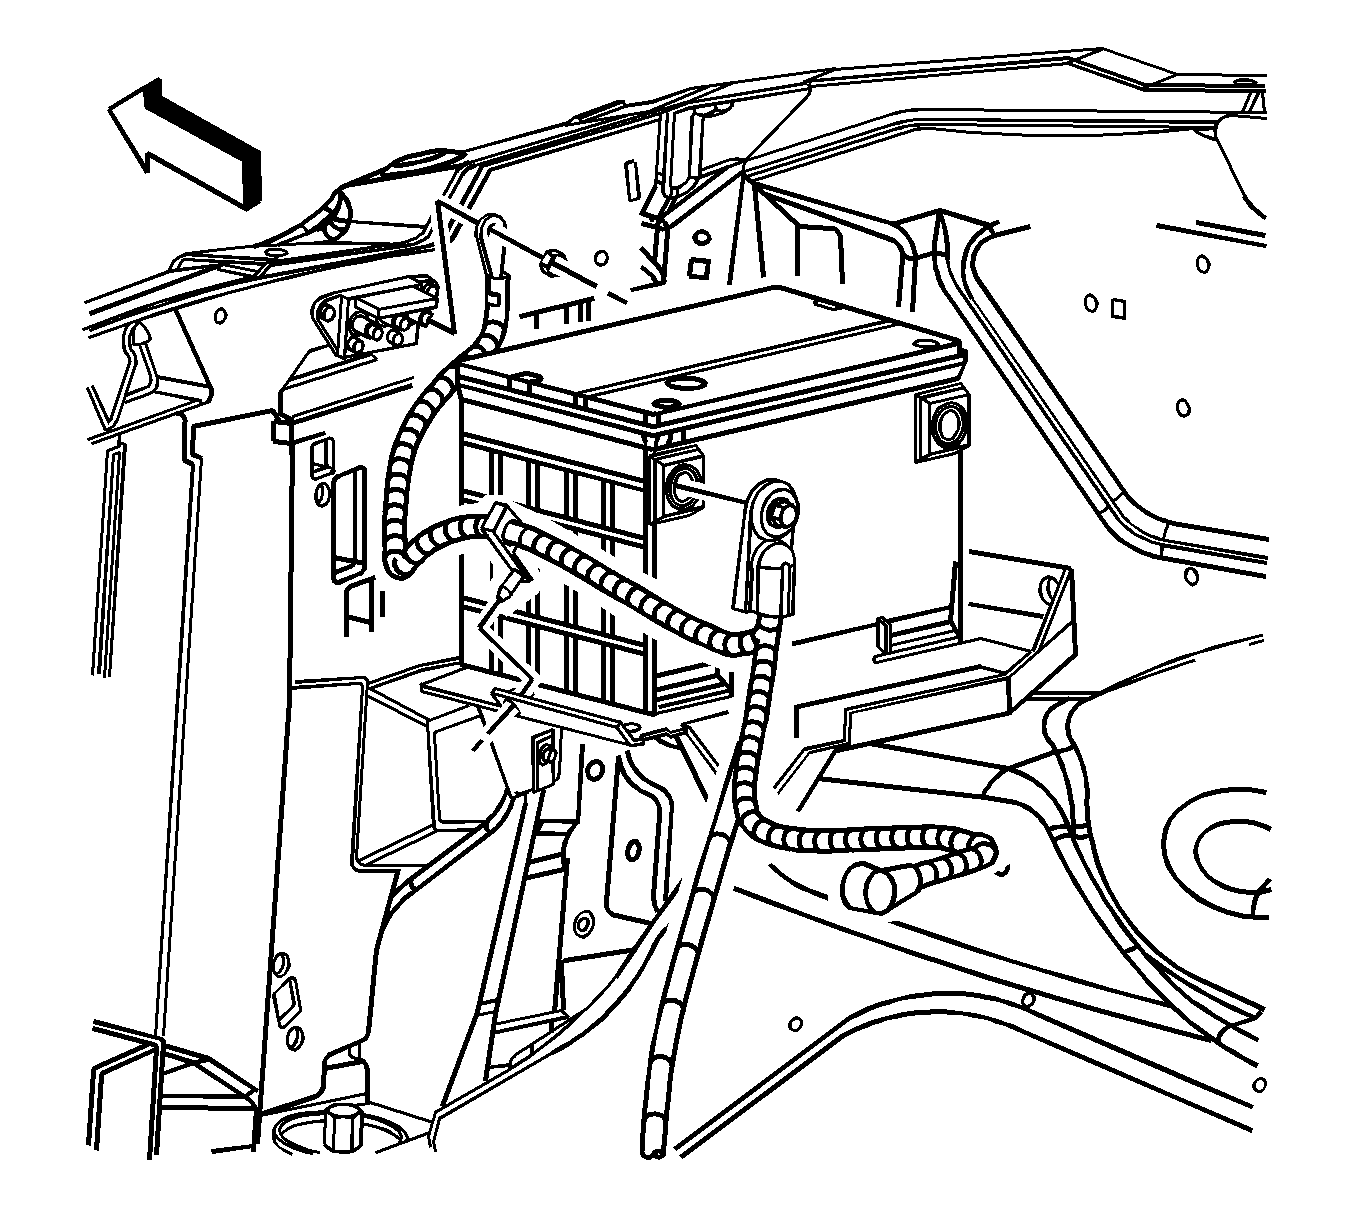
- Disconnect the battery negative cable from the battery. Refer to Battery Negative Cable Disconnection and Connection .
- Disconnect the battery positive cable from the battery.
- On models equipped with the 4.8L, or 6.0L engine, disconnect the positive lead to the junction block.
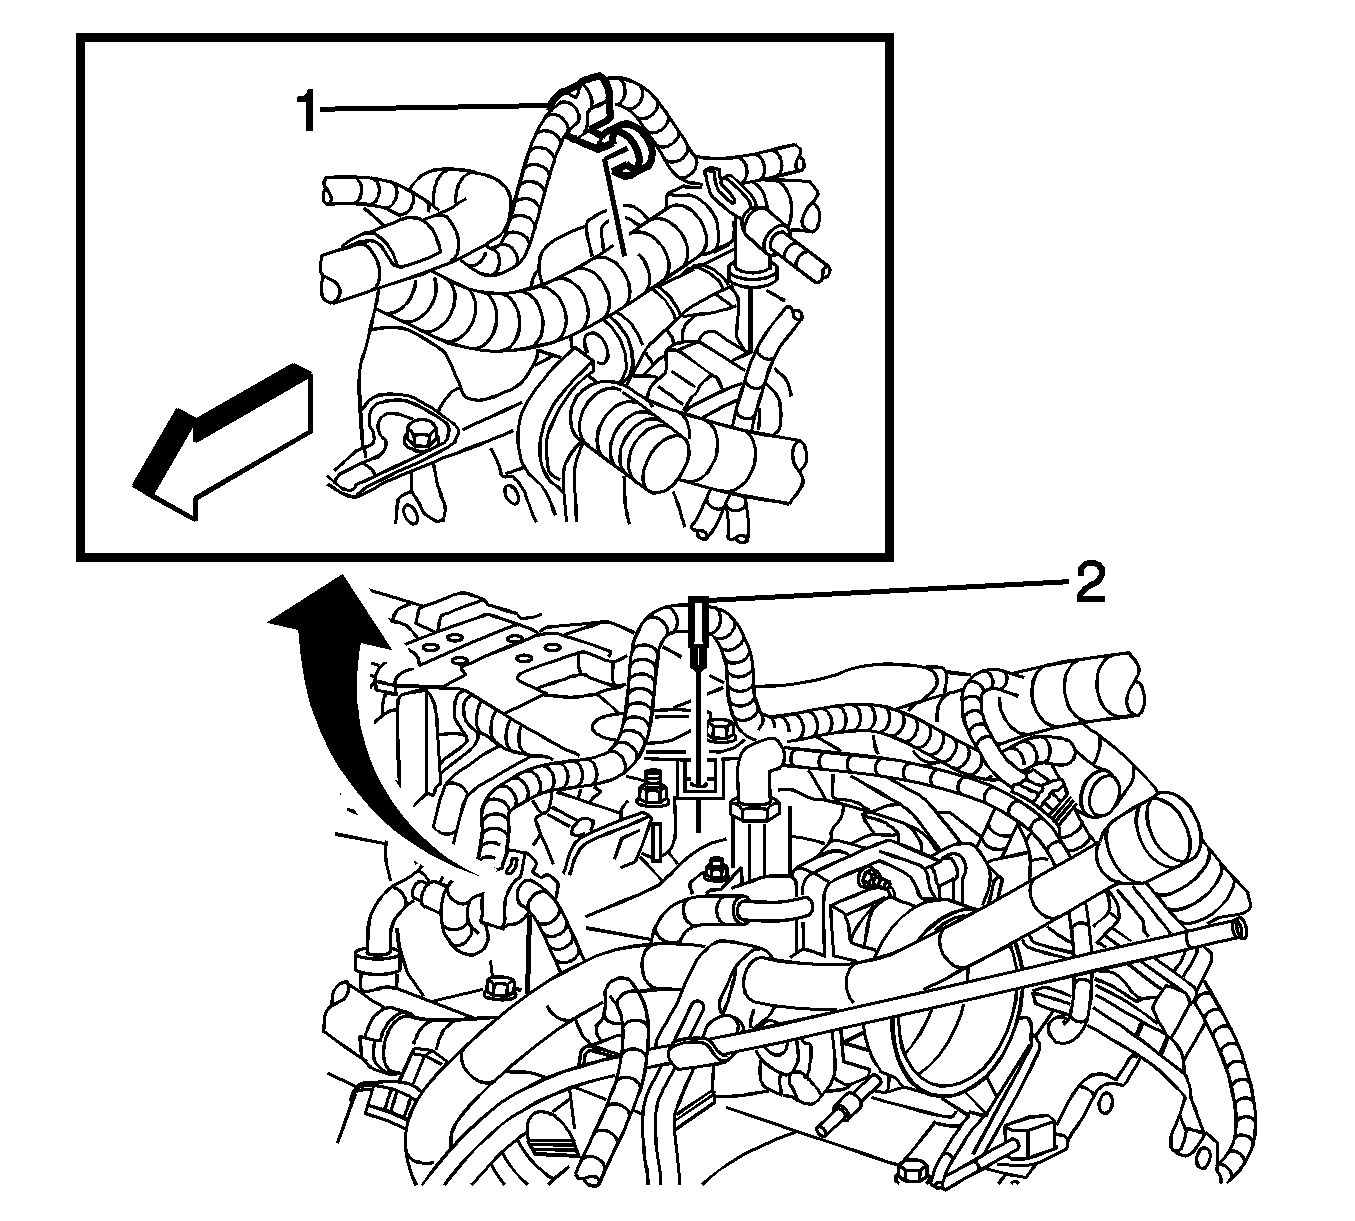
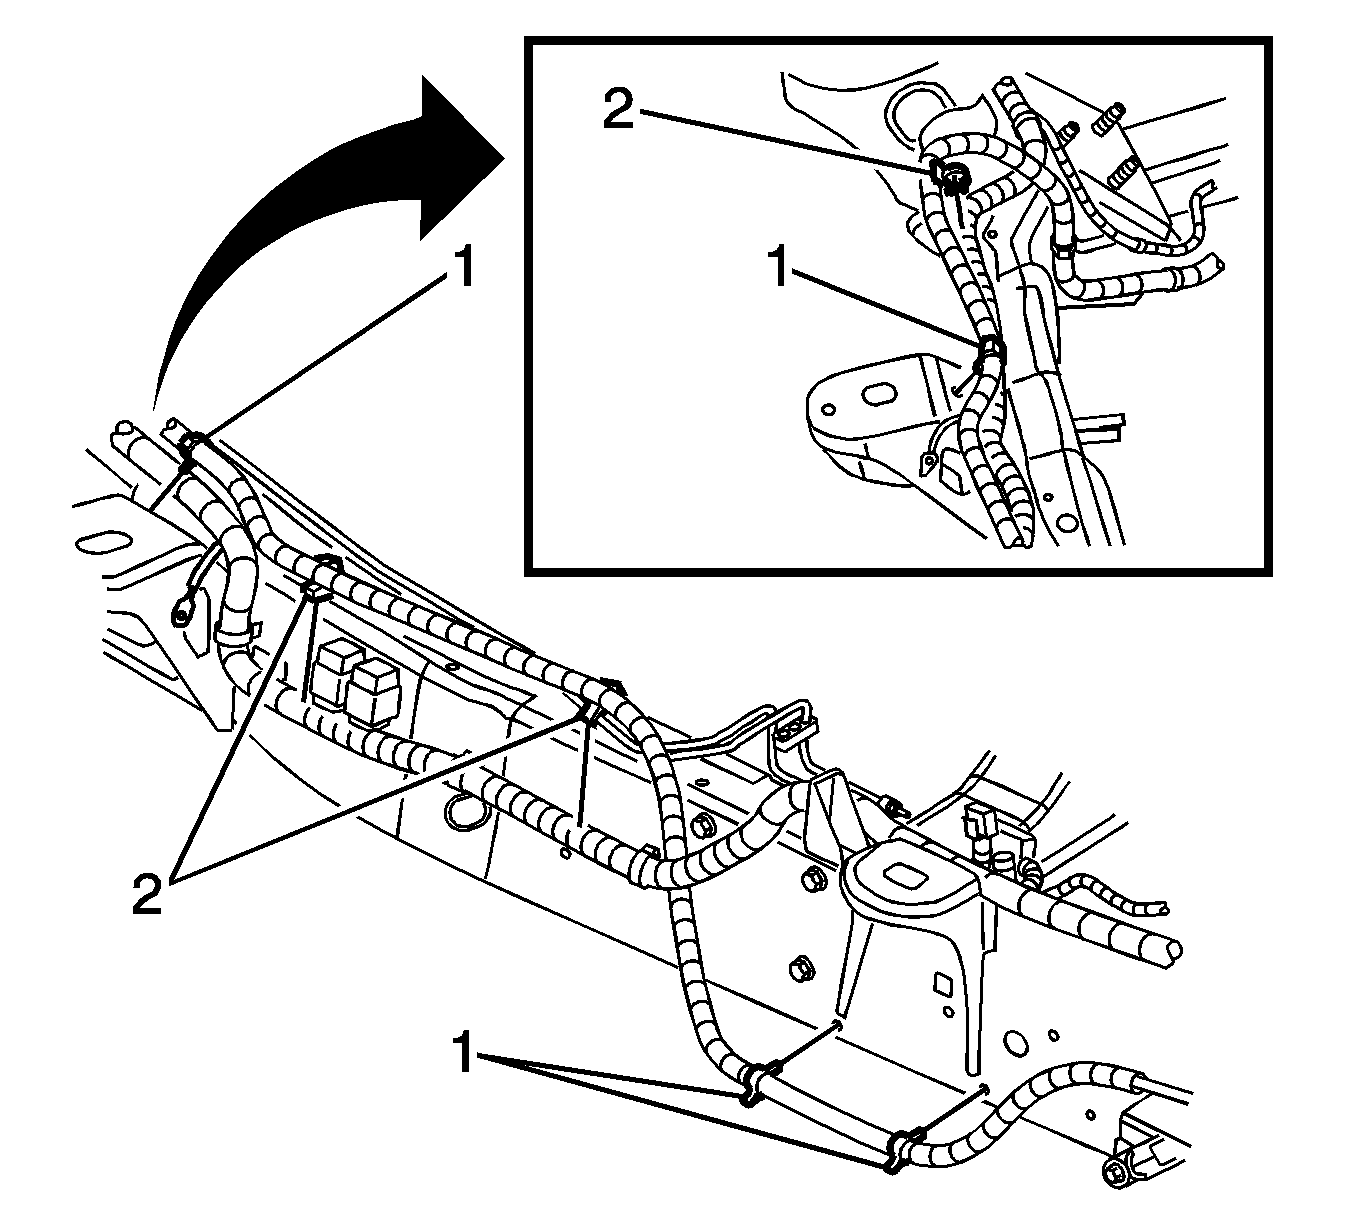
- On models equipped with 4.8L, 5.3L or 6.0L engine, unclip the battery positive cable from the engine harness clip (1).
- Unclip the battery positive cable from the engine harness retainer (2).
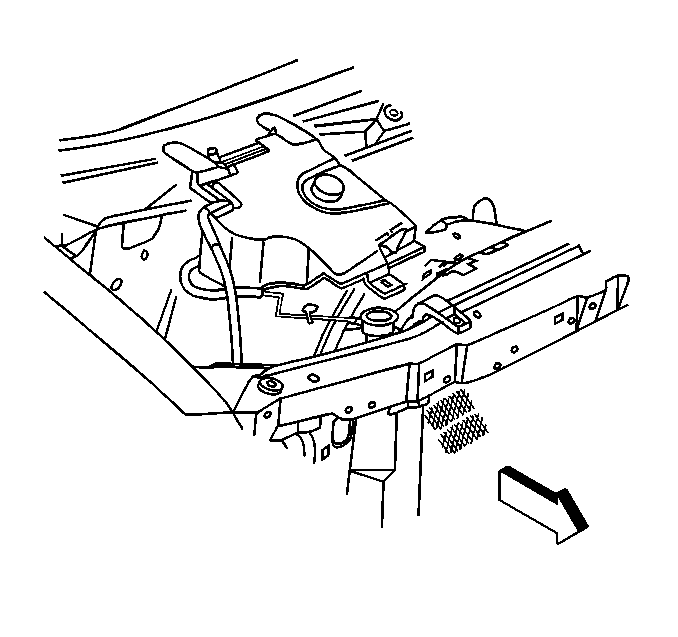
- On all models, raise the vehicle. Refer to Lifting and Jacking the Vehicle .
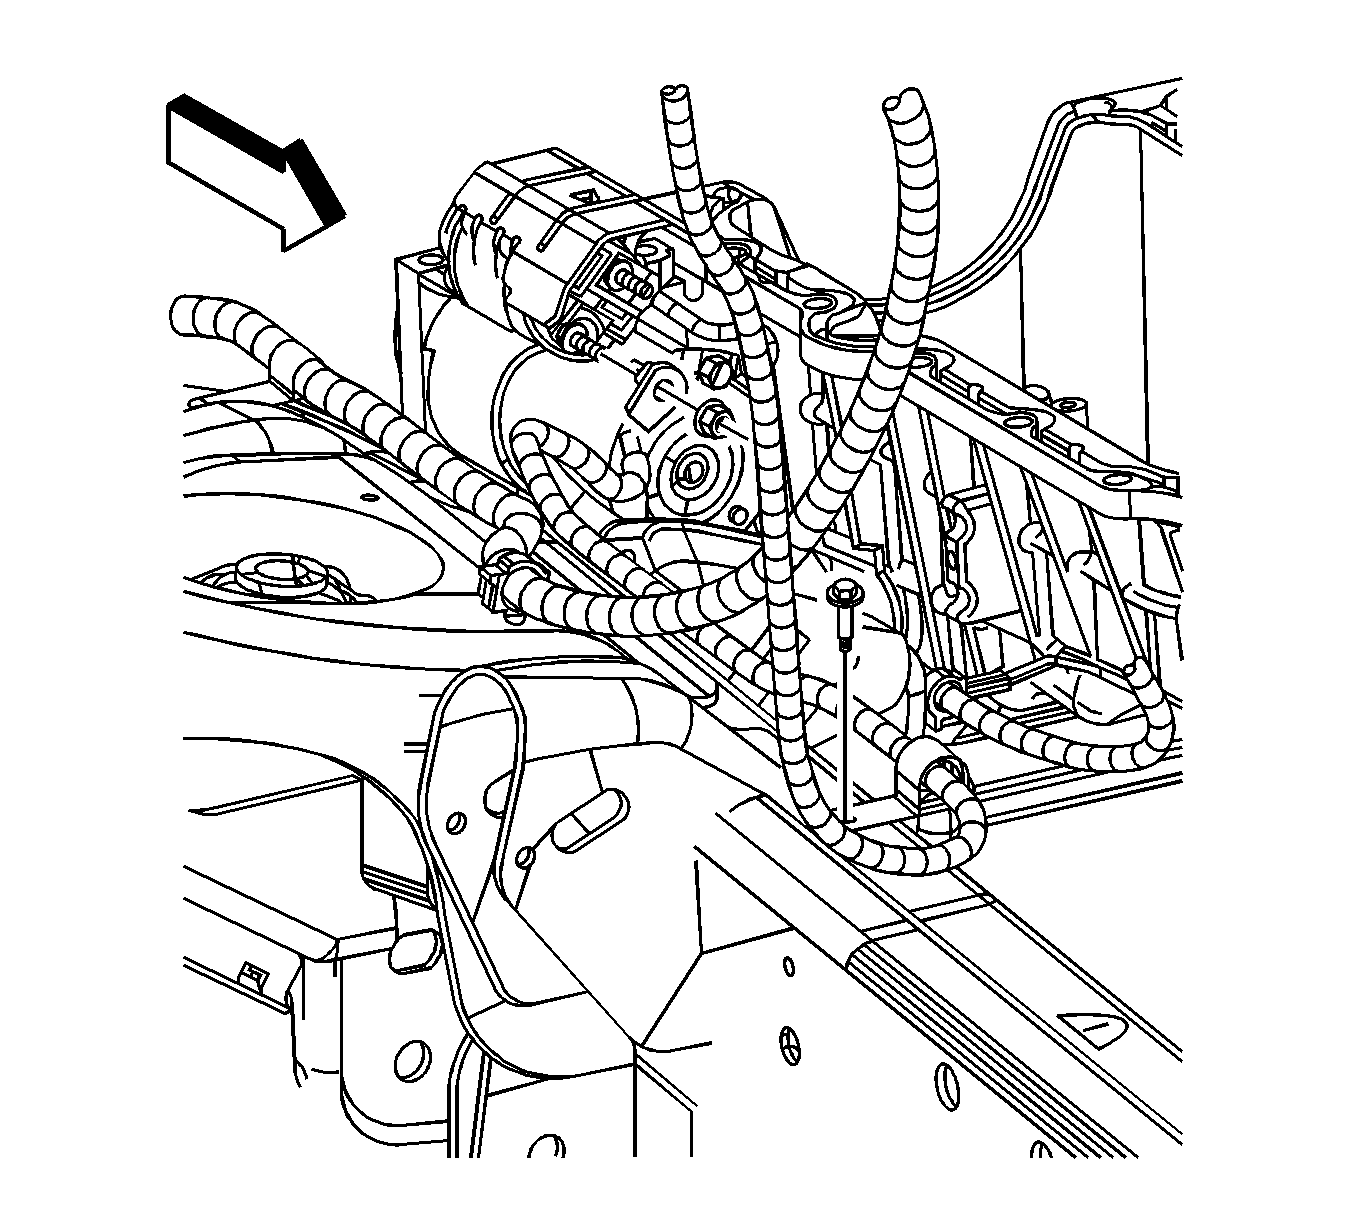
- Disconnect the positive lead at the starter solenoid.
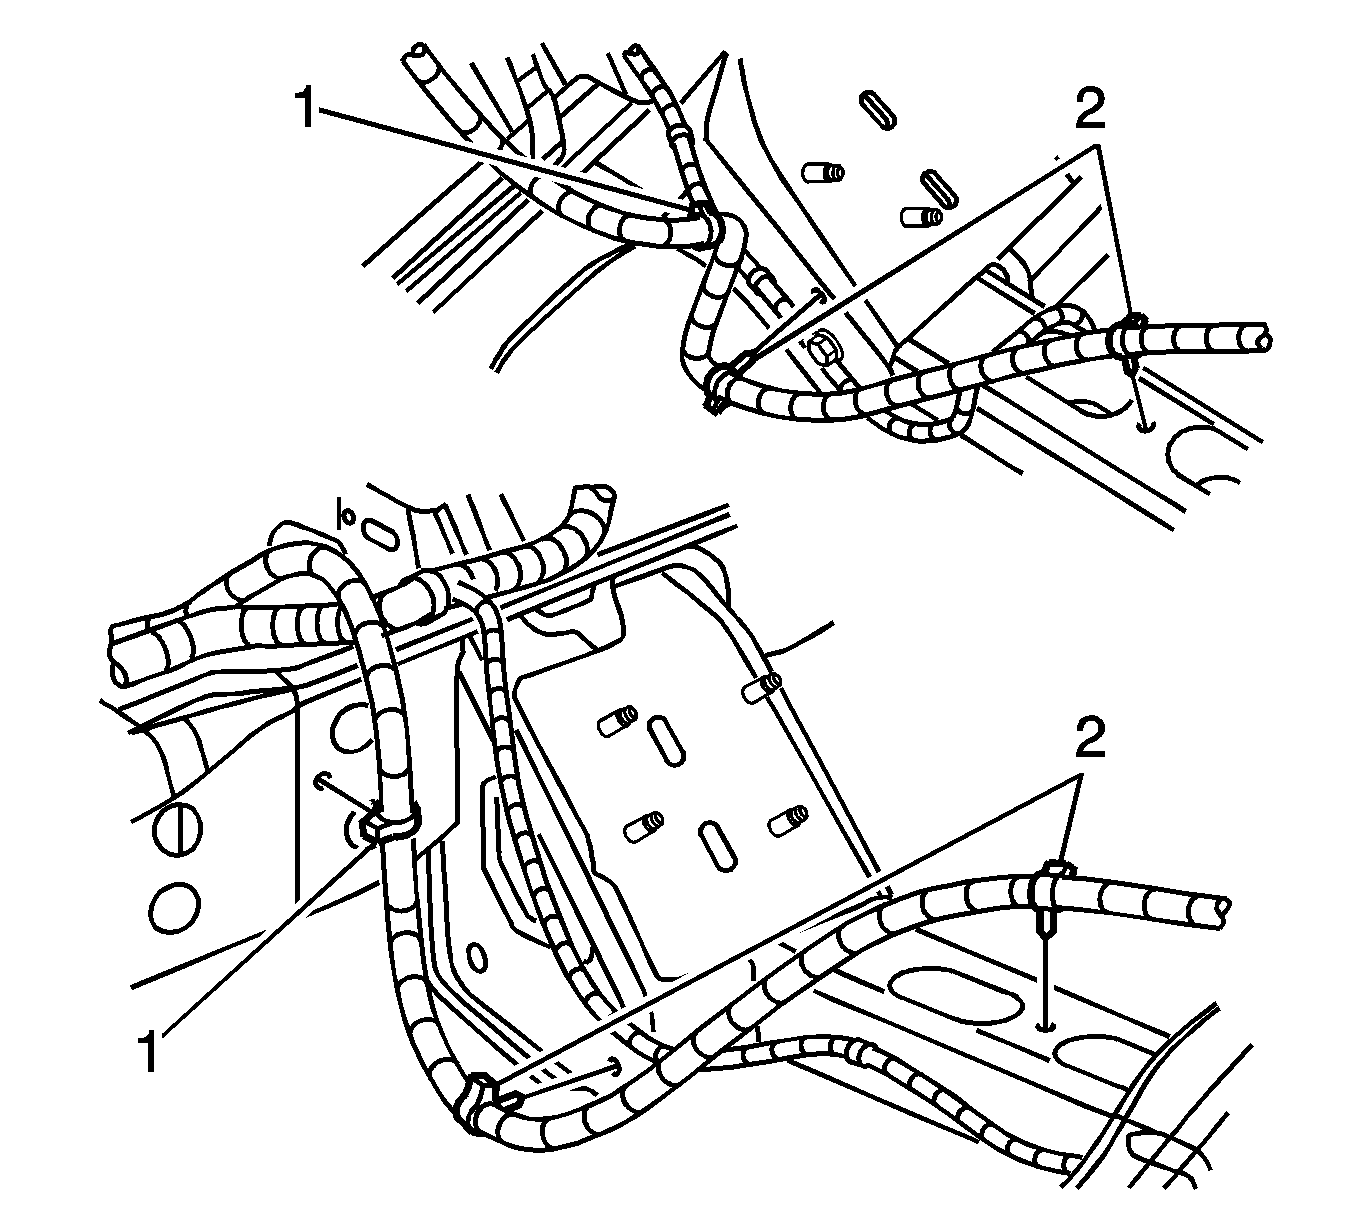
- On models with 4.8L and 6.0L engine, remove the battery positive cable retainer clips (1).
- Remove the positive cable to the chassis harness clips (2).
- Remove the positive cable retainer clips (1) from the frame.
- Remove battery positive cable retainer clips (2) from crossmember.
- On all models, lower the vehicle.
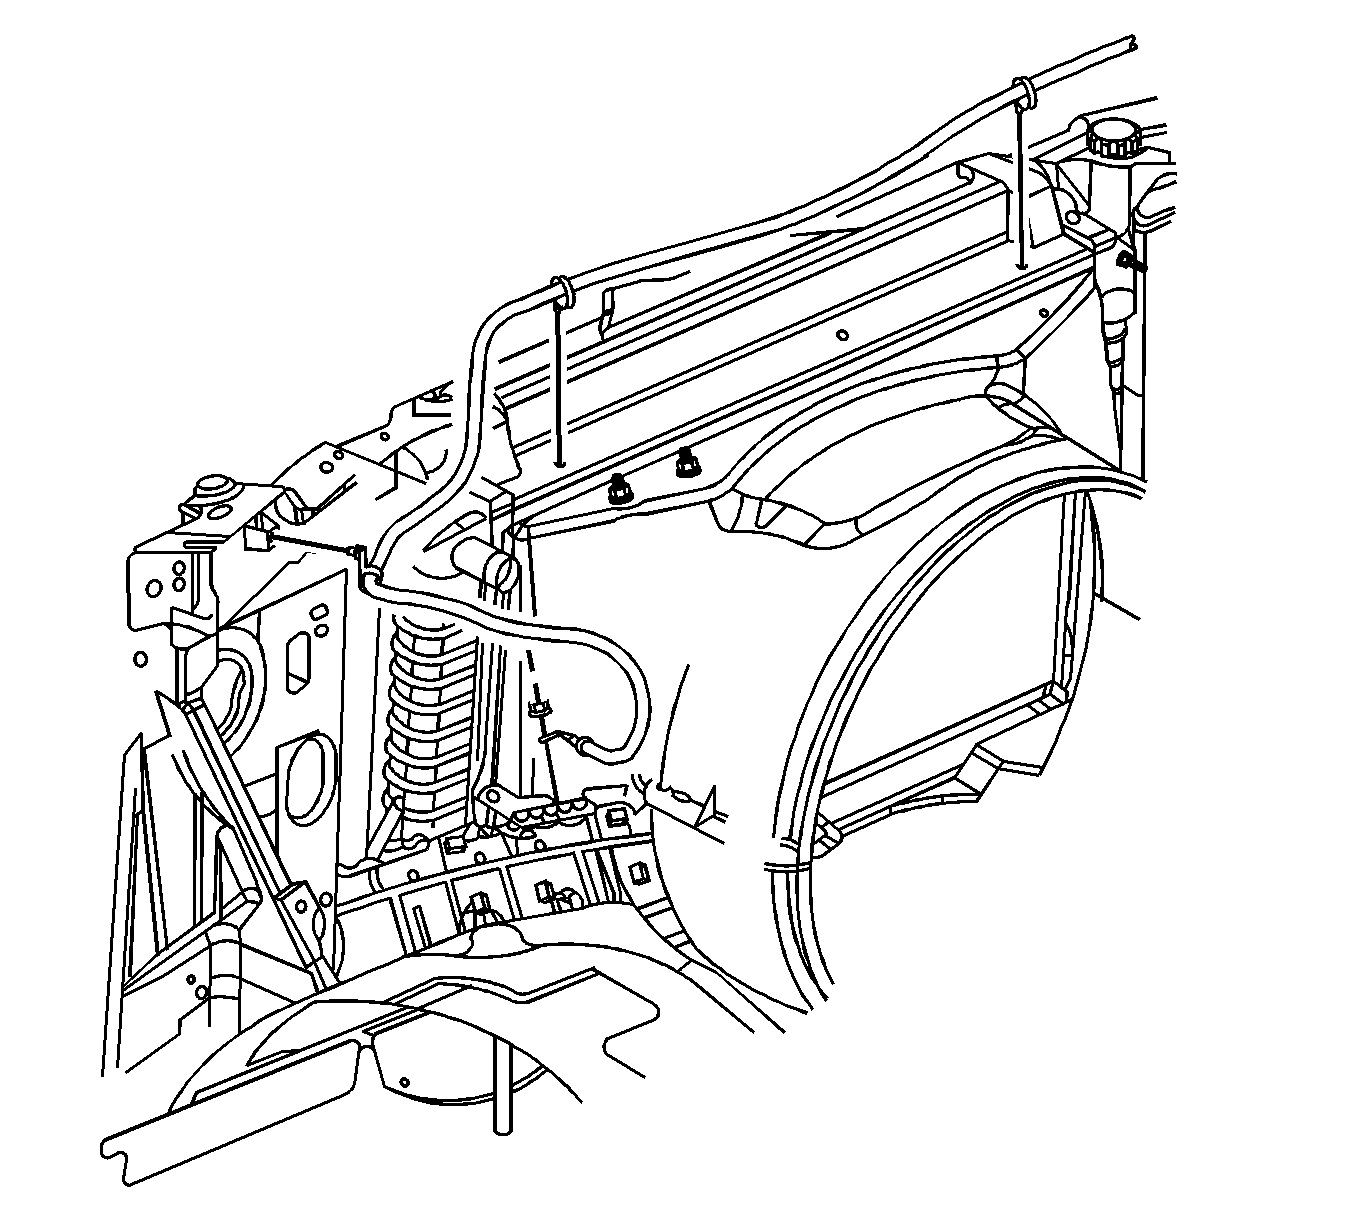
- On models equipped with the 4.8L, 5.3L or 6.0L engine, unclip the battery positive cable from the fan shroud.
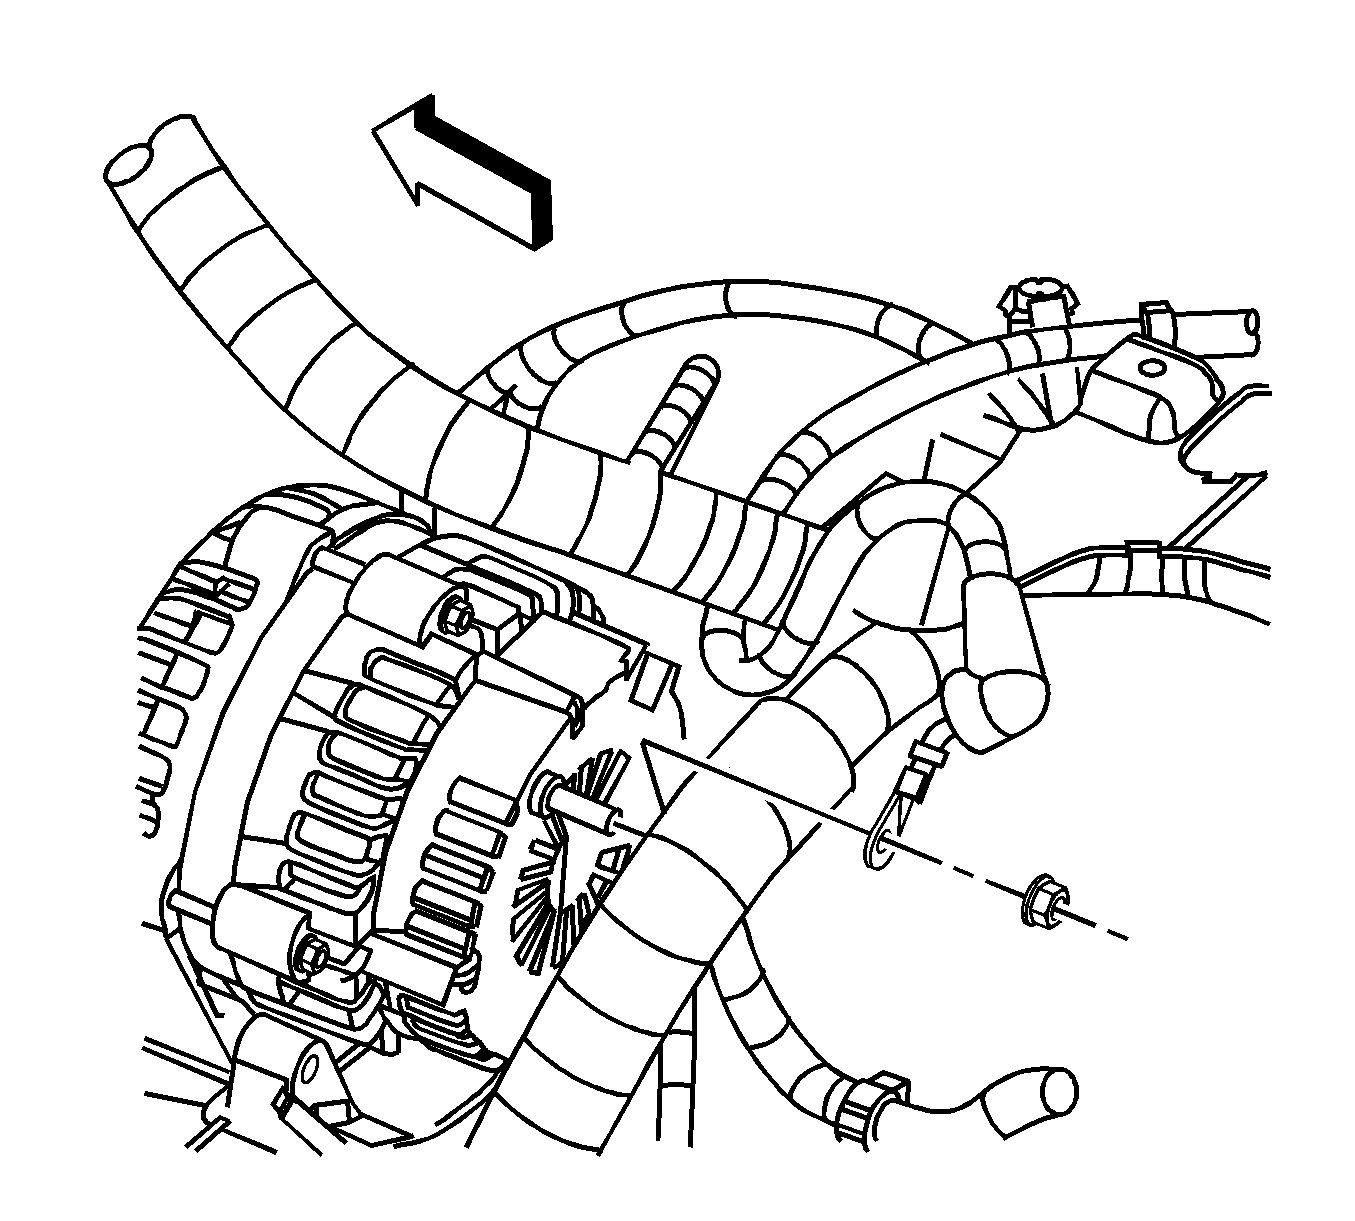
- On all models, disconnect the positive lead to the generator.
- Remove the positive cable from the vehicle. Note the location of the retaining clips.
Installation Procedure
- On all models, install the positive cable to the vehicle.
- Connect the positive lead to the generator.
- On models equipped with the 4.8L, 5.3L or 6.0L engine, clip the positive cable to the fan shroud.
- On all models, raise the vehicle. Refer to Lifting and Jacking the Vehicle .
- On models with 4.8L and 6.0L engine, install the positive cable retainer clips (2) to the crossmember.
- Install the positive cable retainer clips (1) to the frame.
- Install the positive cable to the chassis harness clips (2).
- Install the positive cable retainer clips (1).
- Install the positive lead to the starter solenoid.
- On all models, lower the vehicle.
- On models equipped with 4.8L, 5.3L or 6.0L engine, clip battery positive cable to the engine harness retainer (2).
- Clip the positive cable to the engine harness clip (1).
- On models equipped with the 4.8L, or 6.0L engine, install the positive lead to the junction block.
- On all models, connect the battery positive cable to the battery.
- Connect the battery negative cable to the battery. Refer to Battery Negative Cable Disconnection and Connection .
- Install the coolant recovery reservoir or surge tank and the bolt.

Ensure the cable is routed correctly and installed in the retainer clips.
Notice: Refer to Fastener Notice in the Preface section.
Tighten
Tighten the generator output (BAT) nut to 10 N·m (89 lb in).


Tighten
Tighten the positive lead to starter solenoid to 10 N·m (89 lb in).


Tighten
Tighten the junction block nut to 10 N·m (89 lb in).
Tighten
Tighten the battery terminals to 14 N·m (123 lb in).

Tighten
Tighten the coolant recovery reservoir or surge tank bolt to 11 N·m (97 lb in).
Battery Positive Cable Replacement 6.6L - Primary
Removal Procedure
- Disconnect the negative battery cable. Refer to Battery Negative Cable Disconnection and Connection .
- Disconnect the positive battery cable from the battery.
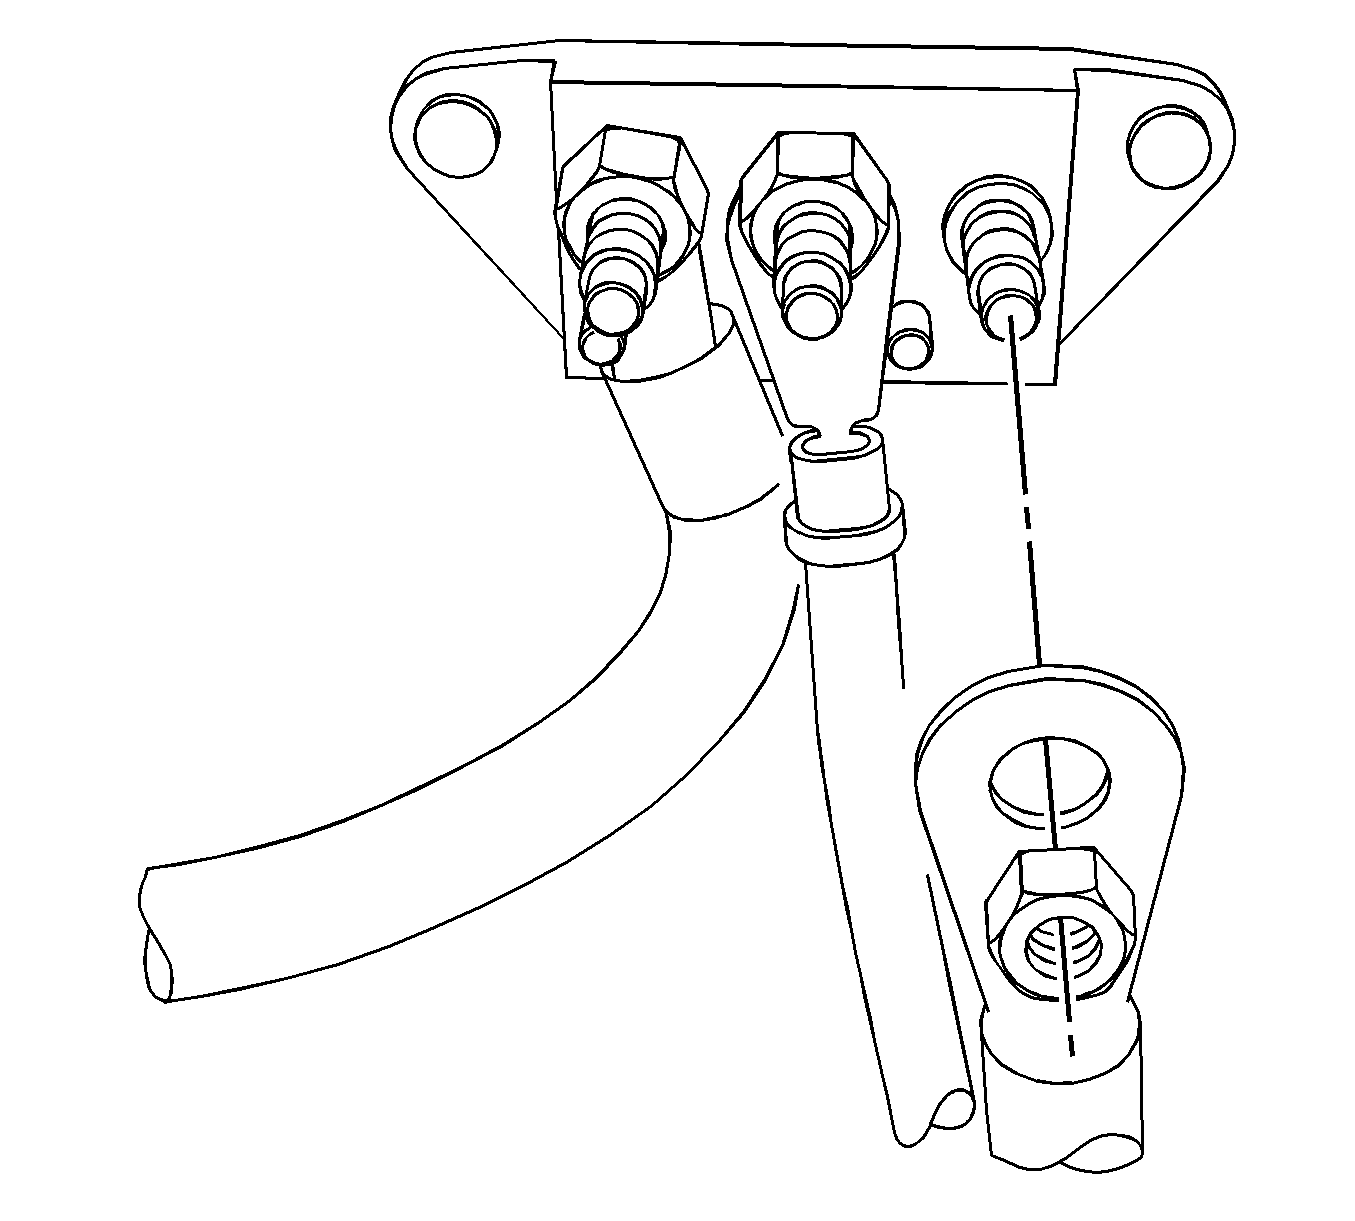
- Remove the positive cable nut from the junction block and disconnect the cable.
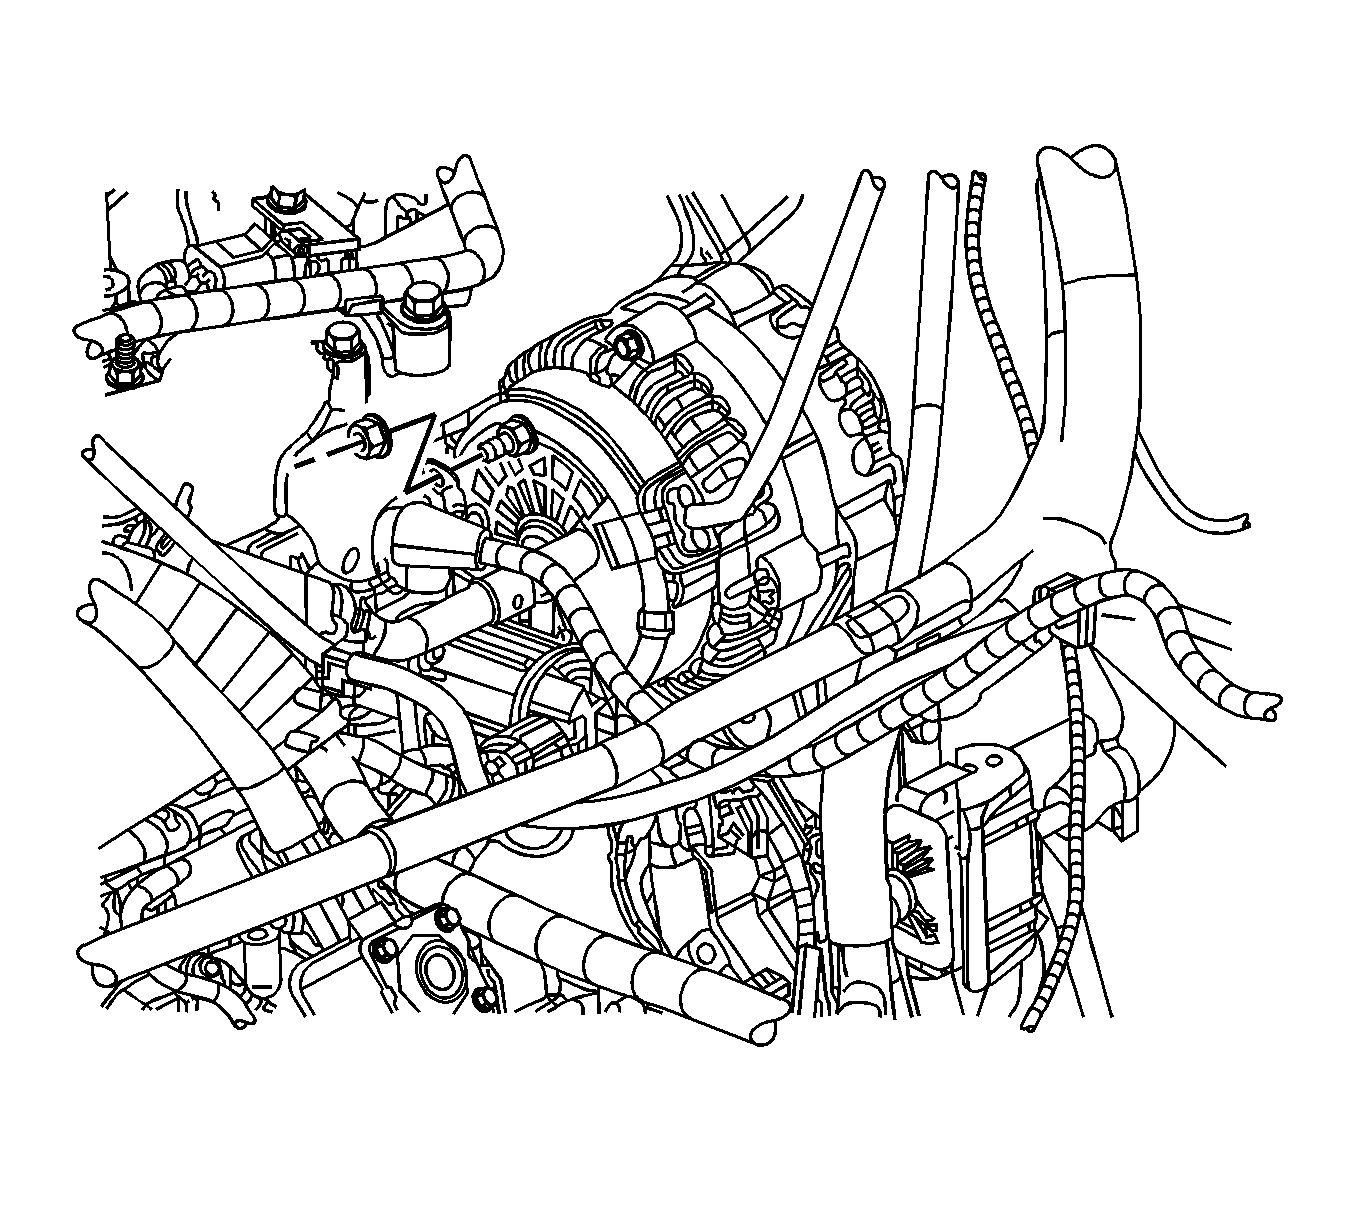
- Remove the positive cable nut from the generator and disconnect the cable .
- Remove the engine cover. Refer to Engine Cover Replacement .
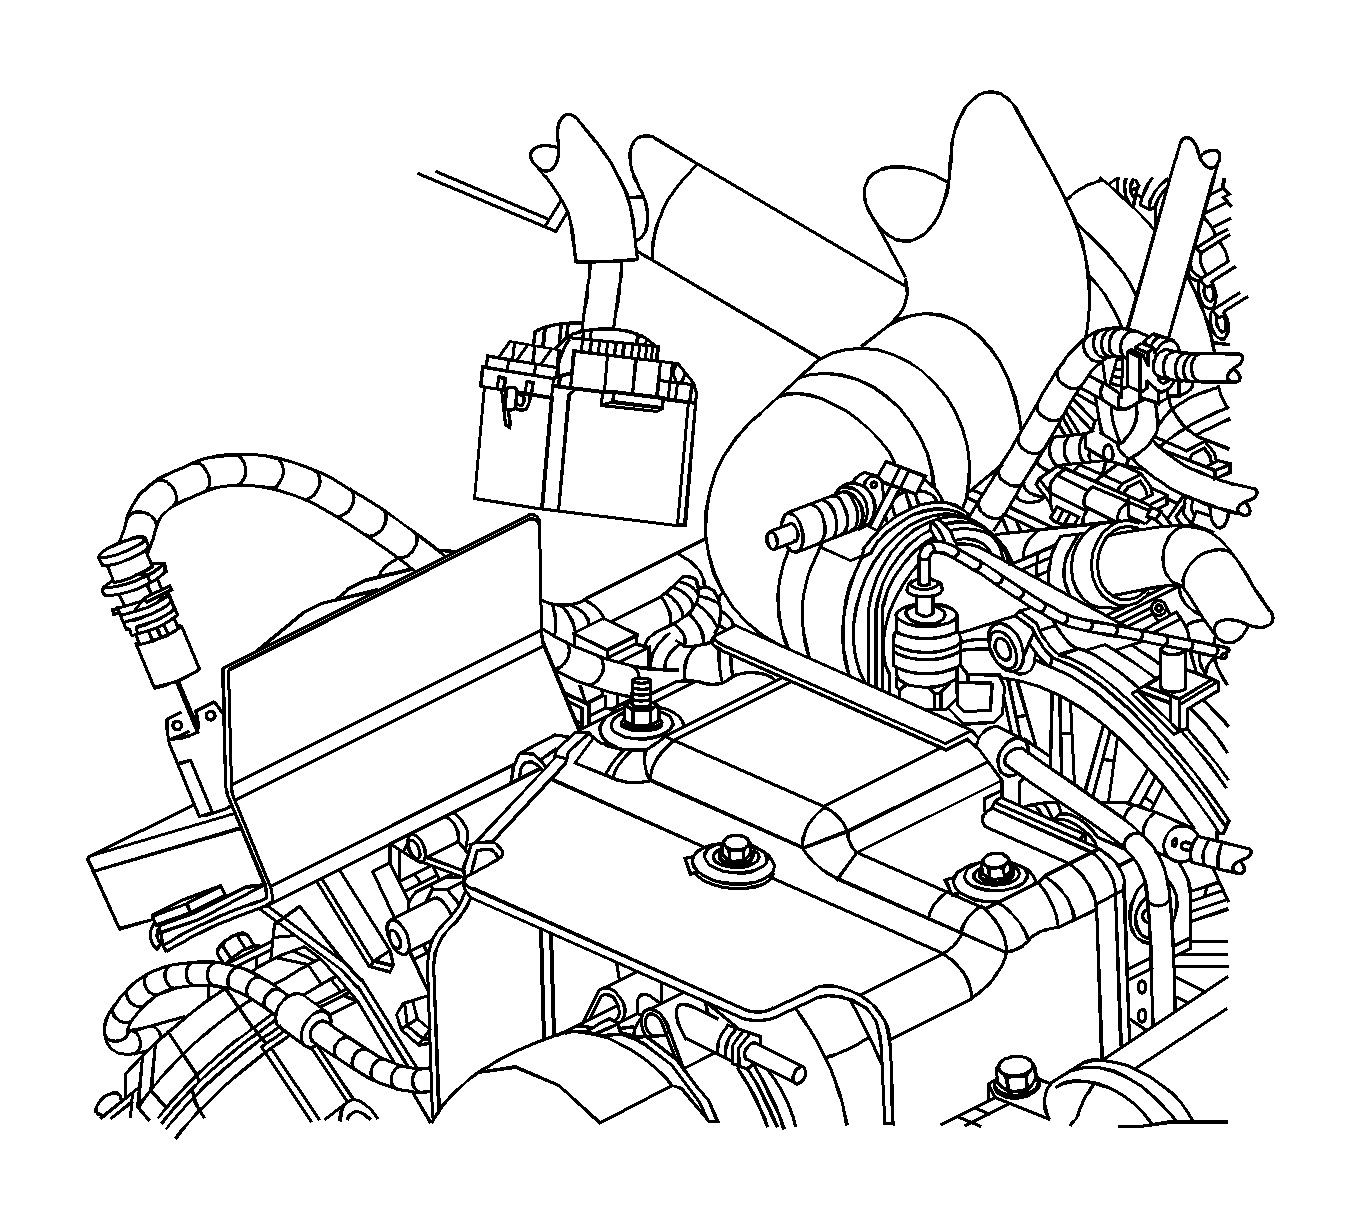
- Disconnect the wiring harness clips and the positive cable from the glow plug module.
- Remove the battery positive cable from the engine harness clip.
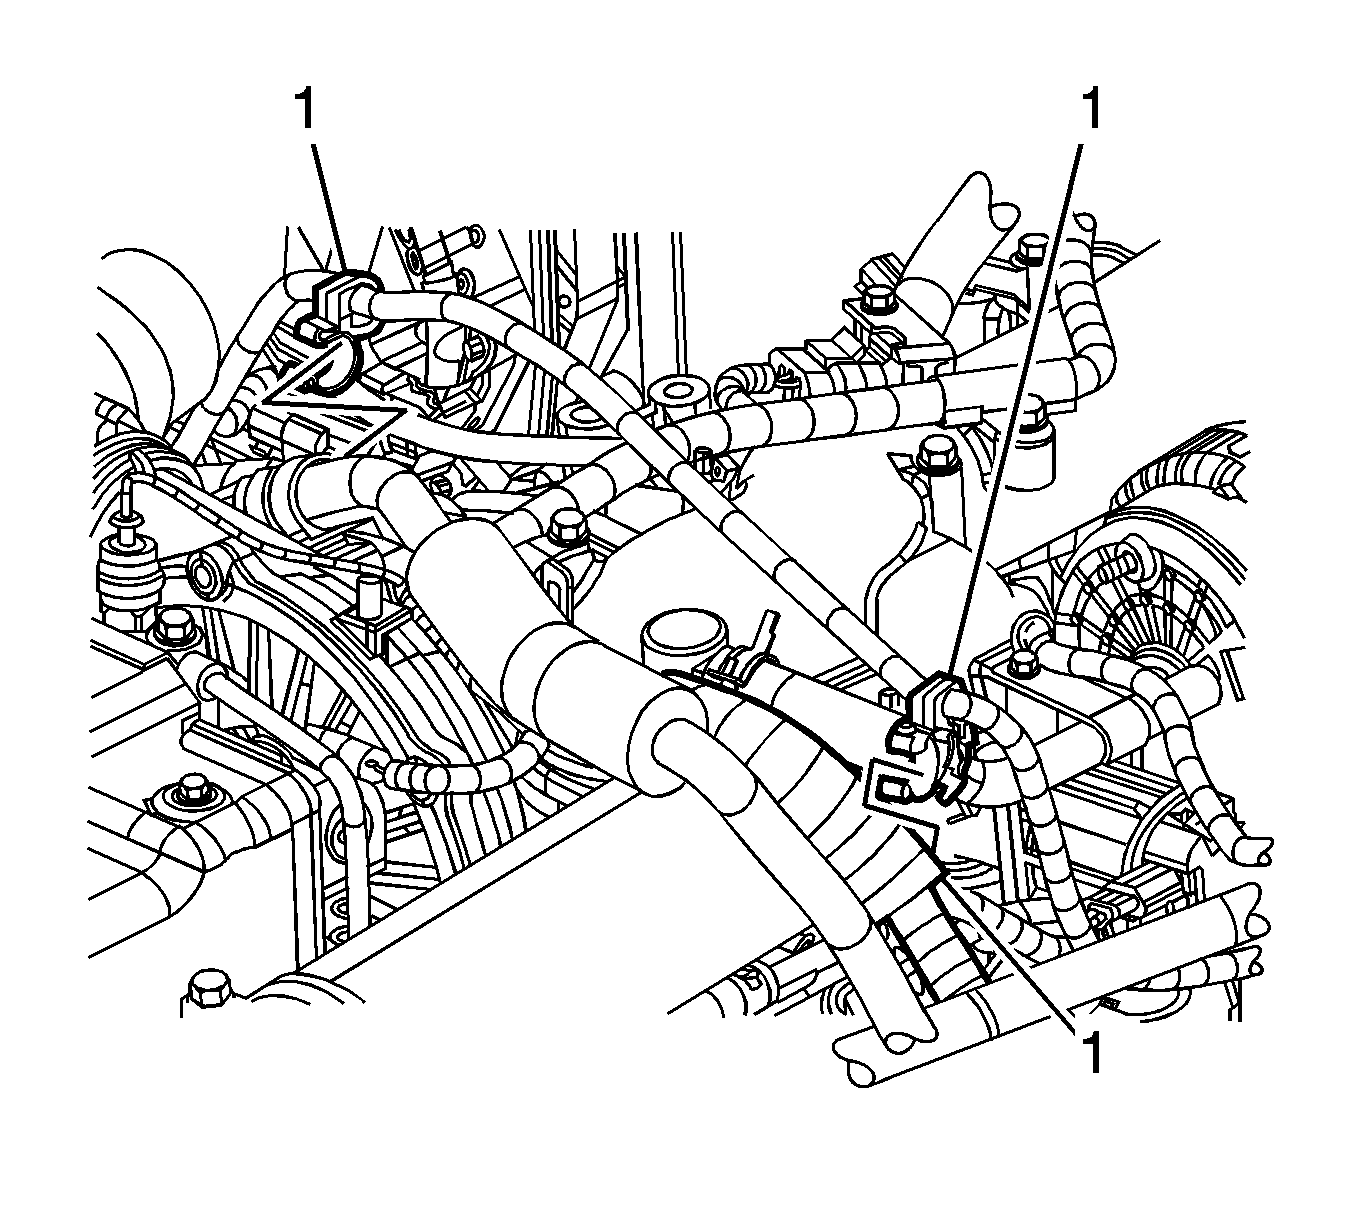
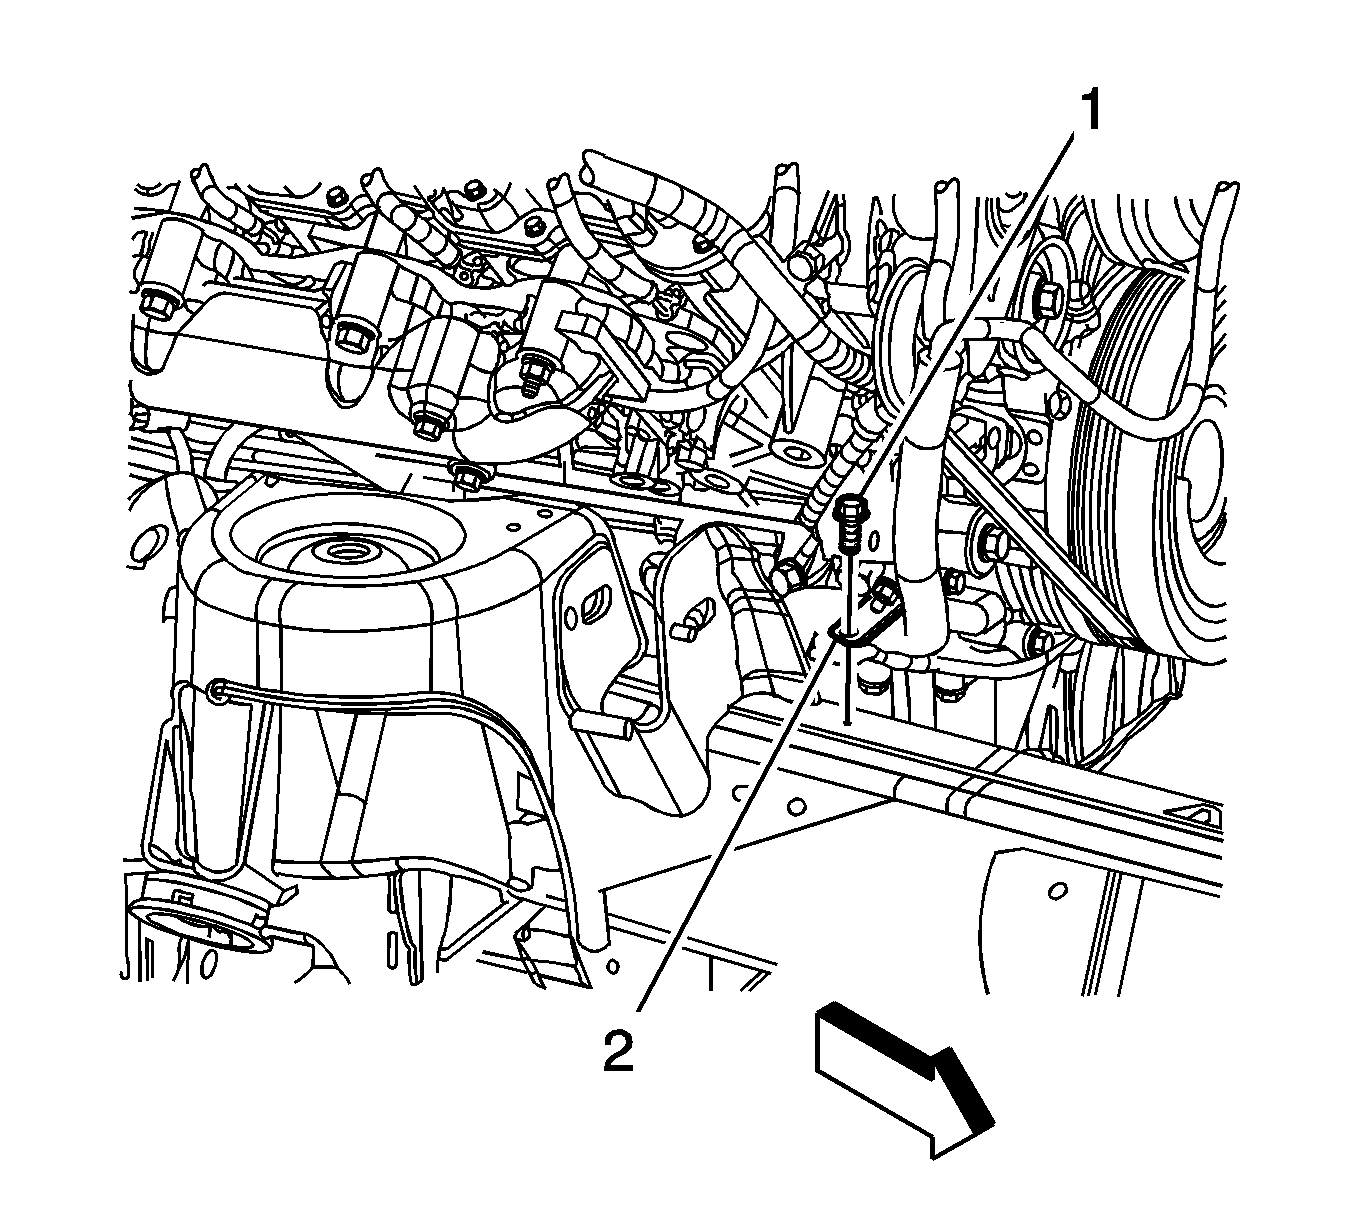
- Remove the battery positive cable from the engine harness clips (1).
- Raise the vehicle. Refer to Lifting and Jacking the Vehicle .
- Remove the battery positive cable bolt (1) and clip (2) from the frame.
- Remove the battery positive cable retaining clip from the transmission line bracket.
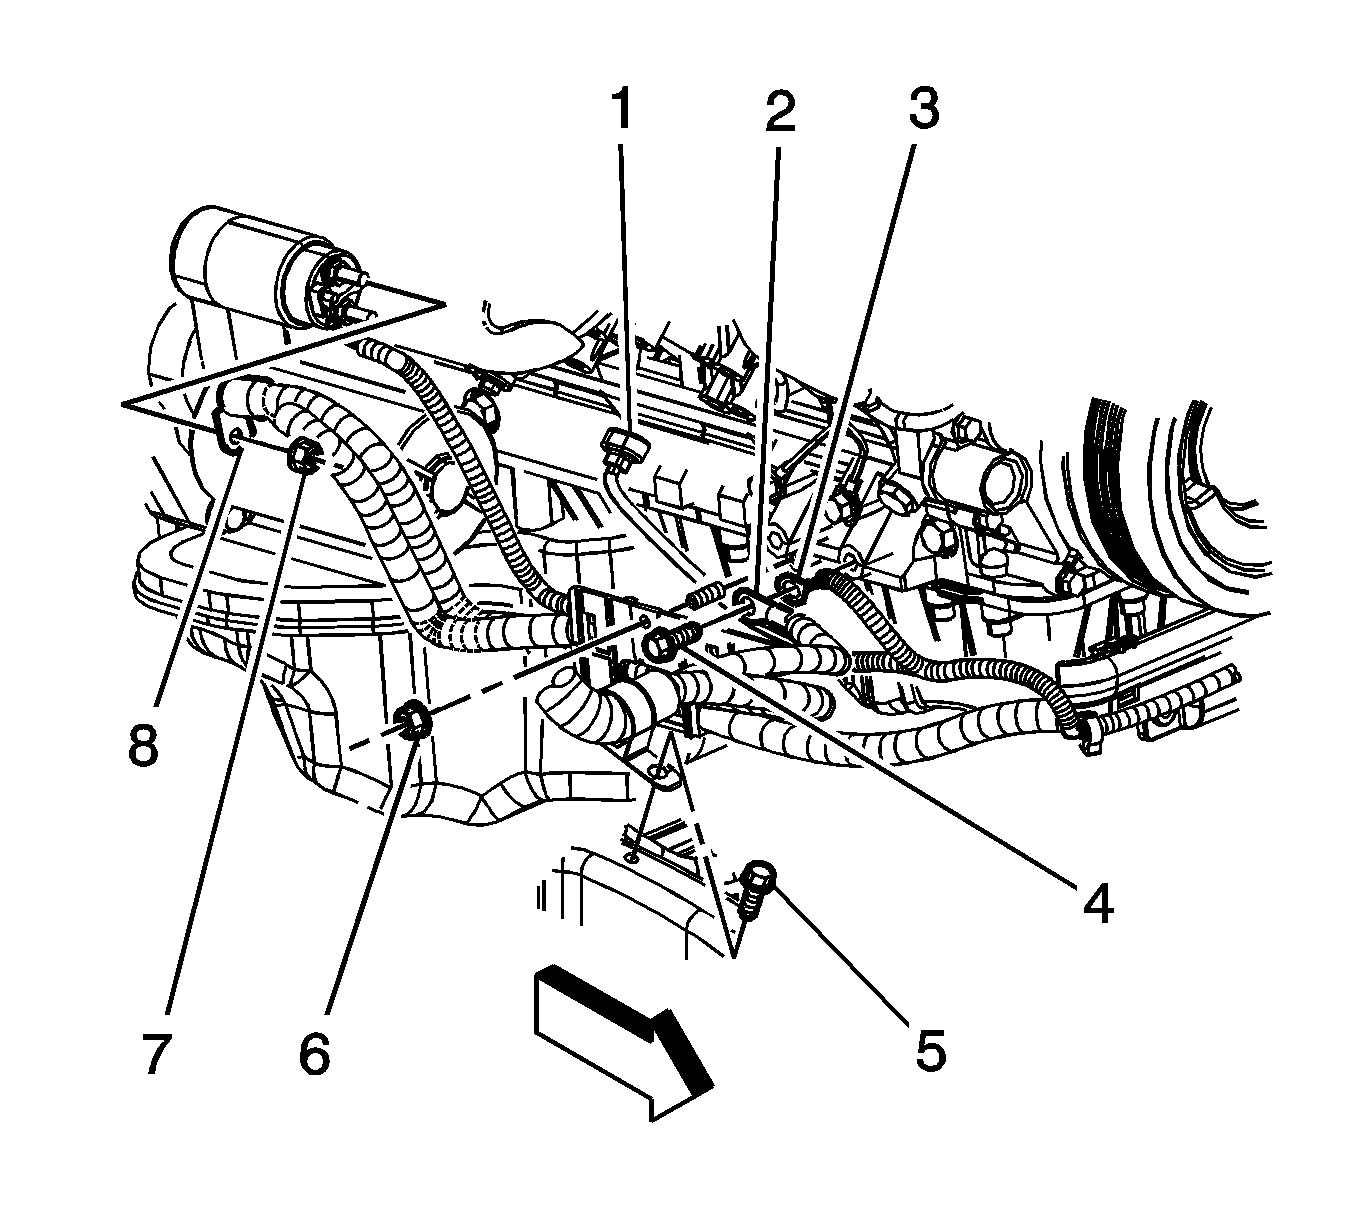
- Remove the positive battery cable nut (7) from the starter and disconnect the cable (8).
- Remove the positive battery cable.
Installation Procedure
- Position the positive cable to the vehicle using the same cable routing as in removal.
- Position the positive cable (8) to the starter and install the nut (7).
- Install the positive cable retaining clip to the transmission line bracket.
- Install the battery positive cable nut (1) and clip (2) to the frame.
- Lower the vehicle.
- Install the positive cable to engine harness clips (1).
- Install the positive cable to the engine harness clip.
- Connect the positive cable to the glow plug module and connect the wiring harness clips.
- Install the engine cover. Refer to Engine Cover Replacement .
- Install the positive battery cable to the generator and install the nut.
- Install the positive cable to the junction block and install the nut.
- Connect the positive cable to the battery.
- Connect the negative battery cable. Refer to Battery Negative Cable Disconnection and Connection .
Notice: Refer to Fastener Notice in the Preface section.

Tighten
Tighten the positive cable to starter nut to 10 N·m (89 lb in).


Tighten
Tighten the positive cable to generator nut to 10 N·m (89 lb in).

Tighten
Tighten the nut to 8 N·m (71 lb in).
Tighten
Tighten the bolt to 14 N·m (123 lb in).
Battery Positive Cable Replacement 6.6L - Auxiliary
Removal Procedure
Caution: Refer to Battery Disconnect Caution in the Preface section.
- Disconnect the auxiliary battery negative cable. Refer to Battery Negative Cable Disconnection and Connection .
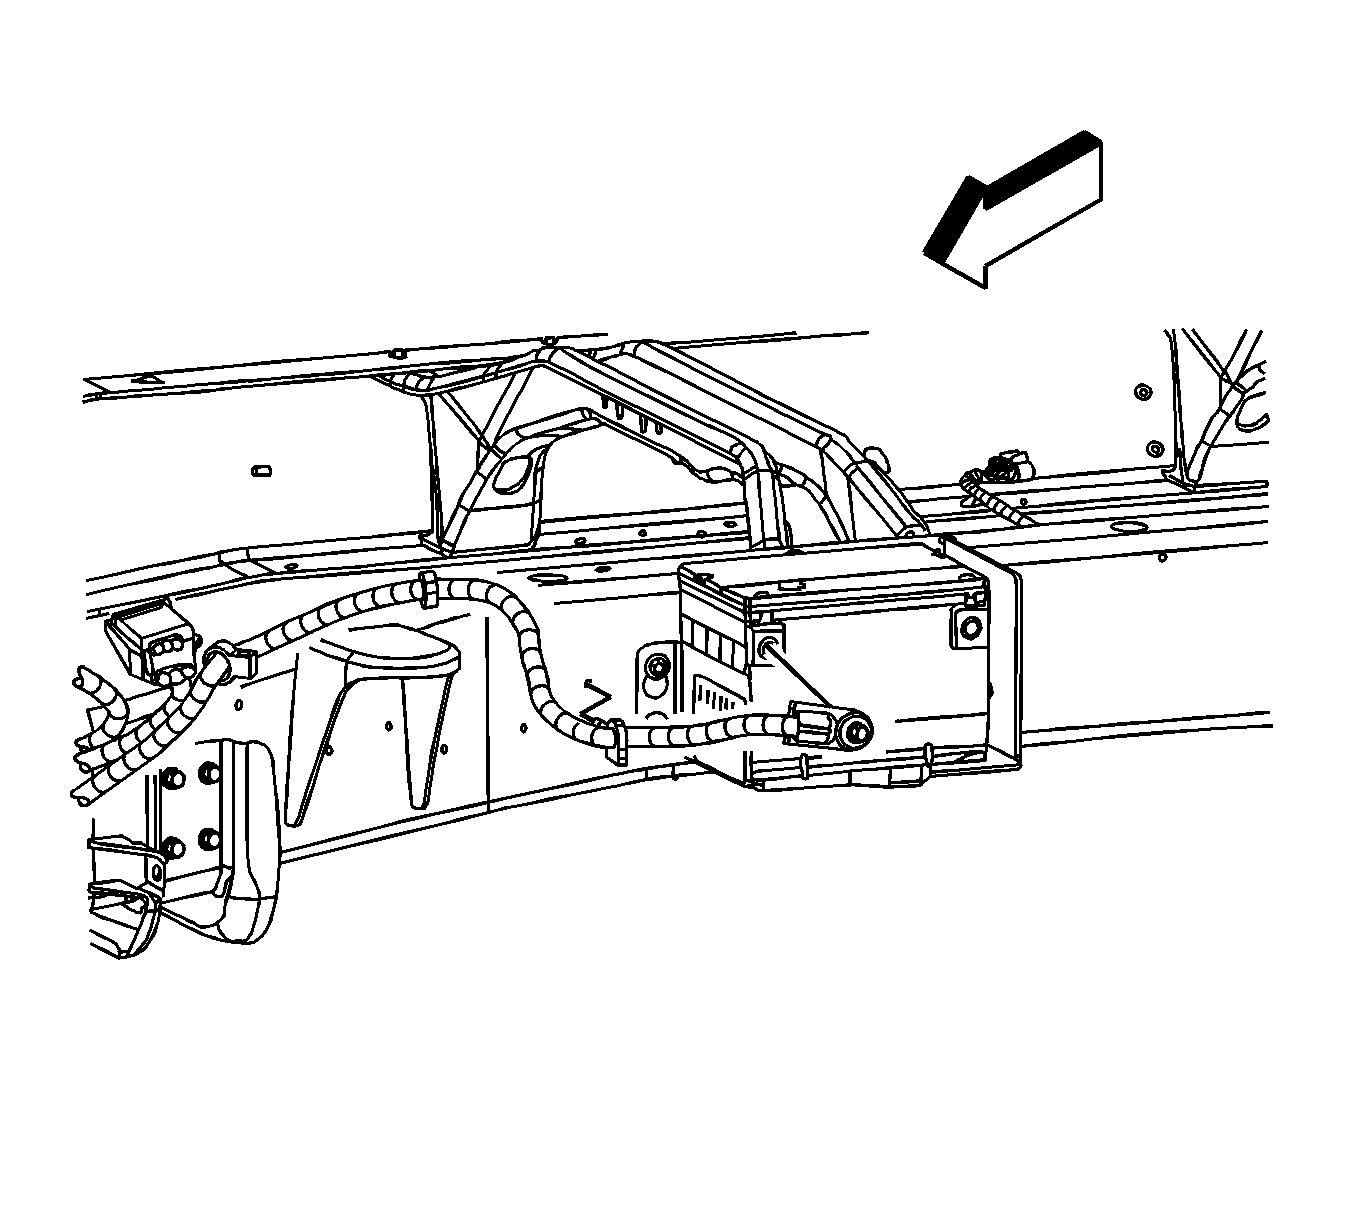
- Disconnect the auxiliary battery positive cable.
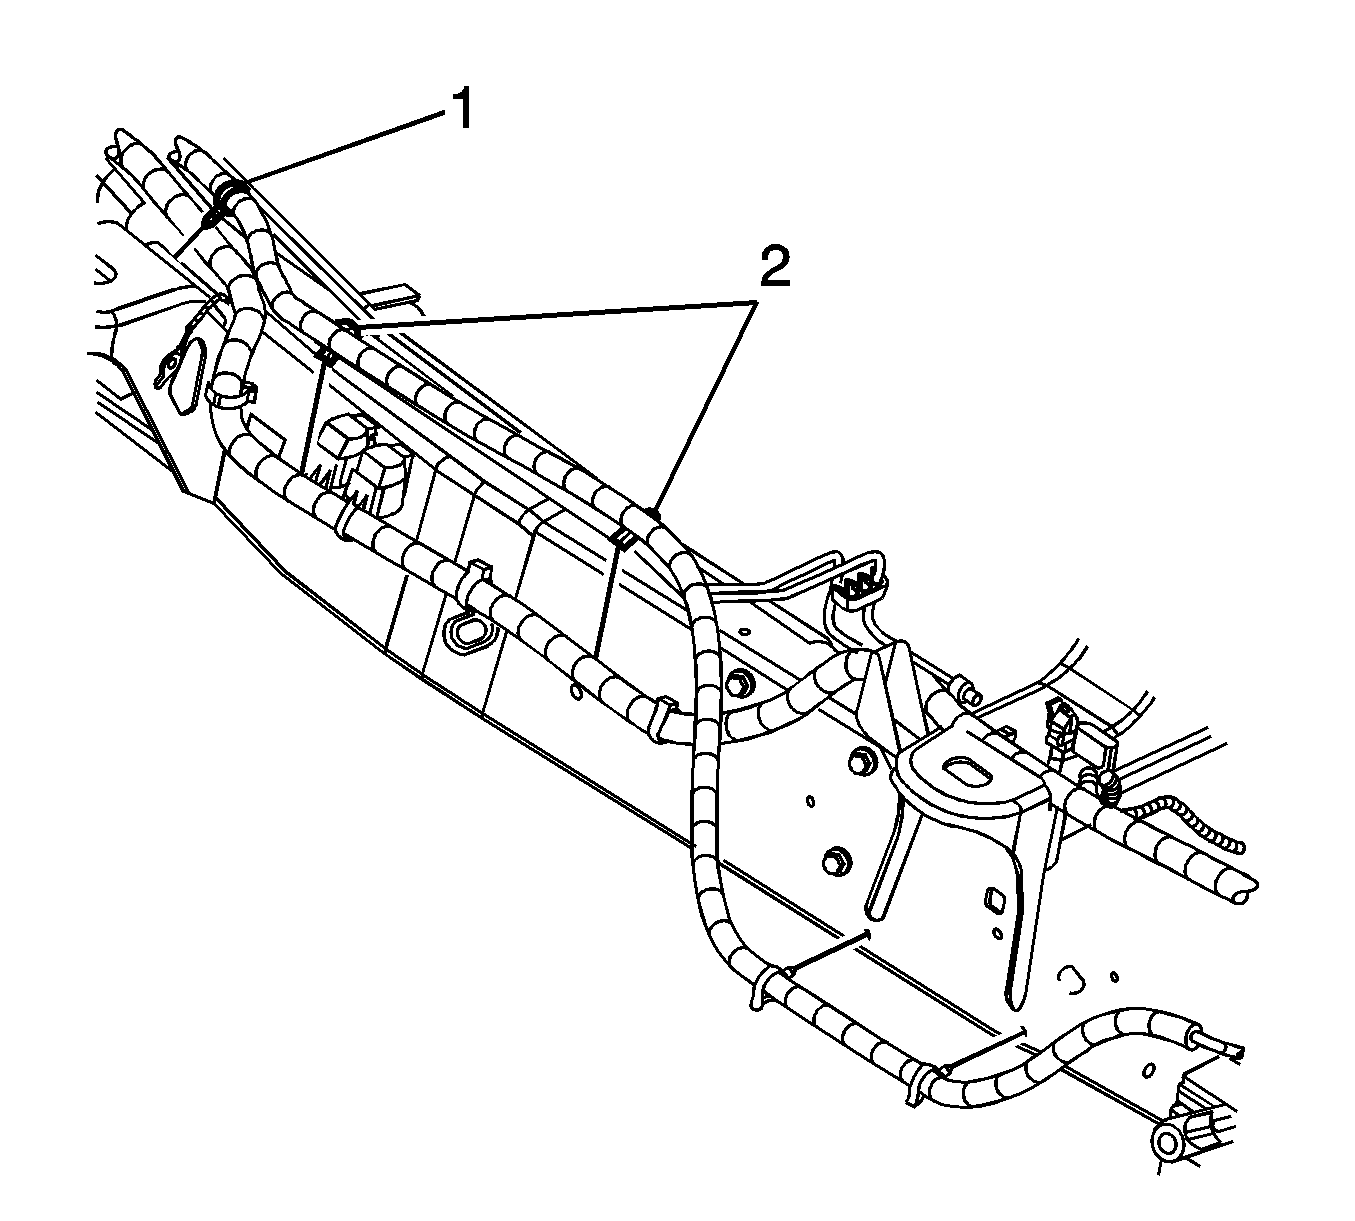
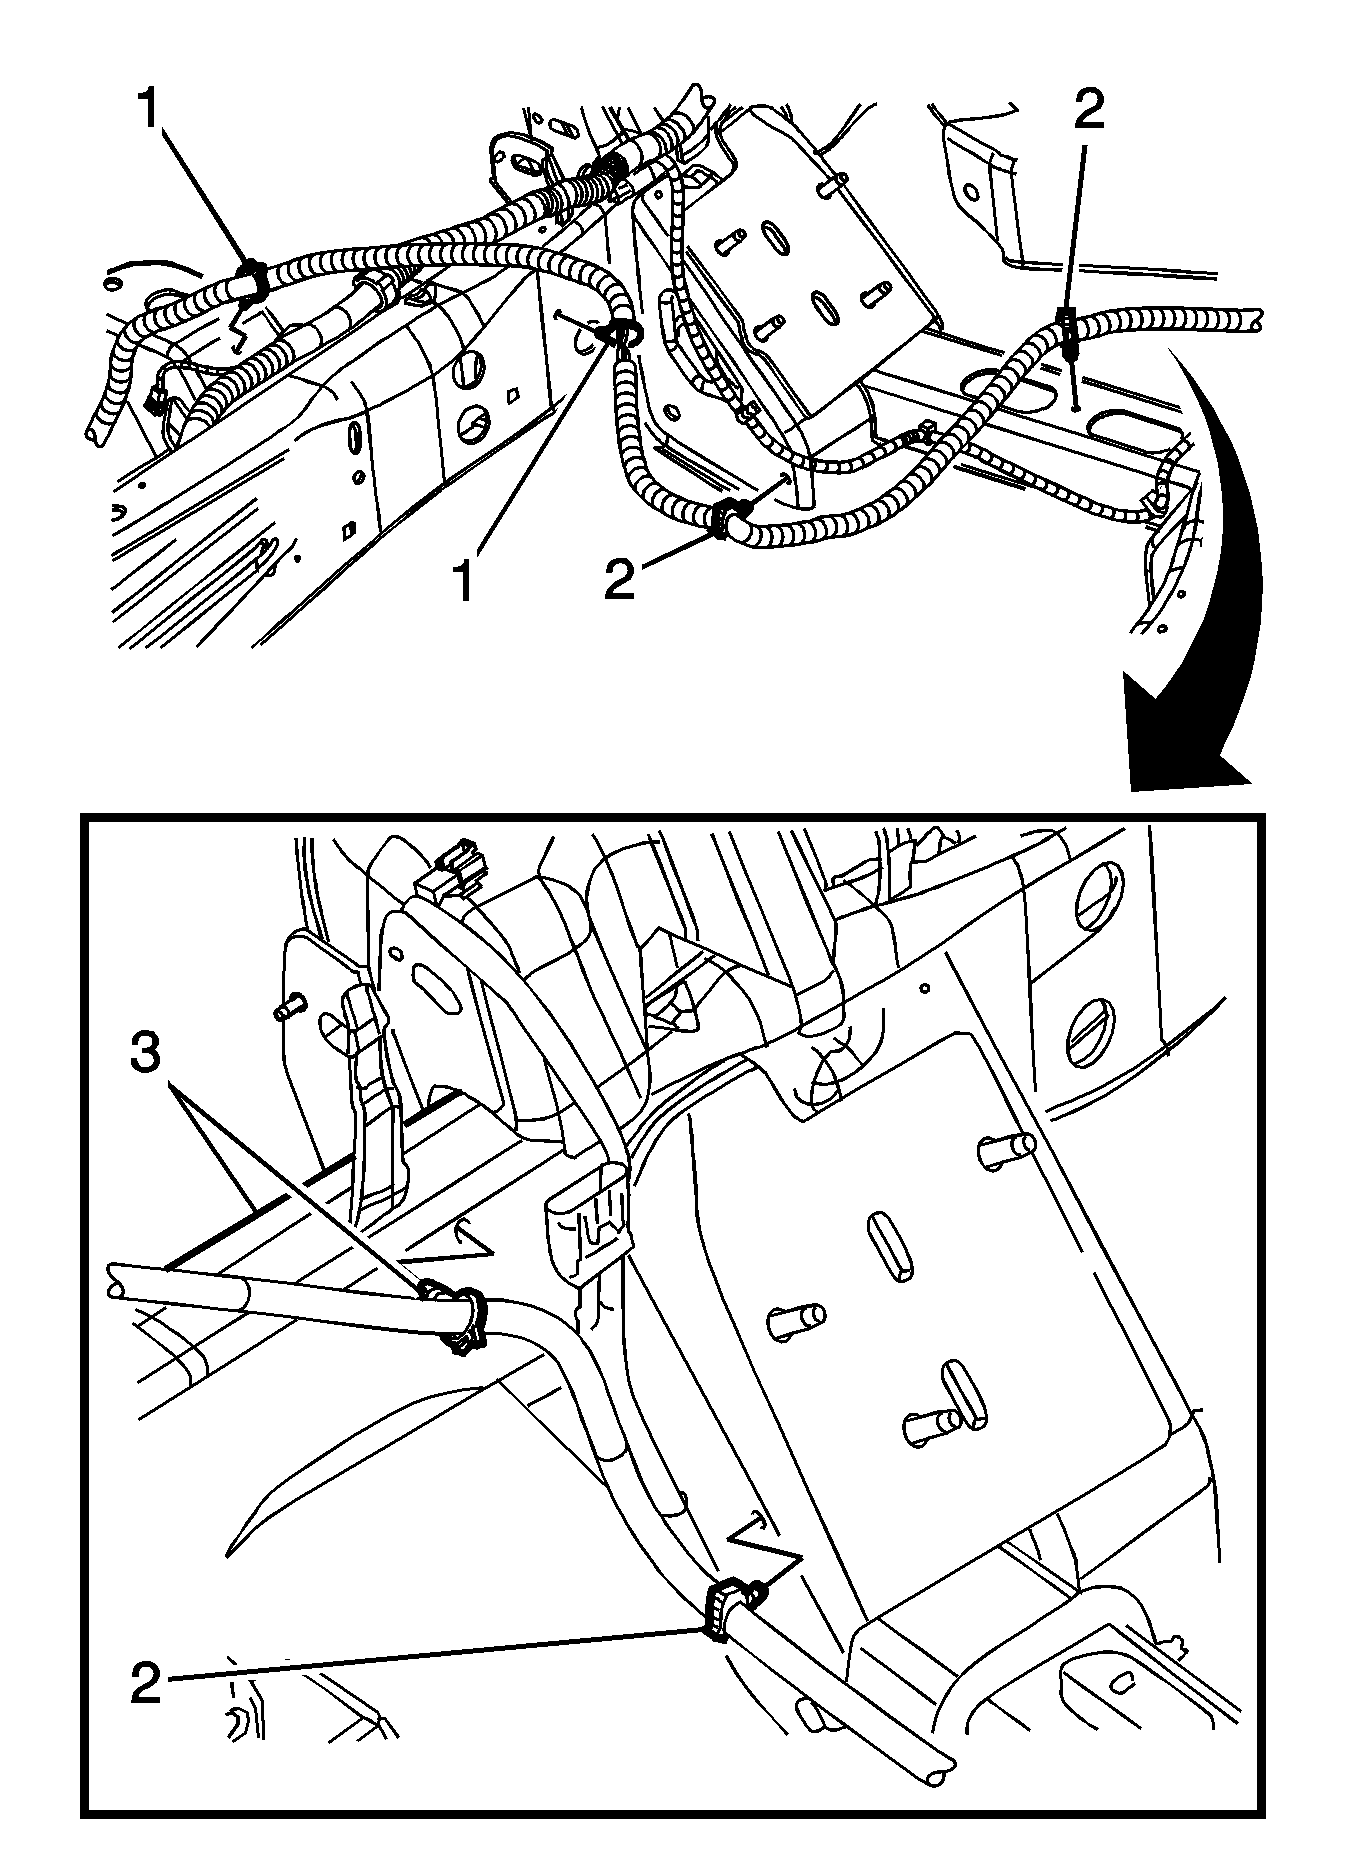
- Remove the auxiliary positive battery cable to the frame clips (1).
- Remove the auxiliary positive battery cable to chassis harness clips (2).
- Remove the auxiliary positive battery cable to frame clips (1).
- Remove the auxiliary positive battery cable to crossmember clips (2).
- Remove the auxiliary positive battery cable to frame clip (3).
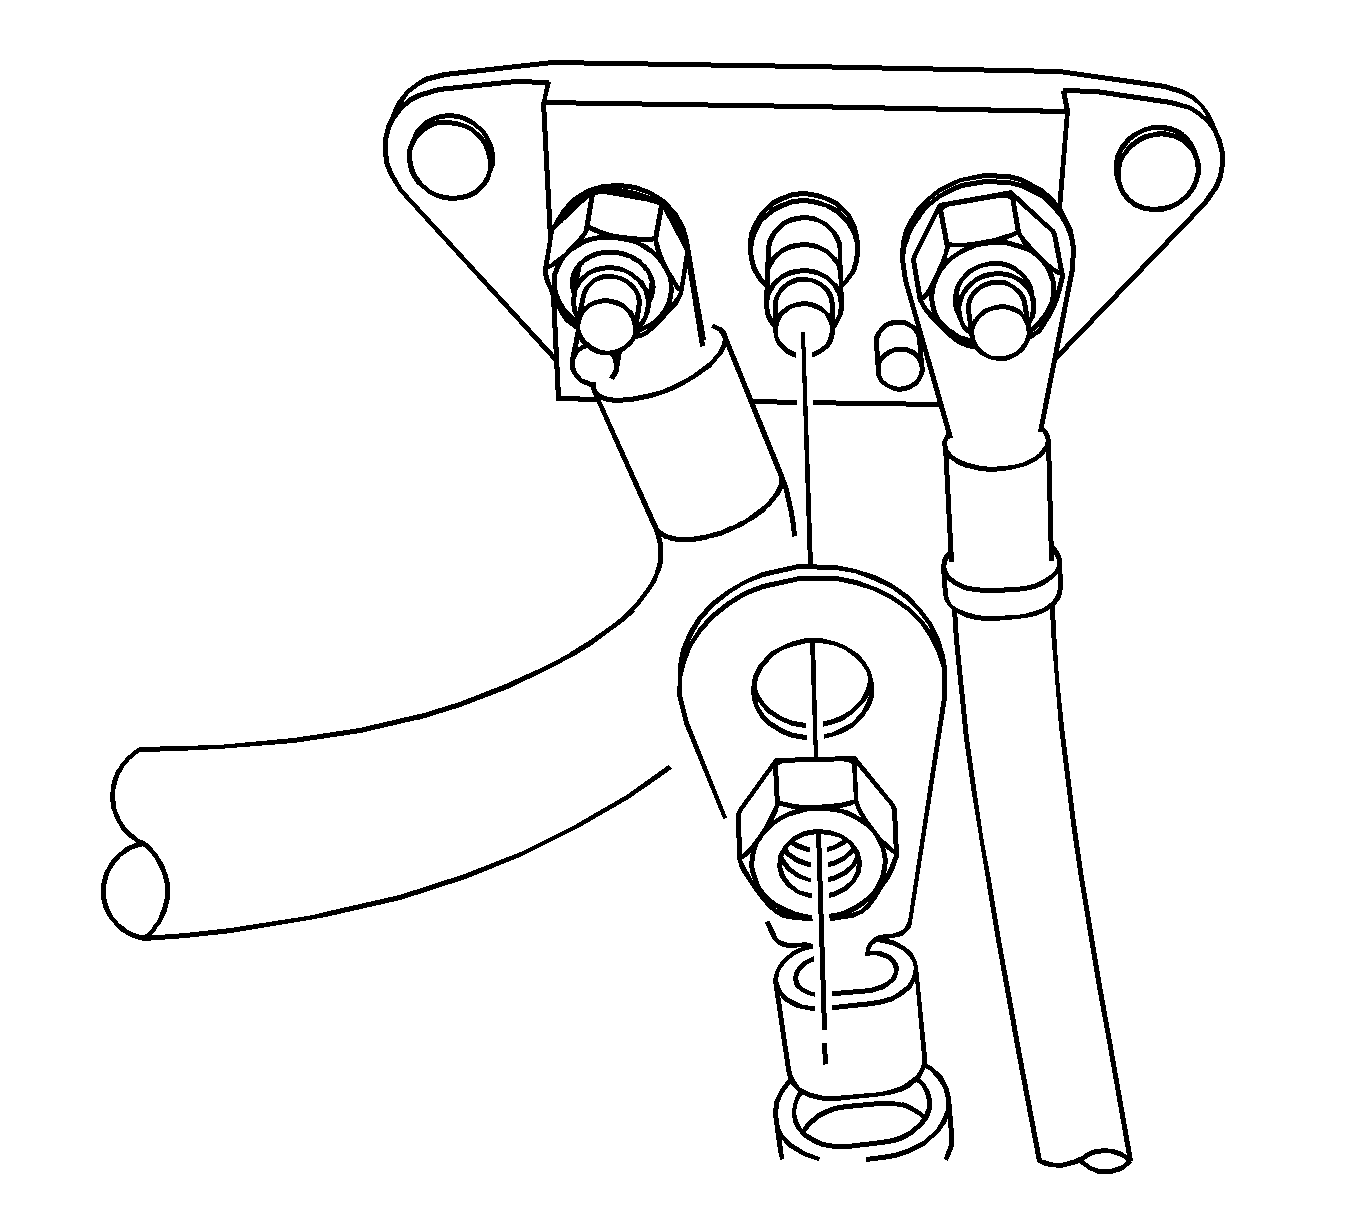
- Remove the auxiliary positive battery cable nut from the junction block.
- Disconnect the auxiliary positive battery cable wiring harness clips.
- Remove the auxiliary positive battery cable from the vehicle.

Installation Procedure
- Position the auxiliary positive battery cable and connect the wiring harness clips.
- Position the auxiliary positive battery cable to the junction block and install the cable nut.
- Install the auxiliary positive battery cable to frame clip (3).
- Install the auxiliary positive battery cable to crossmember clips (2).
- Install the auxiliary positive battery cable to frame clips (1).
- Install the auxiliary positive battery cable to the chassis harness clips (2).
- Connect the auxiliary positive battery cable to the auxiliary battery.
- Connect the auxiliary negative battery cable. Refer to Battery Negative Cable Disconnection and Connection .
Notice: Refer to Fastener Notice in the Preface section.

Tighten
Tighten the auxiliary positive cable nut to 8 N·m (71 lb in).


Install the auxiliary positive battery cable to the frame clips (1).

Tighten
Tighten the auxiliary positive cable bolt to 14 N·m (123 lb in).
Battery Positive Cable Replacement 4.3L
Removal Procedure
- Unbolt and reposition the coolant recovery reservoir. Refer to Coolant Recovery Reservoir Replacement .
- Disconnect the negative battery cable. Refer to Battery Negative Cable Disconnection and Connection .
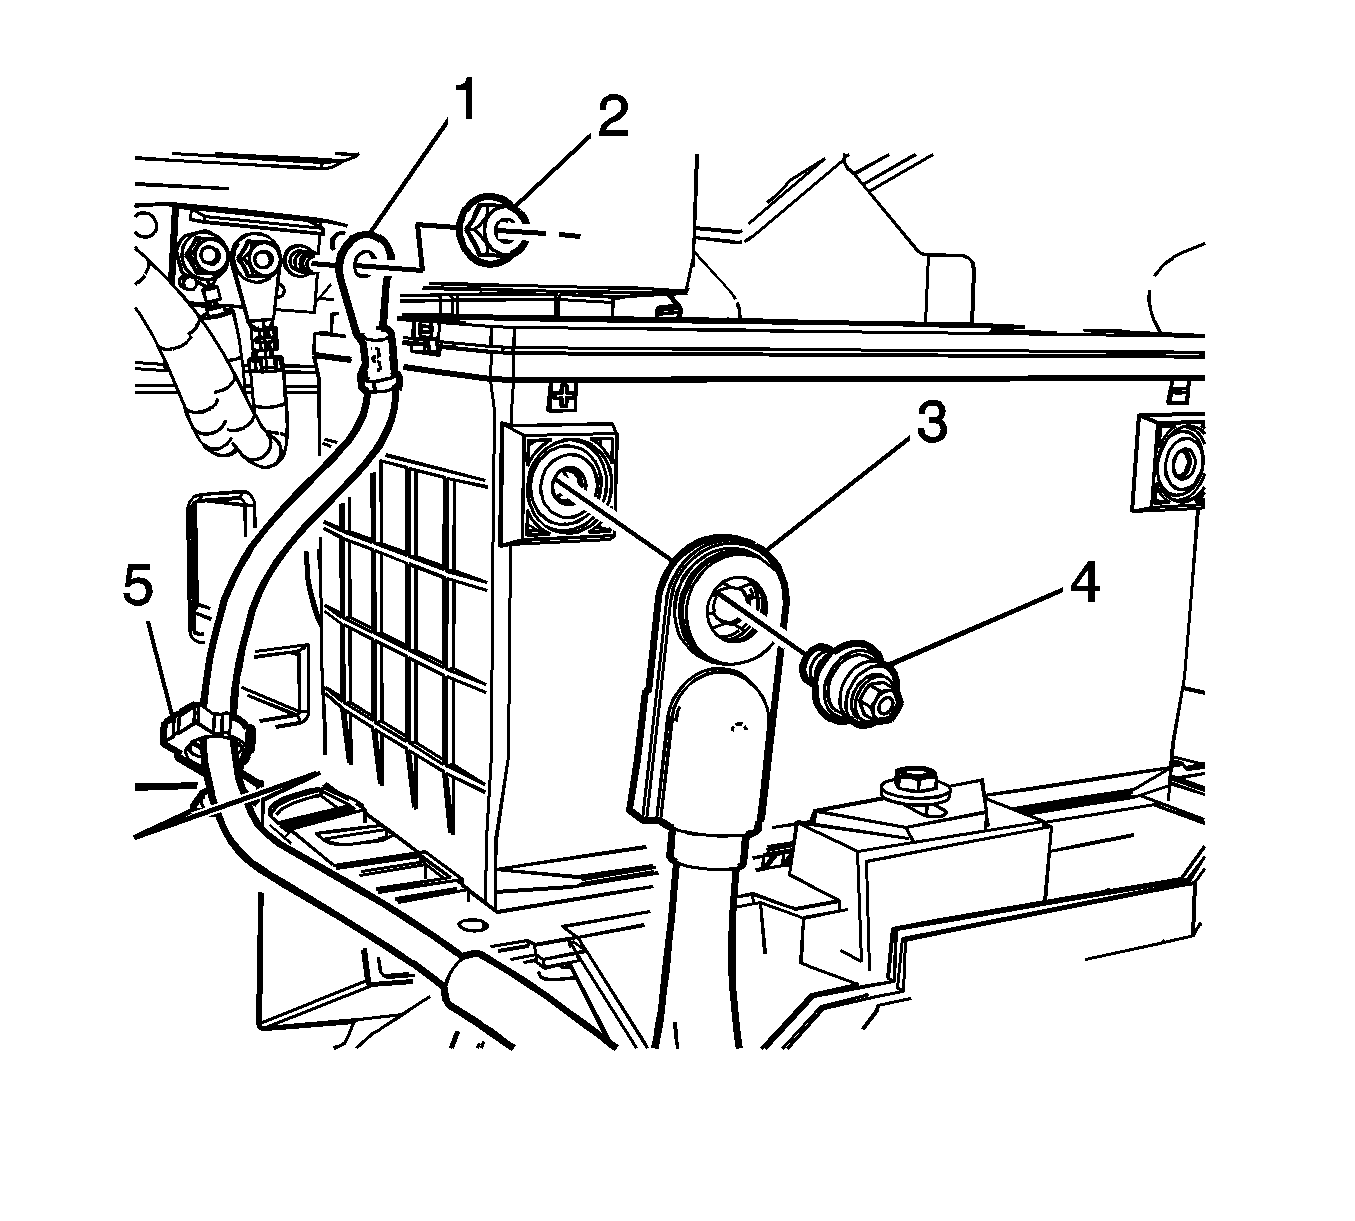
- Loosen the positive battery cable bolt (4) in order to disconnect the positive battery cable (3) from the battery.
- Remove the nut (2) retaining the positive battery cable (1) to the junction block.
- Remove the positive battery cable clip (5) from the battery tray.
- Raise and support the vehicle. Refer to Lifting and Jacking the Vehicle .
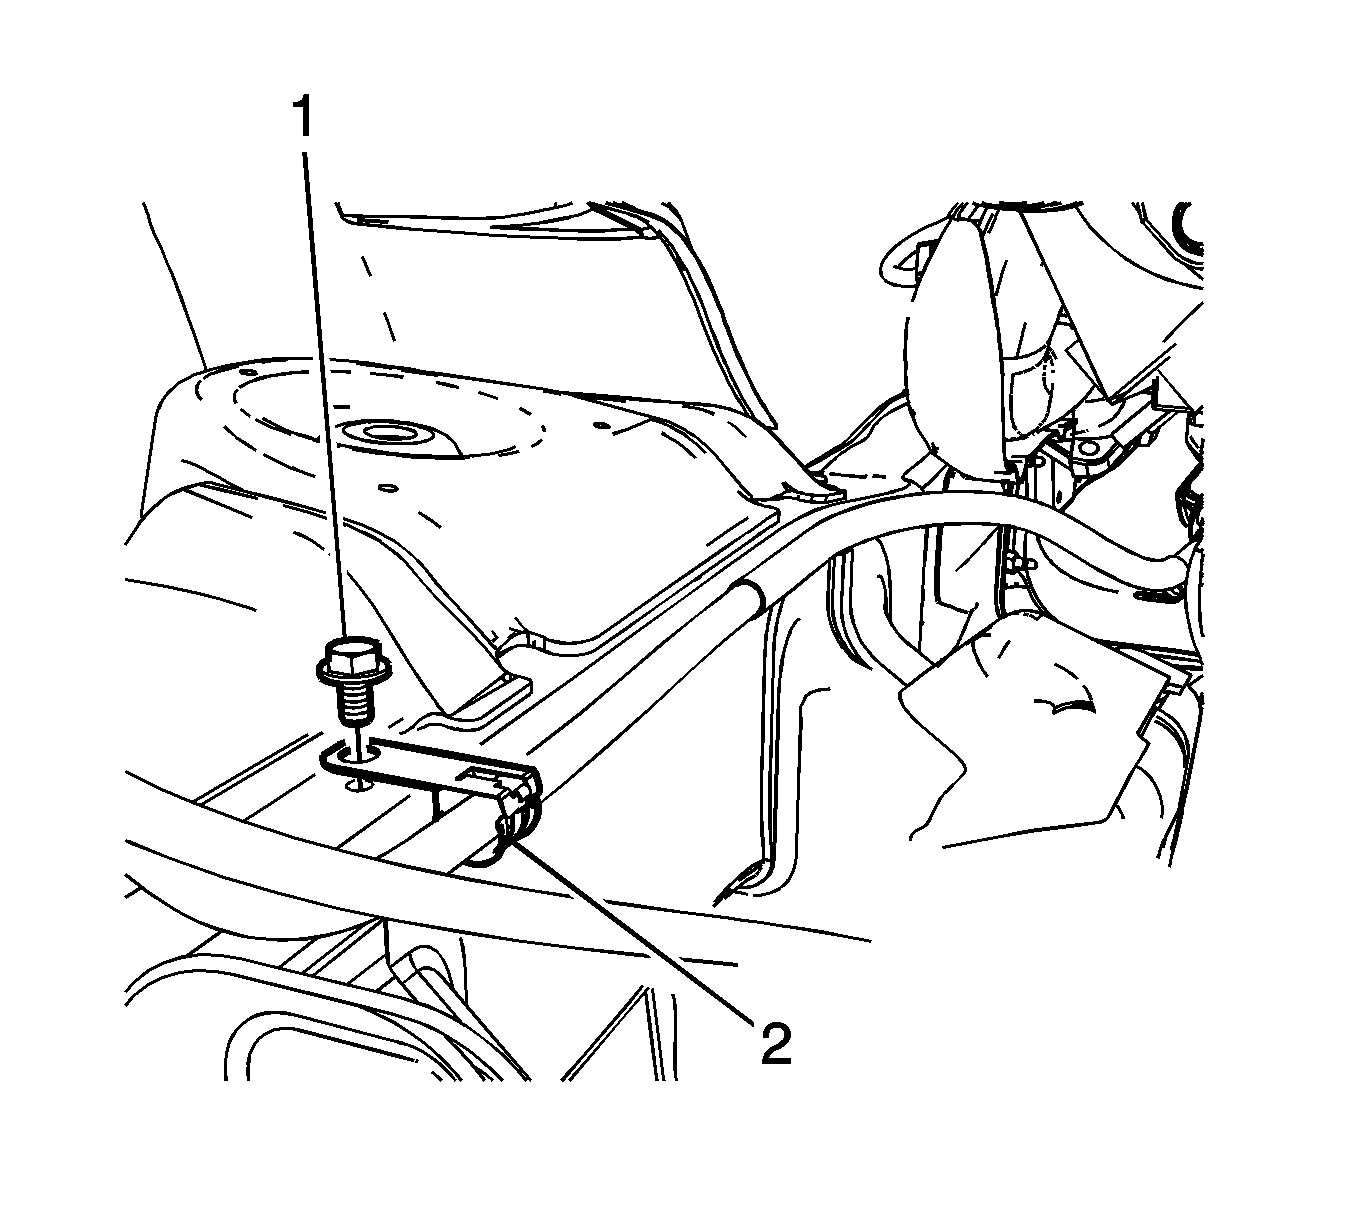
- Remove the positive battery cable retainer (2) to frame bolt (1).
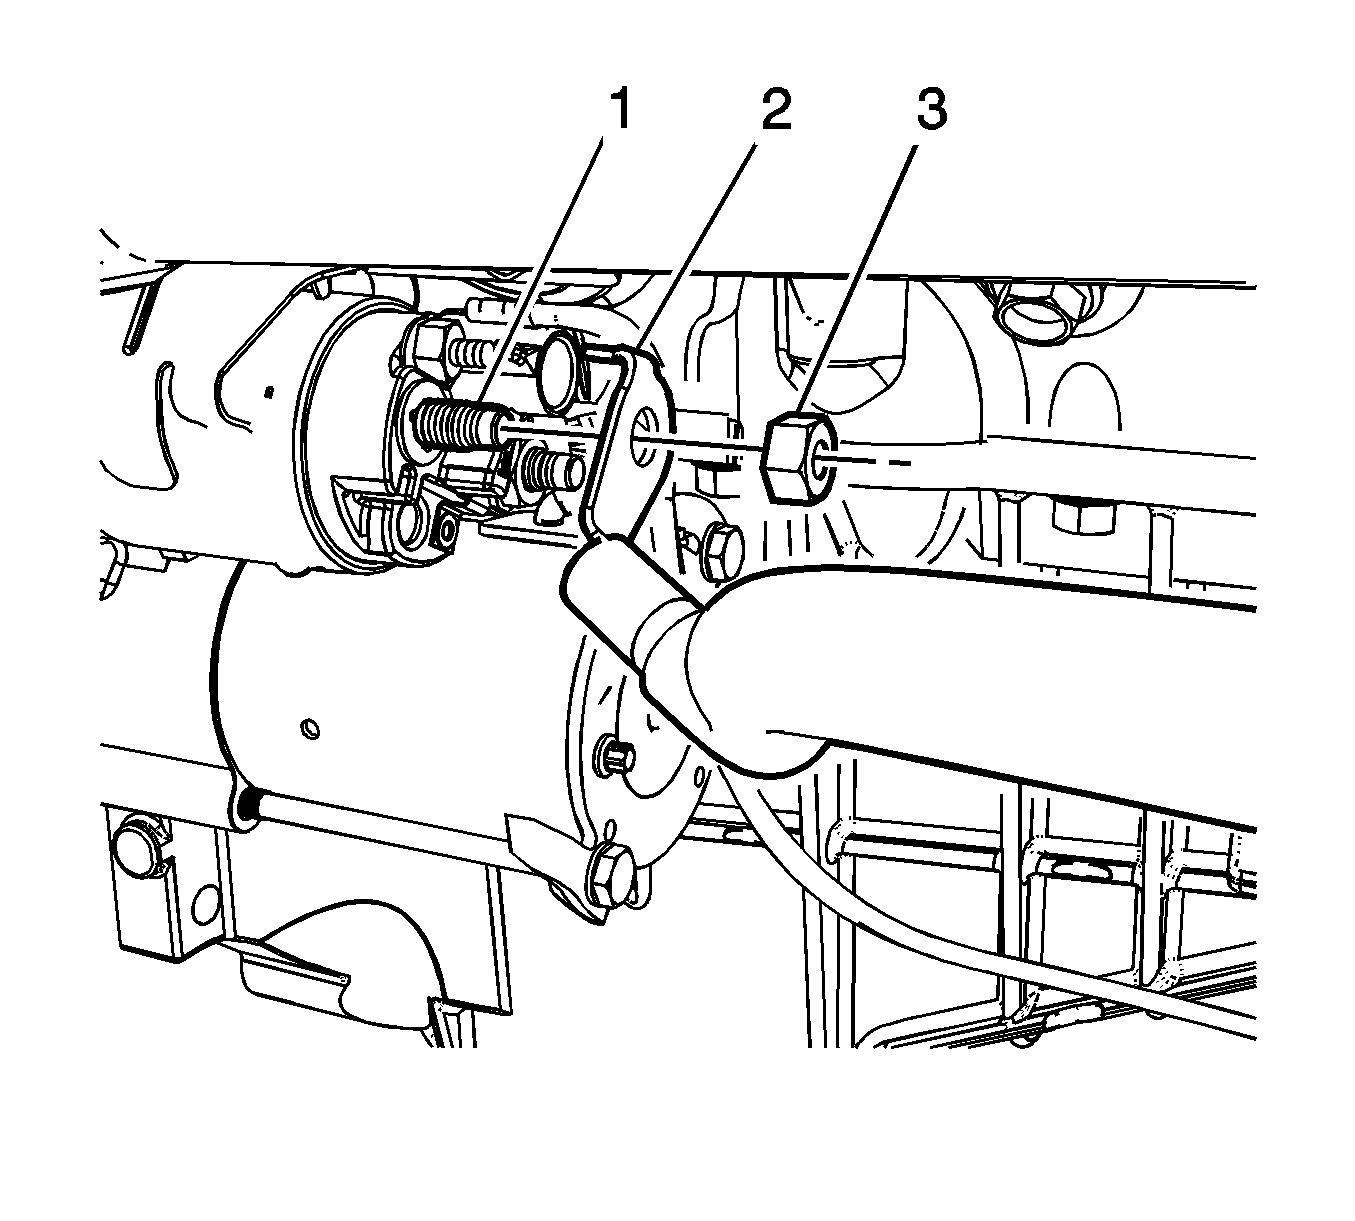
- Remove the battery terminal nut (3) on the starter solenoid (1).
- Remove the positive battery cable (2) from the starter solenoid.
- Lower the vehicle.
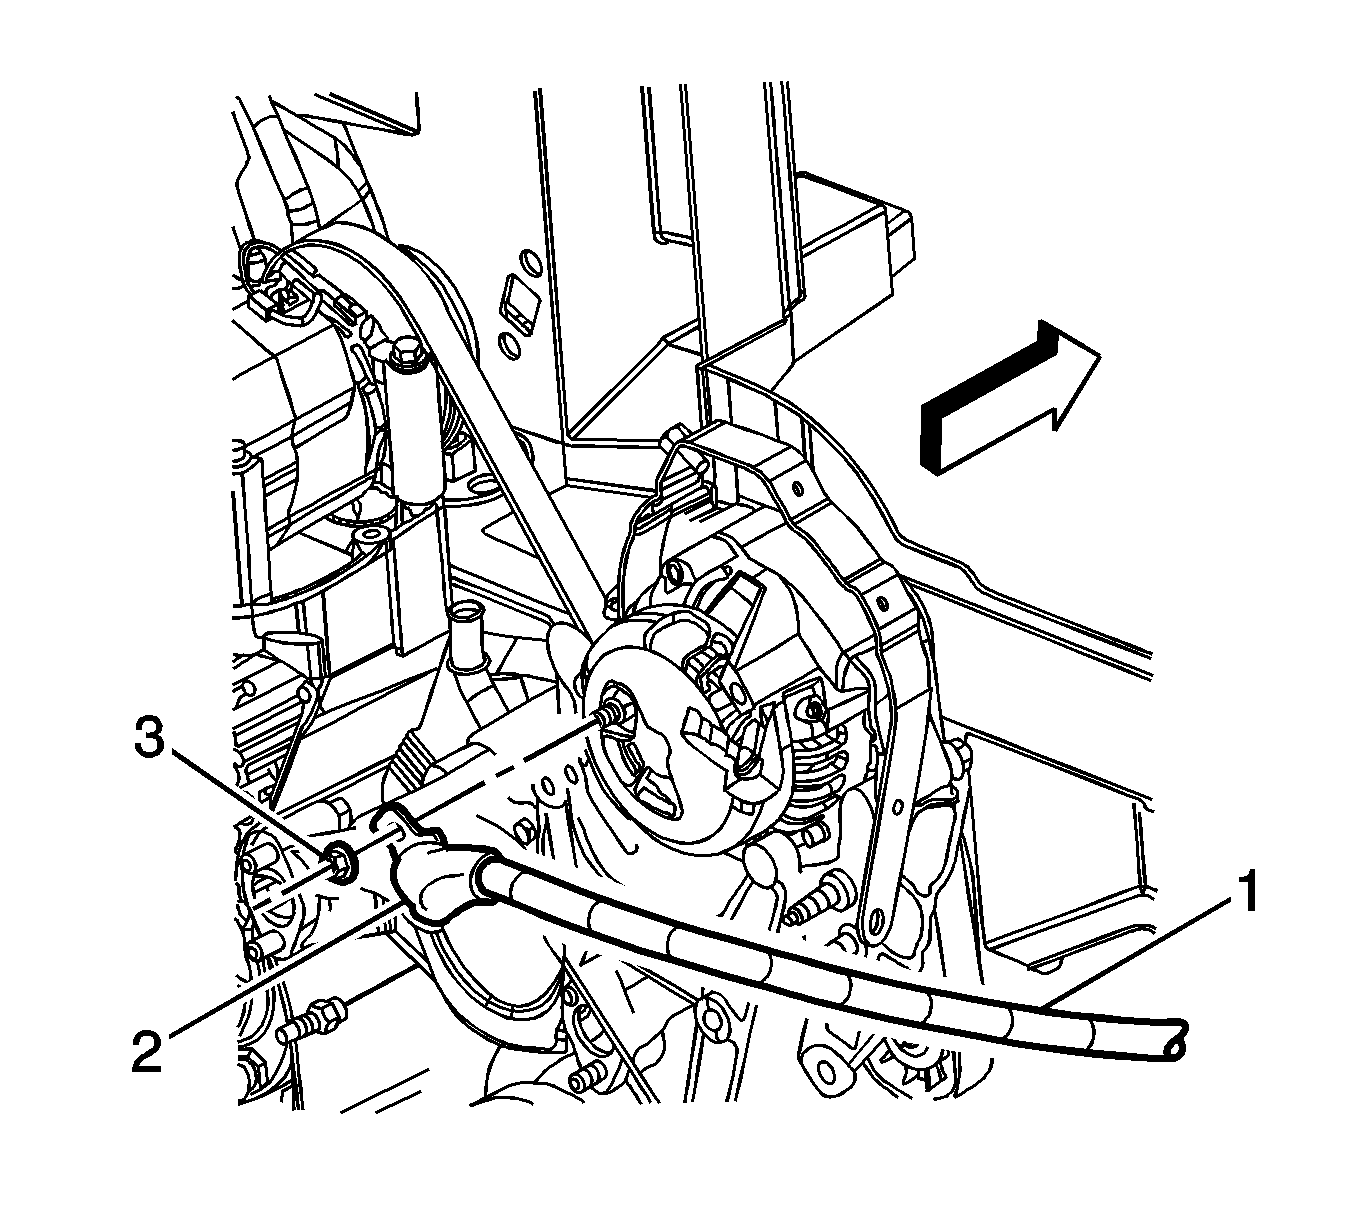
- Reposition the positive battery cable boot (2) at the generator.
- Remove the generator nut (3).
- Remove the positive battery cable (1) from the generator.
- Remove the positive battery cable from the vehicle.
Installation Procedure
- Install the positive battery cable to the vehicle.
- Install the positive cable (1) to the generator.
- Install the generator nut (3).
- Position the positive cable boot (2) at the generator.
- Raise and support the vehicle.
- Install the positive cable (2) to the starter solenoid battery terminal (1).
- Install the battery terminal nut (3) onto the starter solenoid battery terminal (1).
- Install the positive cable retainer (2) to frame bolt (1).
- Lower the vehicle.
- Install the positive battery cable (1) to the junction block.
- Install the positive battery cable clip (5) from the battery tray.
- Install the positive battery cable to the battery.
- Connect the negative battery cable. Refer to Battery Negative Cable Disconnection and Connection .
- Install the coolant recovery reservoir. Refer to Coolant Recovery Reservoir Replacement .

Notice: Refer to Title not found in the Preface section.
Tighten
Tighten the nut to 10 N·m (89 lb in).

Tighten
Tighten the nut to 10 N·m (89 lb in).

Tighten
Tighten the bolt to 13 N·m (115 lb in).

Tighten
Tighten the nut to 13 N·m (115 lb in).
Tighten
Tighten the bolt to 14 N·m (123 lb in).
