Generator Bracket Replacement 4.8L /5.3L /6.0L
Removal Procedure
- Remove the generator. Refer to Generator Replacement .
- Remove the power steering pump. Refer to Power Steering Pump Replacement .
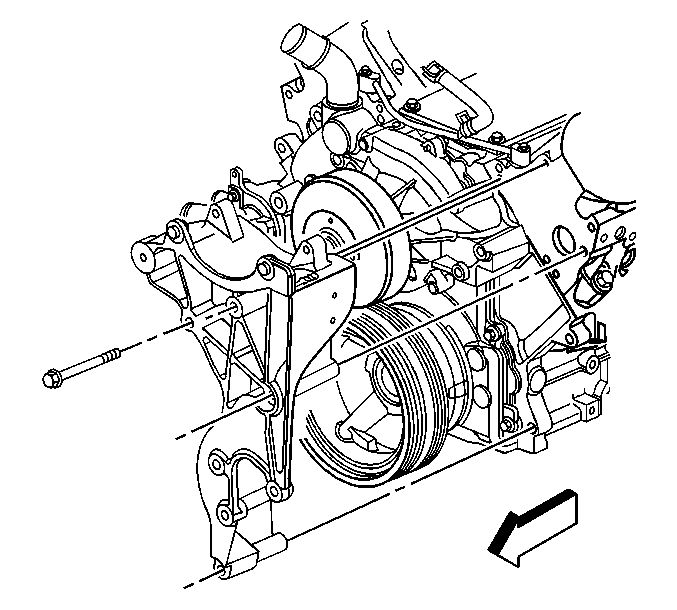
- Remove the generator bracket bolts.
- Remove the generator bracket.
Installation Procedure
- Install the generator bracket.
- Install the generator bracket bolts.
- Install the power steering pump. Refer to Power Steering Pump Replacement .
- Install the generator. Refer to Generator Replacement .
Notice: Refer to Fastener Notice in the Preface section.

Tighten
Tighten the generator bracket bolts to 50 N·m (37 lb ft).
Generator Bracket Replacement 6.6L
Removal Procedure
Caution: Refer to Battery Disconnect Caution in the Preface section.
- Remove the cooling fan. Refer to Fan Replacement .
- Remove the drive belt. Refer to Drive Belt Replacement .
- Disconnect the generator electrical connector.
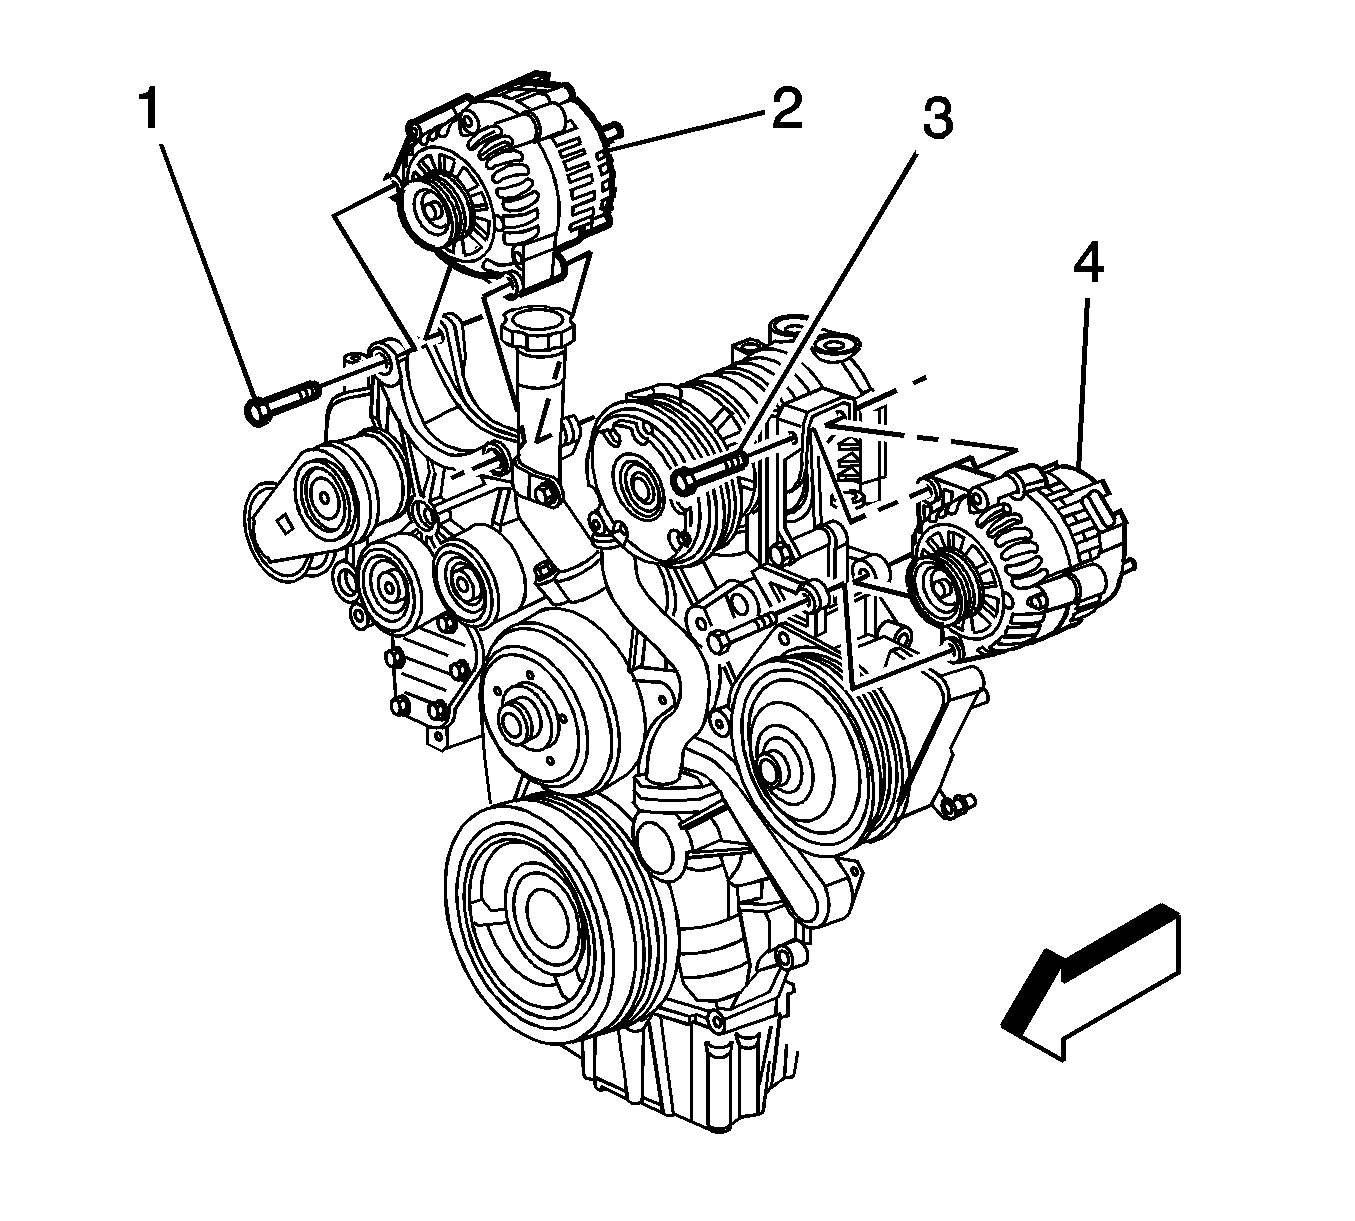
- Remove the generator bolts (1).
- Remove the generator (2).
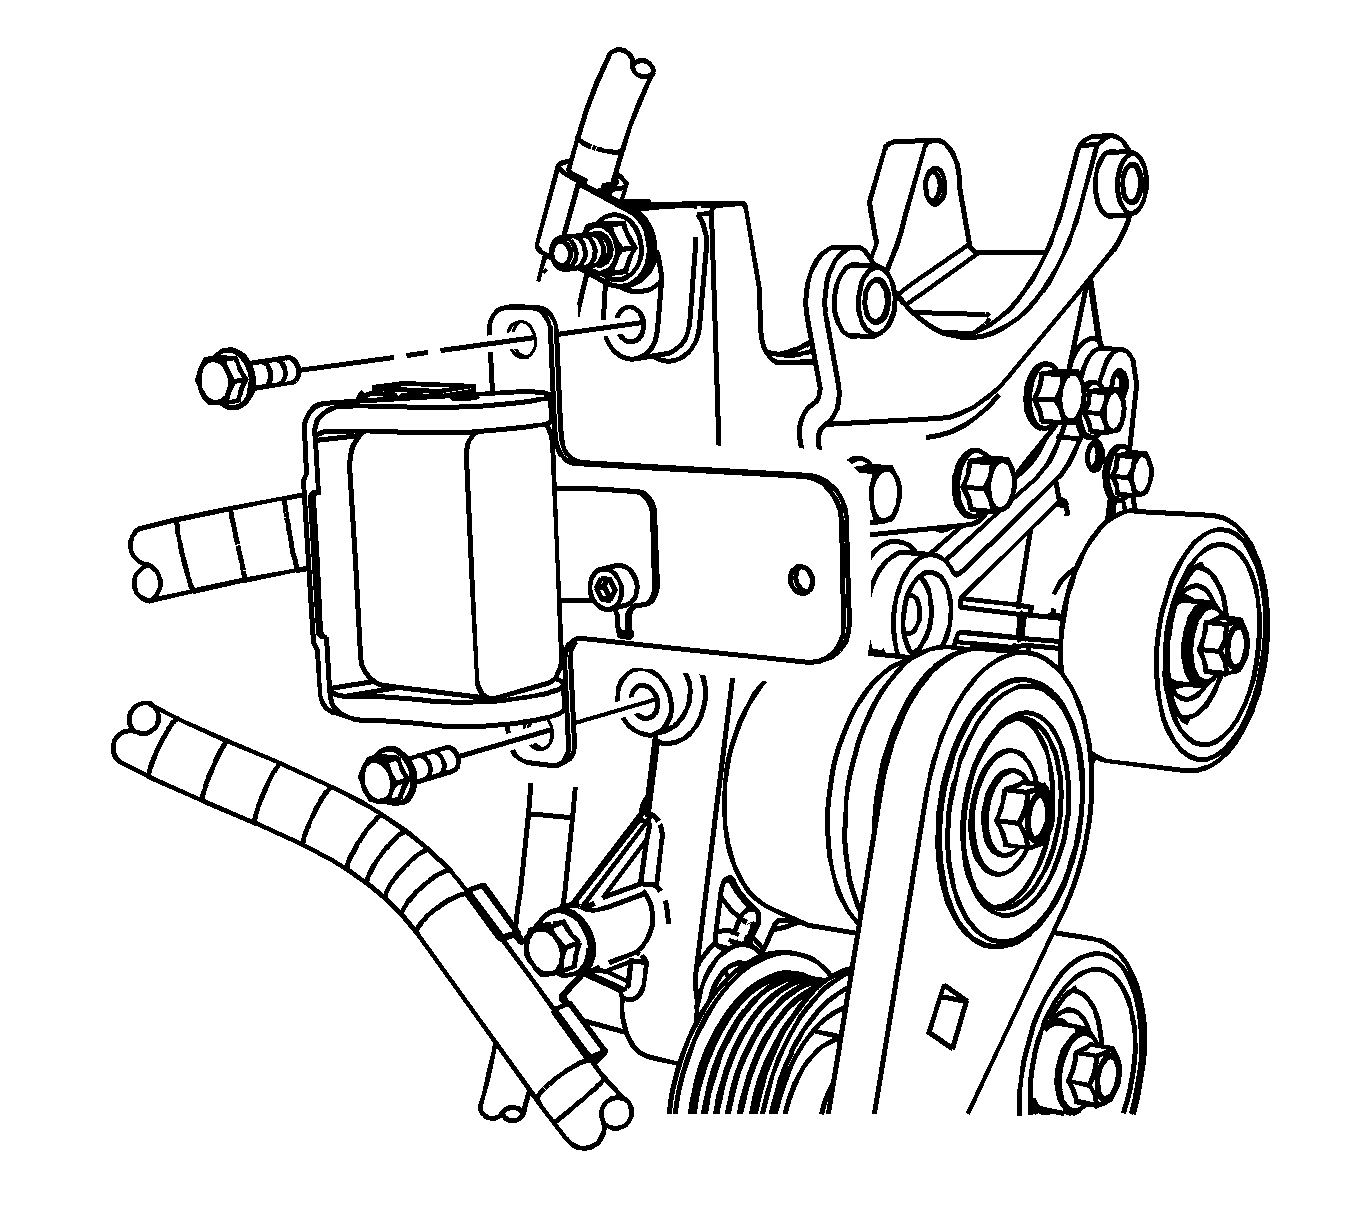
- Remove the positive battery cable from the generator, perform the following:
- Disconnect the right engine wiring main harness connector.
- Remove the 2 right engine wiring harness bracket bolts and position aside.
- Remove the 2 wiring harness routing bolts.
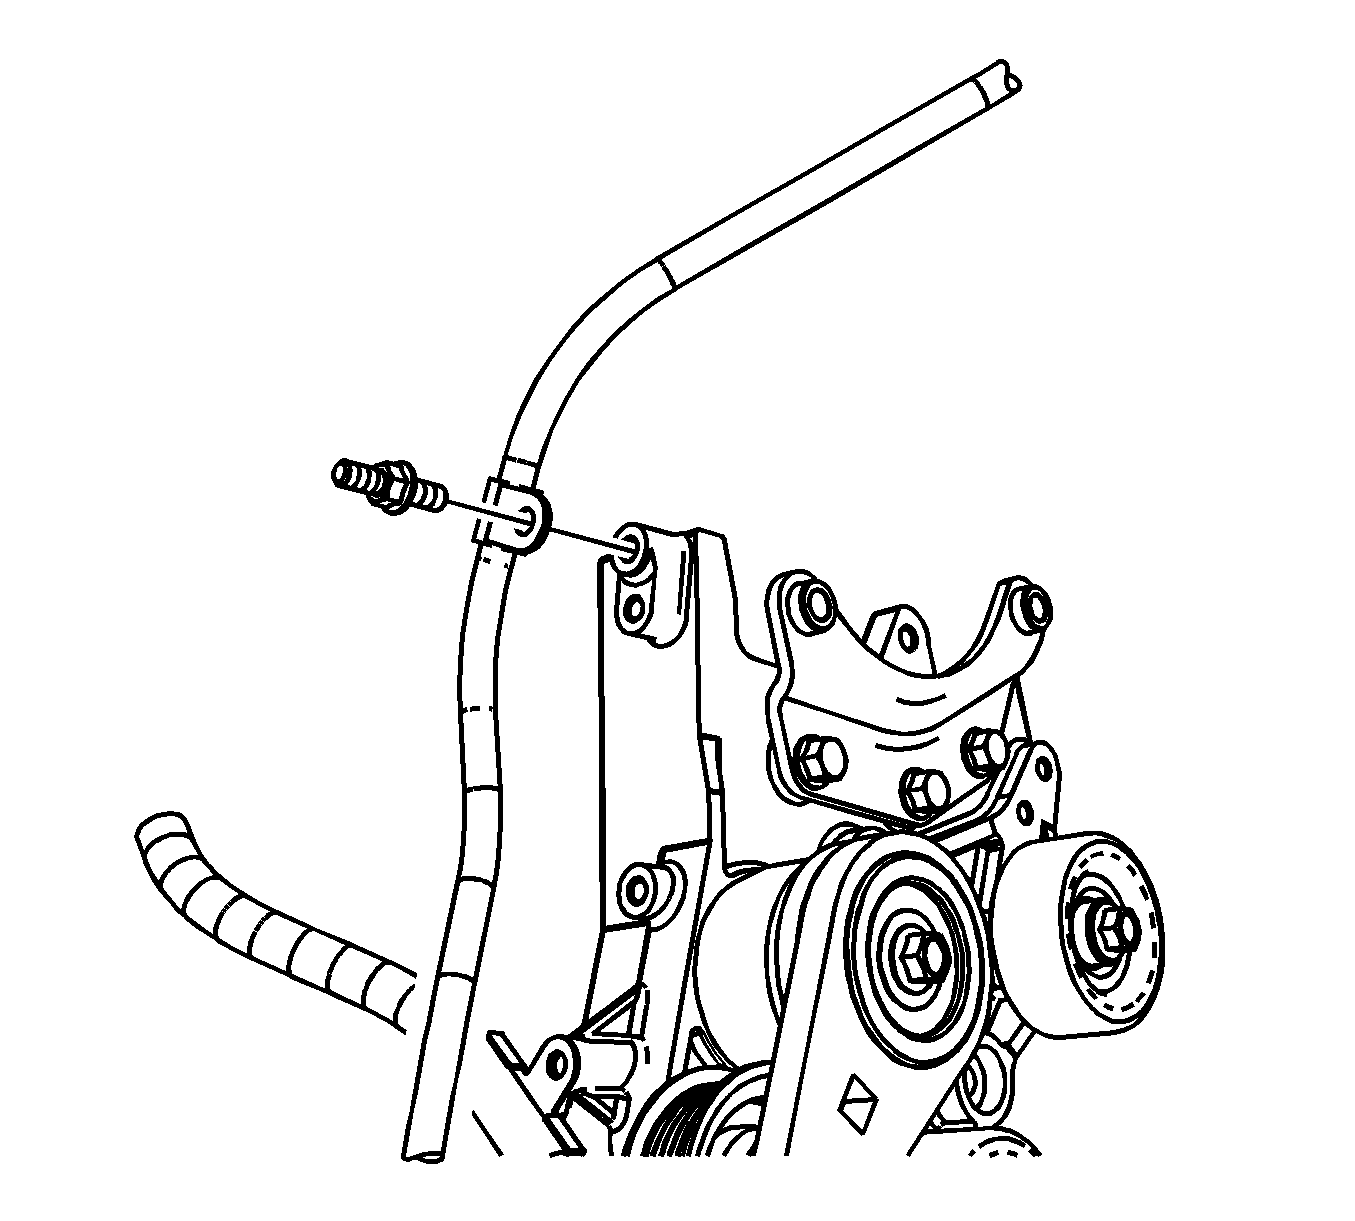
- Remove the oil indicator tube bracket bolt.
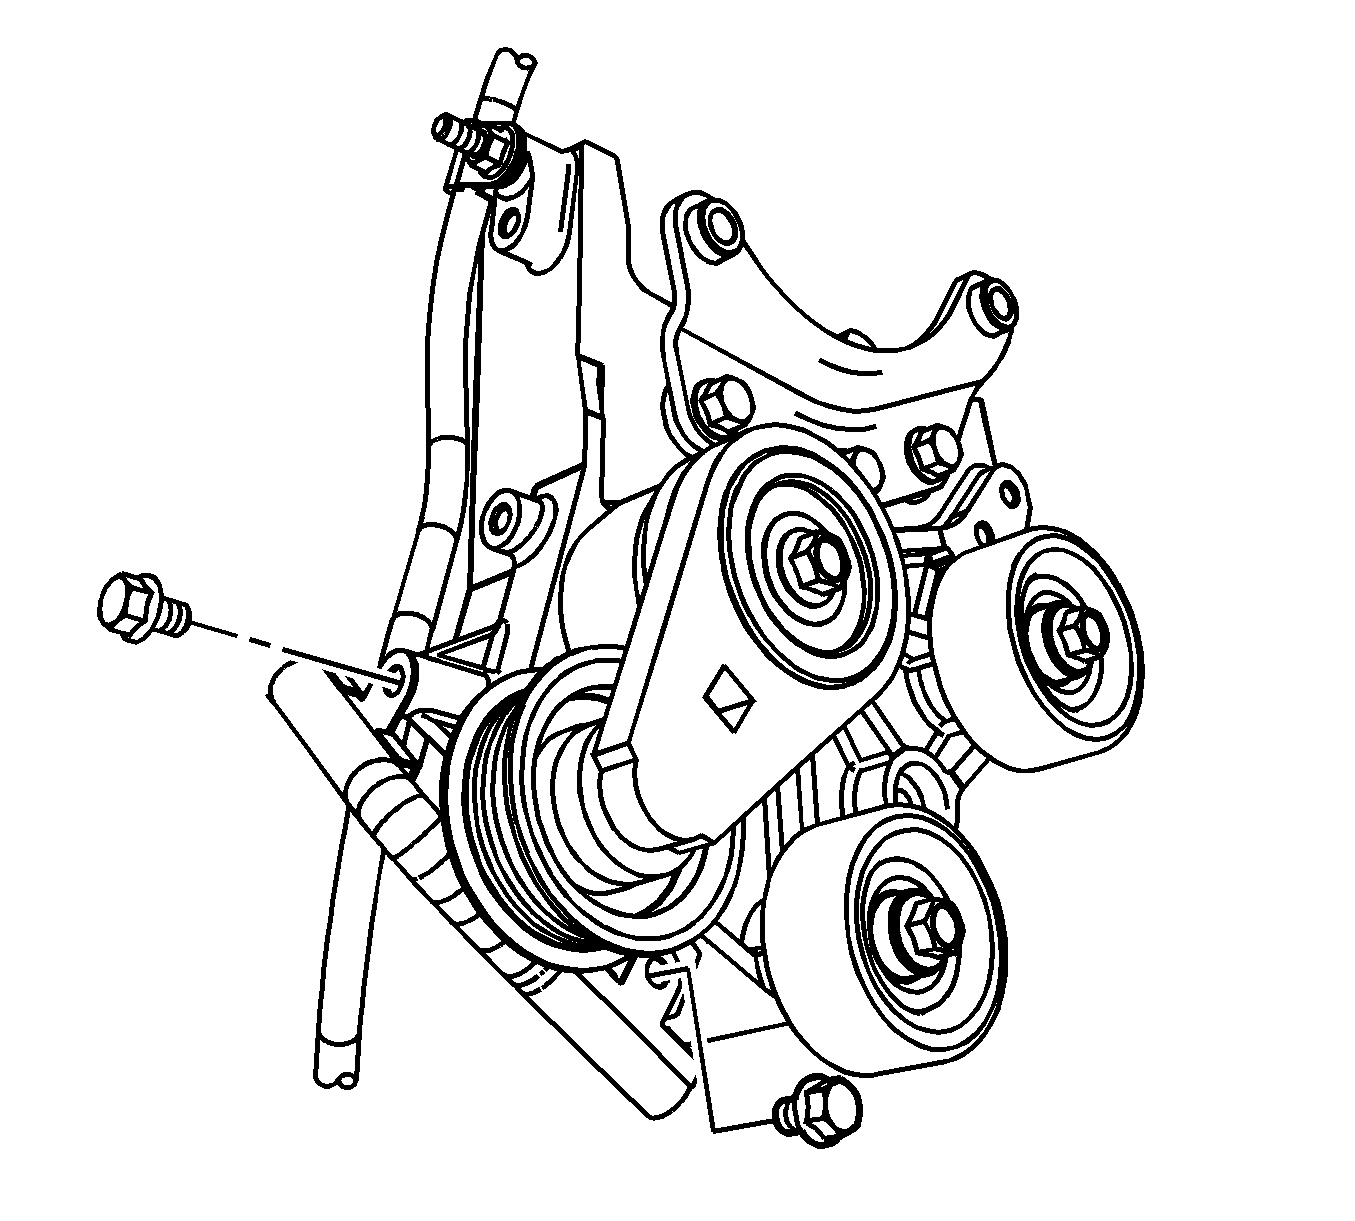
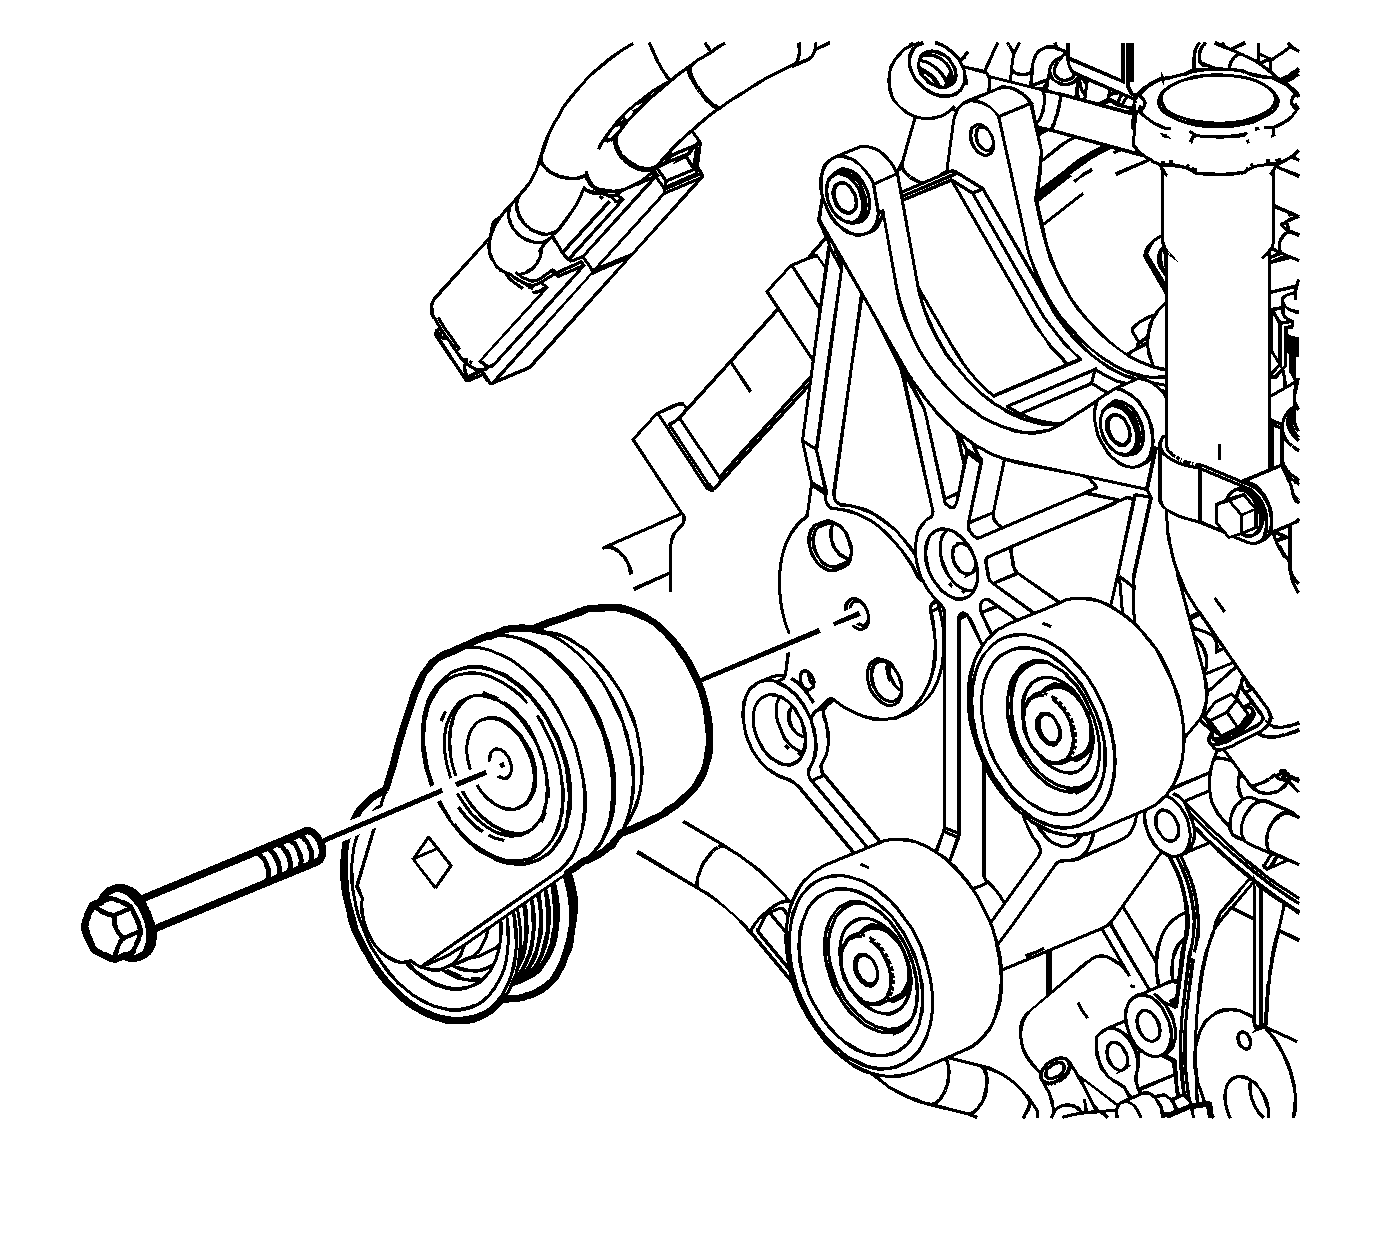
- Remove the drive belt tensioner bolt and tensioner.
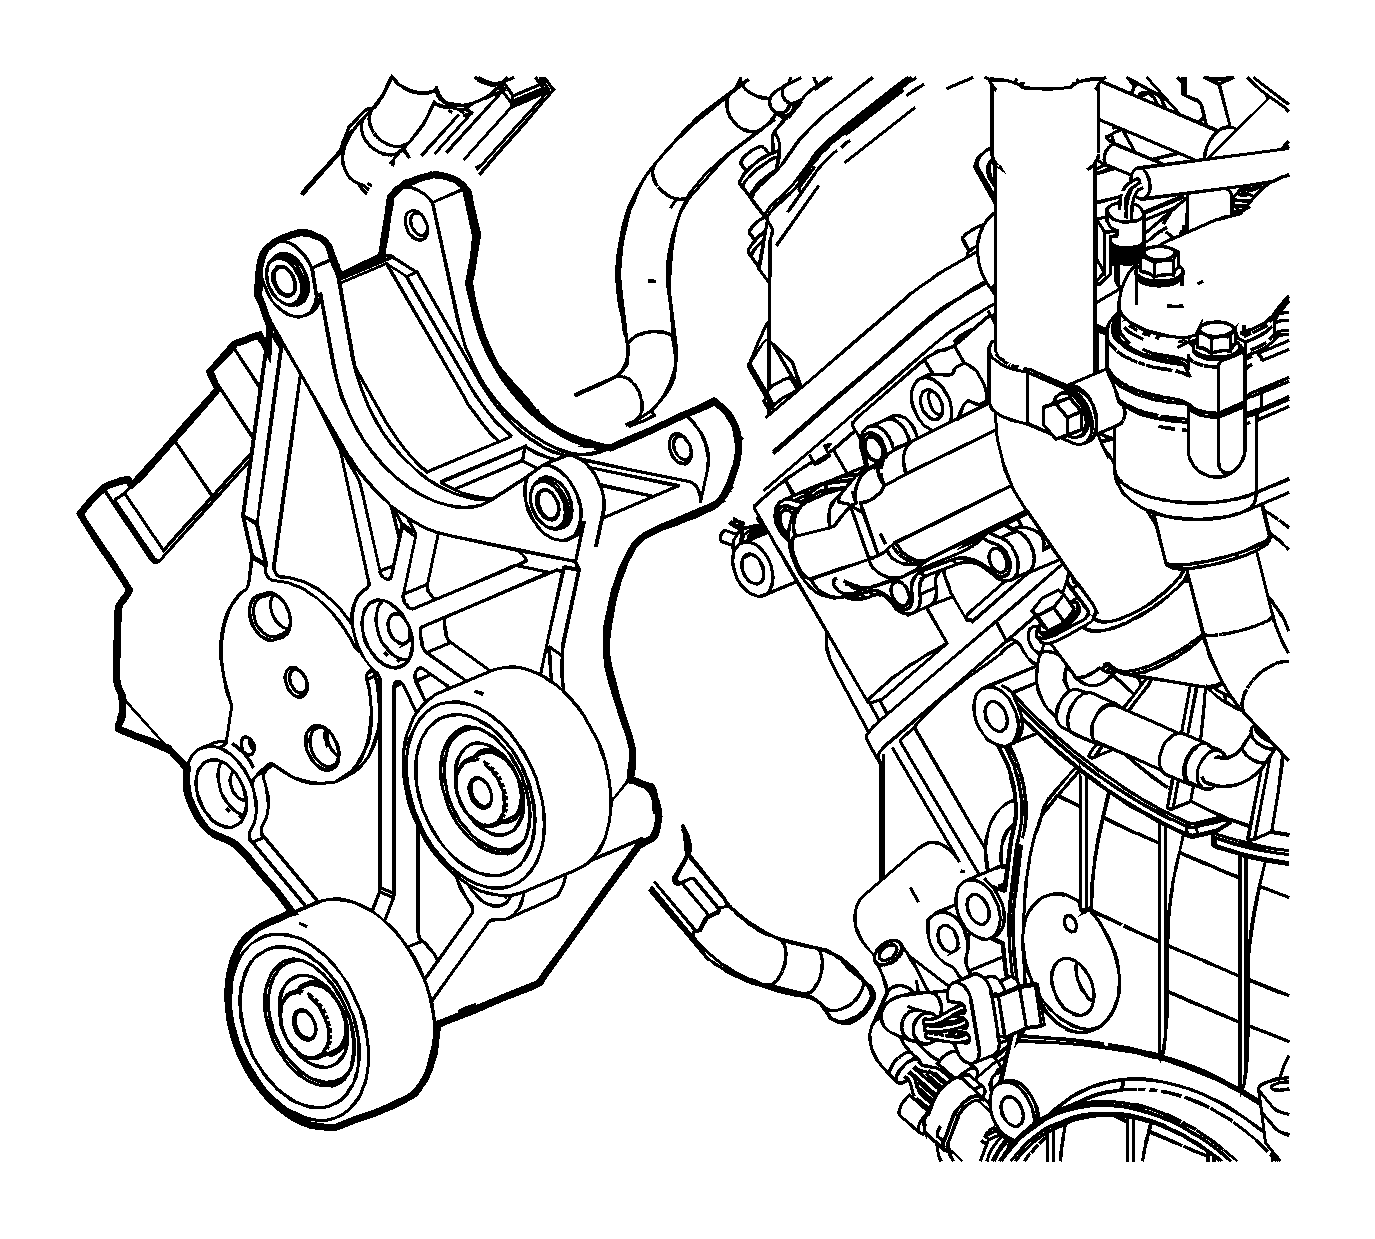
- Remove the bolts and nut and the generator mounting bracket.
- Transfer any parts as needed.
| 6.1. | Slide the boot down to access the terminal stud. |
| 6.2. | Remove the positive cable nut. |
| 6.3. | Remove the positive cable. |
Installation Procedure
- Position the generator mounting bracket and install the bolts.
- Position the drive belt tensioner and install the bolt.
- Install the oil indicator tube bracket bolt.
- Install the 2 wiring harness routing bolts.
- Position the right engine wiring harness bracket and install the 2 bolts.
- Connect the right engine wiring harness connector.
- Install the positive cable to the auxiliary generator, perform the following:
- Position the generator.
- Install the generator bolts (1).
- Connect the generator electrical connector.
- Install the drive belt. Refer to Drive Belt Replacement .
- Install the cooling fan. Refer to Fan Replacement .

Tighten
Tighten the generator mounting bracket bolts to 50 N·m (37 lb ft).

Tighten
Tighten the drive belt tensioner bolt to 50 N·m (37 lb ft).

Tighten
Tighten the oil indicator tube bracket bolt to 21 N·m (15 lb ft).

Tighten
Tighten the wiring harness routing bolts to 10 N·m (89 lb in).

Tighten
Tighten the right engine wiring harness bracket bolts to 10 N·m (89 lb in).
| 7.1. | Install the positive cable. |
| 7.2. | Install the positive cable nut. |
Tighten
Tighten the positive cable nut to 9 N·m (80 lb in).
| 7.3. | Slide the boot to cover the terminal stud. |

Tighten
Tighten the generator bolts to 50 N·m (37 lb ft).
Generator Bracket Replacement 4.3L
Removal Procedure
- Remove the generator. Refer to Generator Replacement .
- Remove the drive belt tensioner. Refer to Drive Belt Tensioner Replacement .
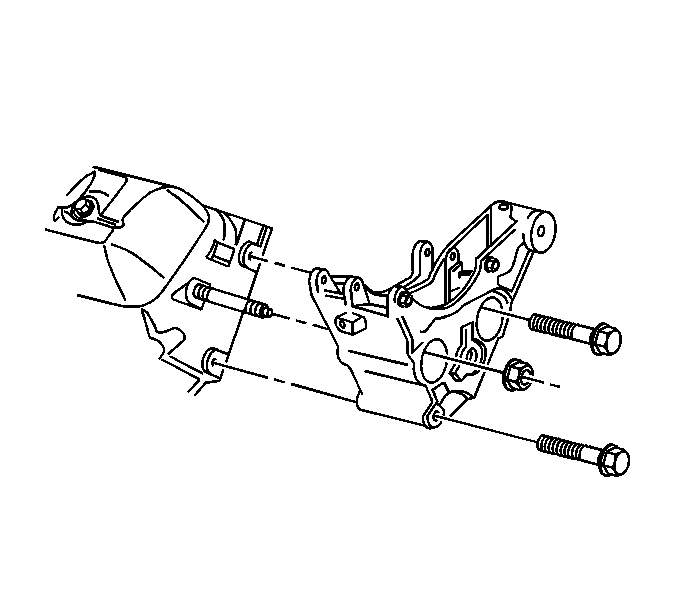
- Remove the generator bracket bolts and nut.
- Remove the generator bracket.
Installation Procedure
- Install the generator bracket.
- Install the generator bracket bolts and nut.
- Install the drive belt tensioner. Refer to Drive Belt Tensioner Replacement .
- Install the generator. Refer to Generator Replacement .
Notice: Refer to Fastener Notice in the Preface section.

Tighten
Tighten the bolts/nut to 41 N·m (30 lb ft).
