Tools Required
J 41416 Ultrasonic Leak Detector
Removal Procedure
- Relieve the CNG fuel system pressure. Refer to the Fuel Pressure Relief .
- Disconnect the negative battery cable. Refer to Battery Negative Cable Disconnection and Connection in Engine Electrical in the G Van Service Manual.
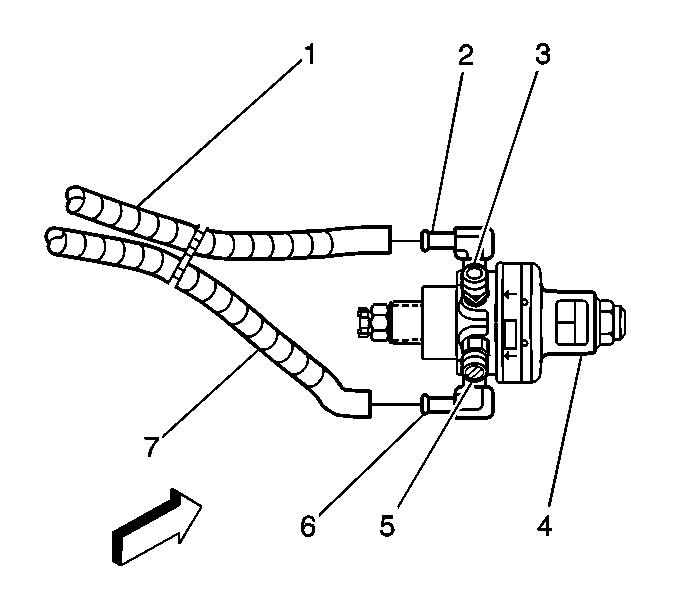
- Clamp off coolant hoses (1, 7) using coolant hose pinch pliers.
- Remove hose clamps and hoses from the high pressure regulator coolant fittings (2, 5).
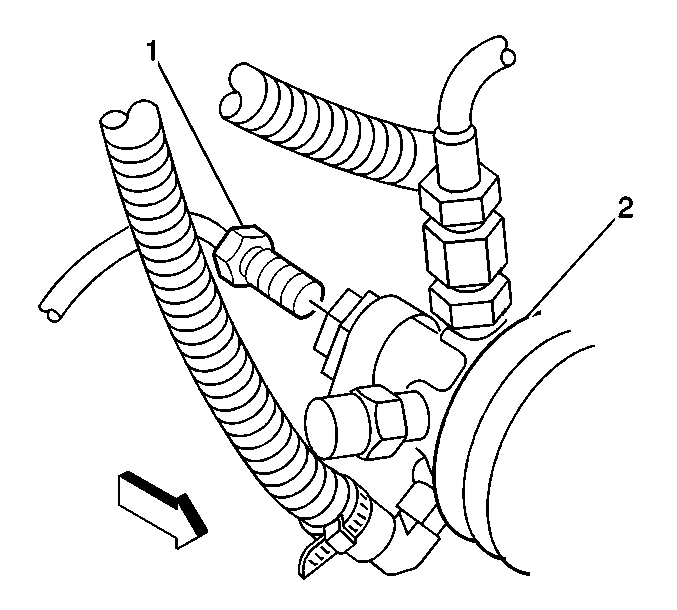
- Remove the fuel inlet line (1) from the high pressure regulator (2).
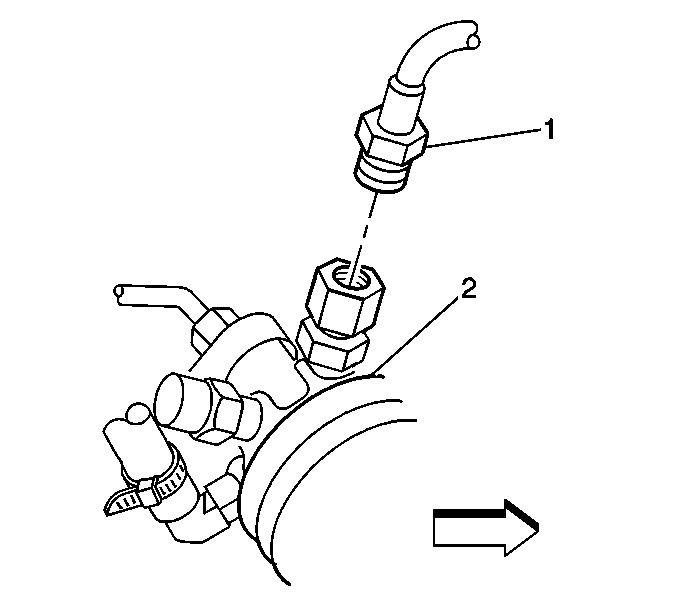
- Remove the fuel outlet line (1) from the high pressure regulator (2).
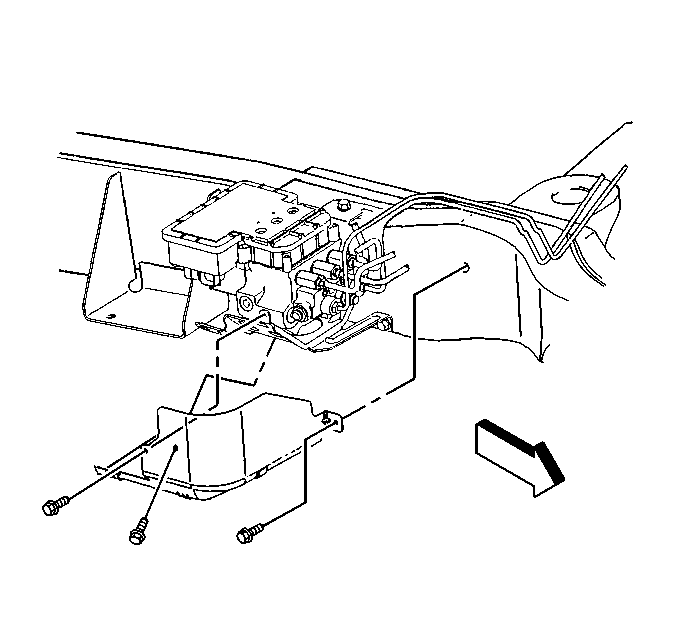
- Remove the bolts from the electronic brake control module shield and remove the shield.
- Loosen but do not remove the lower bracket mounting bolt (4).
- Remove the high pressure regulator mounting bracket thru-frame (1) nut and bolt (2).
- Remove the high pressure regulator and bracket assembly (2, 3) from the vehicle (1).
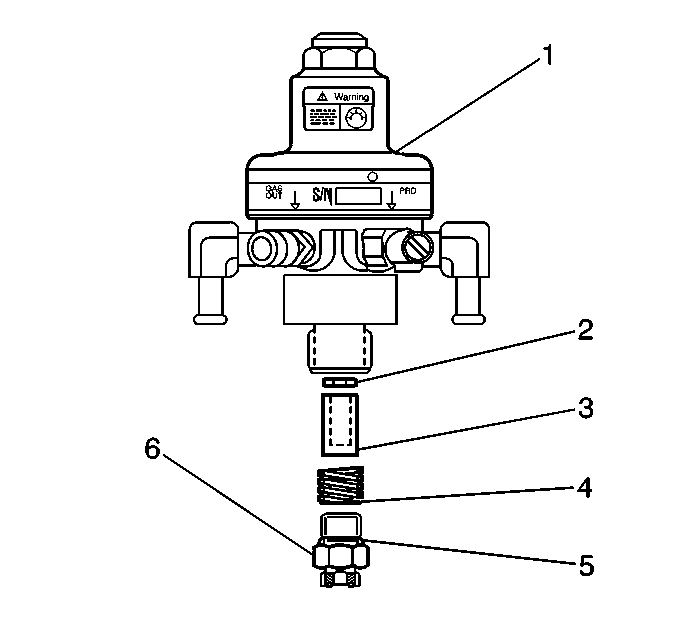
- Remove the fuel inlet line fitting from the high pressure regulator. Retain the high pressure regulator fuel filter and spring for re-installation if clean.
- Remove the high pressure regulator jam nut (1) and remove the high pressure regulator (3) from the bracket (2).
Caution: Natural gas is highly flammable. In order to reduce the risk of fire and personal injury, keep sparks, flames, and smoking materials away from the vehicle while you perform the Compressed Natural Gas (CNG) fuel system service.
Caution: The Compressed Natural Gas (CNG) system operates at pressures up to 24820 kpa (3600 psi). Relieve the CNG fuel system pressure before servicing CNG fuel system components in order to reduce the risk of fire and personal injury.
Caution: Unless directed otherwise, the ignition and start switch must be in the OFF or LOCK position, and all electrical loads must be OFF before servicing any electrical component. Disconnect the negative battery cable to prevent an electrical spark should a tool or equipment come in contact with an exposed electrical terminal. Failure to follow these precautions may result in personal injury and/or damage to the vehicle or its components.
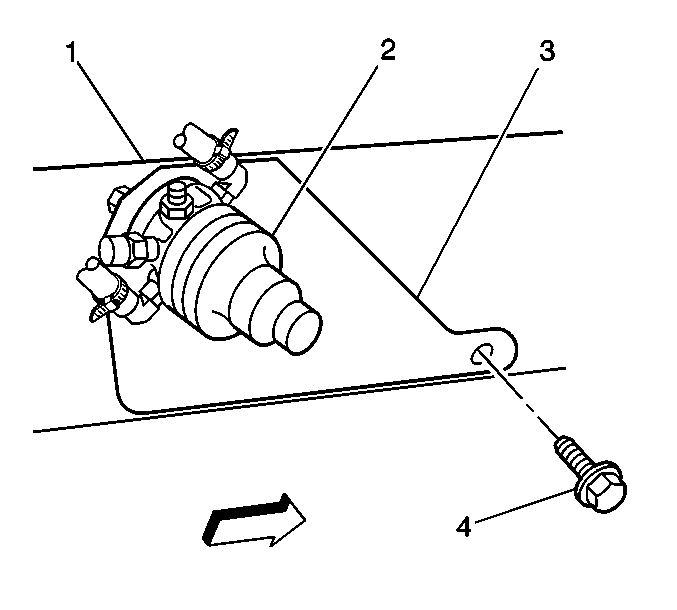
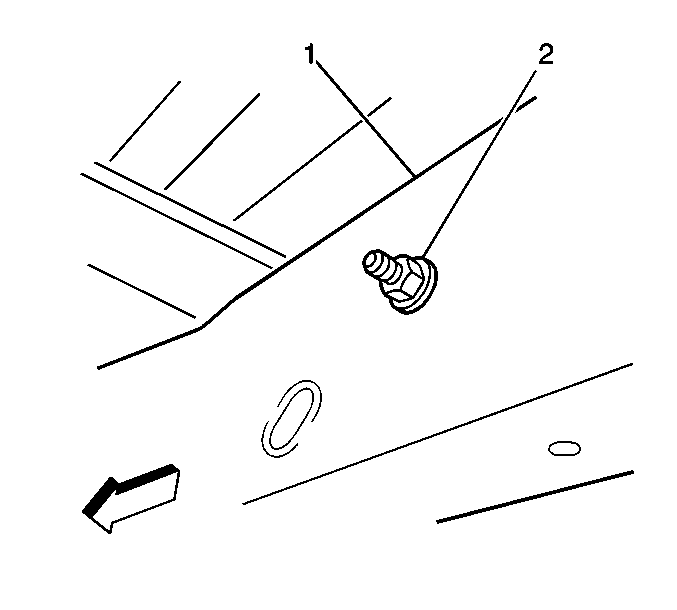

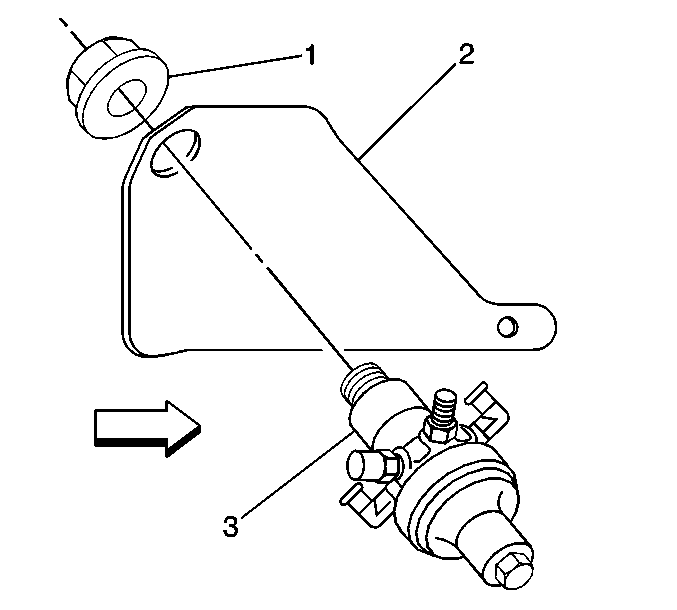
Important: Do not hold the HPR using the hex flange at the end of the HPR near the warning label. Place the HPR in a suitable holding device in order to keep the HPR from spinning in the bracket.
Disassembly Procedure
- Remove the coolant hose fittings (2, 5).
- Remove the pressure relief device (PRD) (4).
- Remove the fuel outlet fitting (3).
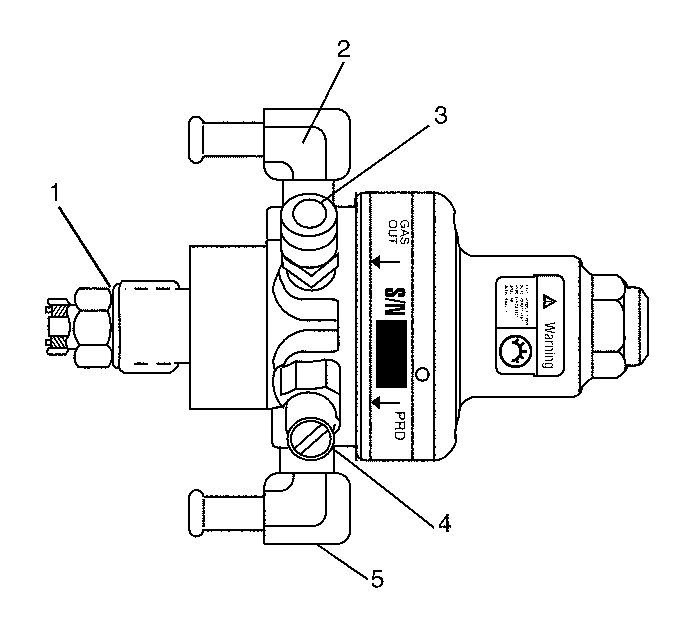
Important: Do not hold the HPR using the hex flange at the end of the HPR near the warning label. Place the HPR in a suitable holding device in order to keep the HPR from moving.
Assembly Procedure
| • |

Notice: Use the correct fastener in the correct location. Replacement fasteners must be the correct part number for that application. Fasteners requiring replacement or fasteners requiring the use of thread locking compound or sealant are identified in the service procedure. Do not use paints, lubricants, or corrosion inhibitors on fasteners or fastener joint surfaces unless specified. These coatings affect fastener torque and joint clamping force and may damage the fastener. Use the correct tightening sequence and specifications when installing fasteners in order to avoid damage to parts and systems. Important: Apply pipe thread sealant containing Teflon® to the following components prior to installation. Do not use Teflon® tape. Tighten
|
| • | Tighten
|
| • | Tighten
|
Installation Procedure
- Install the high pressure regulator (3) into the bracket (2) and install the high pressure regulator jam nut (1).
- Install the fuel inlet fitting (6) using new O-rings. Lubricate the O-rings with petroleum jelly or equivalent.
- Place the high pressure regulator and bracket assembly (2, 3) onto the loosely installed lower mounting bracket bolt (4).
- Install the thru-frame mounting bracket nut, washer and bolt (2).
- Tighten the lower bracket mounting bolt (4).
- Install the electronic brake control module shield and bolts.
- Connect the fuel outlet line (1) to the outlet line fitting using a new O-ring. Lubricate the O-ring with petroleum jelly or equivalent.
- Install the fuel inlet line (1) to the fuel inlet fitting.
- Install the coolant hoses (1, 7) and clamps to the high pressure regulator coolant fittings (2, 6).
- Remove the coolant hose pinch pliers.
- Connect the negative battery cable. Refer to Battery Negative Cable Disconnection and Connection in Engine Electrical in the G Van Service Manual.
- Prime the CNG fuel system by cycling the ignition ON and OFF several times.
- Start the engine and use the J 41416 in order to inspect for CNG fuel system leaks at each serviced fitting.
- Inspect for proper coolant level and fill as necessary.

Important: Do not hold the HPR using the hex flange at the end of the HPR near the warning label. Place the HPR in a suitable holding device in order to keep the HPR from spinning in the bracket.
Notice: Use the correct fastener in the correct location. Replacement fasteners must be the correct part number for that application. Fasteners requiring replacement or fasteners requiring the use of thread locking compound or sealant are identified in the service procedure. Do not use paints, lubricants, or corrosion inhibitors on fasteners or fastener joint surfaces unless specified. These coatings affect fastener torque and joint clamping force and may damage the fastener. Use the correct tightening sequence and specifications when installing fasteners in order to avoid damage to parts and systems.
Tighten
Tighten the jam nut to 54 N·m (40 lb ft).
Caution: Natural gas is stored under high pressure. If a leak occurs, the high pressure could cause a personal injury. In order to prevent Compressed Natural Gas (CNG) fuel leaks, always replace the CNG fuel system O-rings during service.
Important: Ensure that a clean or new fuel filter (3) and the spring (4) and gasket (2) are installed prior to installation of the fuel inlet fitting (6).
Tighten
Tighten the fuel inlet fitting to 37 N·m (27 lb ft).


Tighten
Tighten the thru-frame nut to 37 N·m (27 lb ft).

Tighten
Tighten the mounting bolt to 28 N·m (21 lb ft).

Tighten
Tighten the shield mounting bolts to 28 N·m (21 lb ft).

Tighten
Tighten the fuel outlet line fitting finger-tight plus 1 to 3 turns.

Tighten
Tighten the fuel inlet line fitting to 37 N·m (27 lb ft).

