For 1990-2009 cars only
Removal Procedure
- Disconnect the negative battery cable. Refer to Battery Negative Cable Disconnection and Connection .
- Remove the left front wheel and tire. Refer to Tire and Wheel Removal and Installation .
- Remove the inner fender splash shield.
- Disconnect the pre-charge pump (PCP) motor.
- Remove the PCP electrical connector from the PCP bracket.
- Remove the engine harness from the PCP bracket.
- Remove the engine harness retainer from the inner fender above the PCP.
- Remove the connector C100, above the engine harness, from the inner fender.
- Move the connector C100 and the engine harness up, away from the PCP.
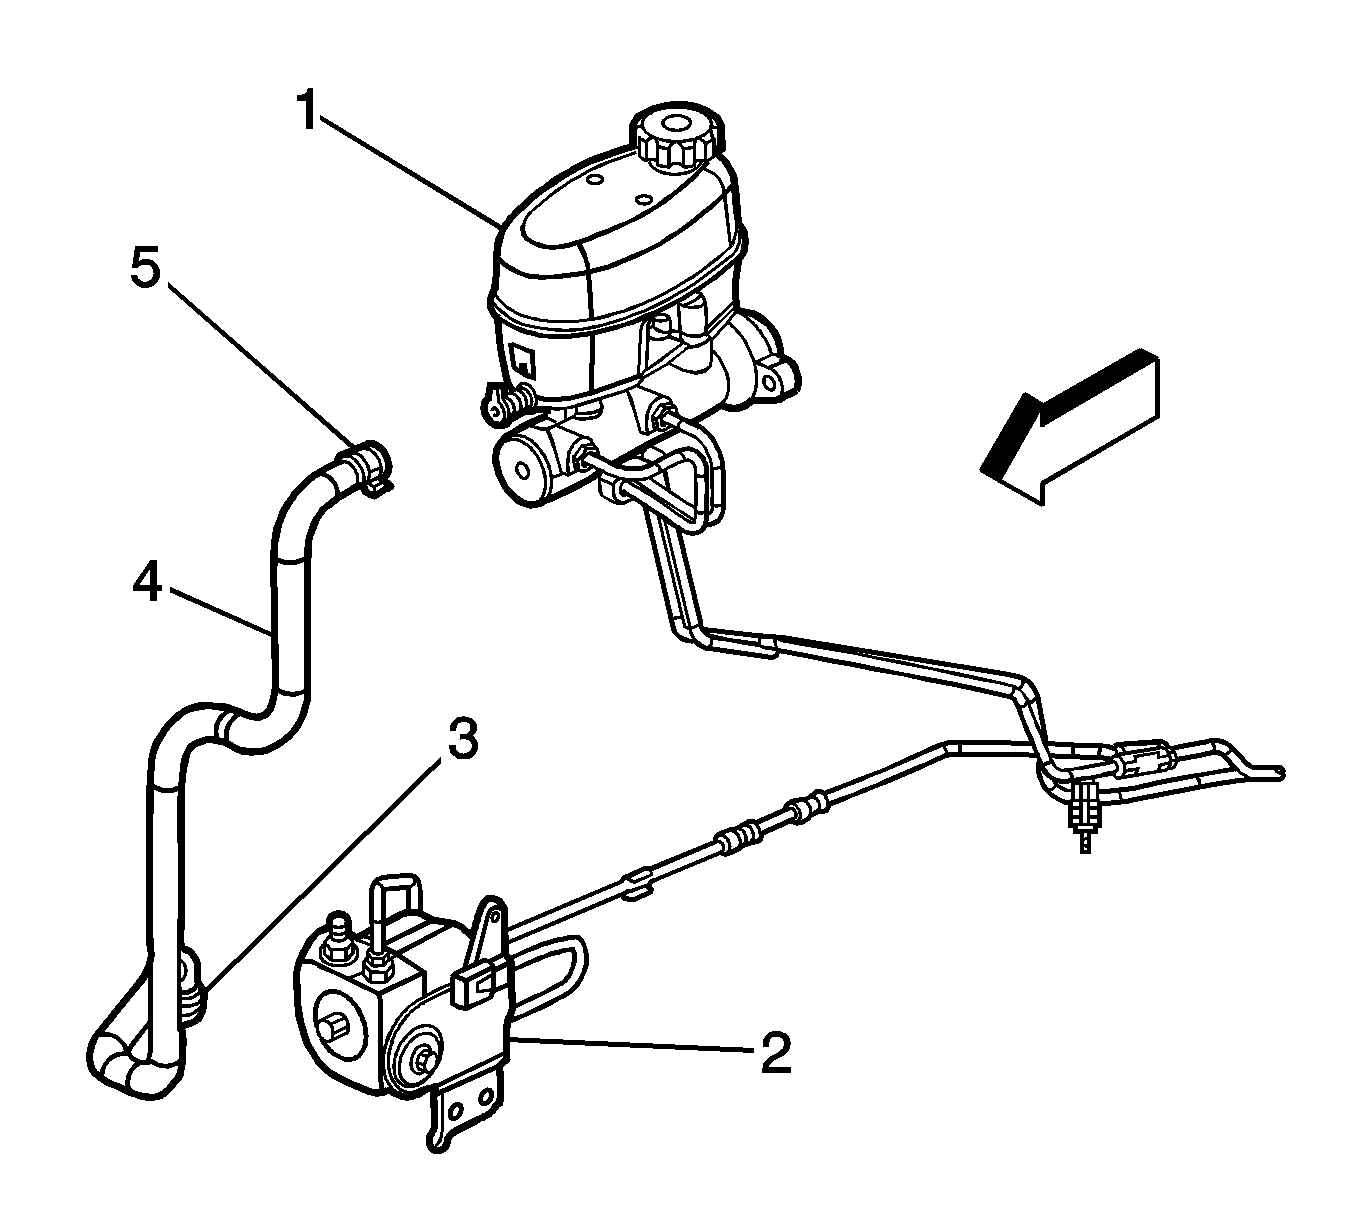
- Loosen and remove the brake fluid outlet pipe (5). Cap or plug the brake pipe to prevent contamination and brake fluid loss.
- Crimp the inlet hose (4) from the master cylinder to the PCP (2) to prevent fluid from leaking out and draining the master cylinder reservoir.
- Remove the inlet hose clamp (3) from the PCP assembly (2) inlet port.
- Remove the inlet hose (4) from the PCP assembly (2) inlet port.
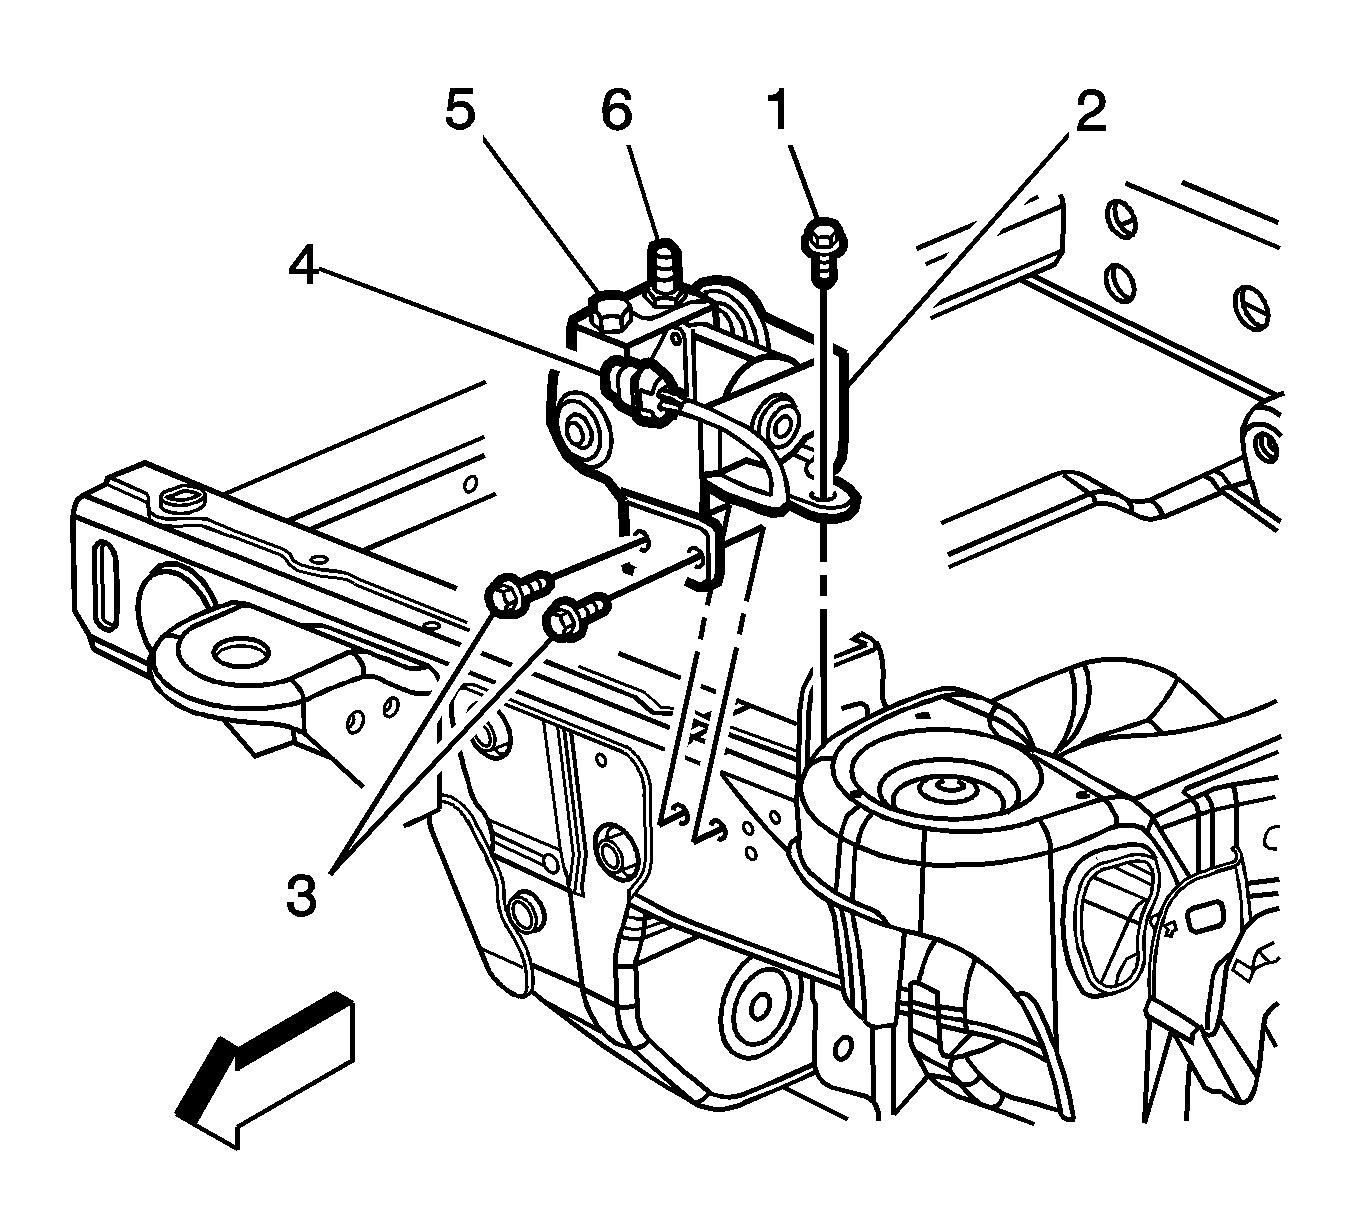
- Remove the PCP mounting bracket top bolt (1) and mounting bracket side bolts (3).
- Remove the PCP assembly (2) from the vehicle.
Caution: Refer to Brake Fluid Irritant Caution in the Preface section.
Notice: Refer to Brake Fluid Effects on Paint and Electrical Components Notice in the Preface section.


Important: The area around the PCP MUST be free from loose dirt to prevent contamination of disassembled ABS components.

Important: For installation, the PCP mounting bracket top bolt is longer than the mounting bracket side bolts.
Installation Procedure
- Install the PCP (2) into the vehicle.
- Install the PCP front and side mounting bracket bolts (1, 3).
- Connect the engine wiring harness to the PCP bracket.
- Connect the PCP electrical connector (4) to the vehicle connector harness.
- Remove the cap or plug from the outlet pipe and install the outlet pipe to the PCP (5).
- Install the inlet hose (4) and clamp (3) to the PCP (2).
- Remove the crimping tool from the inlet hose.
- Install the inner fender splash shield.
- Install the left front wheel and tire. Refer to Tire and Wheel Removal and Installation .
- Connect the negative battery cable. Refer to Battery Negative Cable Disconnection and Connection .
- Fill the master cylinder reservoir. Refer to Master Cylinder Reservoir Filling .
- Using a scan tool, perform a PCP bleed procedure. Refer to Antilock Brake System Automated Bleed Procedure .

Notice: Refer to Fastener Notice in the Preface section.
Tighten
Tighten the bolts to 20 N·m (15 lb ft).
Tighten
Tighten the brake fluid outlet pipe nut to 25 N·m (18 lb ft).

