Removal Procedure
- Raise and support the vehicle. Refer to Lifting and Jacking the Vehicle .
- Remove the tire and wheel. Refer to Tire and Wheel Removal and Installation .
- Remove the shock absorber. Refer to Shock Absorber Replacement .
- Remove the front stabilizer shaft link. Refer to Stabilizer Shaft Replacement .
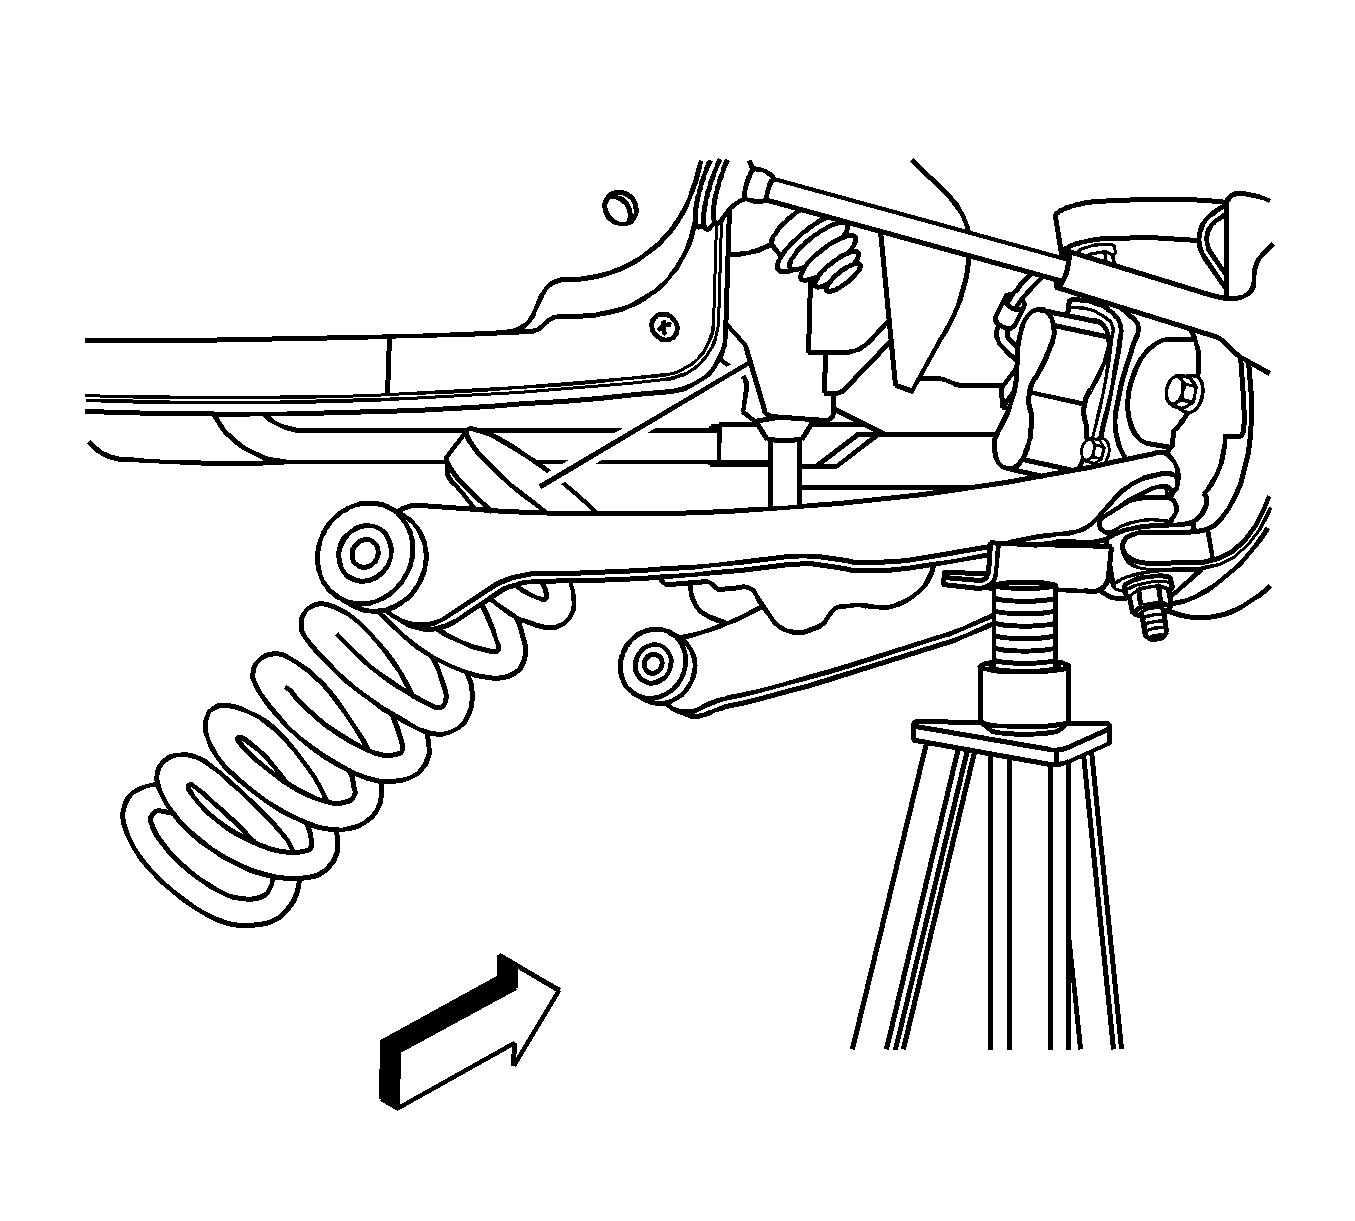
- Support the lower control arm near the lower ball joint with a suitable safety jack.
- Install OTC 7045-B coil spring compressor tool or equivalent to the coil spring through the hole in the lower control arm.
- Compress the front coil spring using OTC 7045-B coil spring compressor tool or equivalent and remove all tension from the lower control arm.
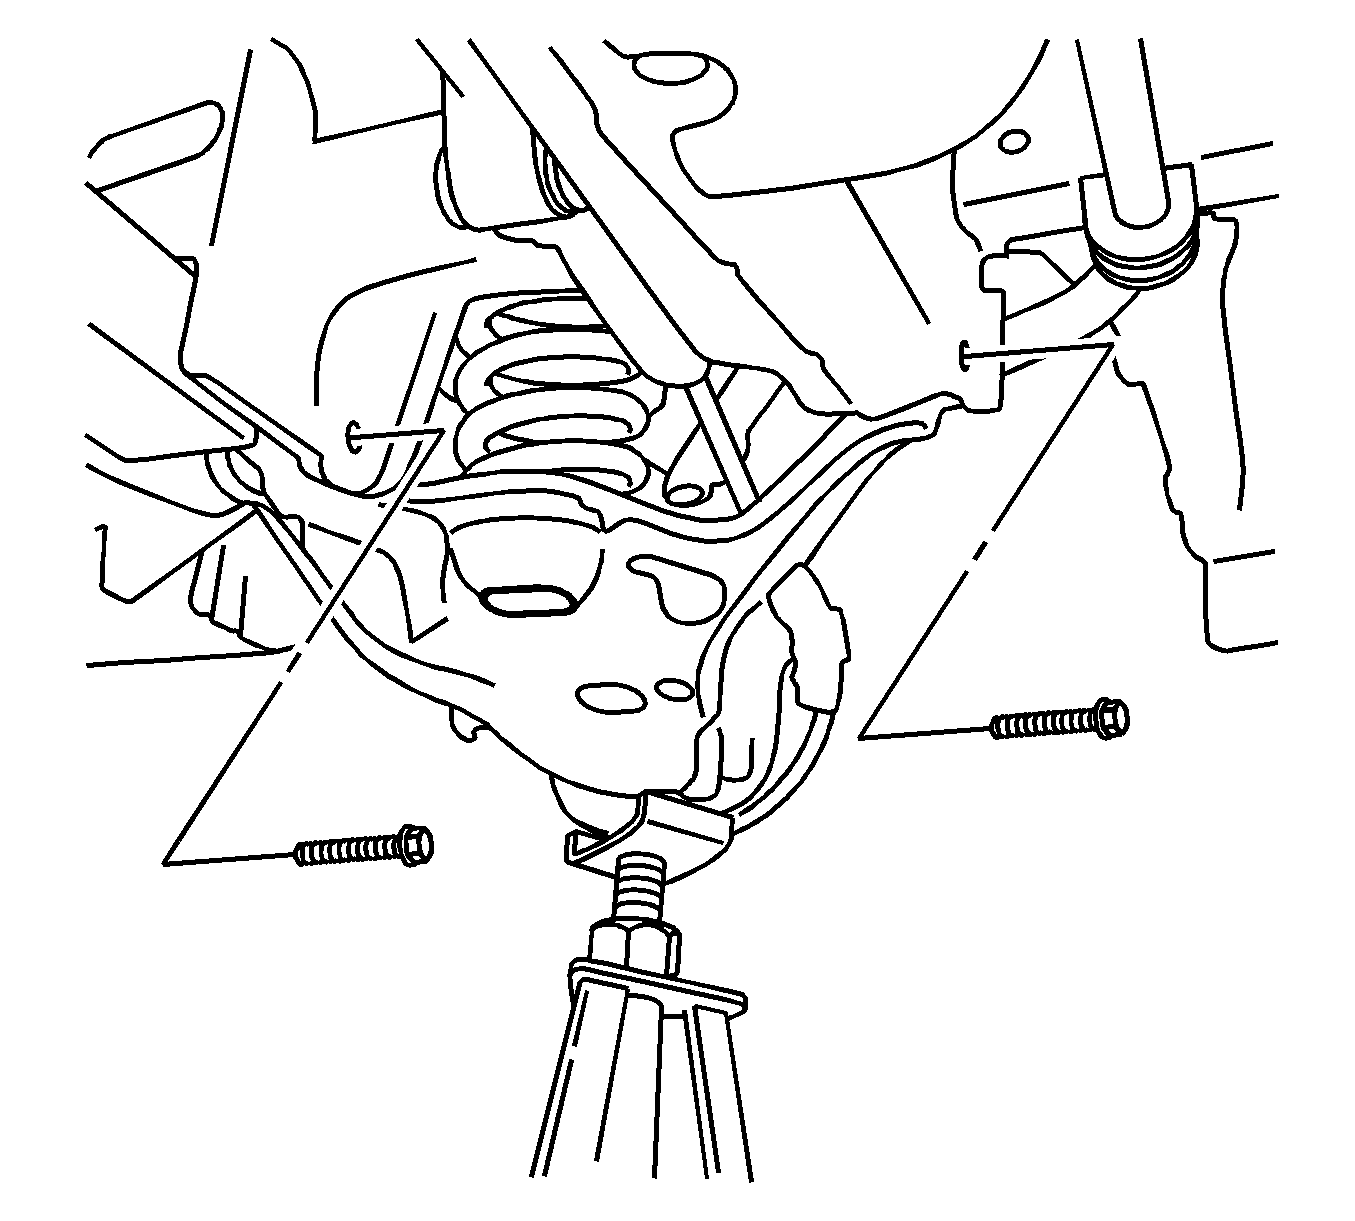
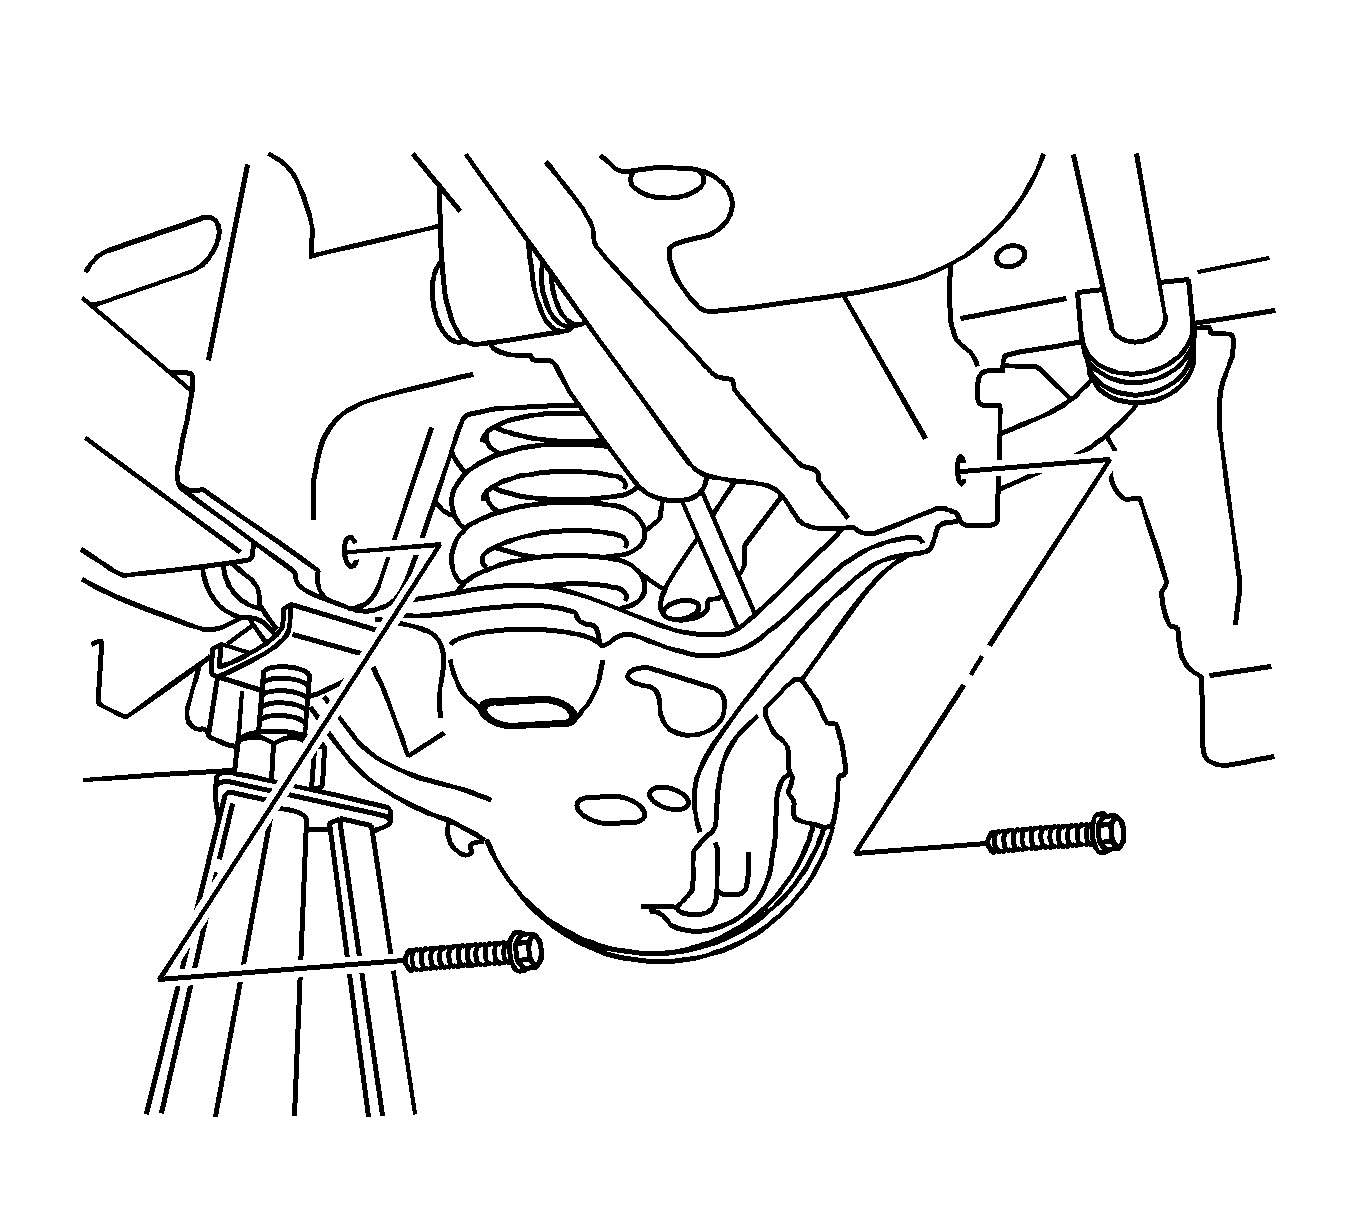
- Remove the lower control arm pivot bolt retaining nuts and washers.
- Remove the rear pivot bolt.
- Remove the front pivot bolt.
- Lower the lower control arm and remove the coil spring and insulator.
- Remove the OTC 7045-B coil spring compressor tool or equivalent from the coil spring.
- Remove the coil spring insulator from the coil spring.
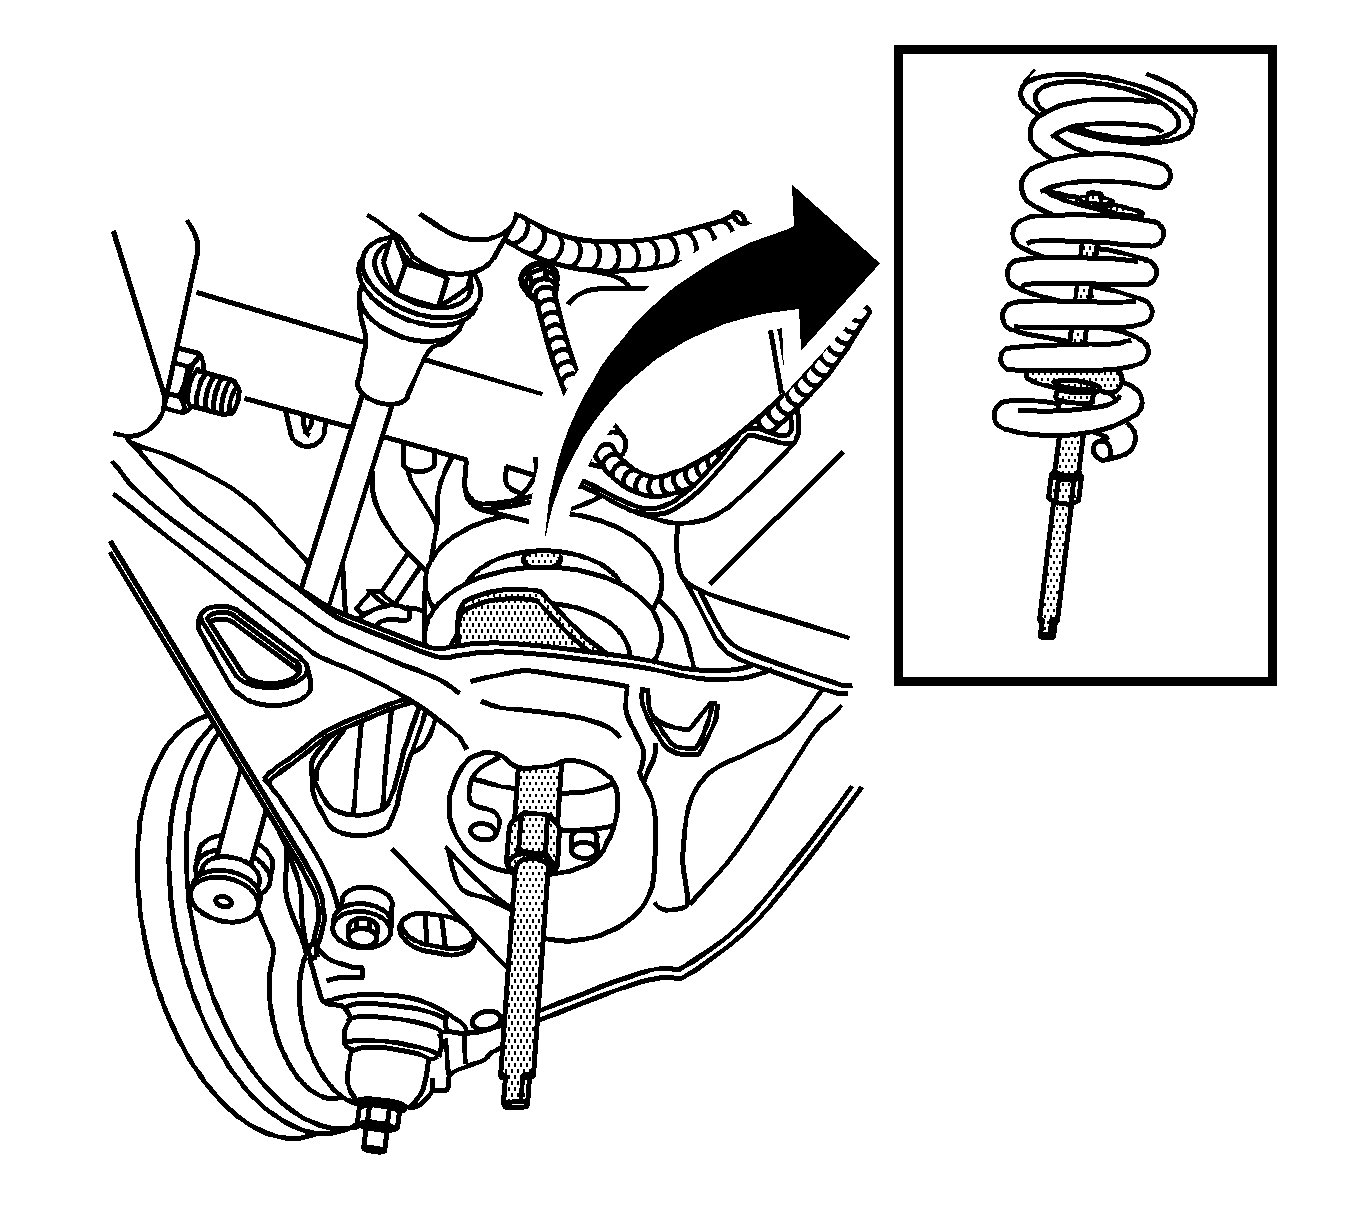
Important: After installing the OTC 7045-B and before compressing the coil spring, ensure the retaining pin is thoroughly seated in the slot of the upper plate. Failure to do so may deform the pin and make the removal of the tool from the coil spring difficult.
Installation Procedure
- Install the coil spring insulator to the coil spring.
- Install the OTC 7045-B coil spring compressor tool or equivalent to the coil spring and compress the coil spring.
- Install the coil spring and insulator to the lower control arm.
- Raise the lower control arm into position and place a suitable safety jack under the lower control arm rear leg near the bushing.
- Install the rear pivot bolt.
- Install the front pivot bolt.
- Install the lower control arm pivot bolt retaining nuts and washers.
- Remove the OTC 7045-B coil spring compressor tool or equivalent from the coil spring.
- Lower and remove the safety jacks.
- Install the front stabilizer shaft link. Refer to Stabilizer Shaft Replacement .
- Install the shock absorber. Refer to Shock Absorber Replacement .
- Install the tire and wheel. Refer to Tire and Wheel Removal and Installation .
- Lower the vehicle.
Important: The flat end of the coil spring and the upper insulator goes up into the shock tower and the pointed end of the coil spring goes on the lower control arm. Align coil spring so that end of the coil spring is seated in the pocket in the lower control arm.
Notice: Use the correct fastener in the correct location. Replacement fasteners must be the correct part number for that application. Fasteners requiring replacement or fasteners requiring the use of thread locking compound or sealant are identified in the service procedure. Do not use paints, lubricants, or corrosion inhibitors on fasteners or fastener joint surfaces unless specified. These coatings affect fastener torque and joint clamping force and may damage the fastener. Use the correct tightening sequence and specifications when installing fasteners in order to avoid damage to parts and systems.
Tighten
| • | W/O 14050/12300 GVW, tighten the nuts to 155 N·m (114 lb ft). |
| • | With 14050/12300 GVW, tighten the nuts to 240 N·m (177 lb ft). |
| • | With Diesel Engine, tighten the nuts to 240 N·m (177 lb ft). |
