For 1990-2009 cars only
Removal Procedure
- Raise and suitably support the vehicle. Refer to Lifting and Jacking the Vehicle .
- Clean the evaporative emission (EVAP) pipe connections and the surrounding areas prior to disconnecting the lines in order to avoid possible contamination of the EVAP system.
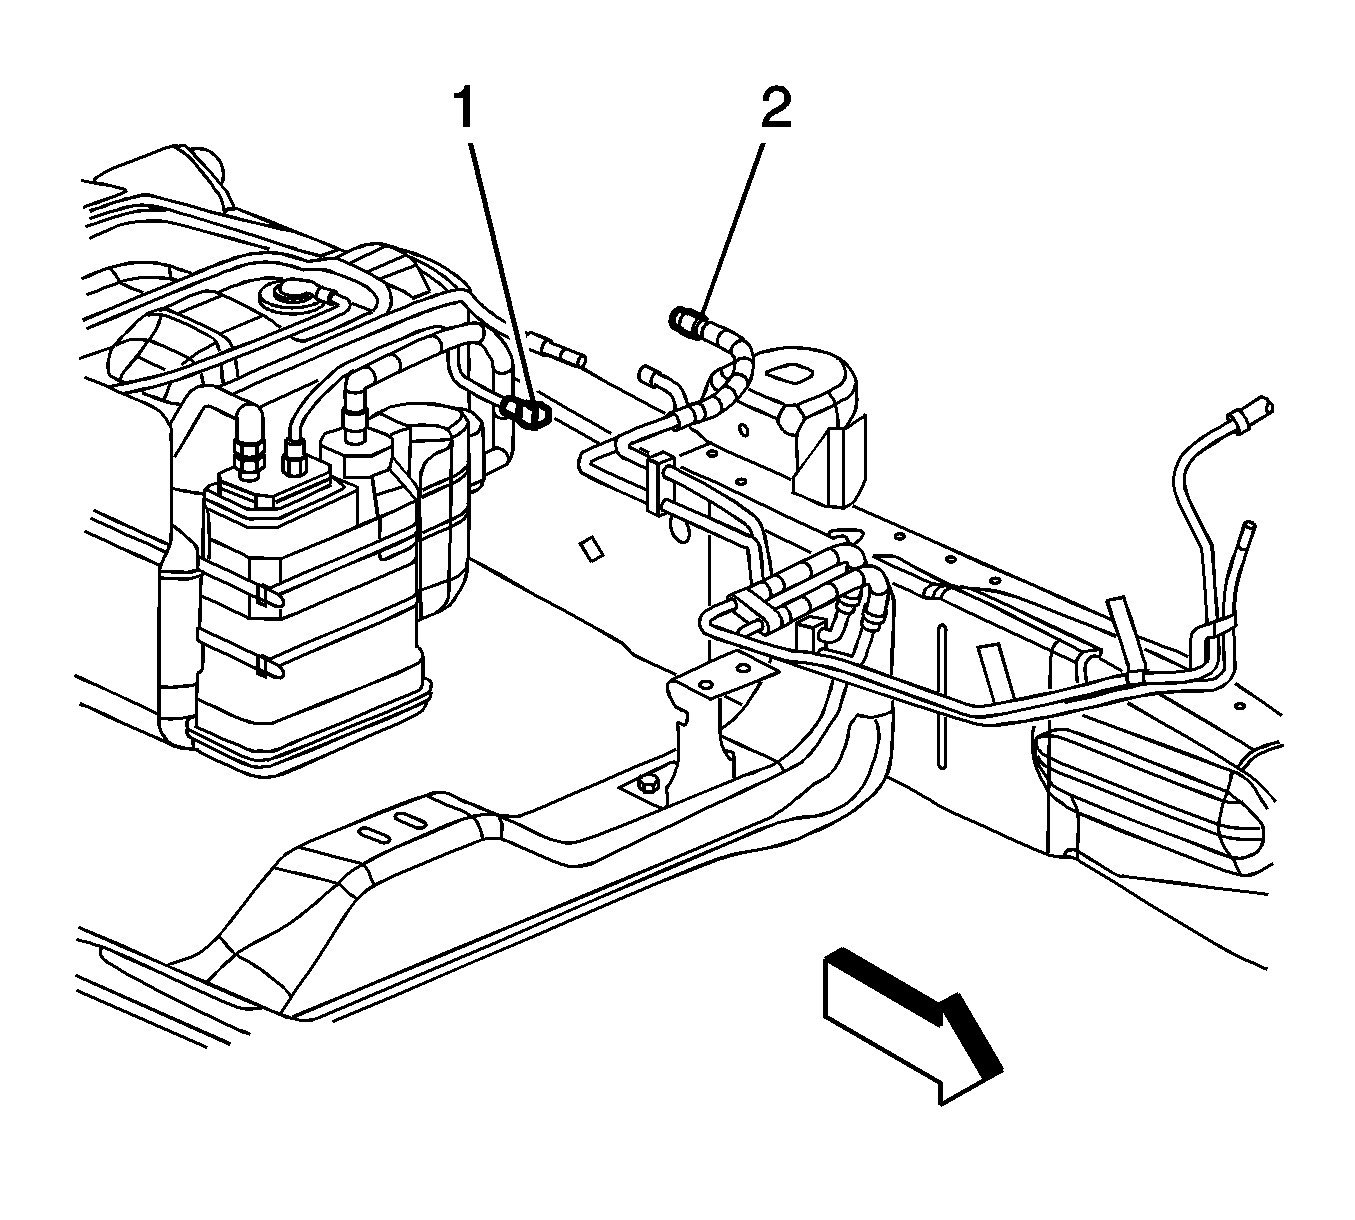
- Disconnect the EVAP canister purge pipe quick connect fitting (1) from the chassis EVAP pipe. Refer to Plastic Collar Quick Connect Fitting Service .
- Remove the fuel tank EVAP pipe from the tank clip and reposition the pipe out of the way.
- Disconnect the chassis wiring harness electrical connector from the evaporative emission (EVAP) canister vent solenoid valve .
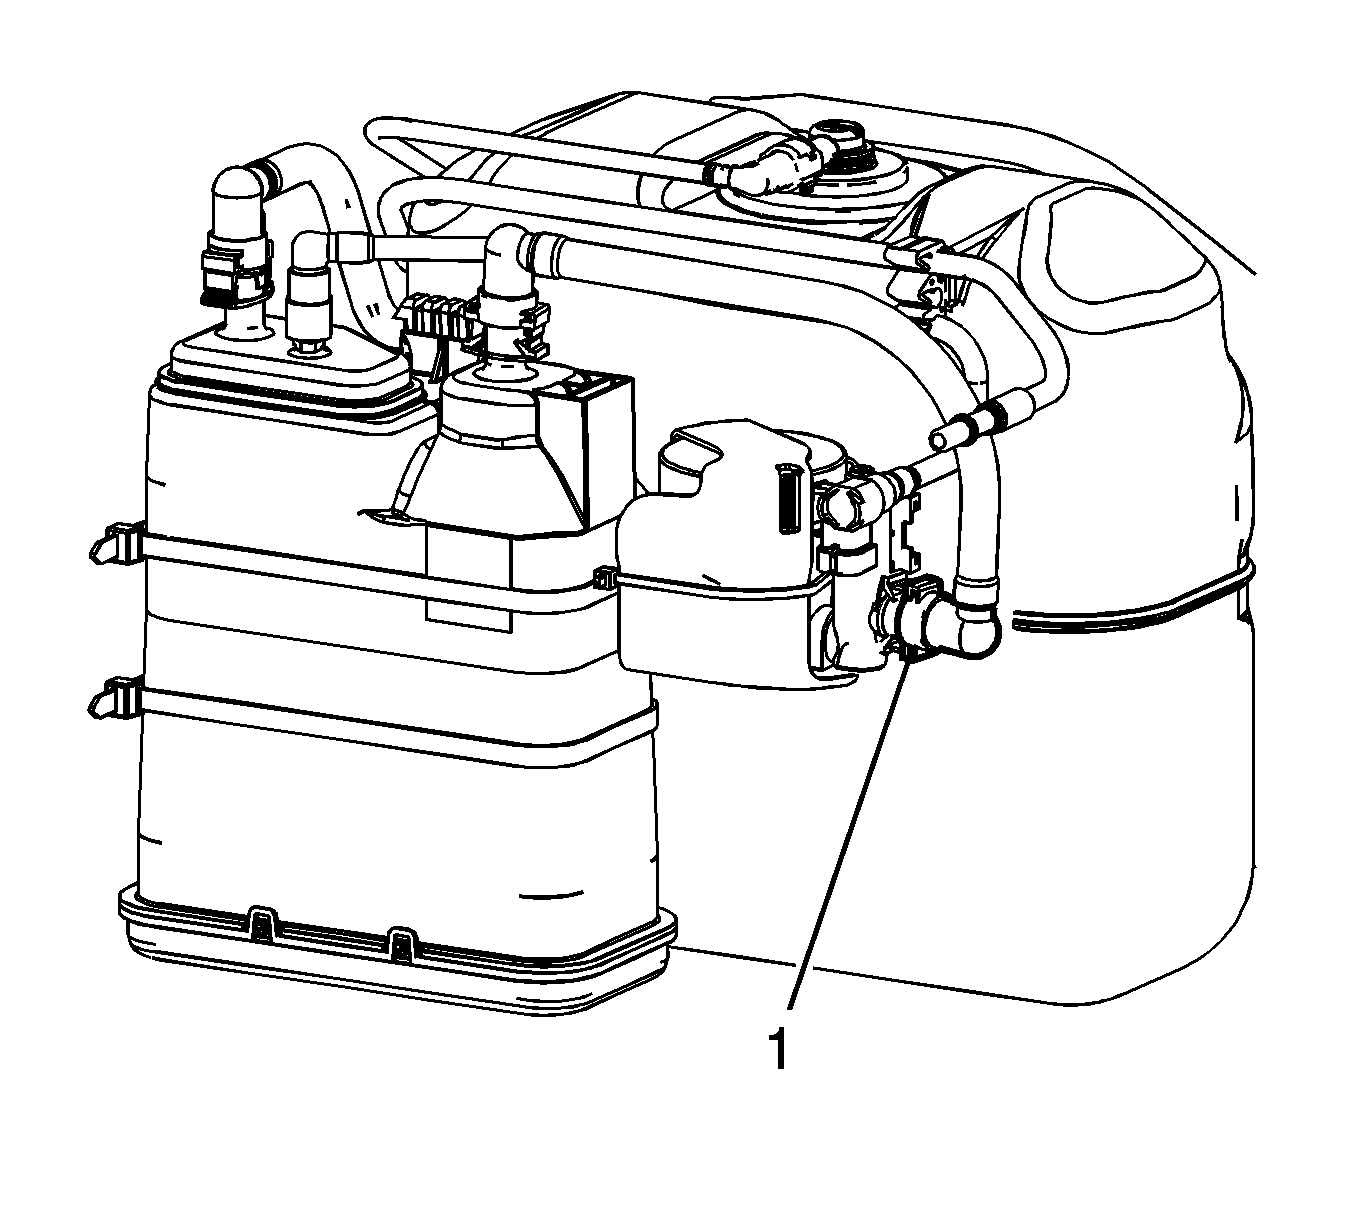
- Disconnect the EVAP canister vent pipe quick connect fitting (1) from the EVAP canister vent solenoid valve. Refer to Plastic Collar Quick Connect Fitting Service .
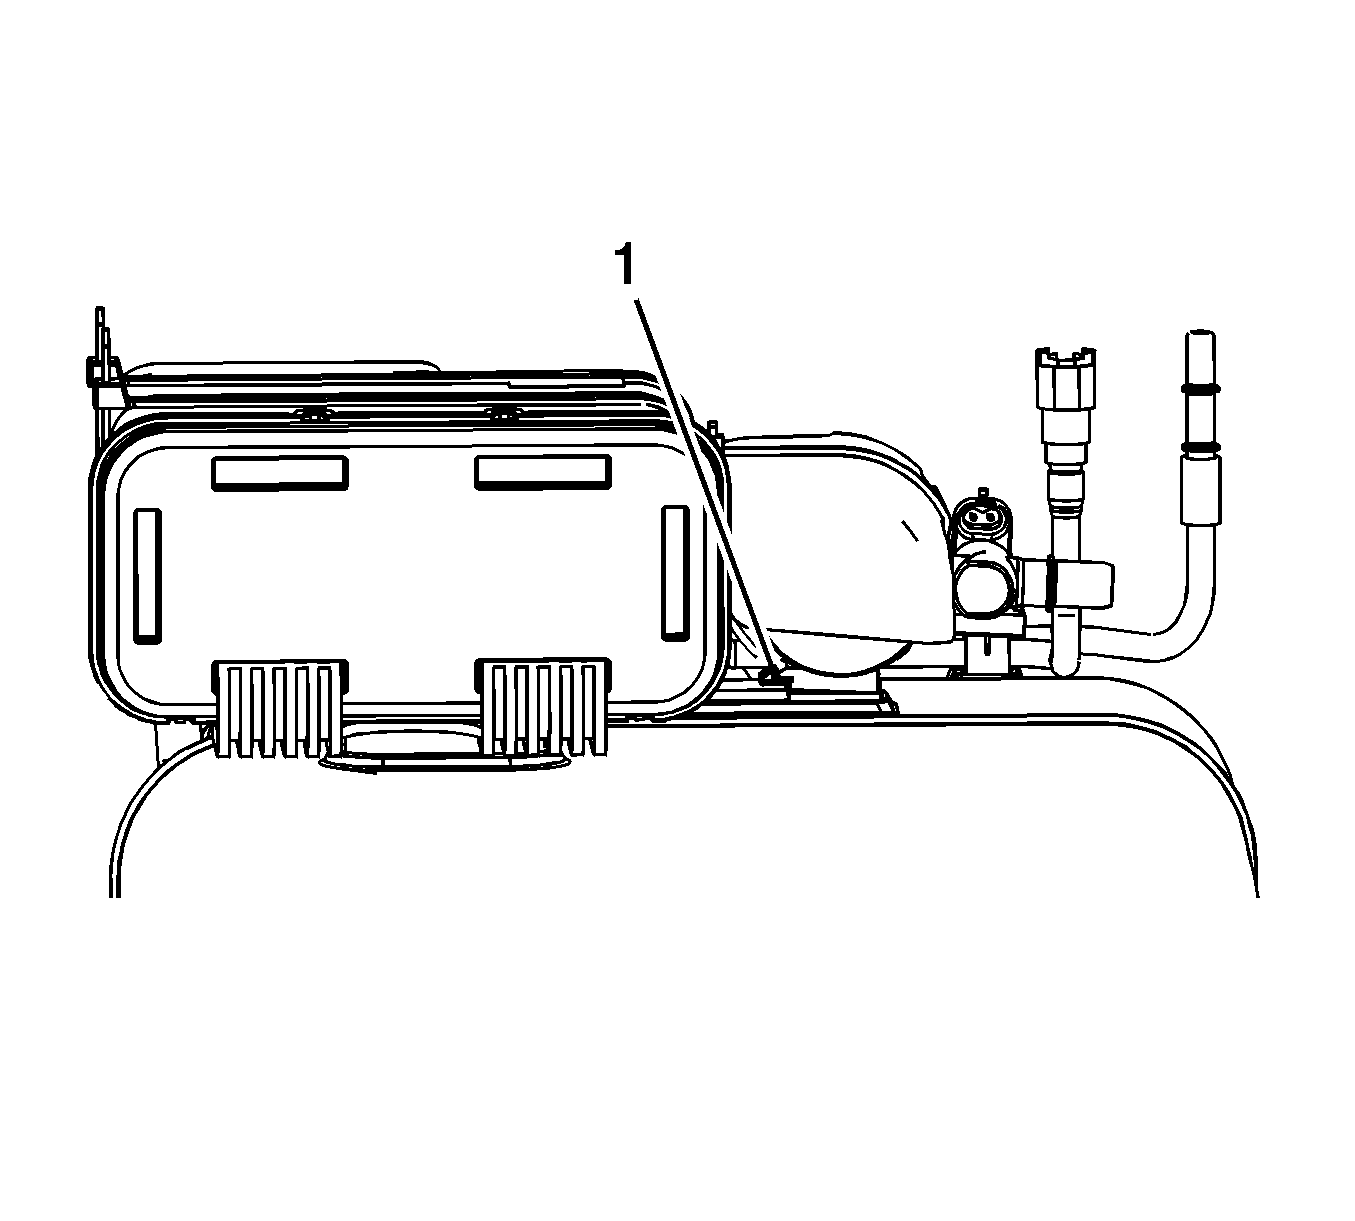
- Using a flat bladed tool, disengage the EVAP canister vent solenoid valve retainer (1).
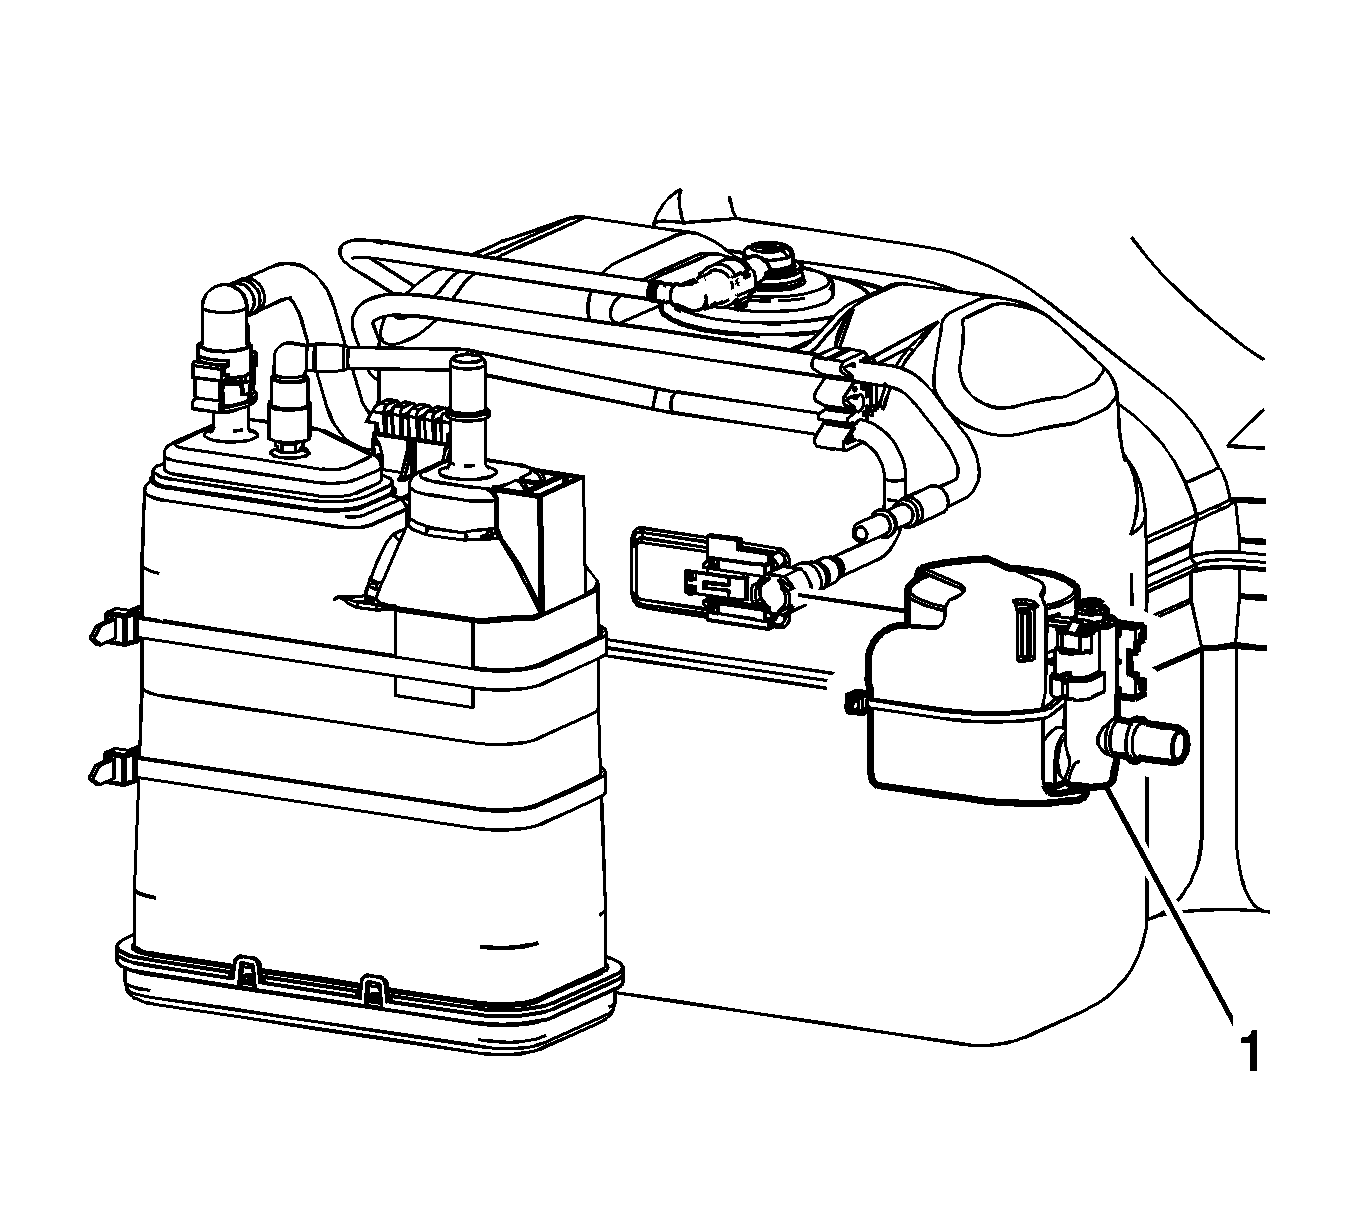
- Slide the EVAP canister vent solenoid valve (1) off of the fuel tank bracket.
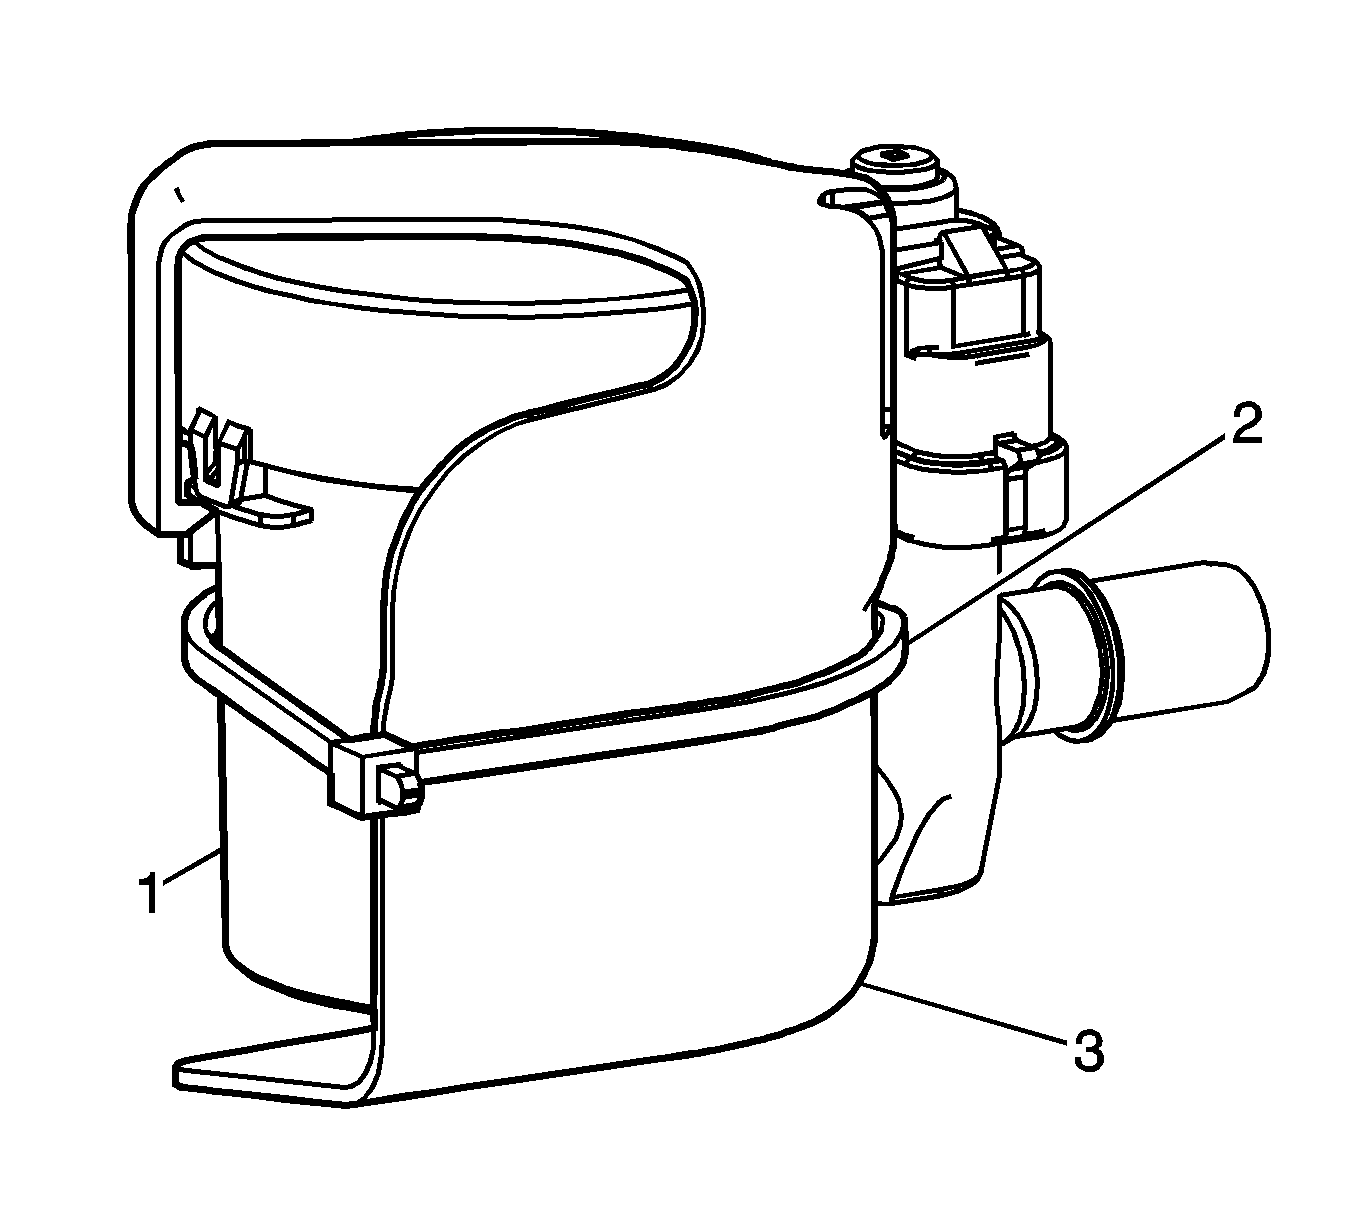
- Cut the tie strap (2) securing the EVAP canister vent solenoid valve shield to the valve.
- Disengage the shield retainer (1) and remove the shield (3) from the valve.
Installation Procedure
- Install the shield (3) to the EVAP canister vent solenoid valve, ensure the shield retainer (1) is engaged.
- Install a NEW tie strap (2) in order to secure the shield to the valve.
- Slide the EVAP canister vent solenoid valve (1) onto of the fuel tank bracket.
- Ensure that the EVAP canister vent solenoid valve engages the retainer (1).
- Connect the EVAP canister vent pipe quick connect fitting (1) to the EVAP canister vent solenoid valve. Refer to Plastic Collar Quick Connect Fitting Service .
- Connect the chassis wiring harness electrical connector to the EVAP canister vent solenoid valve .
- Position and install the fuel tank EVAP pipe to the tank clip.
- Connect the EVAP canister purge pipe quick connect fitting (1) to the chassis EVAP pipe. Refer to Plastic Collar Quick Connect Fitting Service .
- Lower the vehicle.


