For 1990-2009 cars only
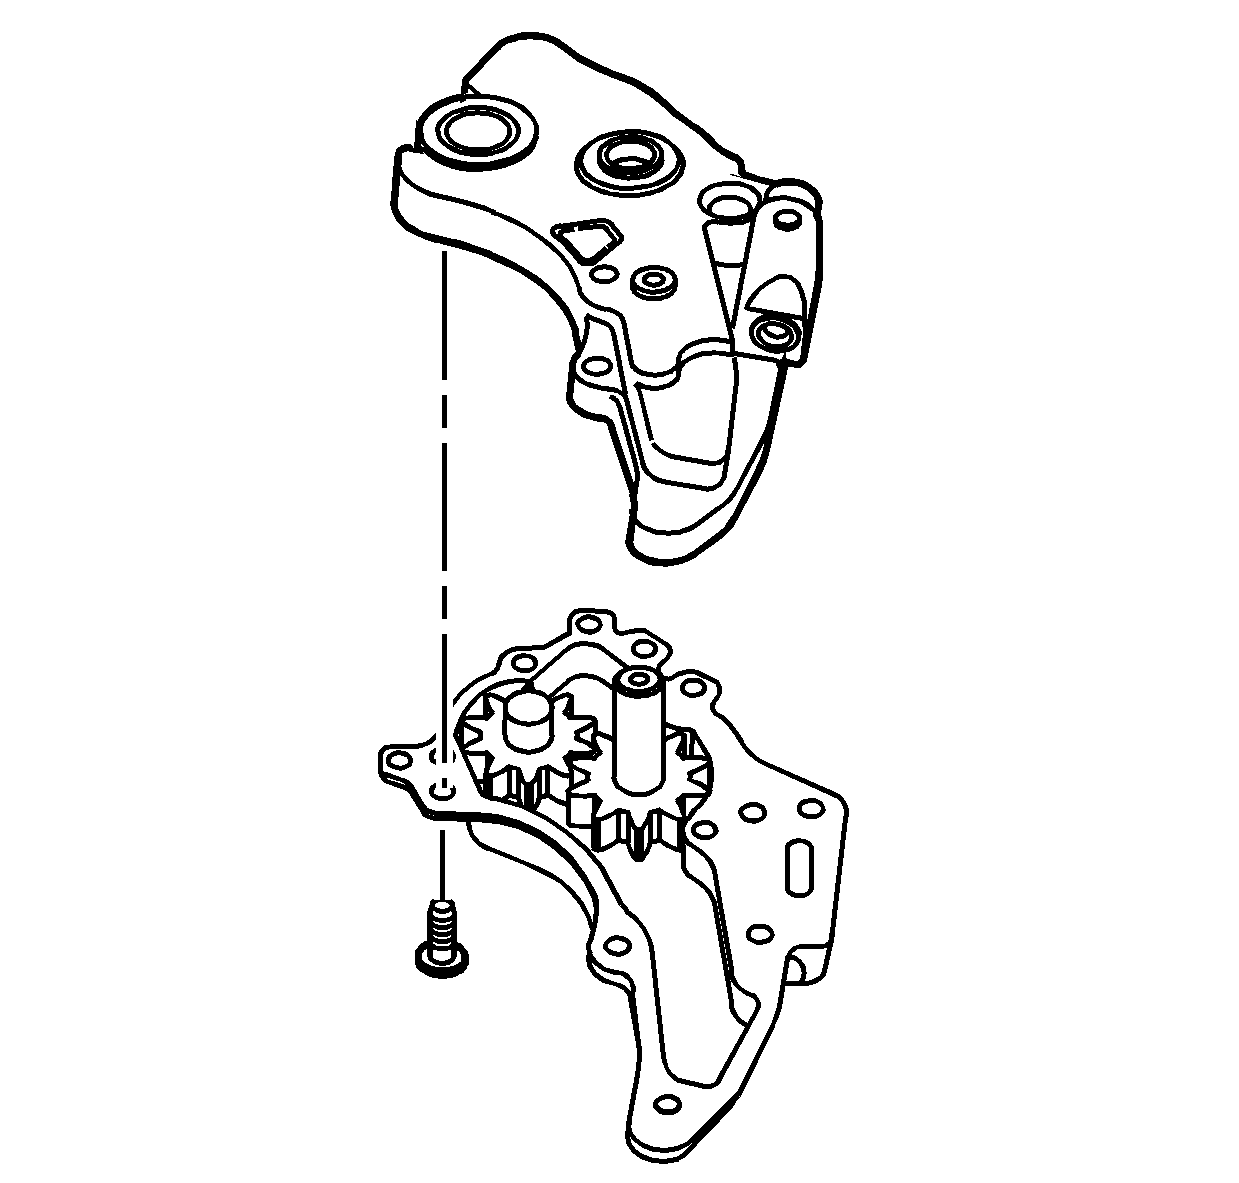
- Remove the oil pump gear cover bolts.
- Remove the oil pump gear cover.
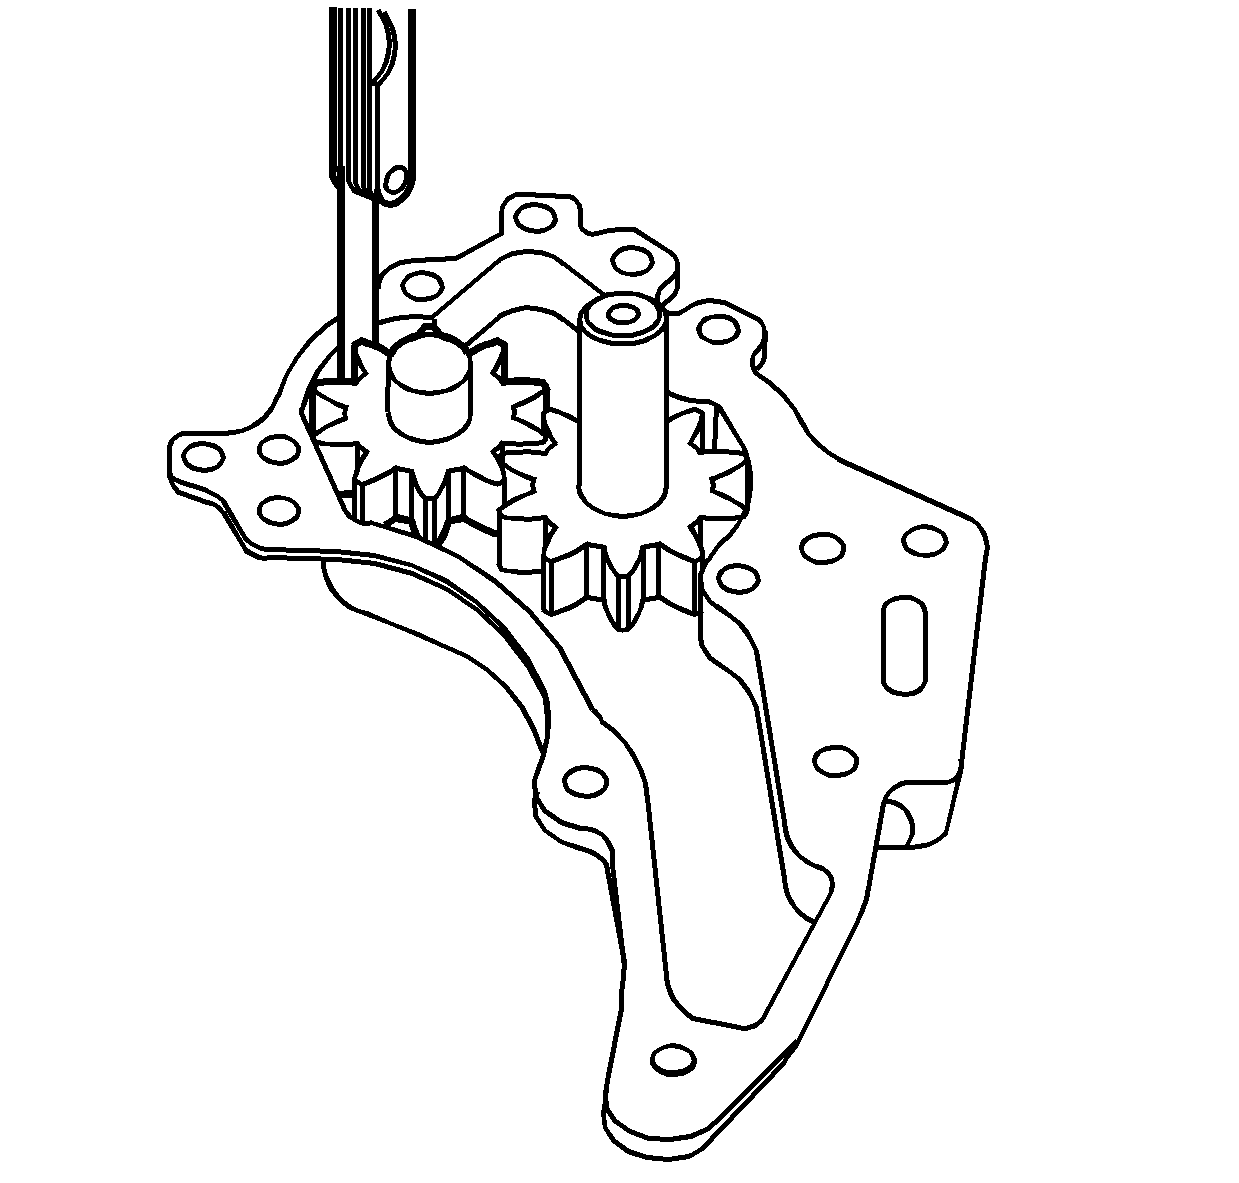
- Use a feeler gauge to measure the clearance between the gear teeth and the oil pump housing. The production clearance is 0.125-0.221 mm (0.0049-0.0087 in) and the service limit is 0.221 mm (0.0087 in).
- Replace the oil pump assembly if the clearance exceeds the service limit.
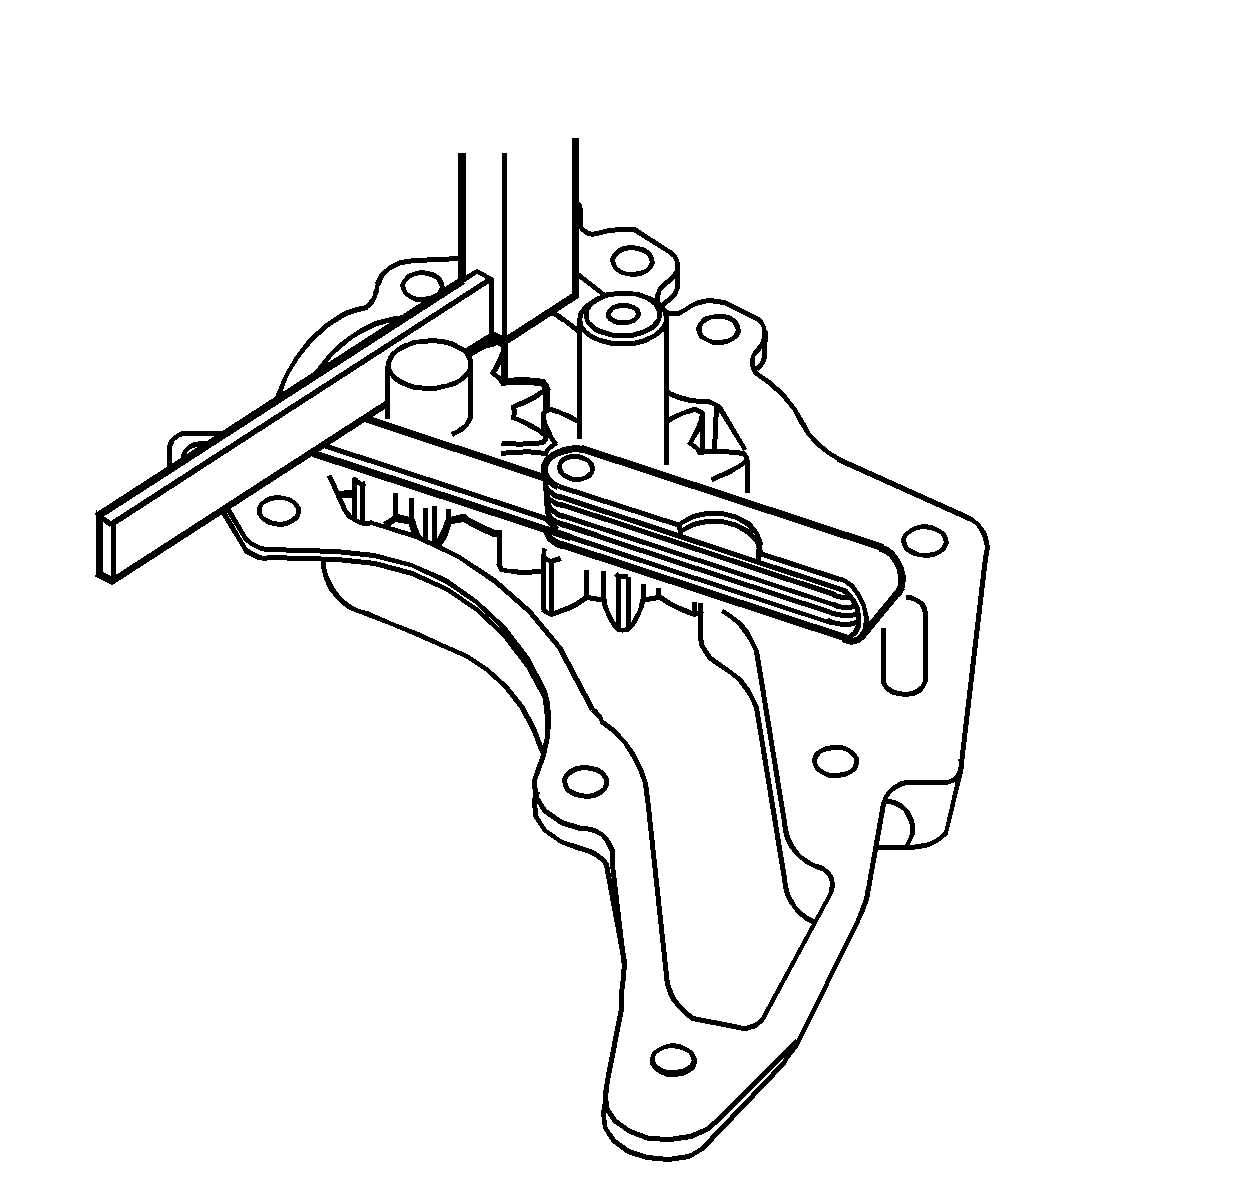
- Use a feeler gauge and a straightedge to measure the clearance between the side of the gear and the cover. The production clearance is 0.064-0.109 mm (0.0025-0.0043 in) and the service limit is 0.109 mm (0.0043 in).
- Replace the oil pump assembly if the clearance exceeds the service limit.
- Calculate the driven gear shaft to bushing clearance.
- Replace the oil pump assembly if the clearance exceeds the service limit.
- Install the oil pump gear cover to the oil pump assembly.
- Install the oil pump gear cover bolts and tighten to 21 N·m (15 lb ft).
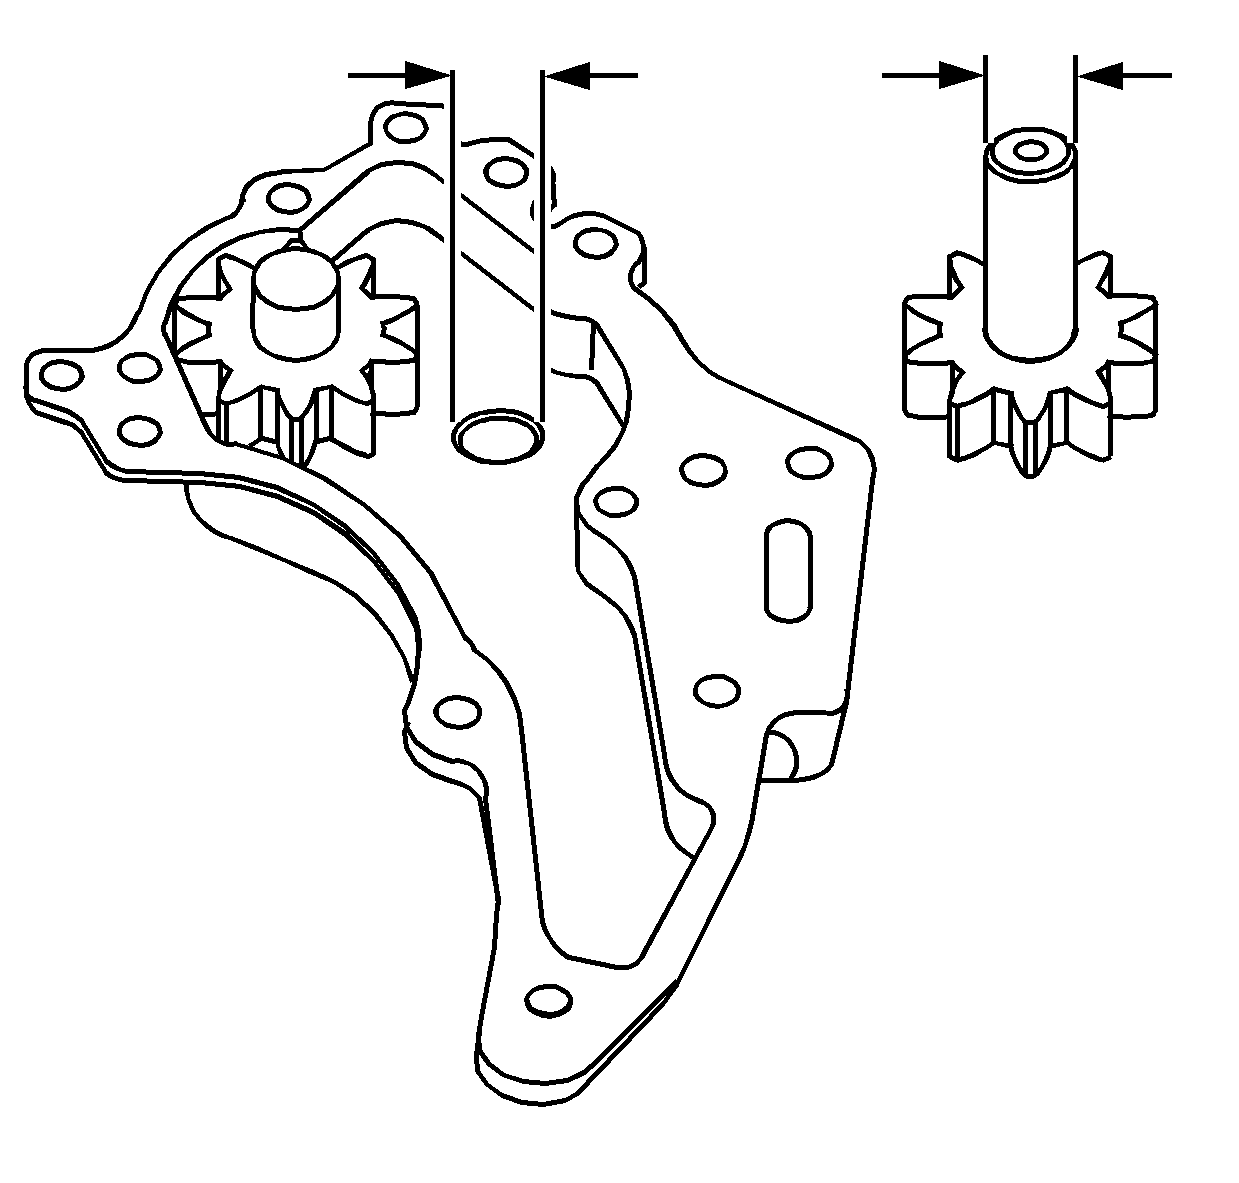
| 7.1. | Measure the driven gear shaft outside diameter. The production specification is 19.947-19.960 mm (0.7853-0.7858 in) and the service limit is 19.86 mm (0.7819 in). |
| 7.2. | Measure the driven gear bushing inside diameter. The production value is 20 mm (0.7874 in). |
| 7.3. | Calculate the driven gear shaft to bushing clearance. The service limit is 0.14 mm (0.0055 in) |

Caution: Refer to Fastener Caution in the Preface section.
