For 1990-2009 cars only
Battery Positive Cable Replacement With LMM Primary
Removal Procedure
- Disconnect the negative battery cable. Refer to Battery Negative Cable Disconnection and Connection .
- Disconnect the positive battery cable from the battery.
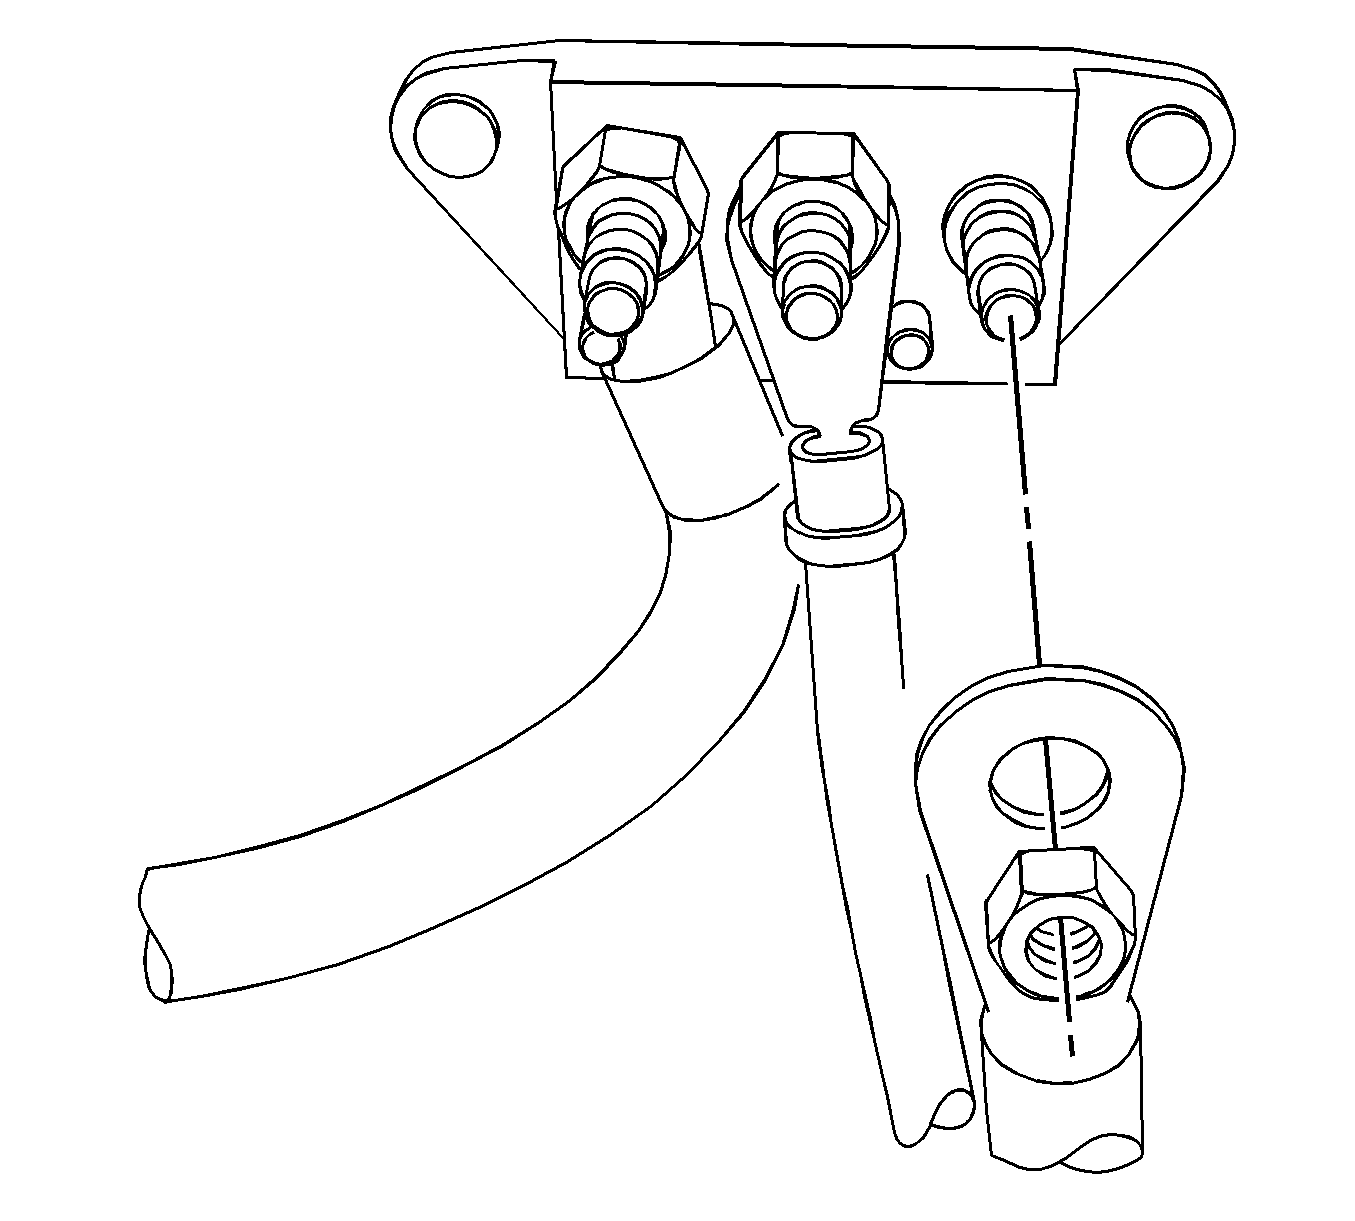
- Remove the positive cable nut from the junction block and disconnect the cable.
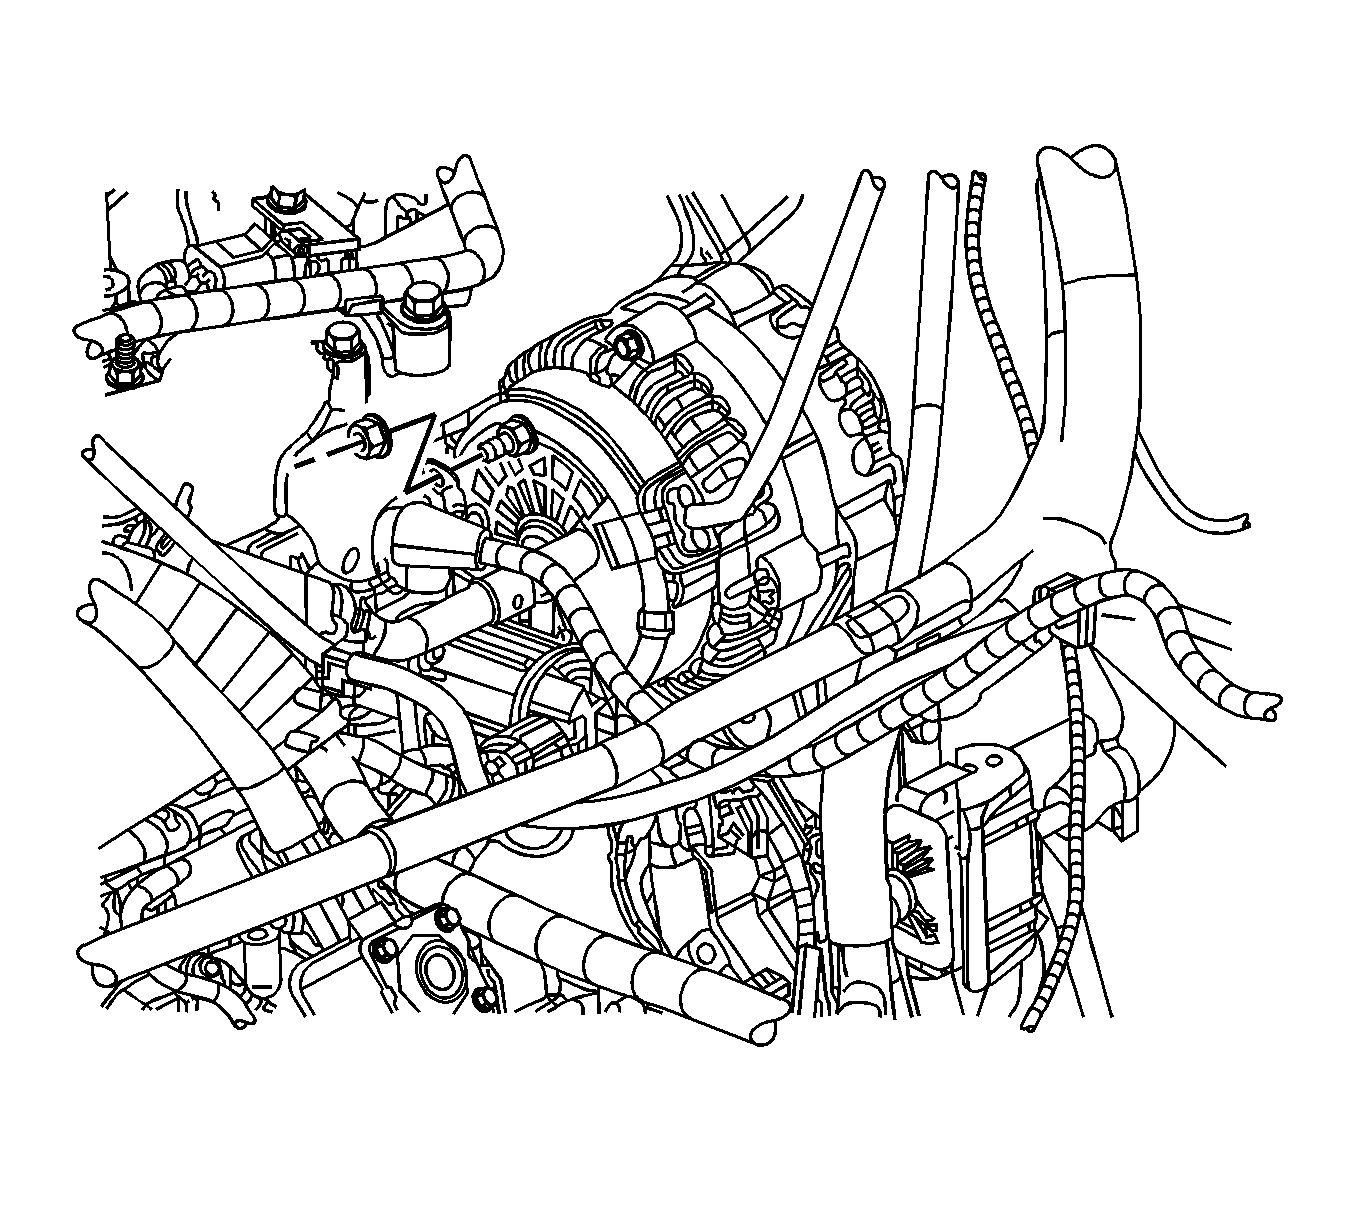
- Remove the positive cable nut from the generator and disconnect the cable .
- Remove the engine cover. Refer to Engine Cover Replacement .
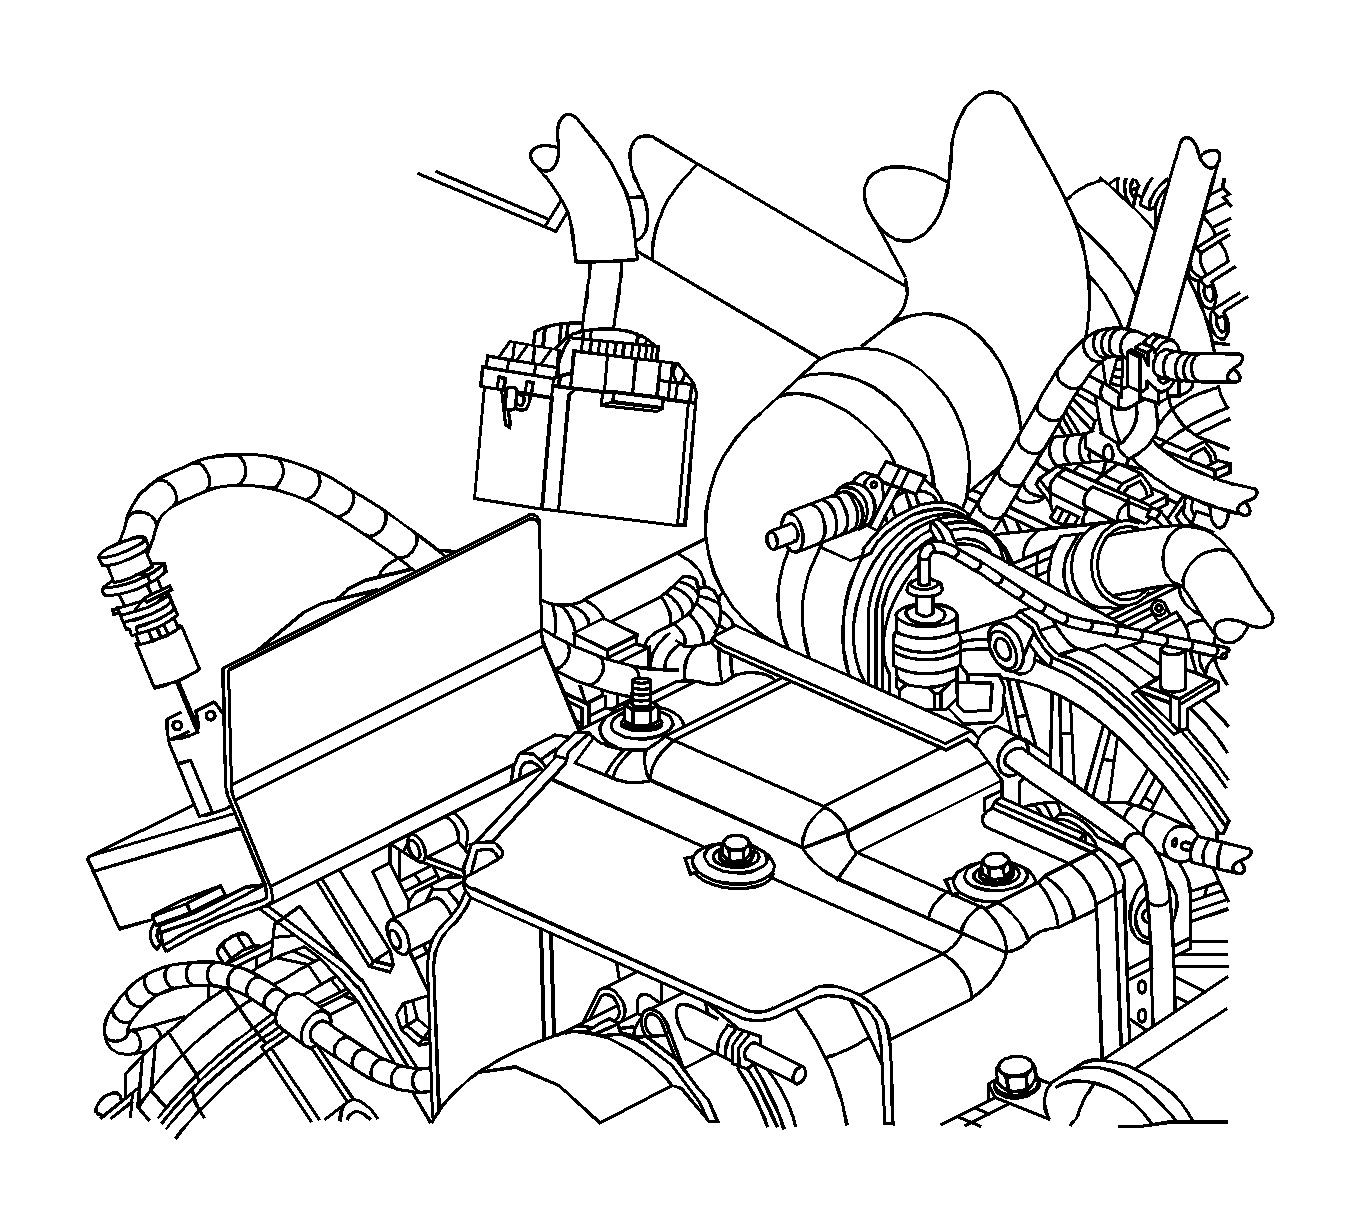
- Disconnect the wiring harness clips and the positive cable from the glow plug module.
- Remove the battery positive cable from the engine harness clip.
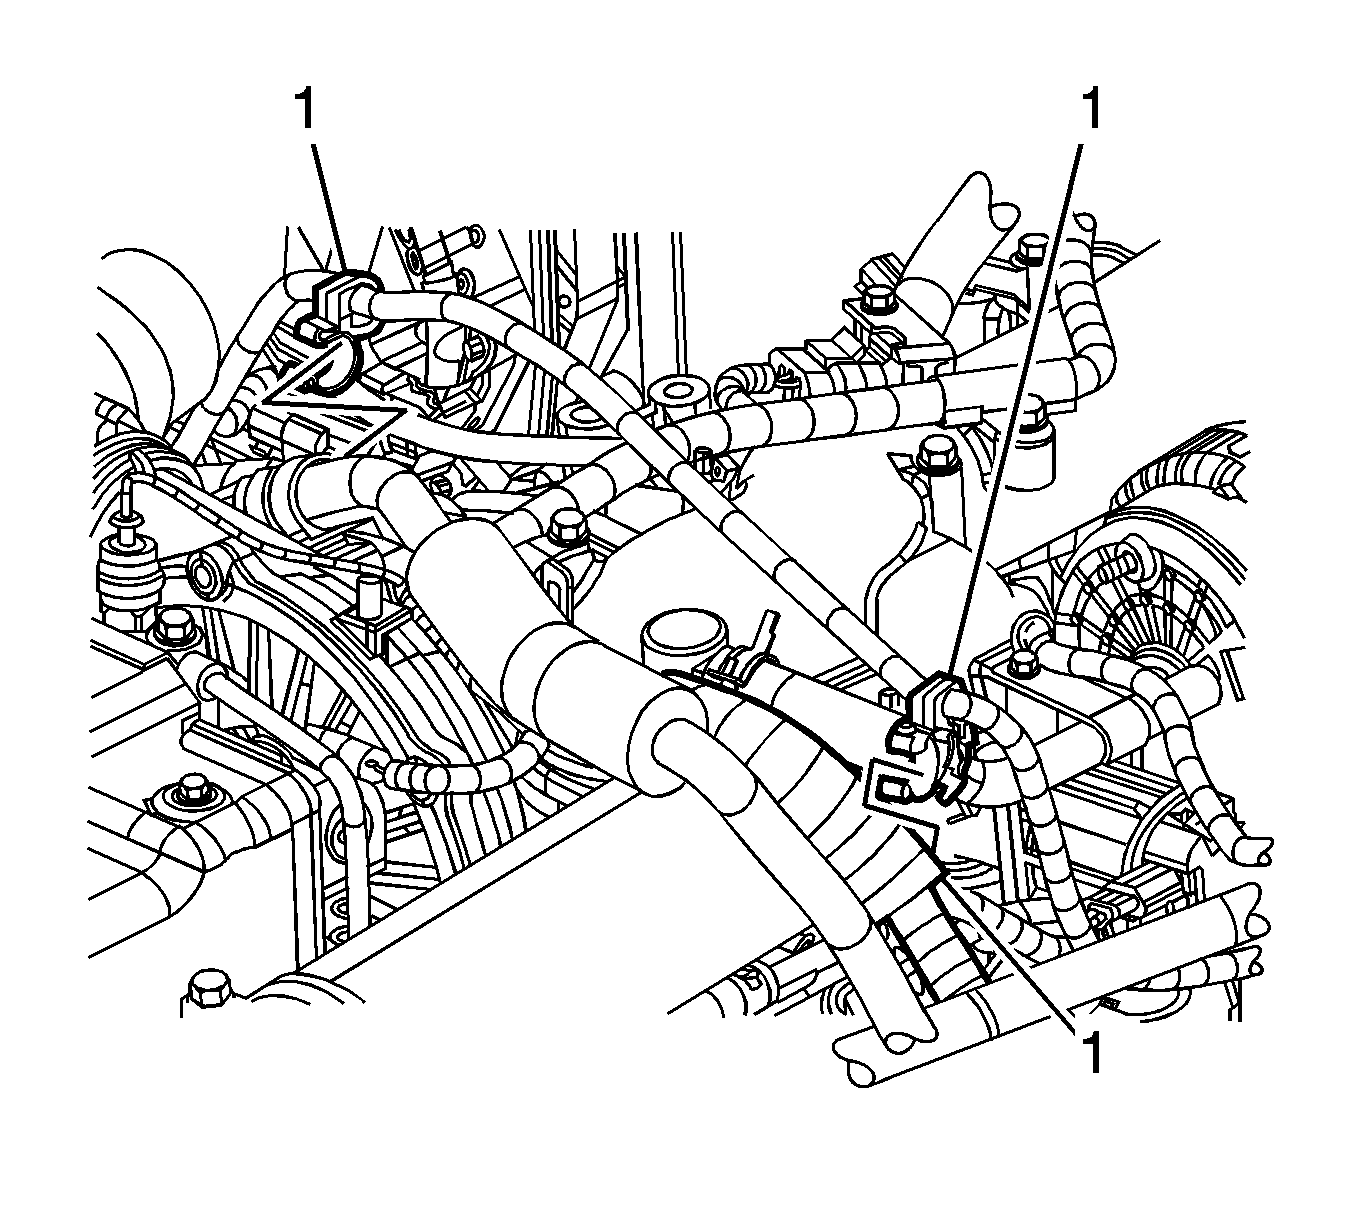
- Remove the battery positive cable from the engine harness clips (1).
- Raise the vehicle. Refer to Lifting and Jacking the Vehicle .
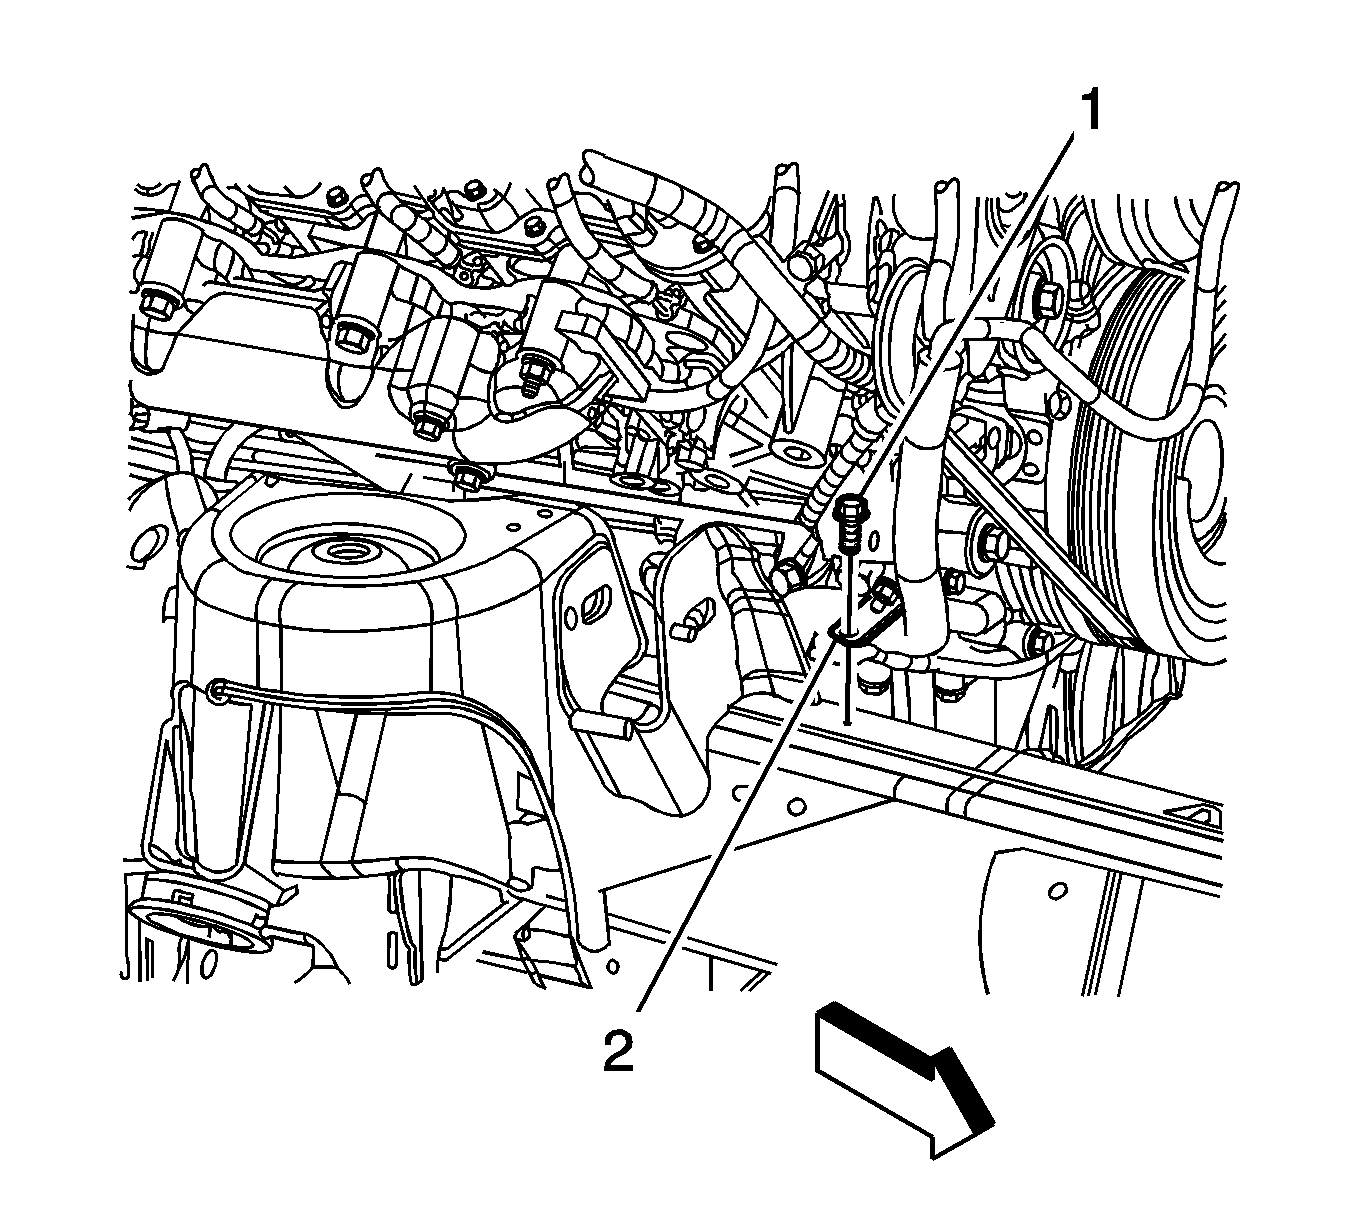
- Remove the battery positive cable bolt (1) and clip (2) from the frame.
- Remove the battery positive cable retaining clip from the transmission line bracket.
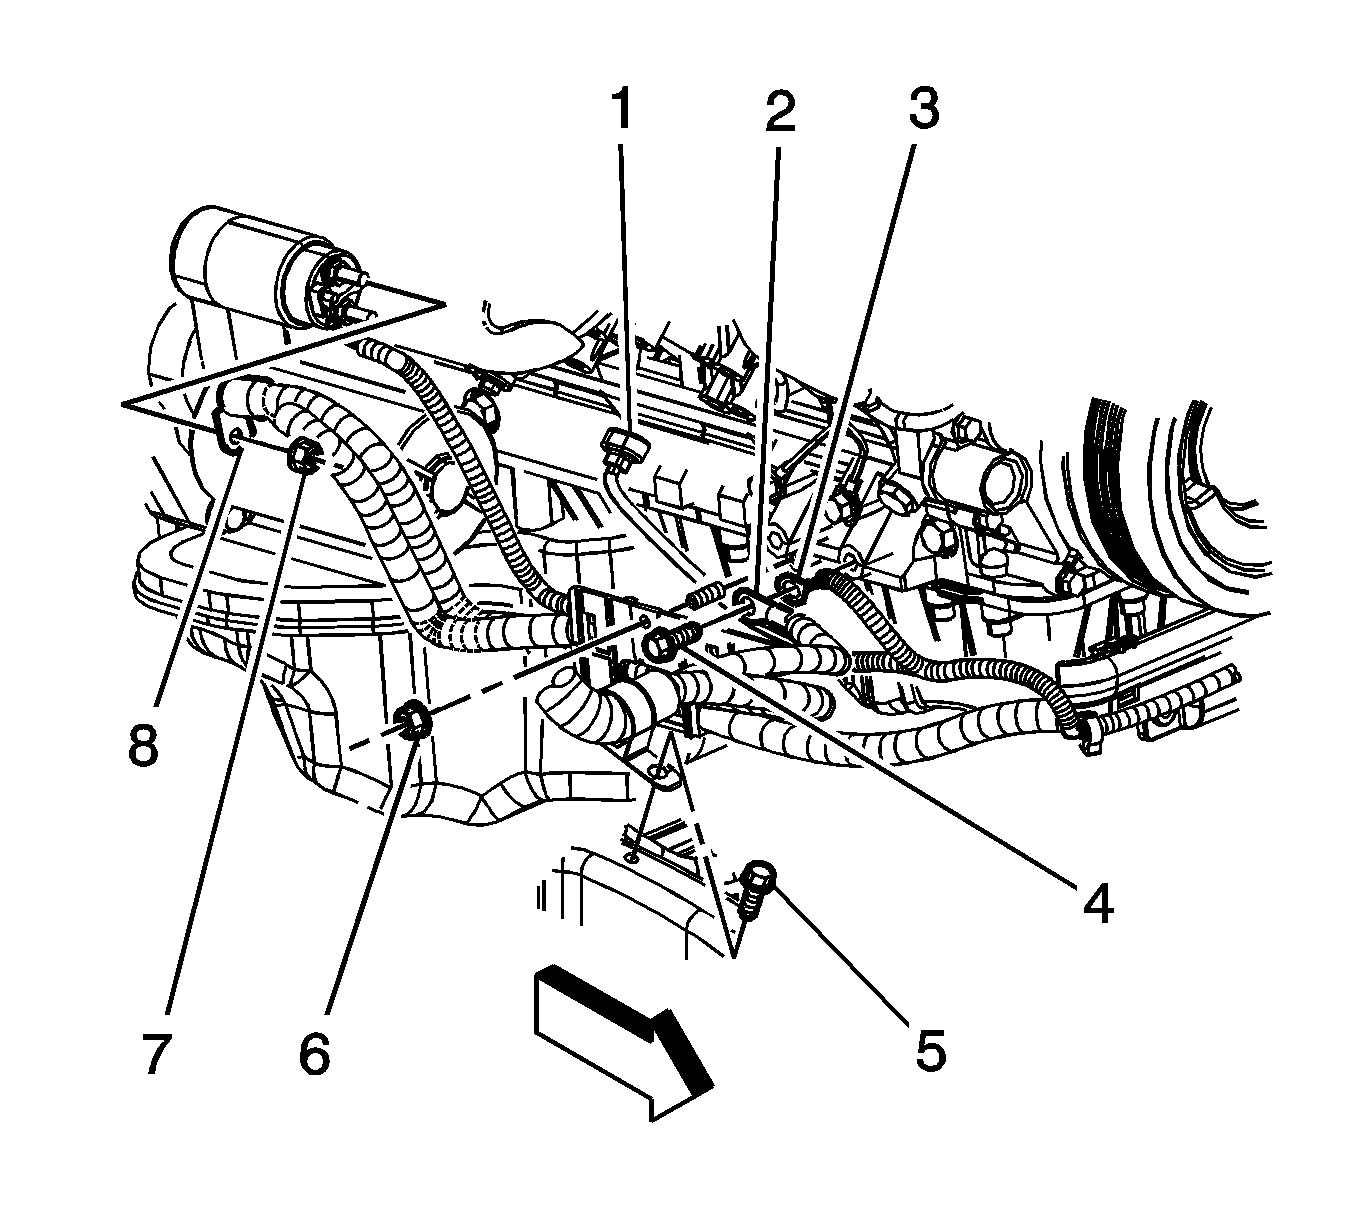
- Remove the positive battery cable nut (7) from the starter and disconnect the cable (8).
- Remove the positive battery cable.
Installation Procedure
- Position the positive cable to the vehicle using the same cable routing as in removal.
- Position the positive cable (8) to the starter and install the nut (7) and tighten to 10 N·m (89 lb in) .
- Install the positive cable retaining clip to the transmission line bracket.
- Install the battery positive cable nut (1) and clip (2) to the frame.
- Lower the vehicle.
- Install the positive cable to engine harness clips (1).
- Install the positive cable to the engine harness clip.
- Connect the positive cable to the glow plug module and connect the wiring harness clips.
- Install the engine cover. Refer to Engine Cover Replacement .
- Install the positive battery cable to the generator and tighten the nut 10 N·m (89 lb in) .
- Install the positive cable to the junction block and tighten the nut to 8 N·m (71 lb in) .
- Connect the positive cable to the battery and tighten the terminal to 14 N·m (123 lb in) .
- Connect the negative battery cable. Refer to Battery Negative Cable Disconnection and Connection .
Caution: Refer to Fastener Caution in the Preface section.


Battery Positive Cable Replacement With LMM Auxiliary
Removal Procedure
Warning: Refer to Battery Disconnect Warning in the Preface section.
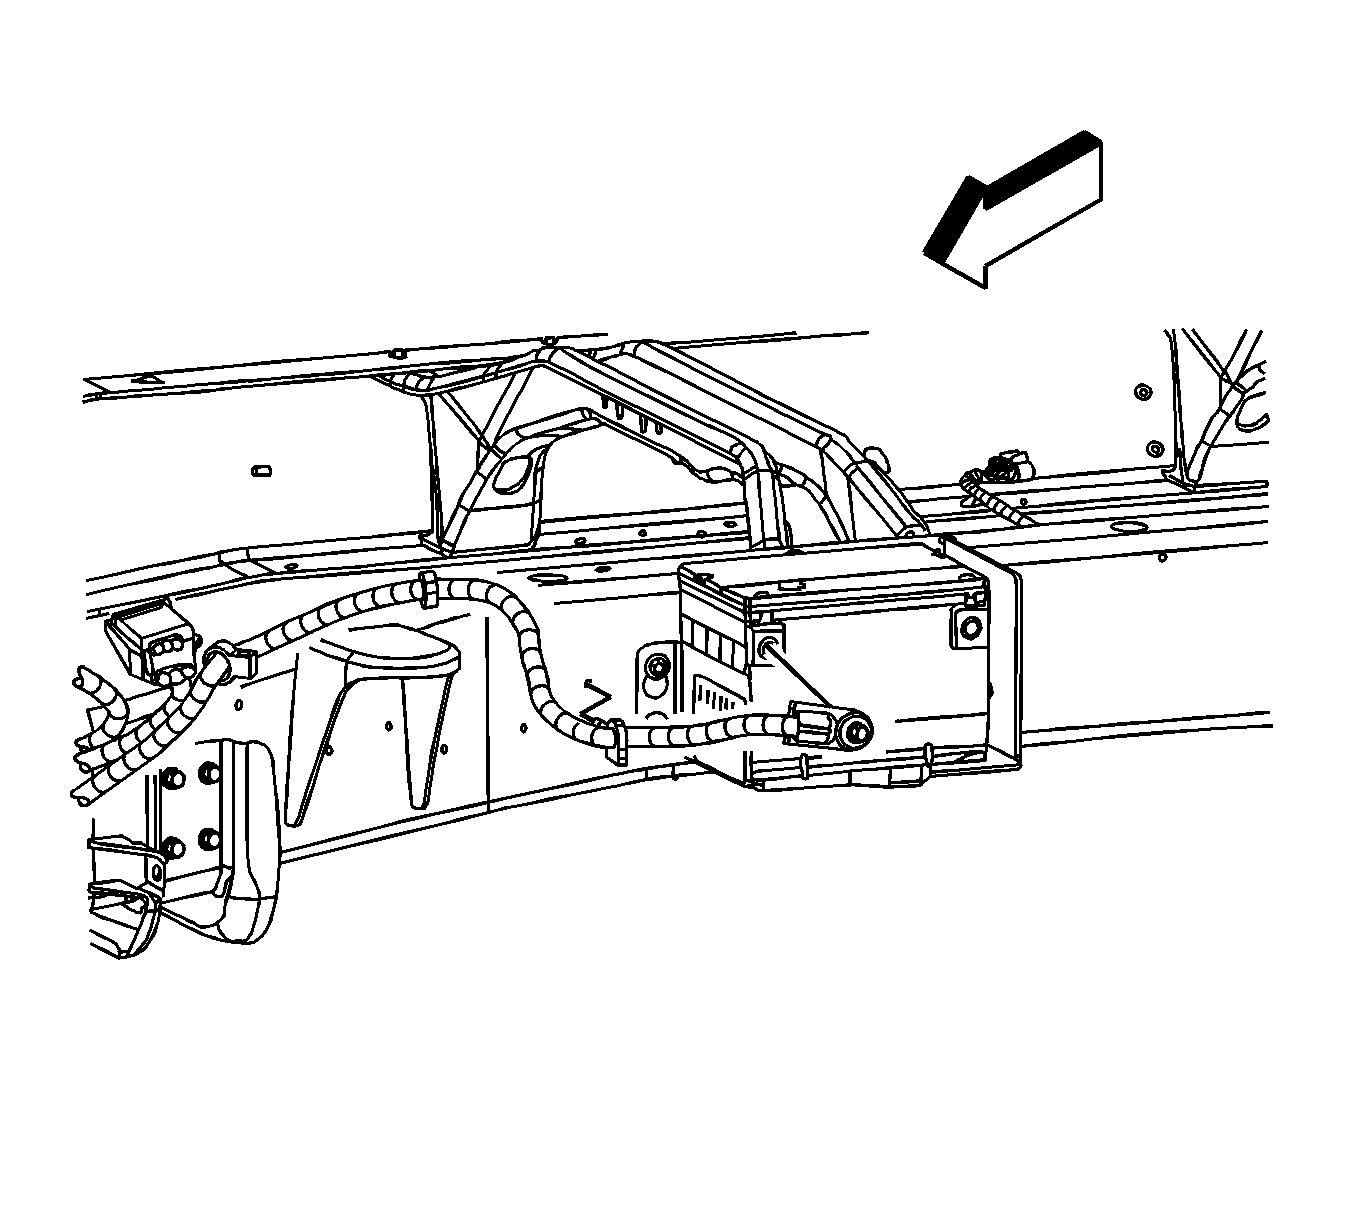
- Disconnect the auxiliary battery negative cable. Refer to Battery Negative Cable Disconnection and Connection.
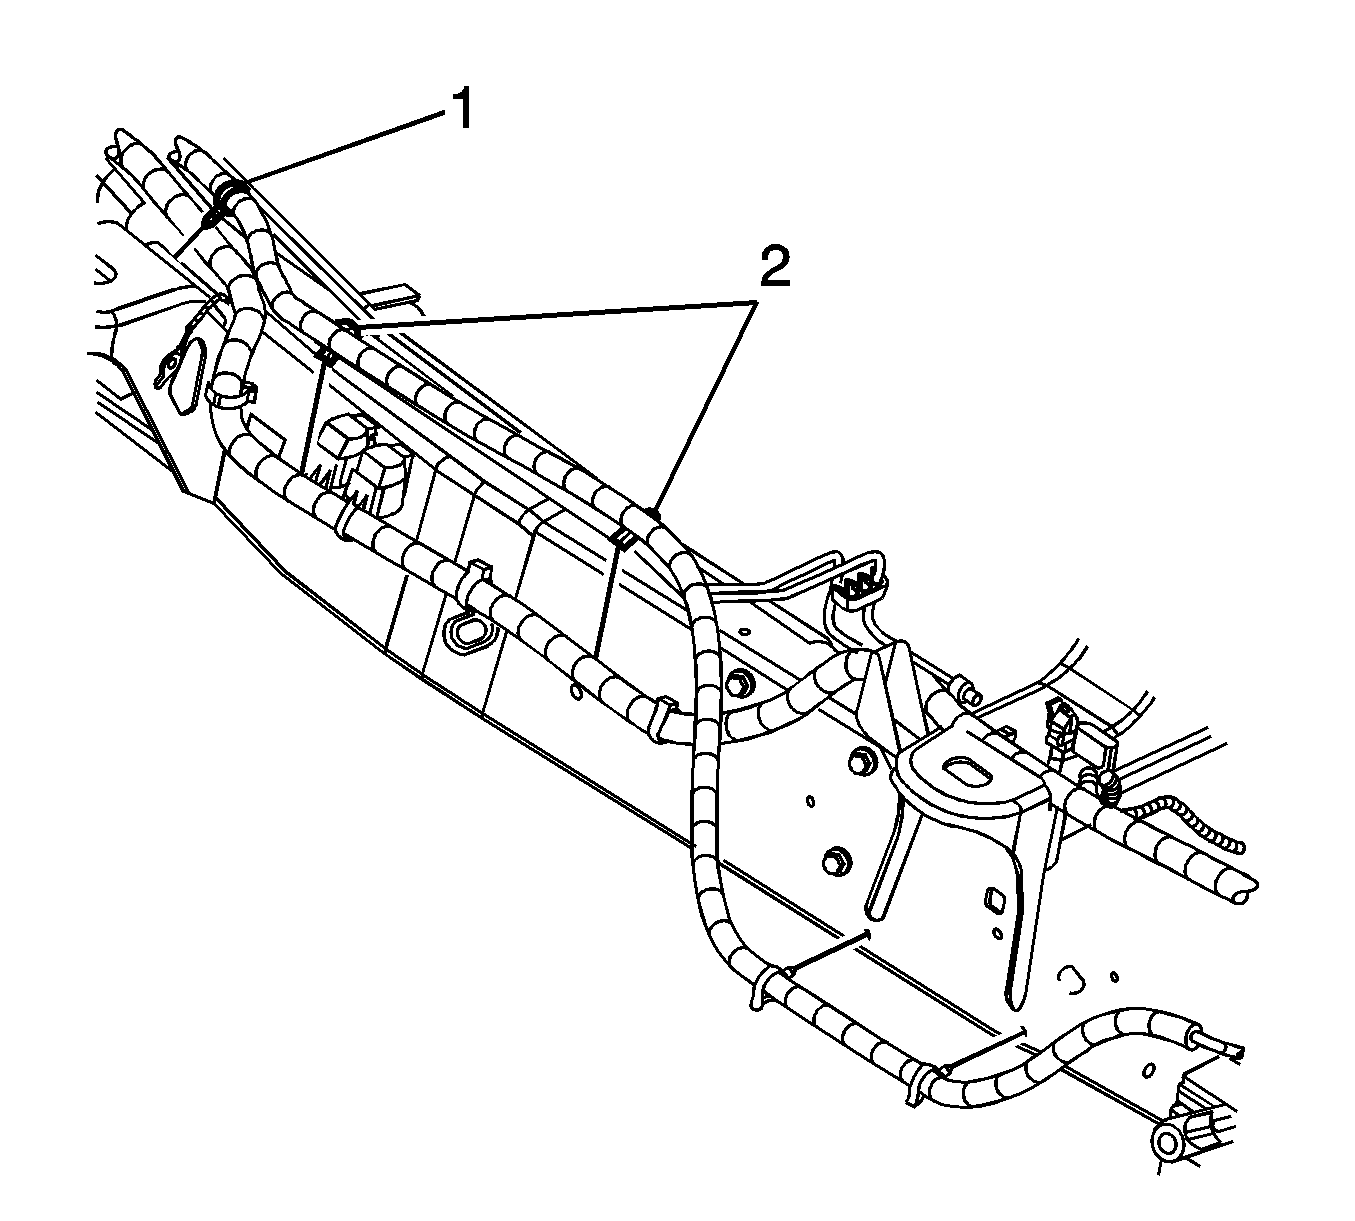
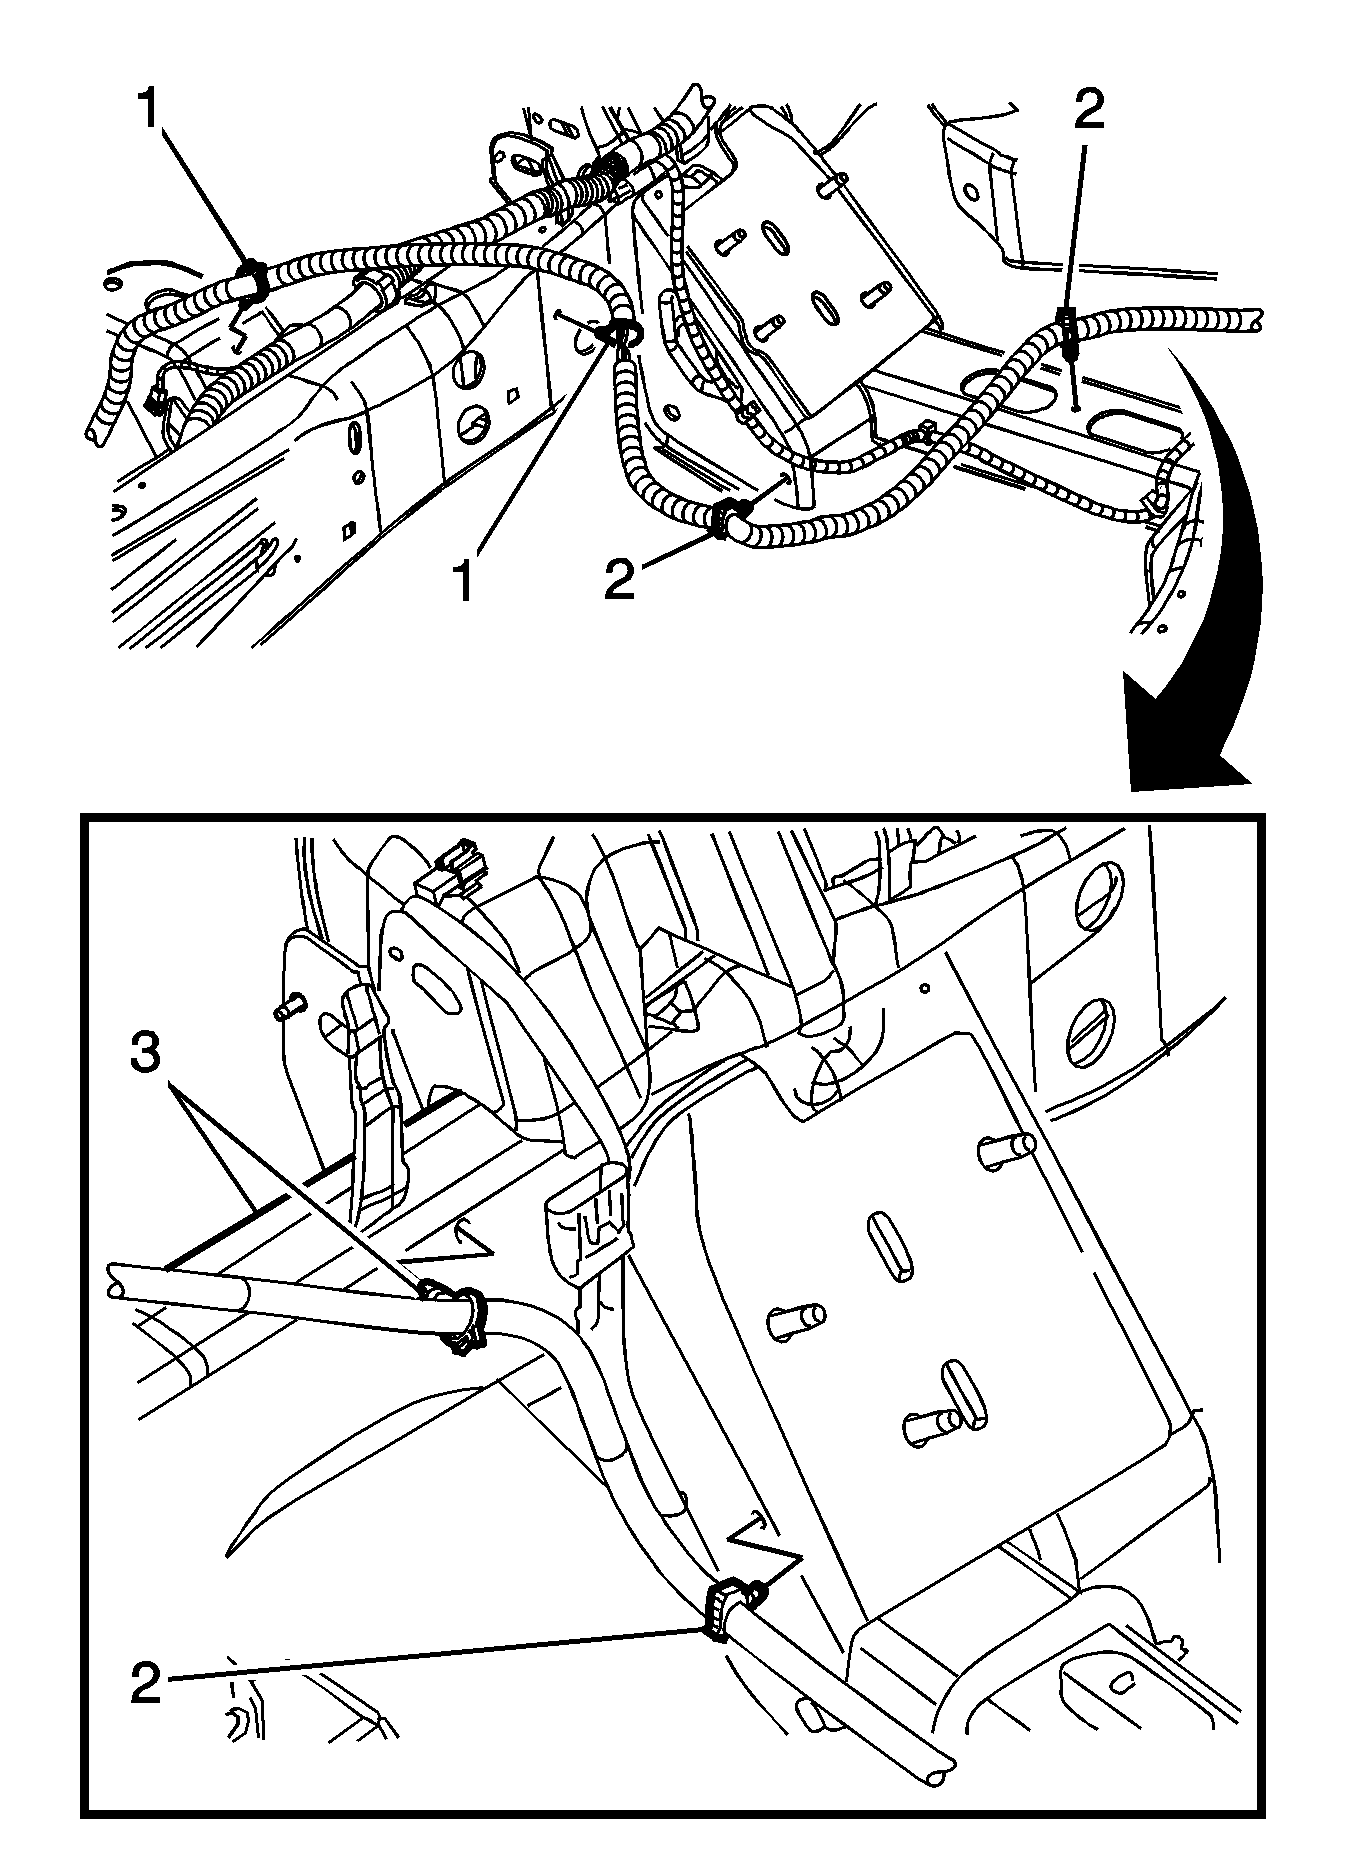
- Remove the auxiliary positive battery cable to the frame clips (1).
- Remove the auxiliary positive battery cable to chassis harness clips (2).
- Remove the auxiliary positive battery cable to frame clips (1).
- Remove the auxiliary positive battery cable to crossmember clips (2).
- Remove the auxiliary positive battery cable to frame clip (3).
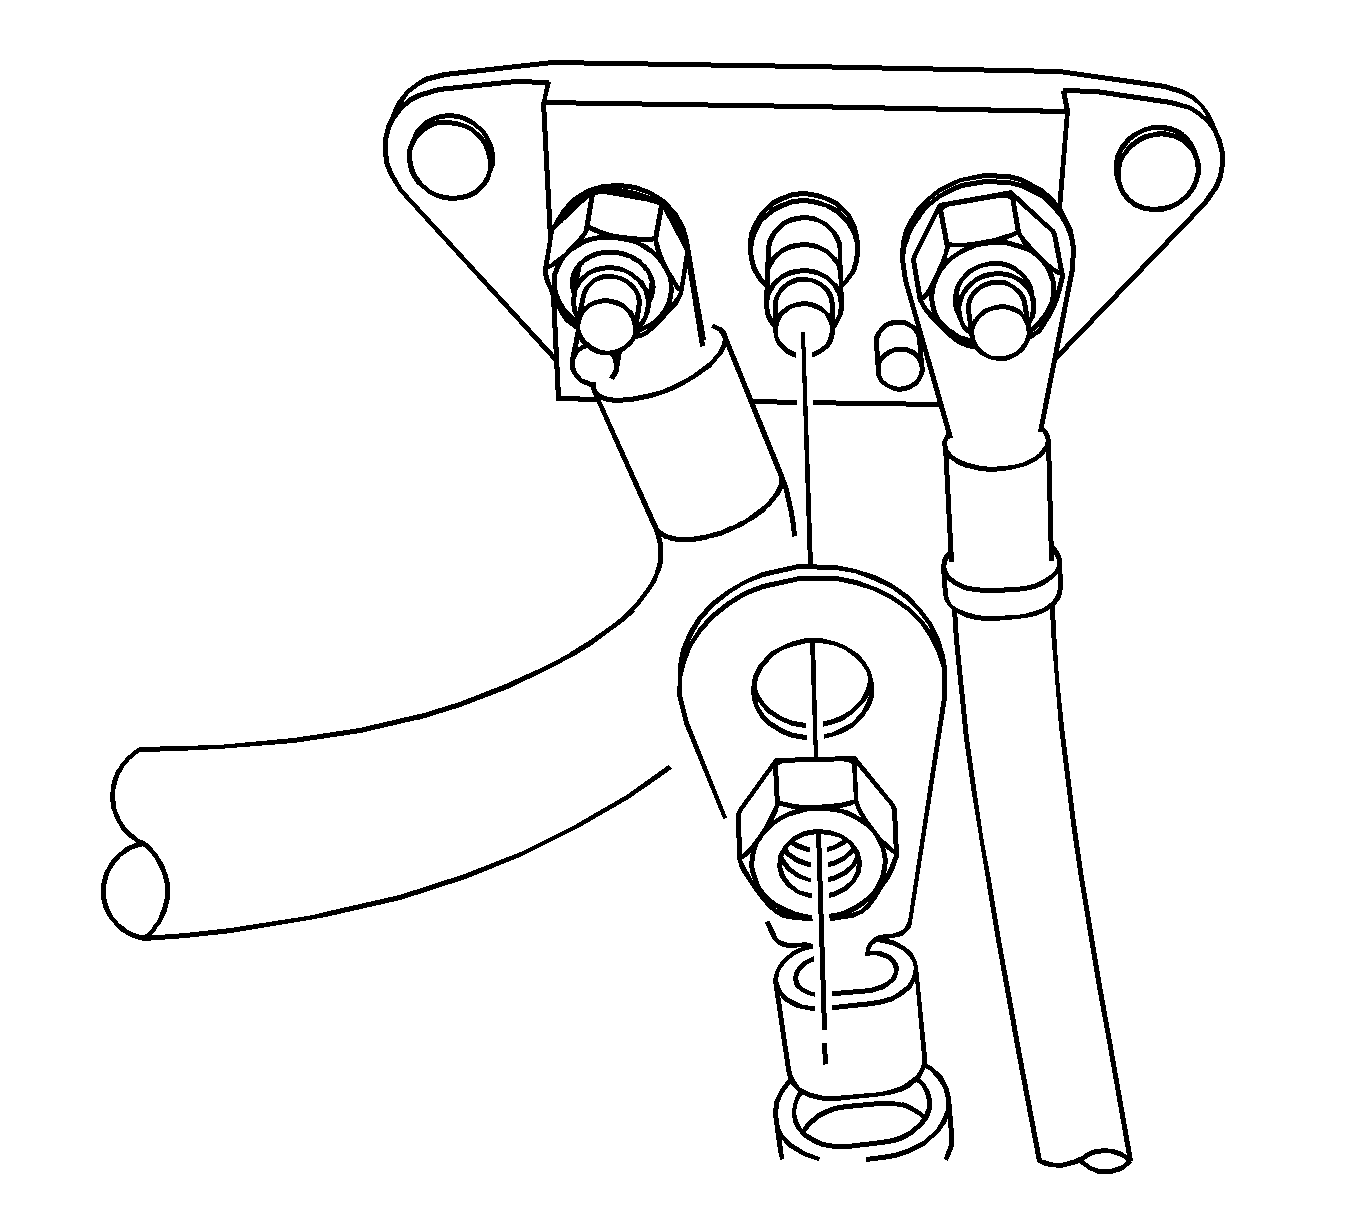
- Remove the auxiliary positive battery cable nut from the junction block.
- Disconnect the auxiliary positive battery cable wiring harness clips.
- Remove the auxiliary positive battery cable from the vehicle.
Installation Procedure
- Position the auxiliary positive battery cable and connect the wiring harness clips.
- Position the auxiliary positive battery cable to the junction block and tighten the cable nut to 8 N·m (71 lb in).
- Install the auxiliary positive battery cable to frame clip (3).
- Install the auxiliary positive battery cable to crossmember clips (2).
- Install the auxiliary positive battery cable to frame clips (1).
- Install the auxiliary positive battery cable to the chassis harness clips (2).
- Connect the auxiliary positive battery cable to the auxiliary battery and tighten the terminal to 14 N·m (123 lb in).
- Connect the auxiliary negative battery cable. Refer to Battery Negative Cable Disconnection and Connection.
Caution: Refer to Fastener Caution in the Preface section.


Install the auxiliary positive battery cable to the frame clips (1).

Battery Positive Cable Replacement With LY2, LME or LY6
Removal Procedure
- On all models, remove the bolt retaining the coolant recovery reservoir or surge tank.
- Position the coolant recovery reservoir or the surge tank aside.
- Disconnect the battery negative cable from the battery. Refer to Battery Negative Cable Disconnection and Connection .
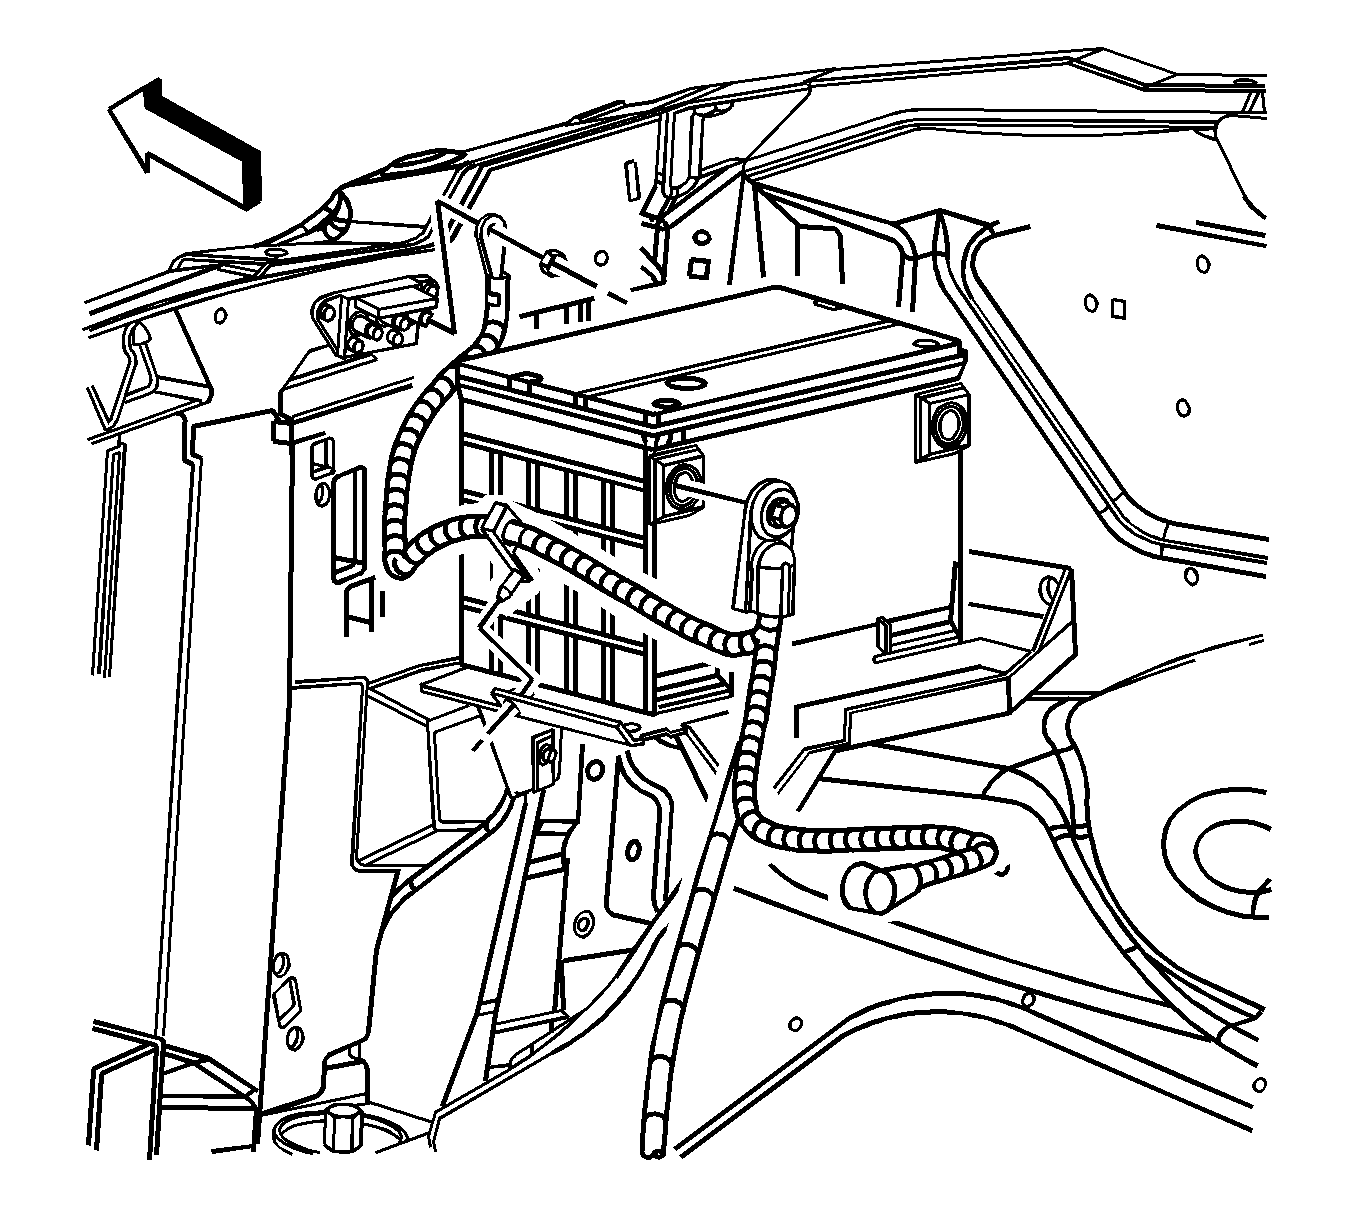
- Disconnect the battery positive cable from the battery.
- On models equipped with the 4.8L, or 6.0L engine, disconnect the positive lead to the junction block.
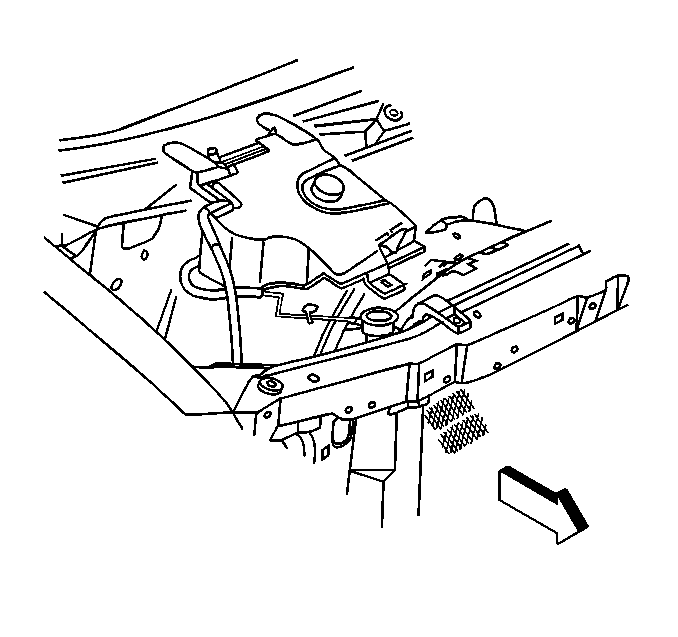
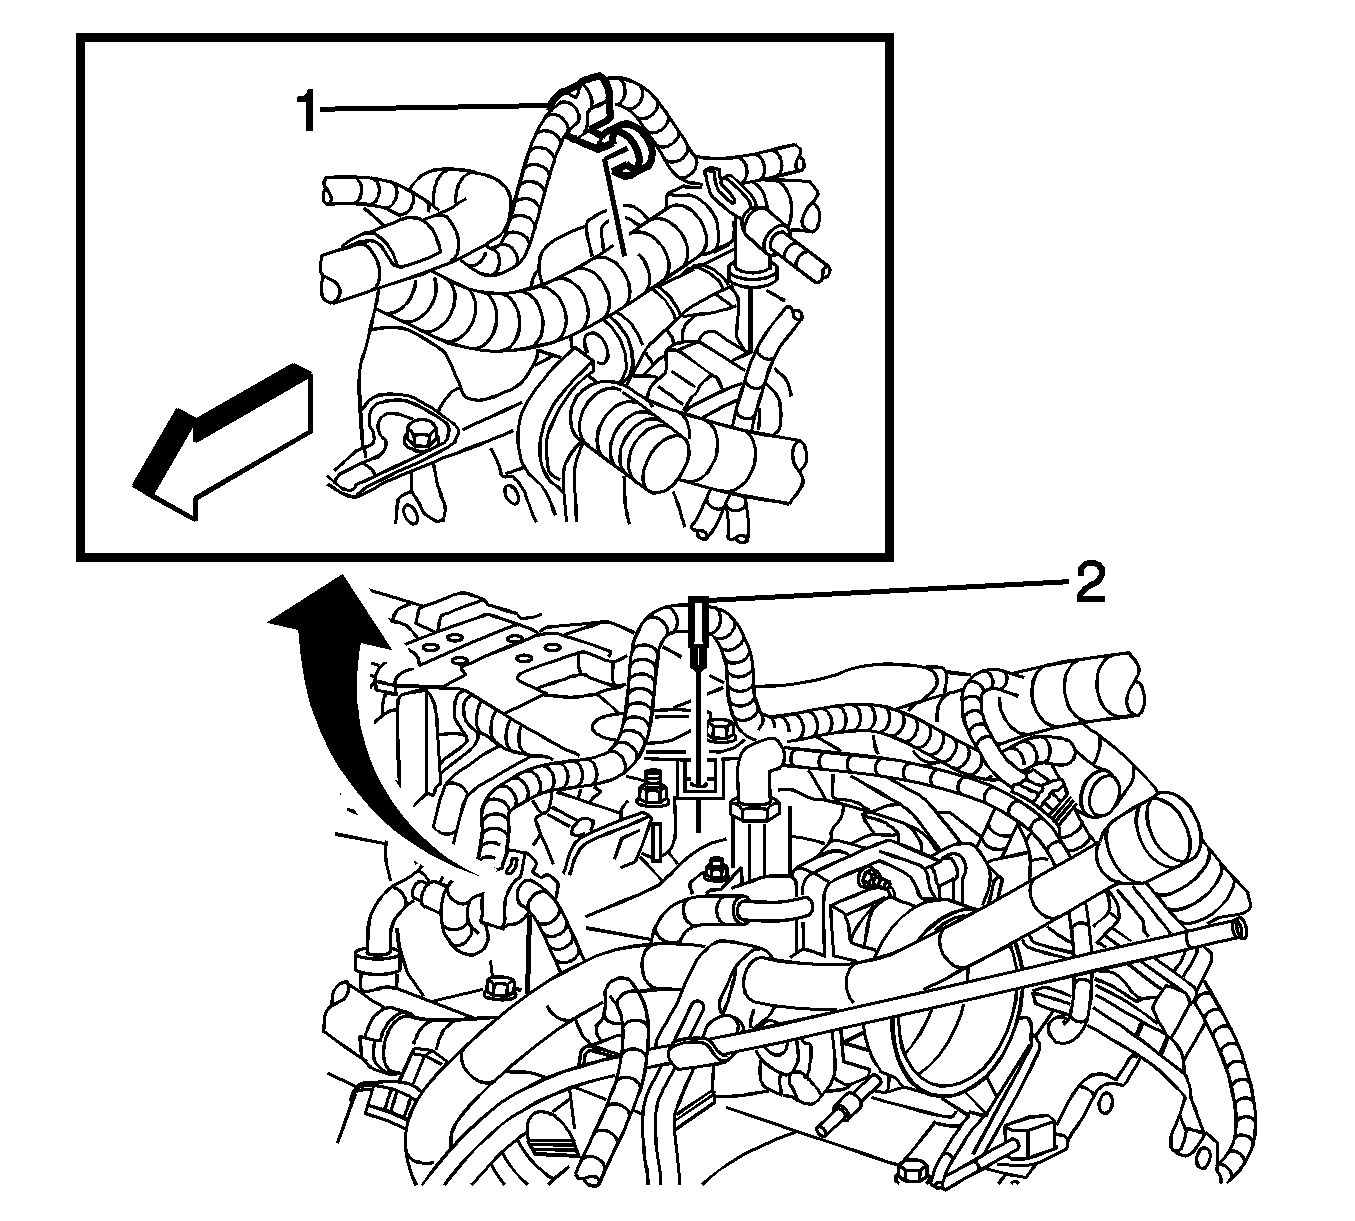
- On models equipped with 4.8L, 5.3L or 6.0L engine, unclip the battery positive cable from the engine harness clip (1).
- Unclip the battery positive cable from the engine harness retainer (2).
- On all models, raise the vehicle. Refer to Lifting and Jacking the Vehicle .
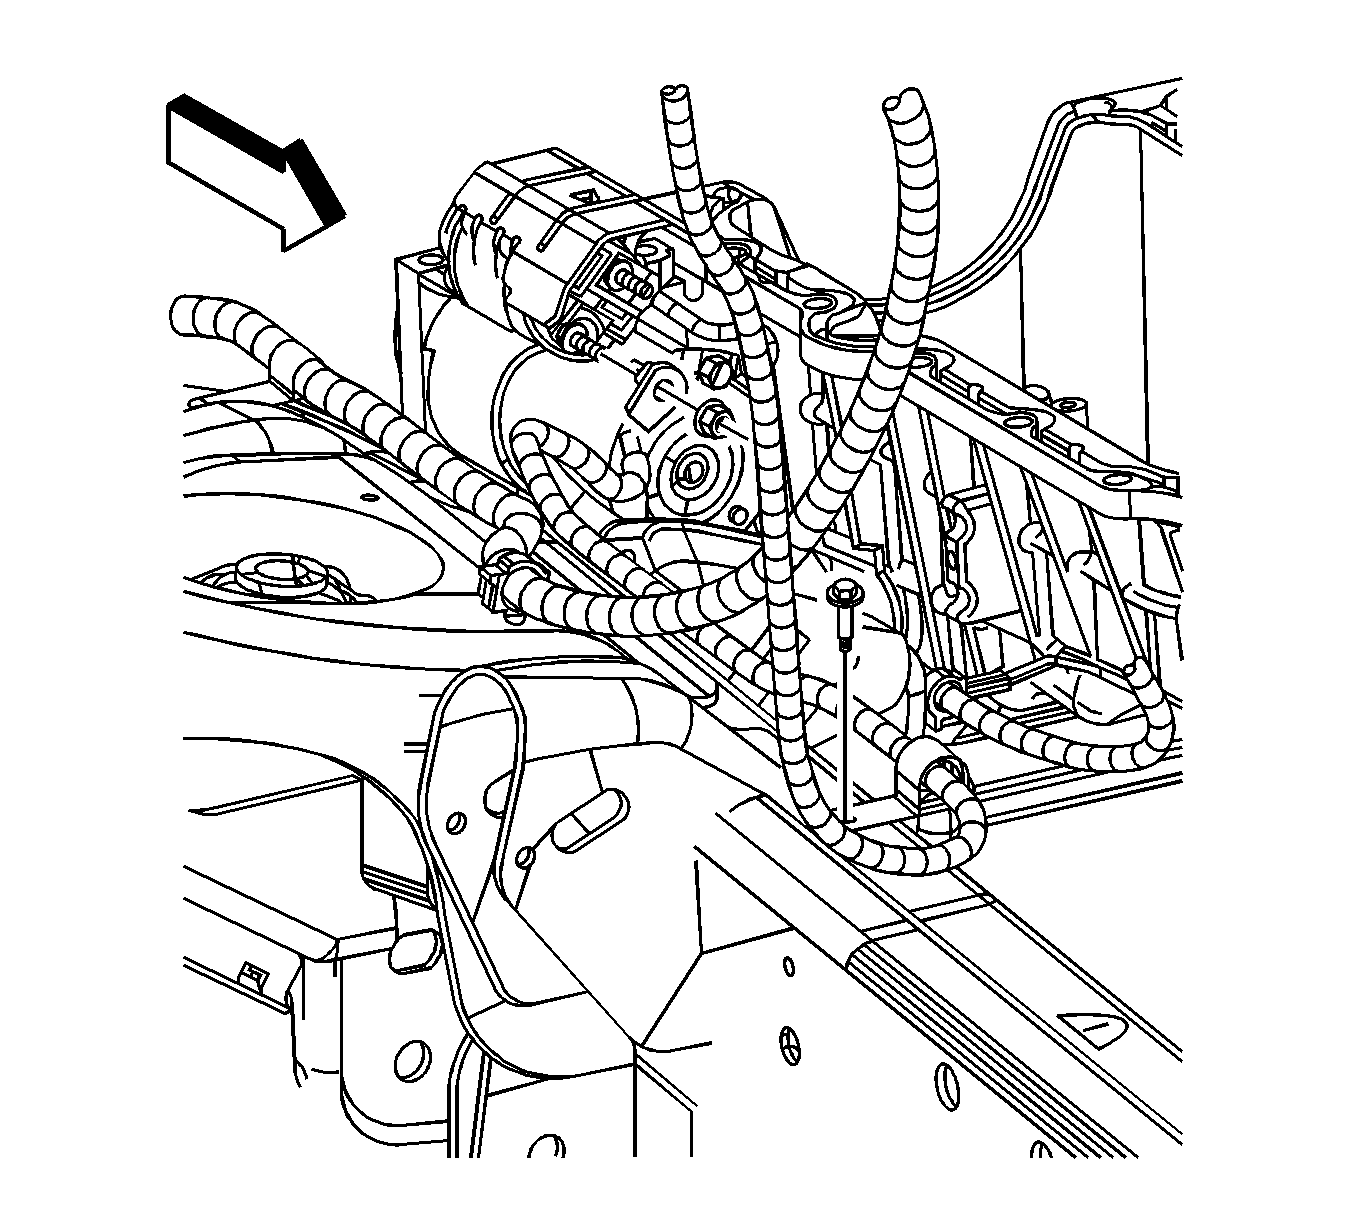
- Disconnect the positive lead at the starter solenoid.
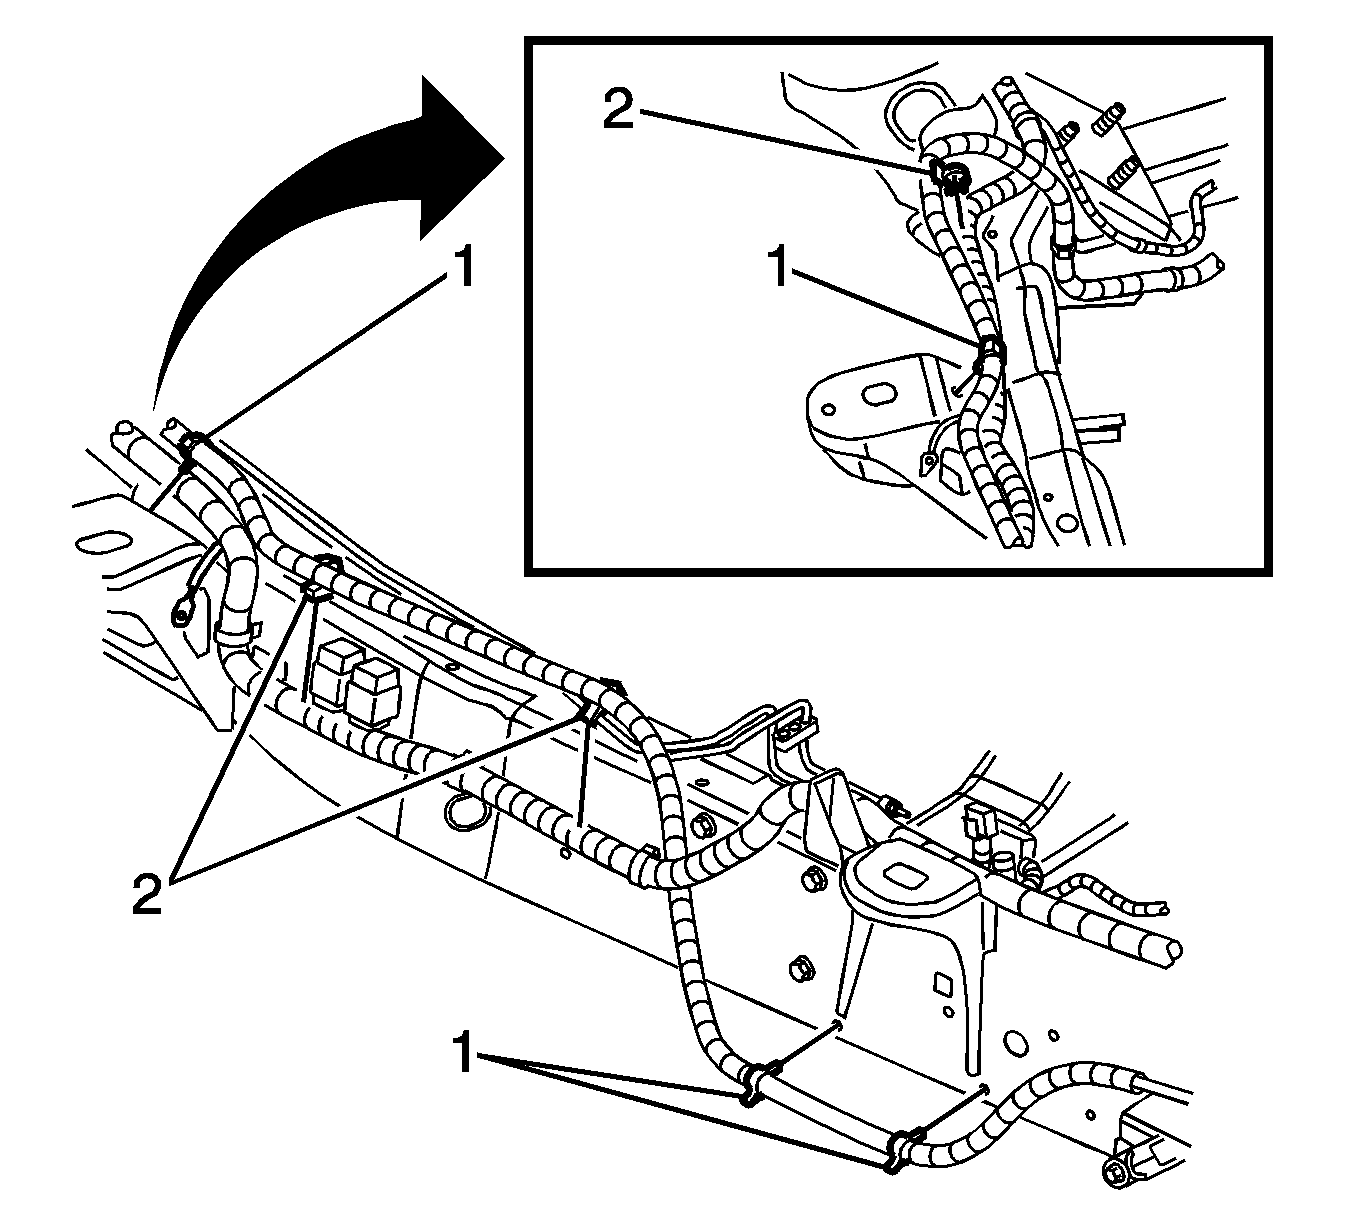
- On models with 4.8L and 6.0L engine, remove the battery positive cable retainer clips (1).
- Remove the positive cable to the chassis harness clips (2).
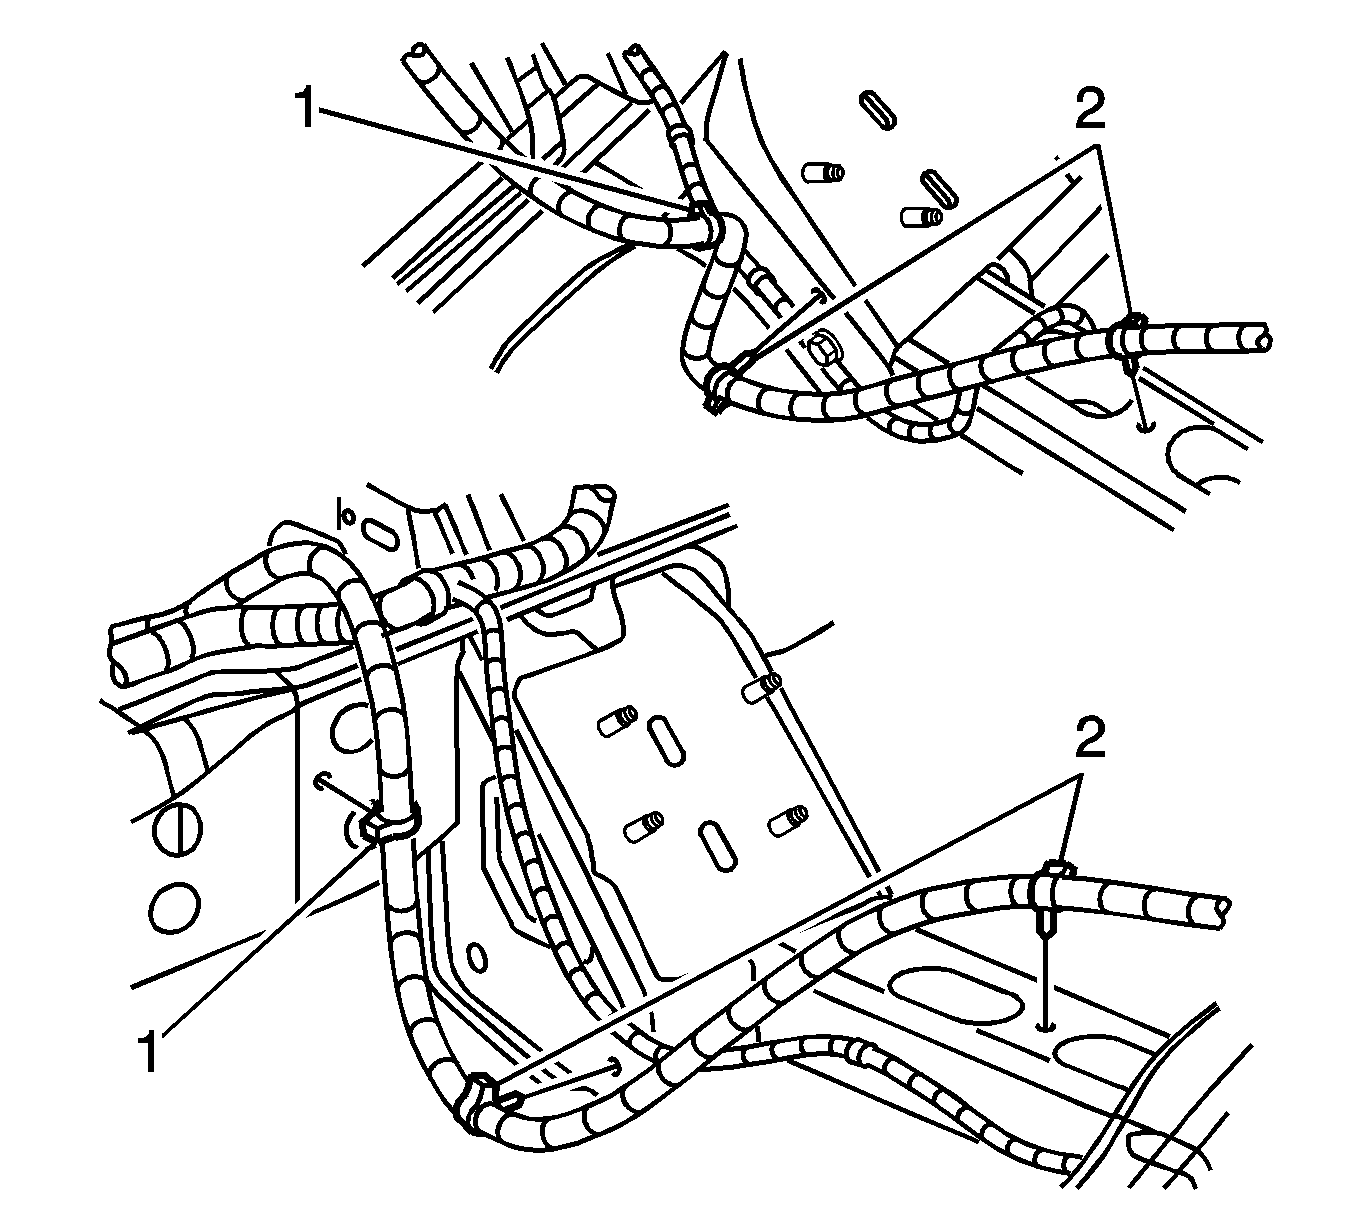
- Remove the positive cable retainer clips (1) from the frame.
- Remove battery positive cable retainer clips (2) from crossmember.
- On all models, lower the vehicle.
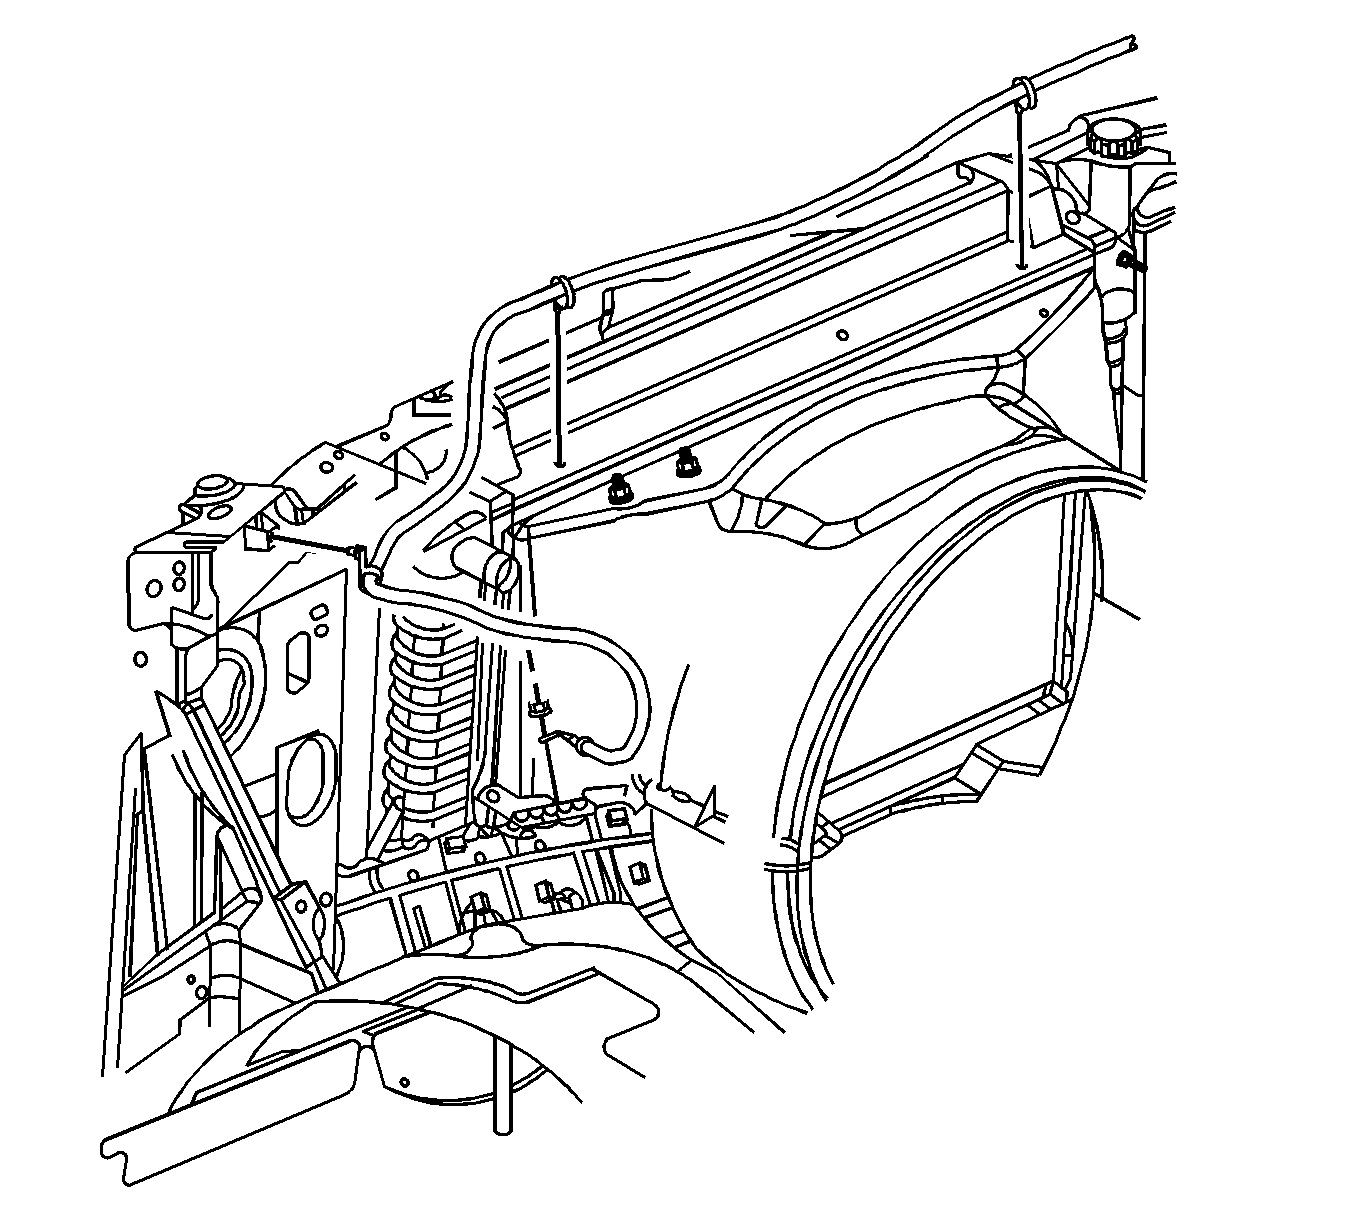
- On models equipped with the 4.8L, 5.3L or 6.0L engine, unclip the battery positive cable from the fan shroud.
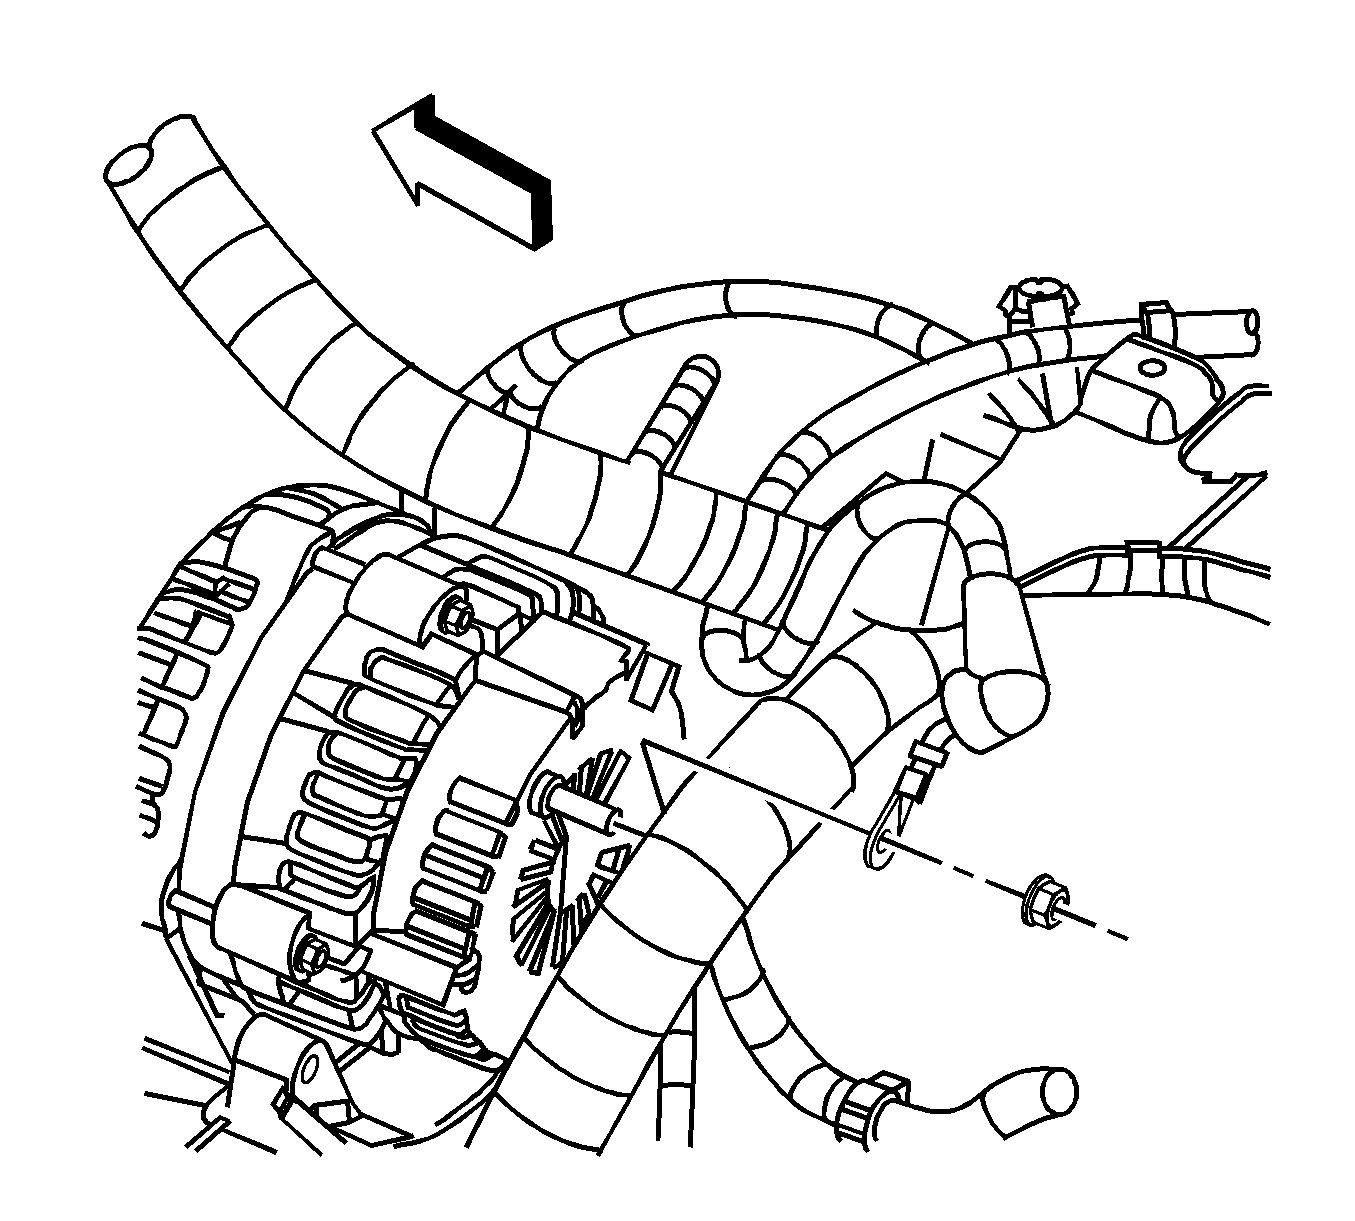
- On all models, disconnect the positive lead to the generator.
- Remove the positive cable from the vehicle. Note the location of the retaining clips.
Installation Procedure
- On all models, install the positive cable to the vehicle.
- Connect the positive lead to the generatoroutput (BAT) terminal and tighten the nut to 10 N·m (89 lb in) .
- On models equipped with the 4.8L, 5.3L or 6.0L engine, clip the positive cable to the fan shroud.
- On all models, raise the vehicle. Refer to Lifting and Jacking the Vehicle .
- On models with 4.8L and 6.0L engine, install the positive cable retainer clips (2) to the crossmember.
- Install the positive cable retainer clips (1) to the frame.
- Install the positive cable to the chassis harness clips (2).
- Install the positive cable retainer clips (1).
- Install the positive lead to the starter solenoid and tighten the nut to 10 N·m (89 lb in) .
- On all models, lower the vehicle.
- On models equipped with 4.8L, 5.3L or 6.0L engine, clip battery positive cable to the engine harness retainer (2).
- Clip the positive cable to the engine harness clip (1).
- On models equipped with the 4.8L, or 6.0L engine, install the positive lead to the junction block and tighten the nut to 10 N·m (89 lb in) .
- On all models, connect the battery positive cable to the battery and tighten to 14 N·m (123 lb in) .
- Connect the battery negative cable to the battery. Refer to Battery Negative Cable Disconnection and Connection .
- Install the coolant recovery reservoir or surge tank and tighten the bolt to 11 N·m (97 lb in) .

Ensure the cable is routed correctly and installed in the retainer clips.
Caution: Refer to Fastener Caution in the Preface section.


Battery Positive Cable Replacement With LU3
Removal Procedure
- Unbolt and reposition the coolant recovery reservoir. Refer to Coolant Recovery Reservoir Replacement .
- Disconnect the negative battery cable. Refer to Battery Negative Cable Disconnection and Connection .
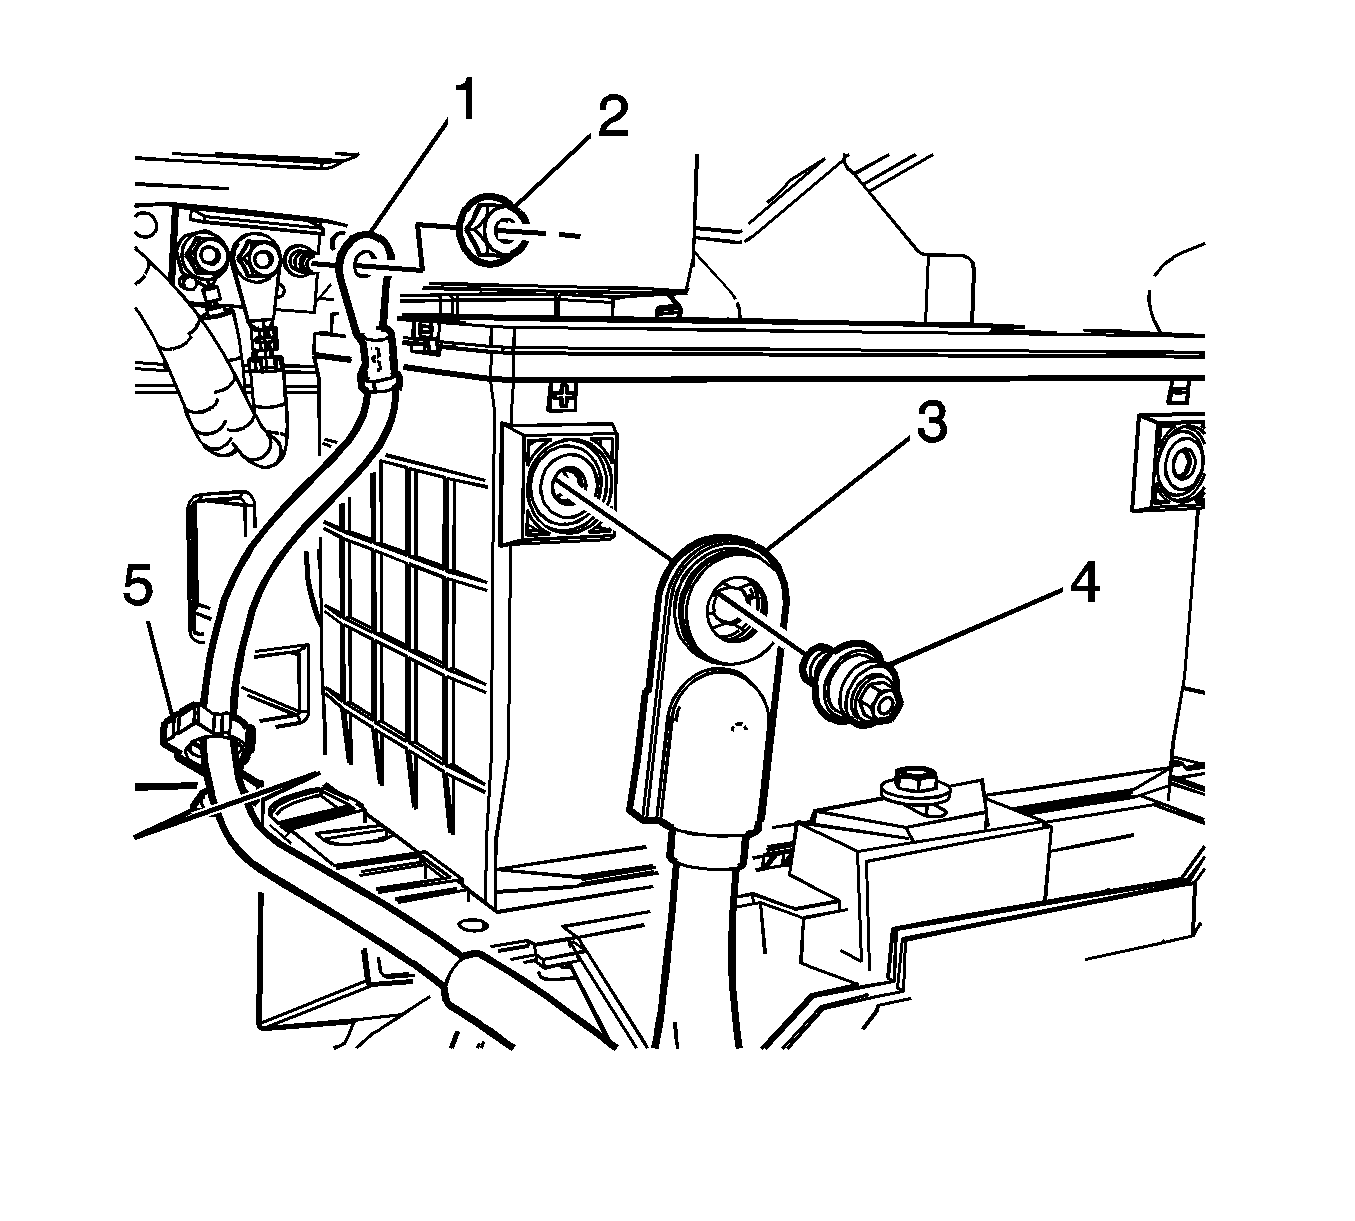
- Loosen the positive battery cable bolt (4) in order to disconnect the positive battery cable (3) from the battery.
- Remove the nut (2) retaining the positive battery cable (1) to the junction block.
- Remove the positive battery cable clip (5) from the battery tray.
- Raise and support the vehicle. Refer to Lifting and Jacking the Vehicle .
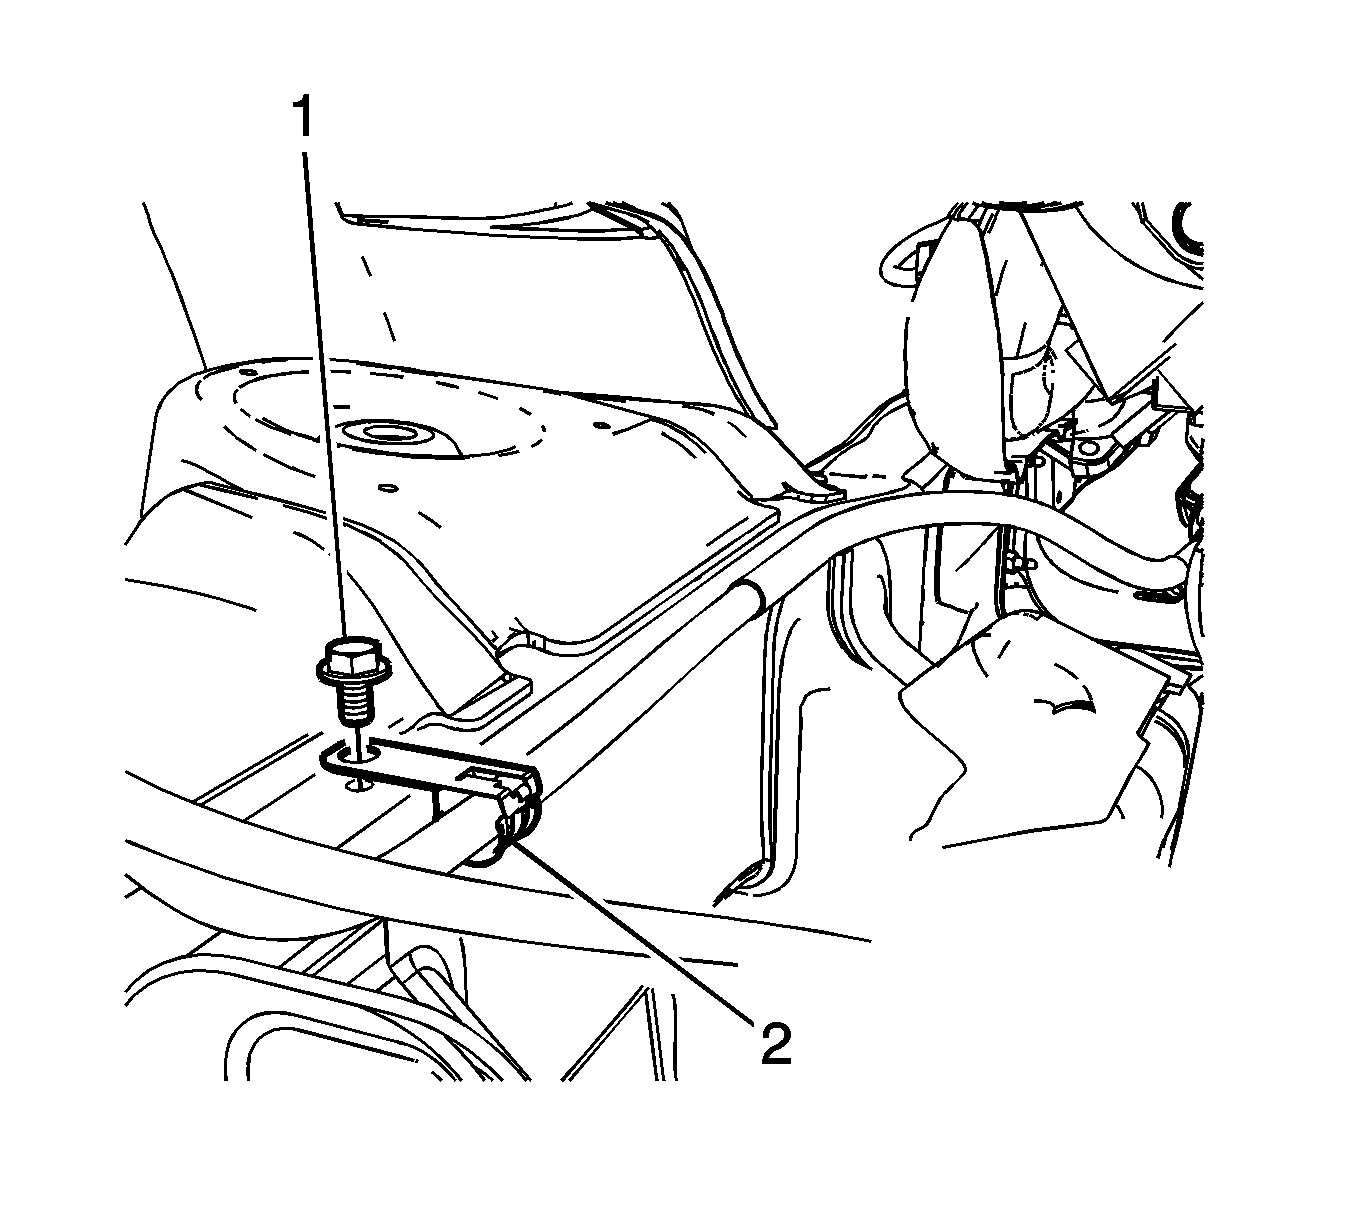
- Remove the positive battery cable retainer (2) to frame bolt (1).
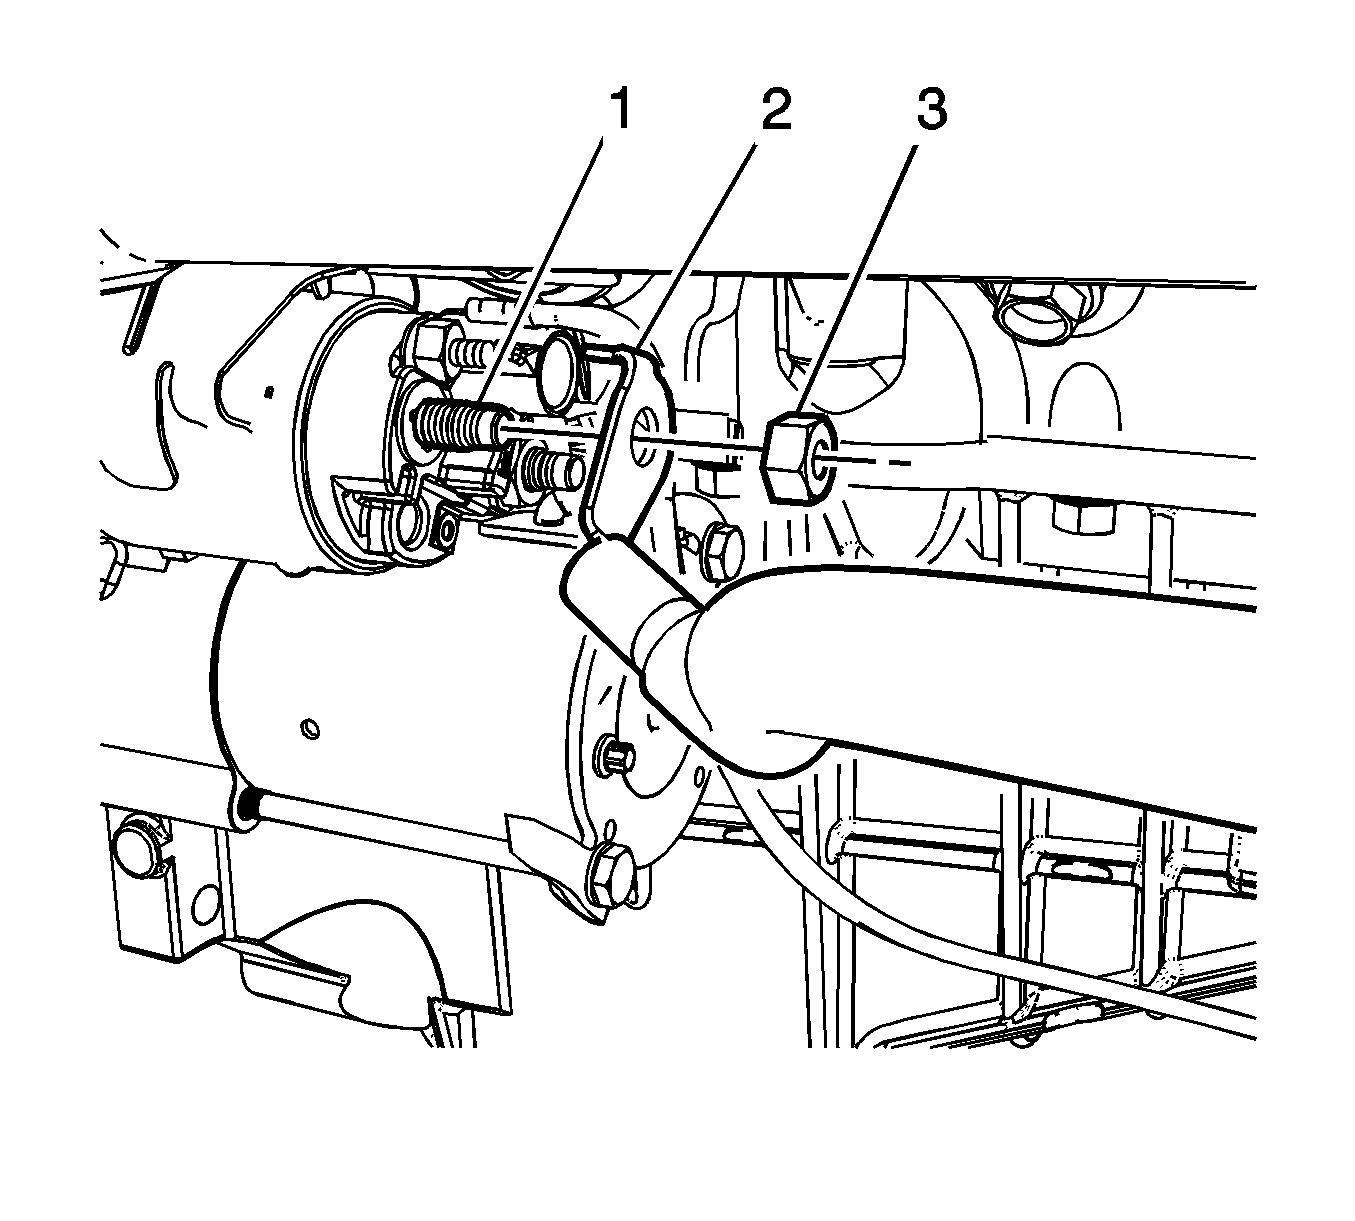
- Remove the battery terminal nut (3) on the starter solenoid (1).
- Remove the positive battery cable (2) from the starter solenoid.
- Lower the vehicle.
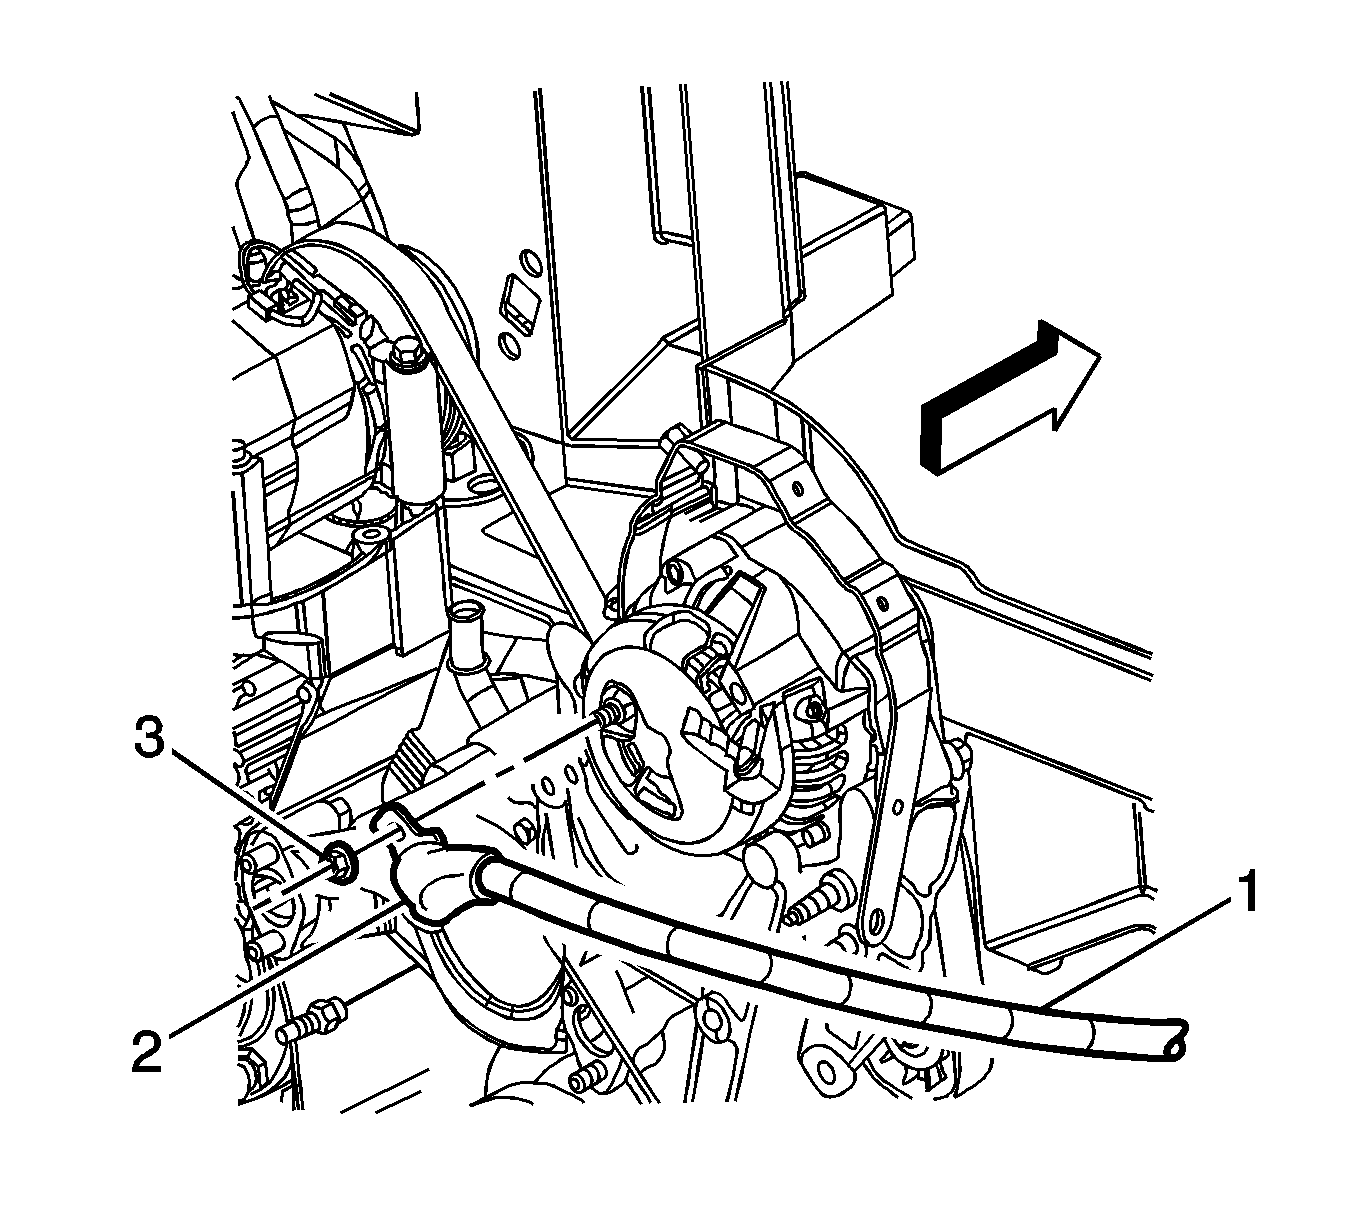
- Reposition the positive battery cable boot (2) at the generator.
- Remove the generator nut (3).
- Remove the positive battery cable (1) from the generator.
- Remove the positive battery cable from the vehicle.
Installation Procedure
- Install the positive battery cable to the vehicle.
- Install the positive cable (1) to the generator.
- Install the generator nut (3) and tighten to 10 N·m (89 lb in) .
- Position the positive cable boot (2) at the generator.
- Raise and support the vehicle.
- Install the positive cable (2) to the starter solenoid battery terminal (1).
- Install the battery terminal nut (3) onto the starter solenoid battery terminal (1) and tighten to 10 N·m (89 lb in).
- Install the positive cable retainer (2) to frame bolt (1) and tighten to 13 N·m (115 lb in) .
- Lower the vehicle.
- Install the positive battery cable (1) to the junction block and tighten to 13 N·m (115 lb in) .
- Install the positive battery cable clip (5) from the battery tray.
- Install the positive battery cable to the battery and tighten the bolt to 14 N·m (123 lb in) .
- Connect the negative battery cable. Refer to Battery Negative Cable Disconnection and Connection .
- Install the coolant recovery reservoir. Refer to Coolant Recovery Reservoir Replacement .

Caution: Refer to Fastener Caution in the Preface section.


