For 1990-2009 cars only
Special Tools
J 38185 Hose Clamp Pliers
Removal Procedure
- Remove the engine cooling fan. Refer to Fan Replacement.
- Remove the accumulator. Refer to Air Conditioning Accumulator Replacement
- Remove the passenger side wheel house splash shield. Refer to Wheelhouse Splash Shield Replacement
- Loosen but DO NOT remove driver side body mount bolts.
- Remove passenger side body mount bolts.
- Slowly lift the passenger side of the body off the frame, and support.
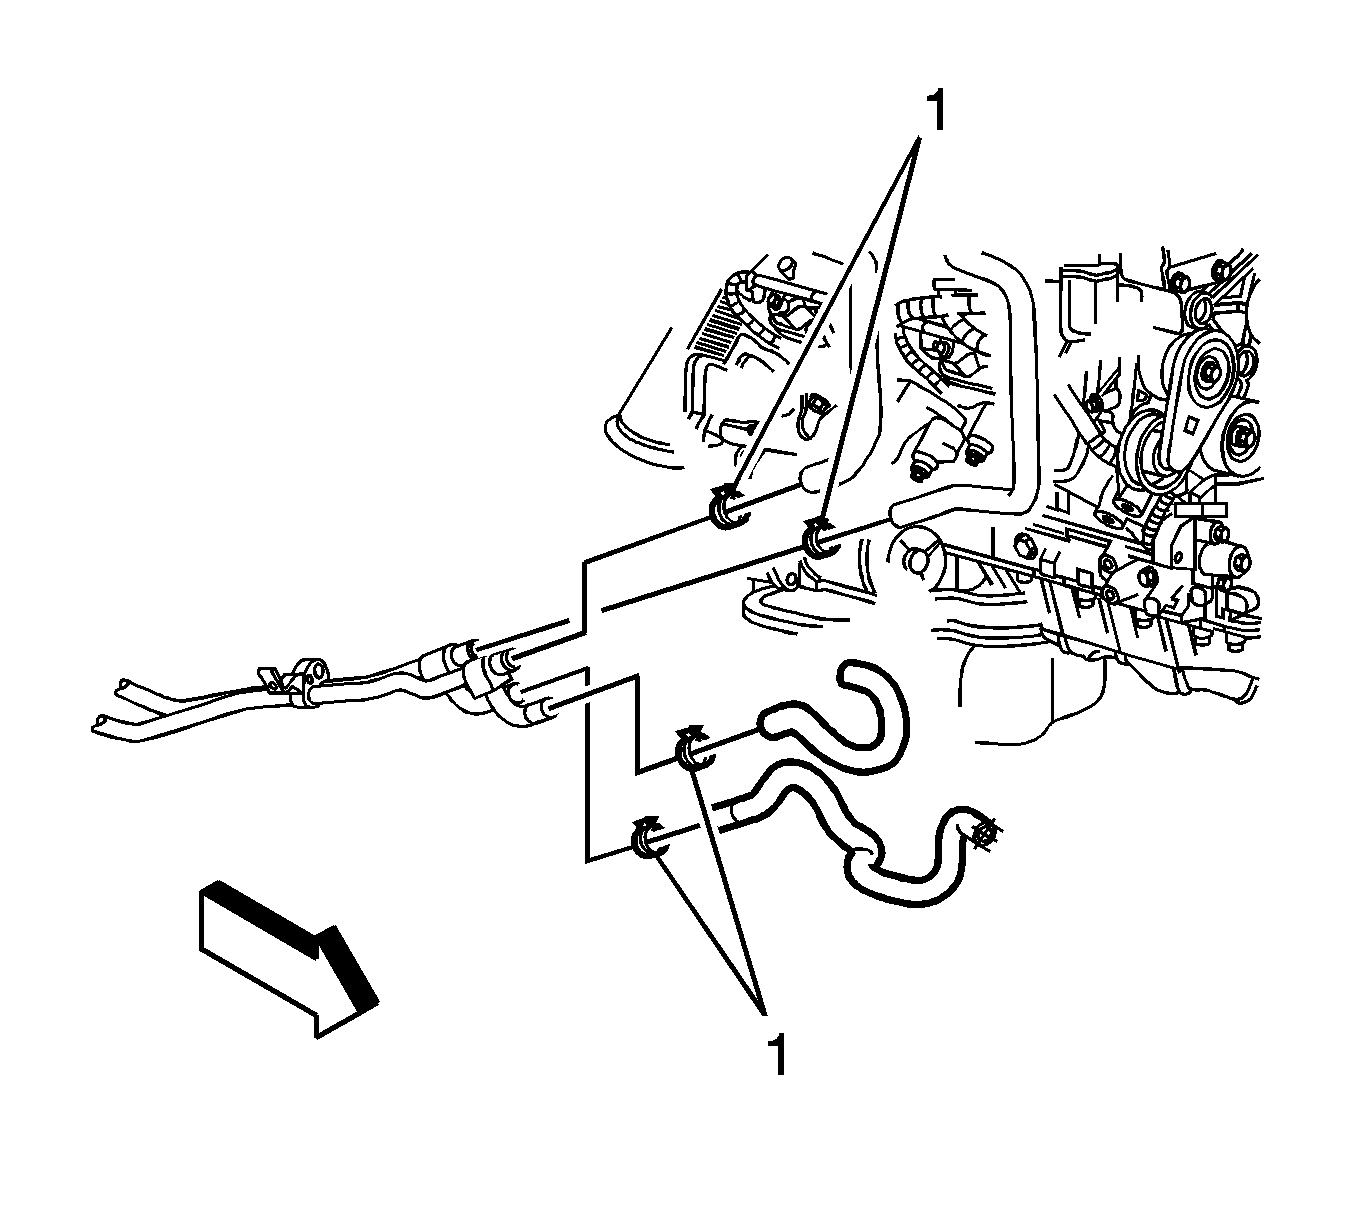
- Remove auxiliary heater hose clamps (1).
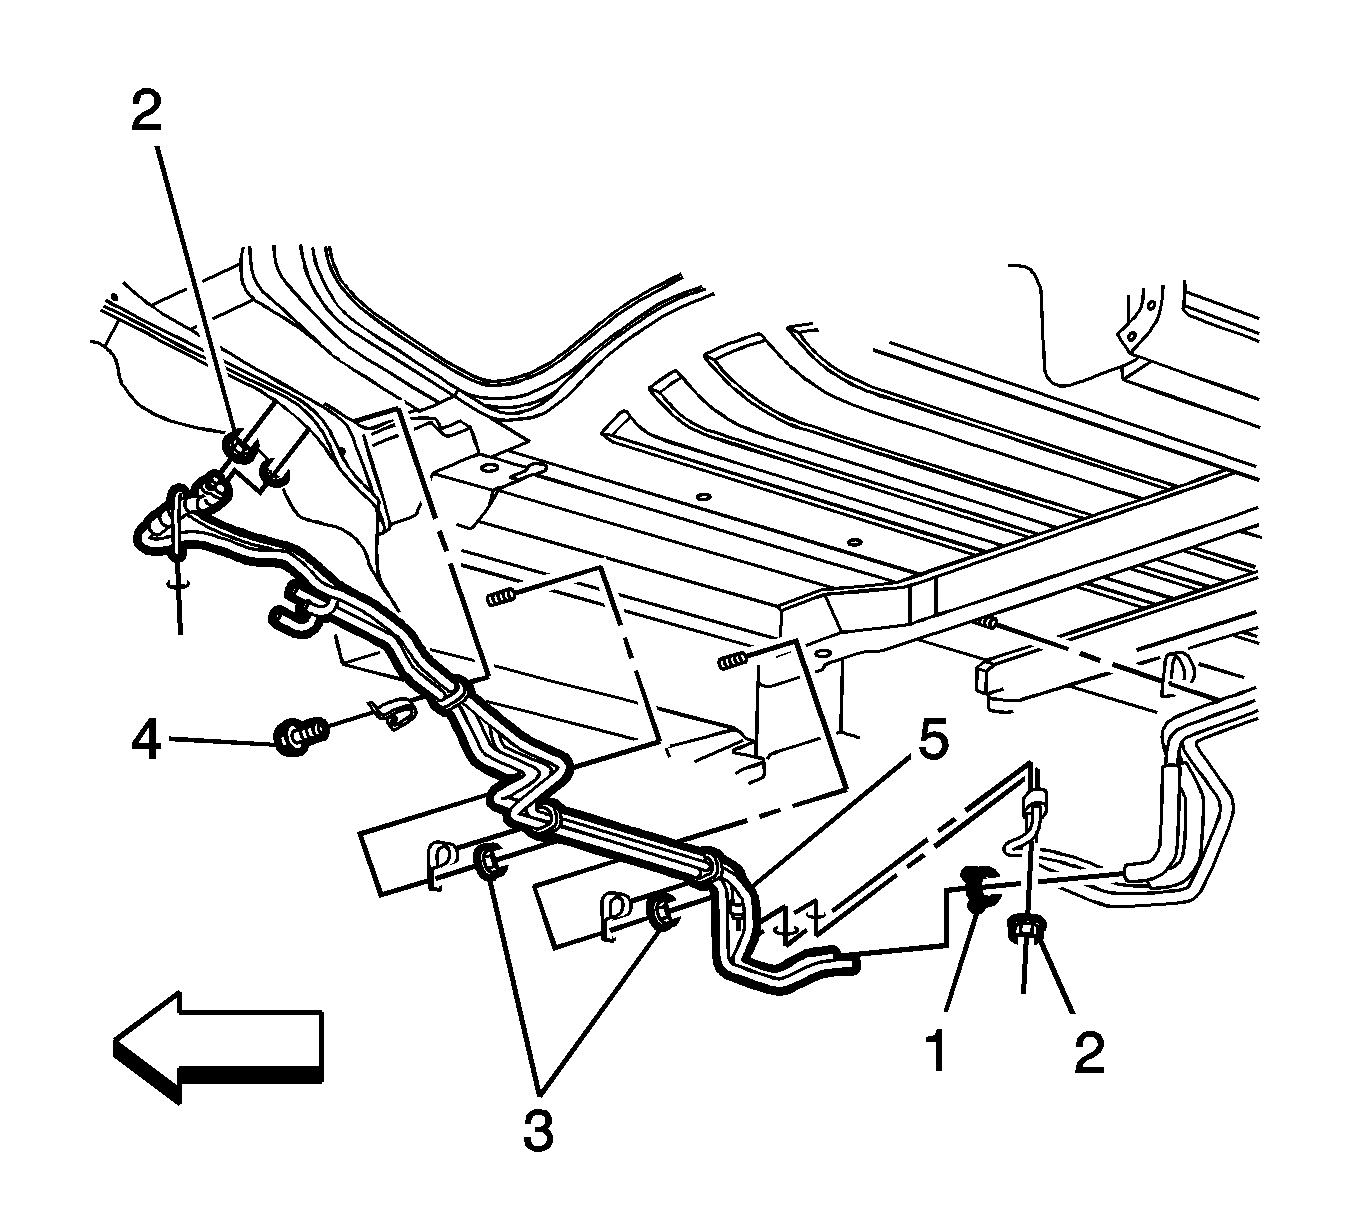
- Remove auxiliary a/c evaporator nuts (2).
- Remove auxiliary a/c and heater hose bracket nuts (3).
- Remove auxiliary a/c and heater hose bracket bolt (4).
- Remove auxiliary air conditioning evaporator & heater tube assembly (5).


Installation Procedure
- Install auxiliary air conditioning evaporator & heater tube assembly
- Install auxiliary a/c and heater hose bracket bolt (4) and tighten to 6 N·m (5 lb in).
- Install auxiliary a/c and heater hose bracket nuts (3) and tighten to 7 N·m (6 lb in).
- Install auxiliary a/c evaporator nut (2) and tighten to 16 N·m (12 lb ft).
- Install auxiliary heater hose clamps (1).
- Install rear auxiliary heater hose clamp (1).
- Slowly and carefully lower the passenger side of the body onto the frame.
- Install passenger side body mount bolts and tighten to 140 N·m (103 lb ft).
- Tighten driver side body mount bolts and tighten to 140 N·m (103 lb ft).
- Install the passenger side wheel house splash shield. Refer to Wheelhouse Splash Shield Replacement
- Lower the vehicle. Refer to Lifting and Jacking the Vehicle
- Install the accumulator. Refer to Air Conditioning Accumulator Replacement
- Install the engine cooling fan. Refer to Fan Replacement.

Caution: Refer to Fastener Caution in the Preface section.

