Catalytic Converter Replacement 4.3L
Removal Procedure
- Raise and support the vehicle. Refer to Lifting and Jacking the Vehicle.
- Remove the heated oxygen sensors (HO2S). Refer to Heated Oxygen Sensor Replacement - Bank 1 Sensor 1 , Heated Oxygen Sensor Replacement - Bank 1 Sensor 2 , Heated Oxygen Sensor Replacement - Bank 2 Sensor 1 , and Heated Oxygen Sensor Replacement - Bank 2 Sensor 2.
- Remove the exhaust hanger bolts and hanger from the transmission.
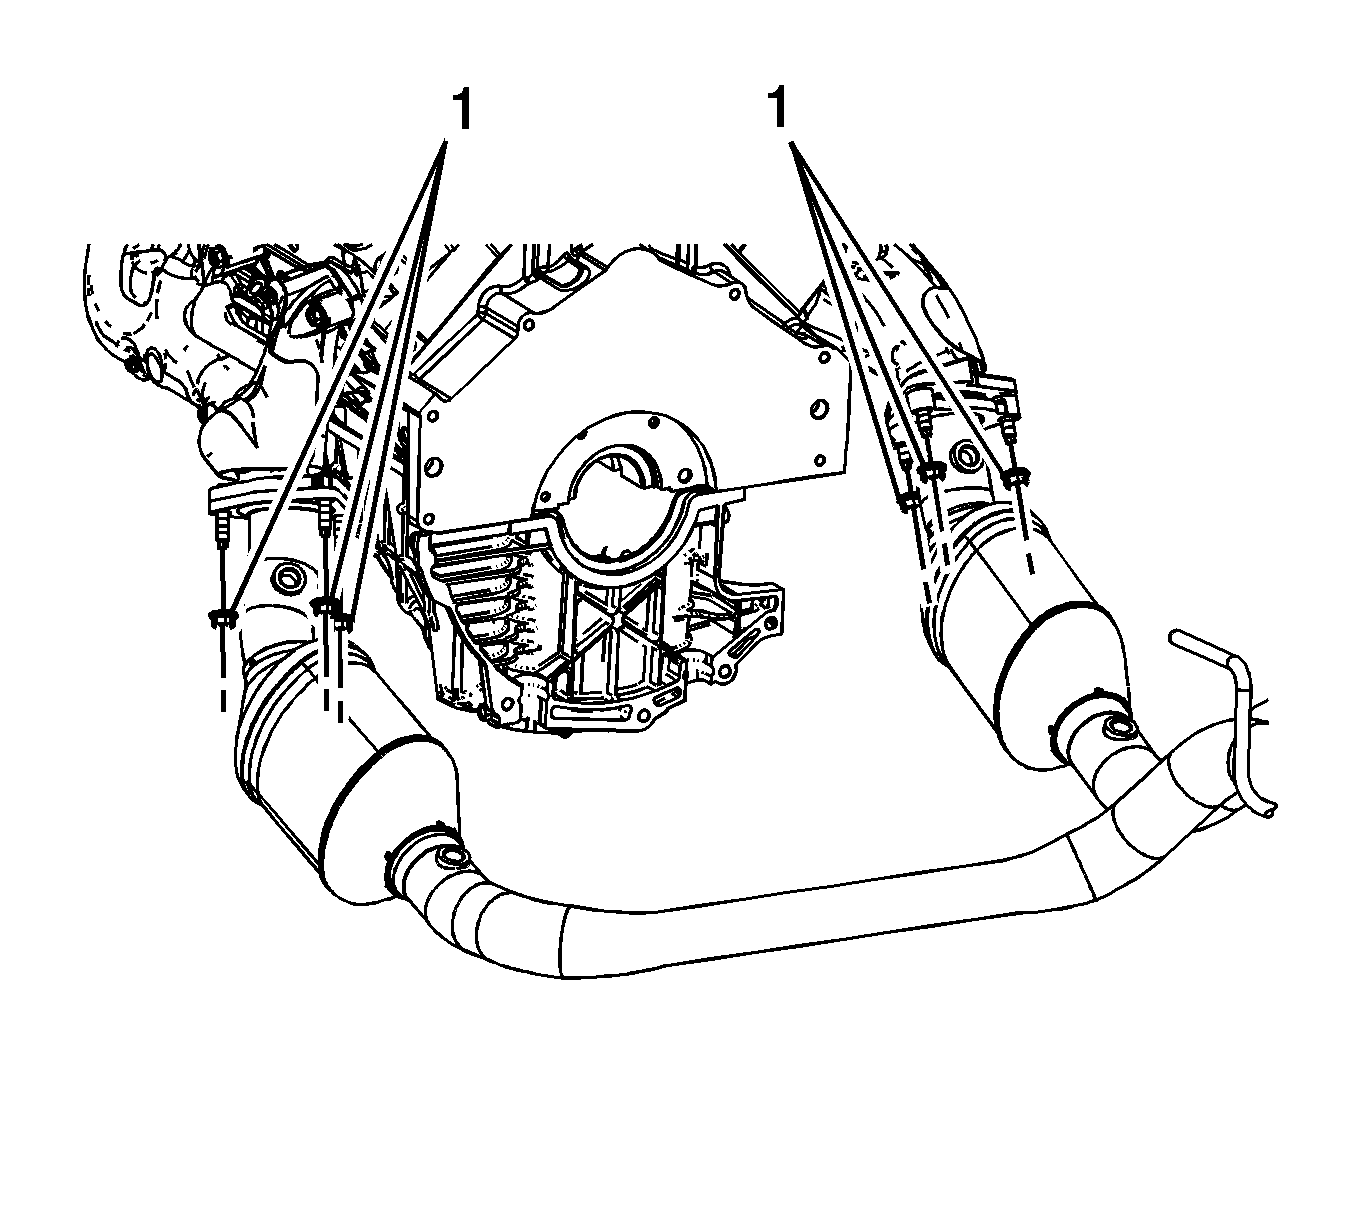
- Remove the catalytic converter to exhaust manifold nuts (1).
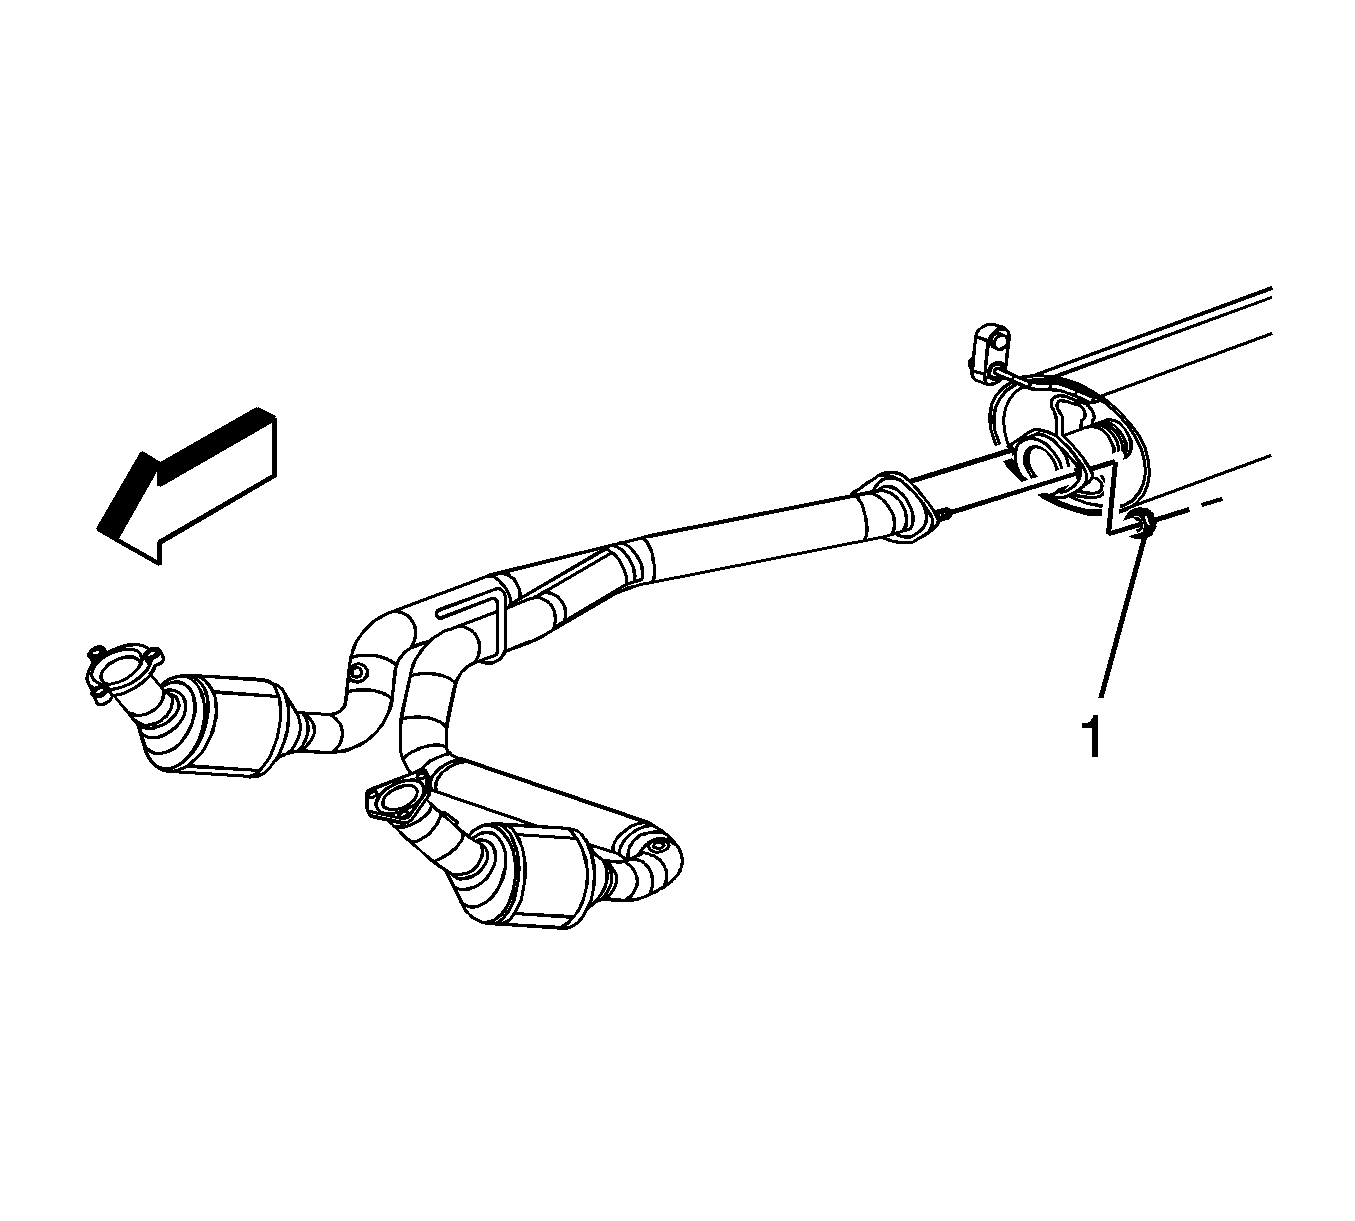
- Remove the muffler to catalytic converter nuts (1).
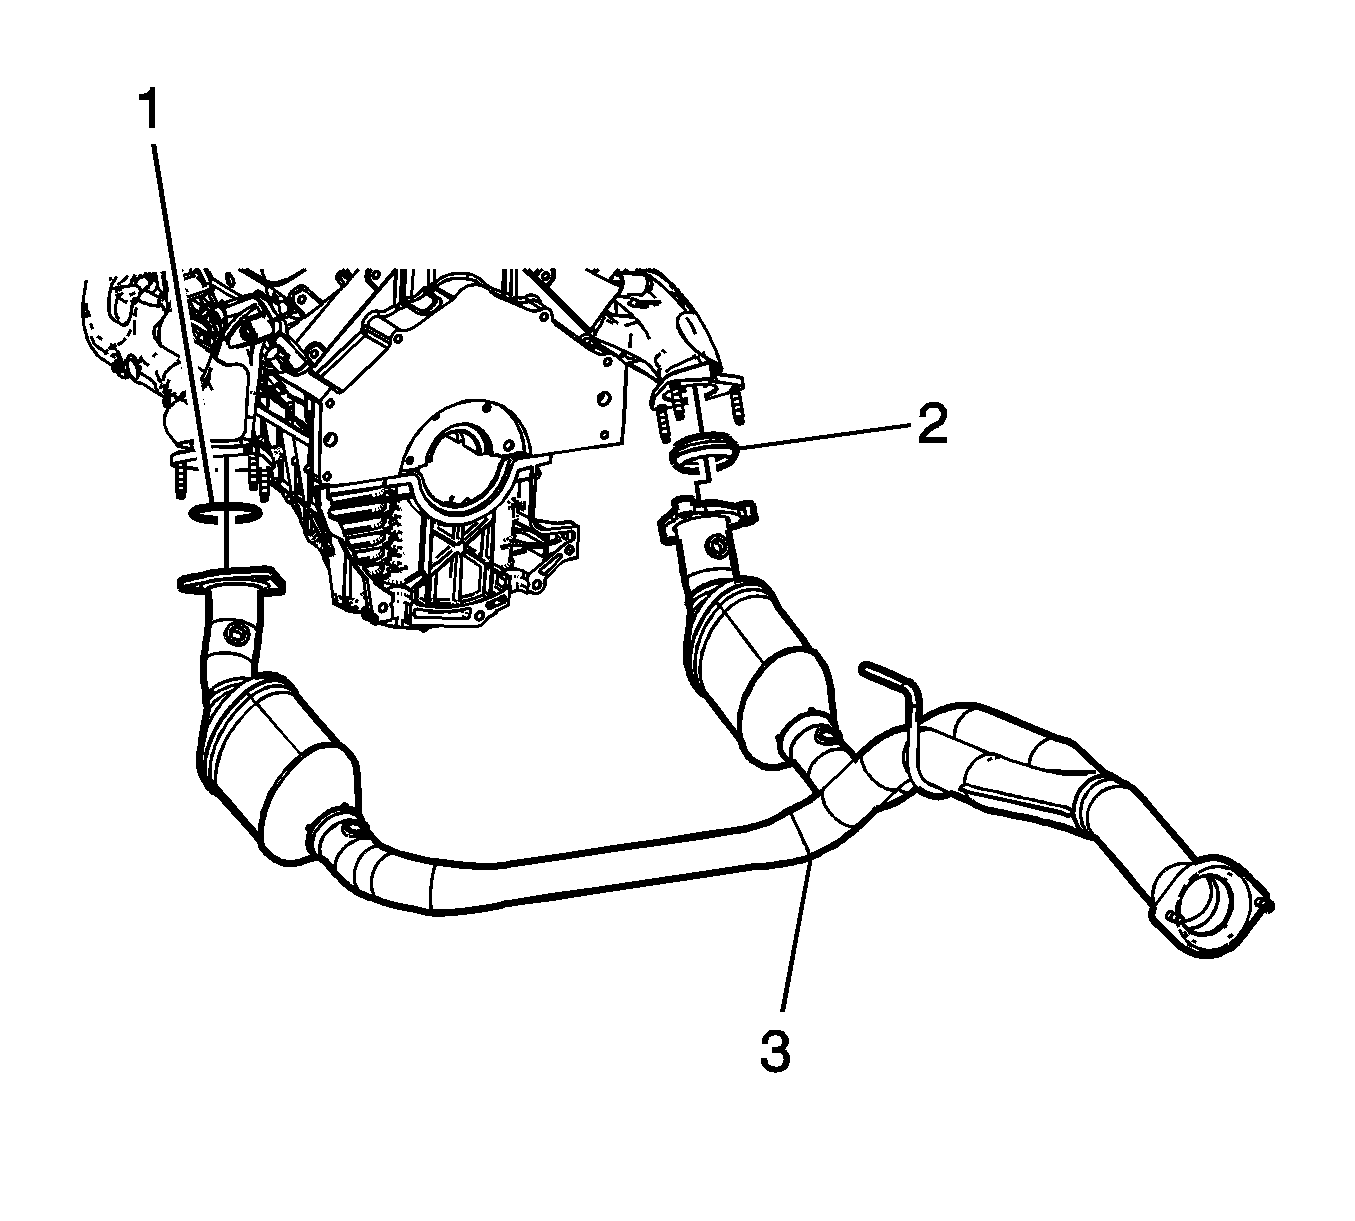
- Lower the catalytic converter (3) from the vehicle.
- Remove and discard the exhaust manifold seals (1 and 2).
Installation Procedure
- Install a NEW exhaust manifold seal (1) into the groove in the left catalytic converter.
- Install a NEW exhaust manifold seal (2) into the right manifold.
- Position the catalytic converter (3) to the exhaust manifolds.
- Install the catalytic converter to exhaust manifold nuts (1) and tighten to 50 N·m (37 lb ft).
- Install the muffler to catalytic converter nuts (1) and tighten to 48 N·m (35 lb ft).
- Install the exhaust hanger bolts and hanger to the transmission and tighten to 50 N·m (37 lb ft).
- Install the HO2S. Refer to Heated Oxygen Sensor Replacement - Bank 1 Sensor 1 , Heated Oxygen Sensor Replacement - Bank 1 Sensor 2 , Heated Oxygen Sensor Replacement - Bank 2 Sensor 1 , and Heated Oxygen Sensor Replacement - Bank 2 Sensor 2.

Caution: Refer to Fastener Caution in the Preface section.


Catalytic Converter Replacement 4.8L/5.3L
Removal Procedure
Warning: Refer to Exhaust Service Warning in the Preface section.
Warning: Refer to Protective Goggles and Glove Warning in the Preface section.
- Raise and support the vehicle. Refer to Lifting and Jacking the Vehicle.
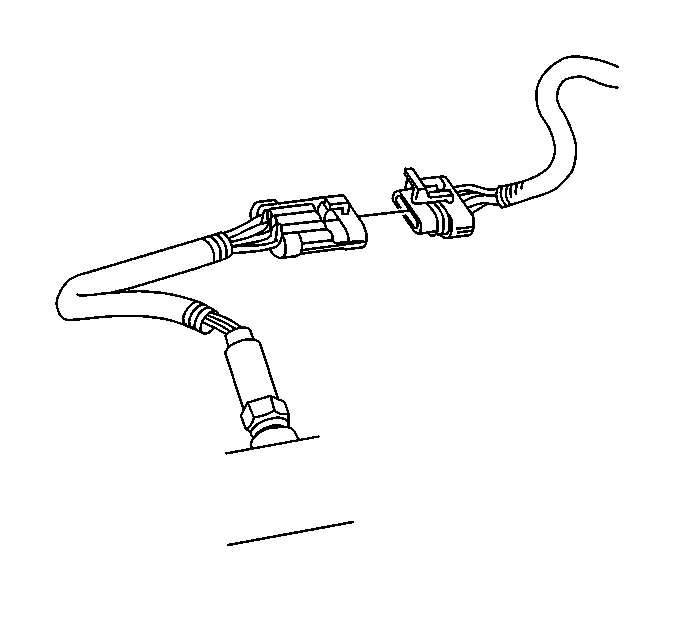
- Disconnect the heated oxygen sensor (HO2S) electrical connectors from the main harness connectors.
- Remove the nuts (1) from the catalytic converter pipe to the exhaust manifolds.
- Remove the nuts from the catalytic converter pipe to the muffler.
- Remove the catalytic converter from the vehicle.
- Remove and discard the exhaust manifold seals.
- If replacing the catalytic converter pipe, remove the oxygen sensors as necessary. Refer to Heated Oxygen Sensor Replacement - Bank 1 Sensor 1.

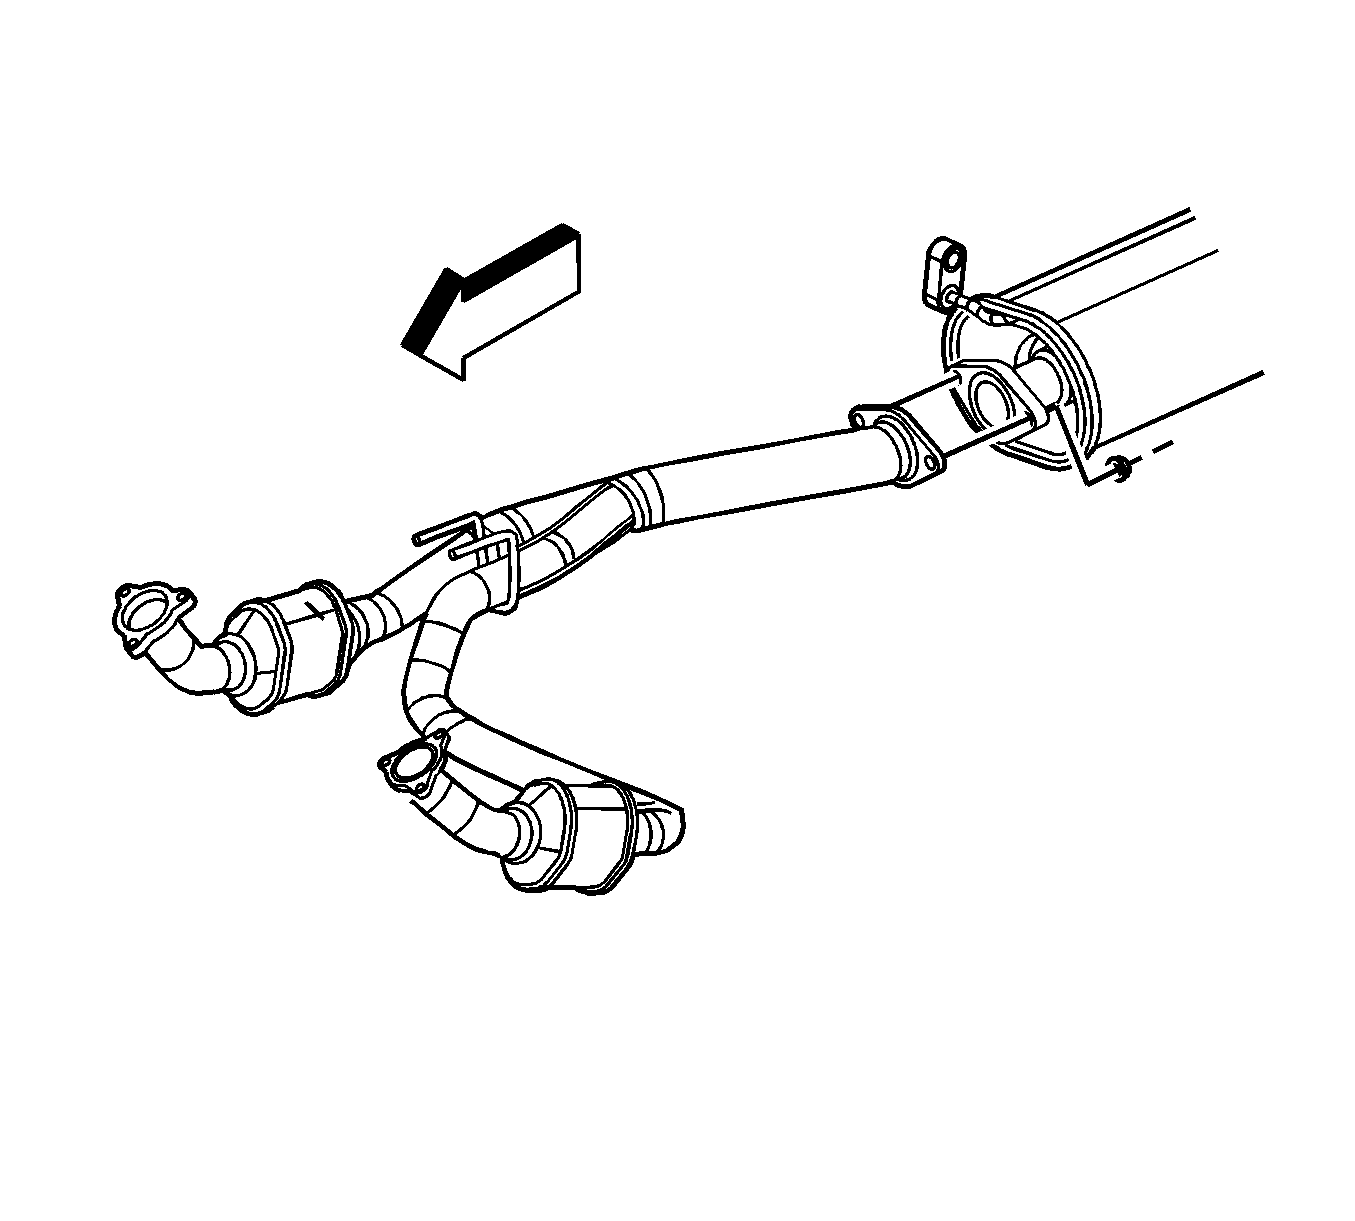
Installation Procedure
Note: A special anti-seize compound is used on the heated oxygen sensor (HO2S) threads. The compound consists of liquid graphite and glass beads. The graphite tends to burn away, but the glass beads remain, making the sensor easier to remove. New, or service replacement sensors already have the compound applied to the threads. If the sensor is removed from an engine and if for any reason the sensors are to be reinstalled, the threads must have anti-seize compound applied before the reinstallation.
- If reusing the old HO2S sensors, coat the threads with ant-seize compound GM P/N 5613695.
- Install the oxygen sensors to the catalytic converter. Refer to Heated Oxygen Sensor Replacement - Bank 1 Sensor 1.
- Install NEW seals to the exhaust manifolds.
- Position the catalytic converter to the exhaust manifolds and the muffler.
- Install the catalytic converter to muffler nuts, but do not completely tighten.
- Install the catalytic converter nuts to the exhaust manifold studs and tighten to 65 N·m(48 lb ft).
- Tighten the catalytic converter to muffler nuts (1) to 48 N·m (35 lb ft).
- Connect the HO2S electrical connections to the main harness connectors.
- Lower the vehicle and inspect for exhaust leaks.

Caution: Refer to Fastener Caution in the Preface section.


Caution: Refer to Exhaust System Inspection Caution in the Preface section.
Catalytic Converter Replacement 6.0L - Left
Removal Procedure
- Raise the vehicle. Refer to Lifting and Jacking the Vehicle.
- Disconnect the oxygen sensors.
- Remove the exhaust hanger bolts and hanger from the vehicle.
- Remove the nuts retaining the exhaust pipe flange to the catalytic converter pipe.
- Remove the nuts retaining the exhaust pipe flange to the muffler.
- Remove the exhaust pipe.
- Remove the flange gasket.
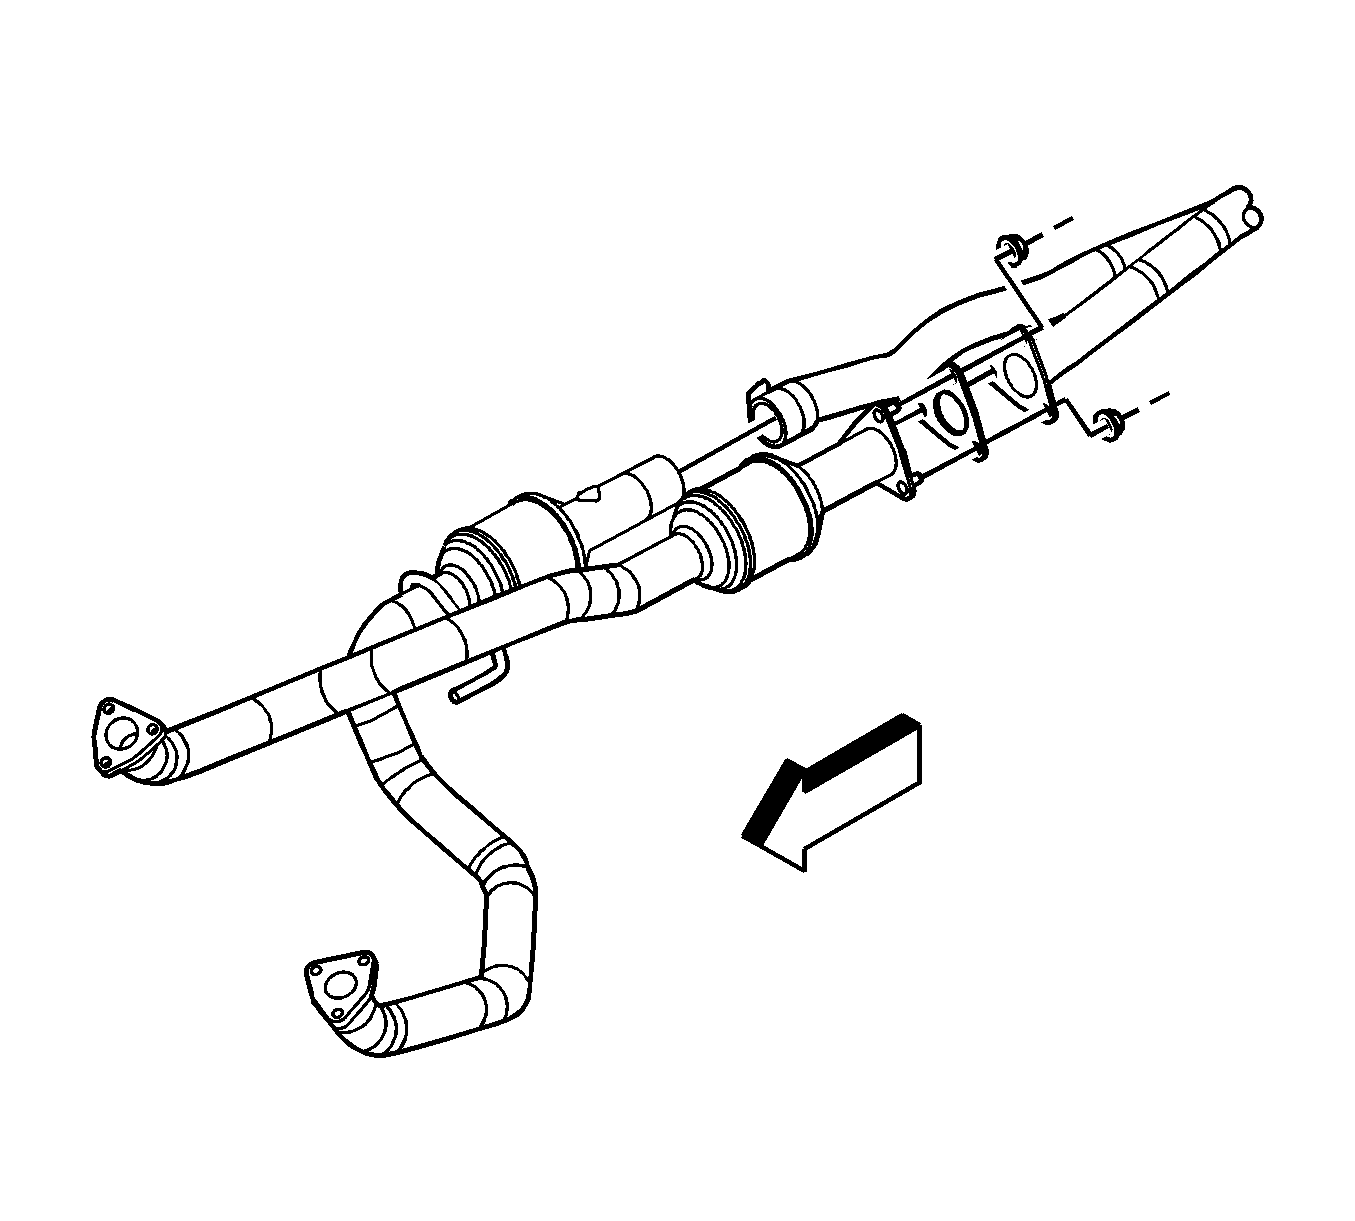
Warning: Refer to Exhaust Service Warning in the Preface section.
Warning: Refer to Protective Goggles and Glove Warning in the Preface section.
Installation Procedure
- Remove the oxygen sensors and install into the new exhaust pipe and tighten to 42 N·m (31 lb ft).
- Install new gaskets to the muffler flange and the catalytic converter pipe flange.
- Install the exhaust pipe.
- Install the nuts for the catalytic converter pipe to the exhaust pipe. Tighten the flange nuts to 48 N·m (35 lb ft).
- Install the nuts for the muffler to the exhaust pipe and tighten to 48 N·m (35 lb ft).
- Connect the oxygen sensor connectors.
- Install the exhaust hanger and bolts and tighten to 17 N·m (13 lb ft).
- Verify the exhaust system for proper clearance and the alignment of all components.
- Lower the vehicle.
Caution: Refer to Fastener Caution in the Preface section.

Caution: Refer to Exhaust System Inspection Caution in the Preface section.
Catalytic Converter Replacement 6.0L - Right
Removal Procedure
- Raise the vehicle. Refer to Lifting and Jacking the Vehicle.
- Disconnect the oxygen sensor connectors.
- Remove the exhaust hanger bolts and hanger from the vehicle.
- Remove the nuts retaining the exhaust pipe flange to the catalytic converter pipe.
- Loosen the nut retaining the exhaust pipe clamp to the muffler.
- Remove the exhaust pipe and flange gasket.

Warning: Refer to Exhaust Service Warning in the Preface section.
Warning: Refer to Protective Goggles and Glove Warning in the Preface section.
Installation Procedure
- Remove the oxygen sensors and install into new exhaust pipe and tighten to 42 N·m (31 lb ft).
- Install new gasket to the catalytic converter pipe flange.
- Install the exhaust pipe to the vehicle.
- Install the nuts for the catalytic converter pipe to exhaust pipe and tighten to 48 N·m (35 lb ft).
- Tighten the exhaust pipe clamp nut to 54 N·m (40 lb ft).
- Verify the exhaust system for proper clearance and the alignment of all components.
- Install the exhaust hanger and bolts and tighten to 17 N·m (13 lb ft).
- Lower the vehicle.
Caution: Refer to Fastener Caution in the Preface section.

Caution: Refer to Exhaust System Inspection Caution in the Preface section.
Catalytic Converter Replacement 6.6 - (LMM)
Removal Procedure
- Raise and support the vehicle. Refer to Lifting and Jacking the Vehicle.
- Remove the catalytic converter (1) to particulate filter nuts (3).
- Loosen the catalytic converter to exhaust pipe adaptor clamp (1).
- Slide the exhaust pipe clamp up onto the exhaust pipe adapter.
- Remove the catalytic converter hanger to transmission bolts (1).
- With the catalytic converter hanger attached, remove the catalytic converter from the vehicle.
- Discard the catalytic converter to particulate filter gasket.
- If replacing the catalytic converter, remove the catalytic converter hanger.
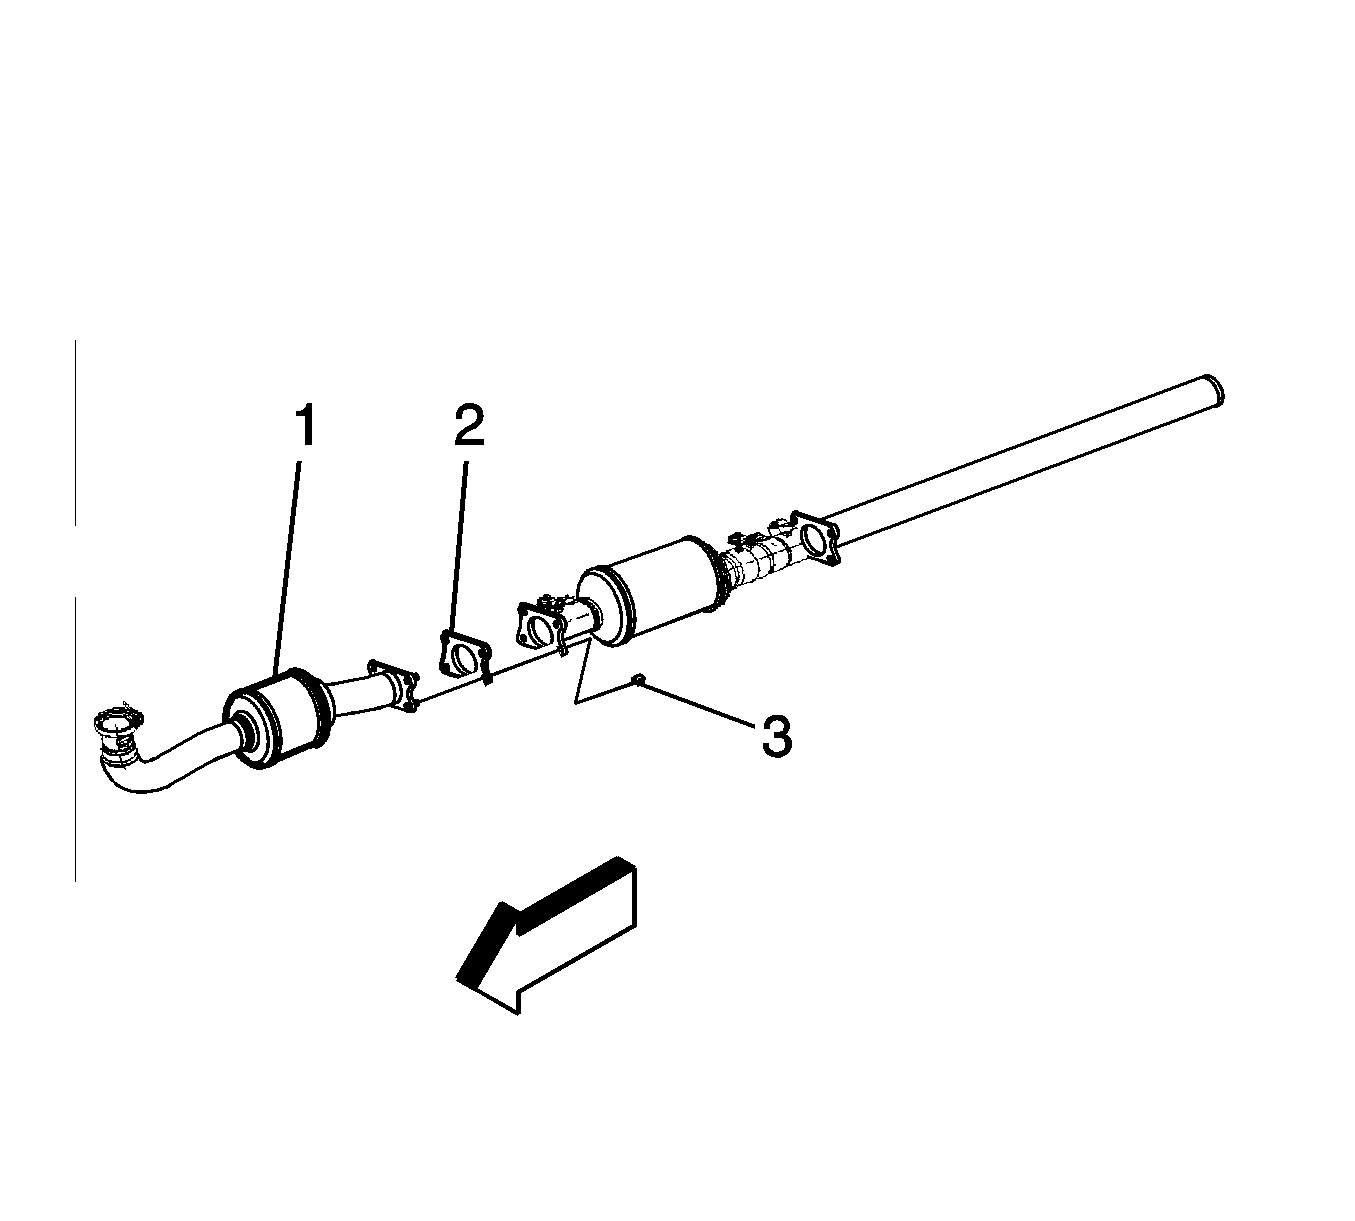
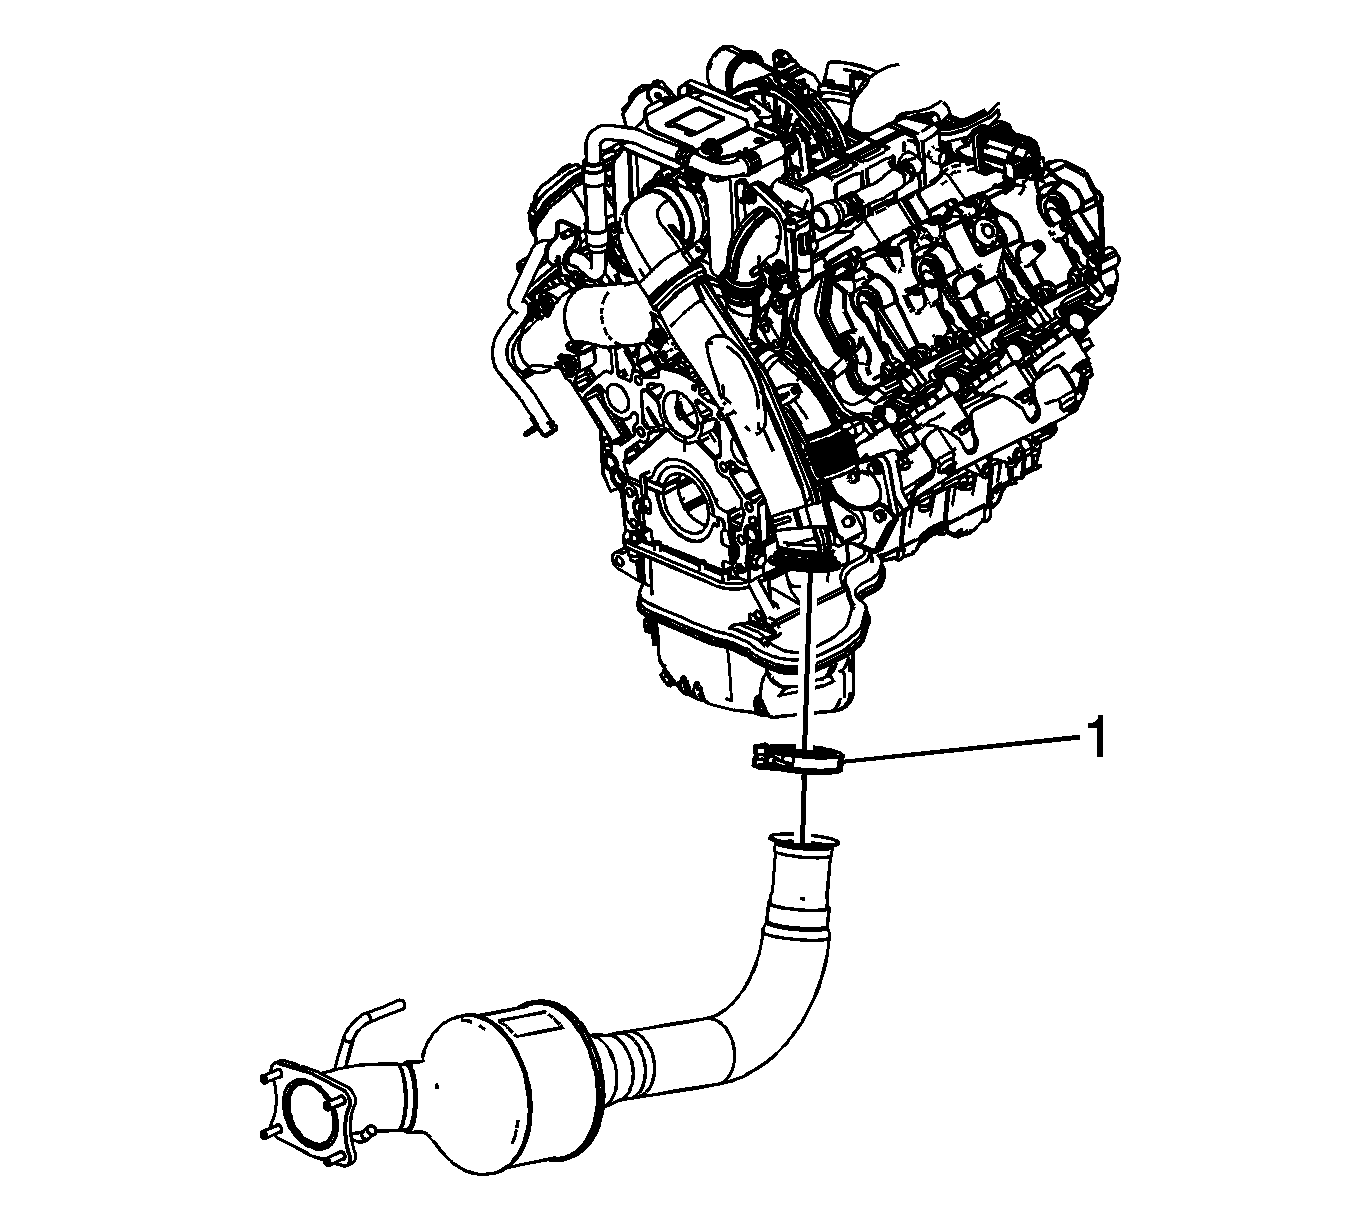
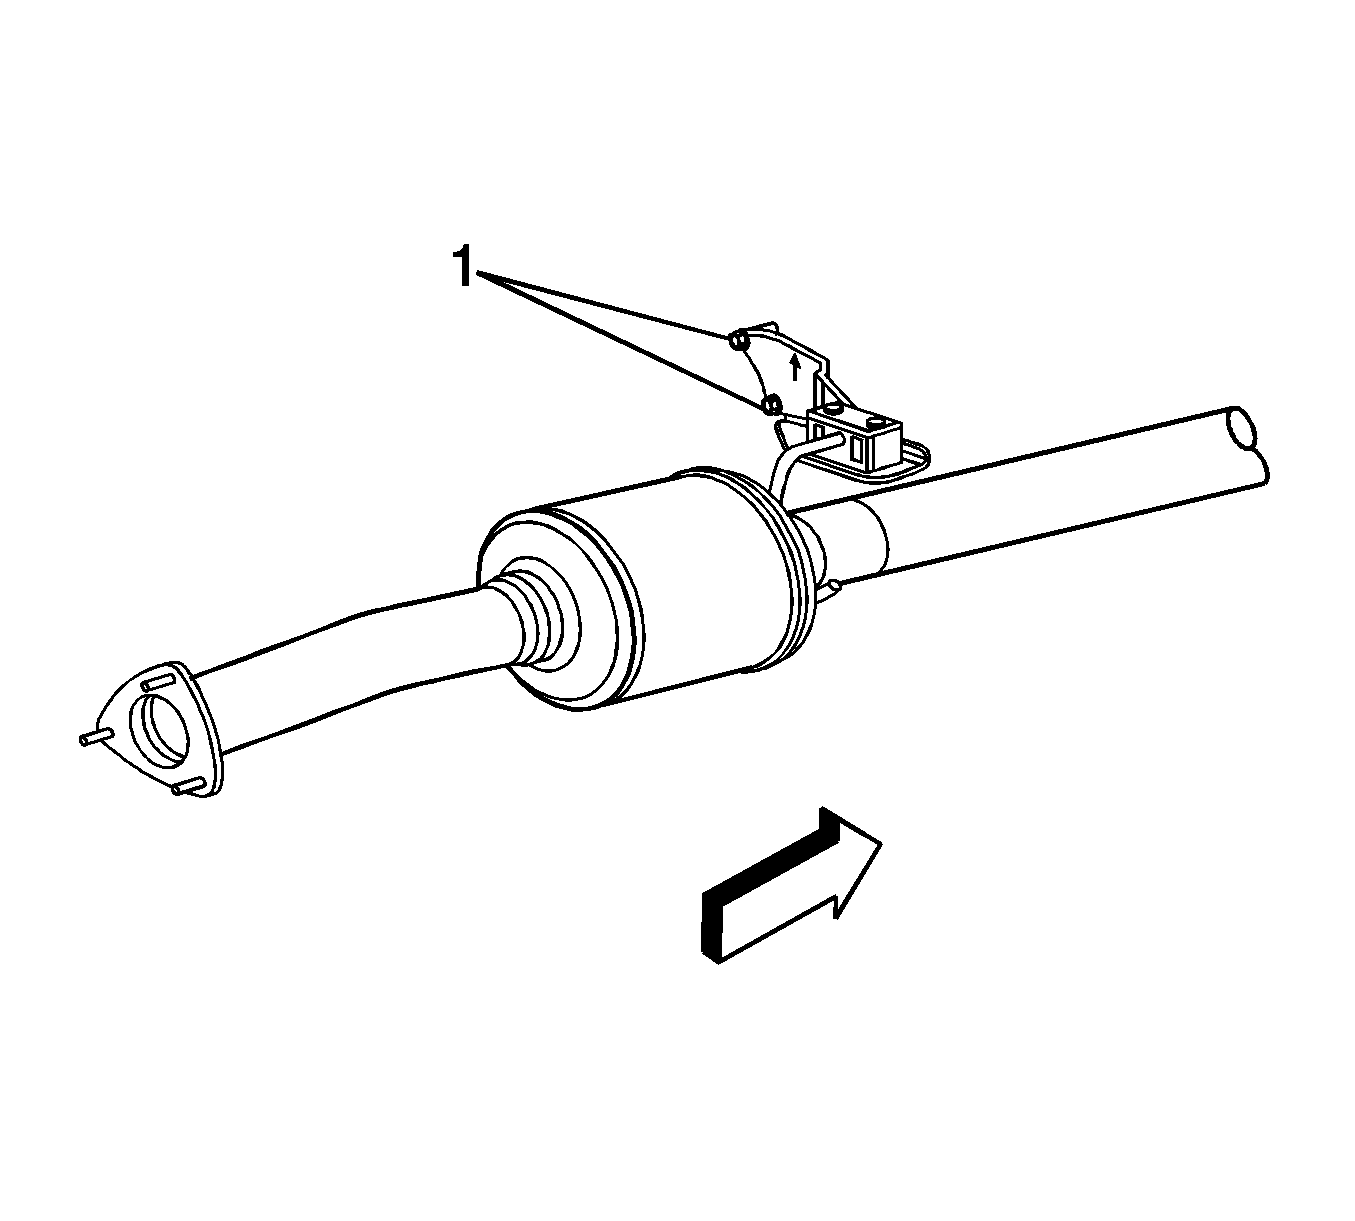
Installation Procedure
- If replacing the catalytic converter, apply water based lubricant to the catalytic converter hanger bracket and slide the exhaust pipe hanger bracket into the catalytic converter hanger.
- Install a NEW catalytic converter to particulate filter gasket.
- Position the catalytic converter to the particulate filter, exhaust pipe adapter and transmission.
- Install the catalytic converter hanger to transmission bolts (1) and tighten to 34 N·m (25 lb ft).
- Install the catalytic converter to particulate filter nuts (3) until snug.
- Slide the exhaust pipe clamp (1) down and around the pipe connection.
- Tighten the exhaust pipe clamp and catalytic converter nuts.
- Lower the vehicle.

Caution: Refer to Fastener Caution in the Preface section.


Note: Ensure that the manifold pipe is square to the exhaust pipe adapter.
| • | Tighten the clamp to 40 N·m (30 lb ft). |
| • | Tighten the nuts to 40 N·m (30 lb ft). |
