Engine Coolant Thermostat Housing Replacement LNF
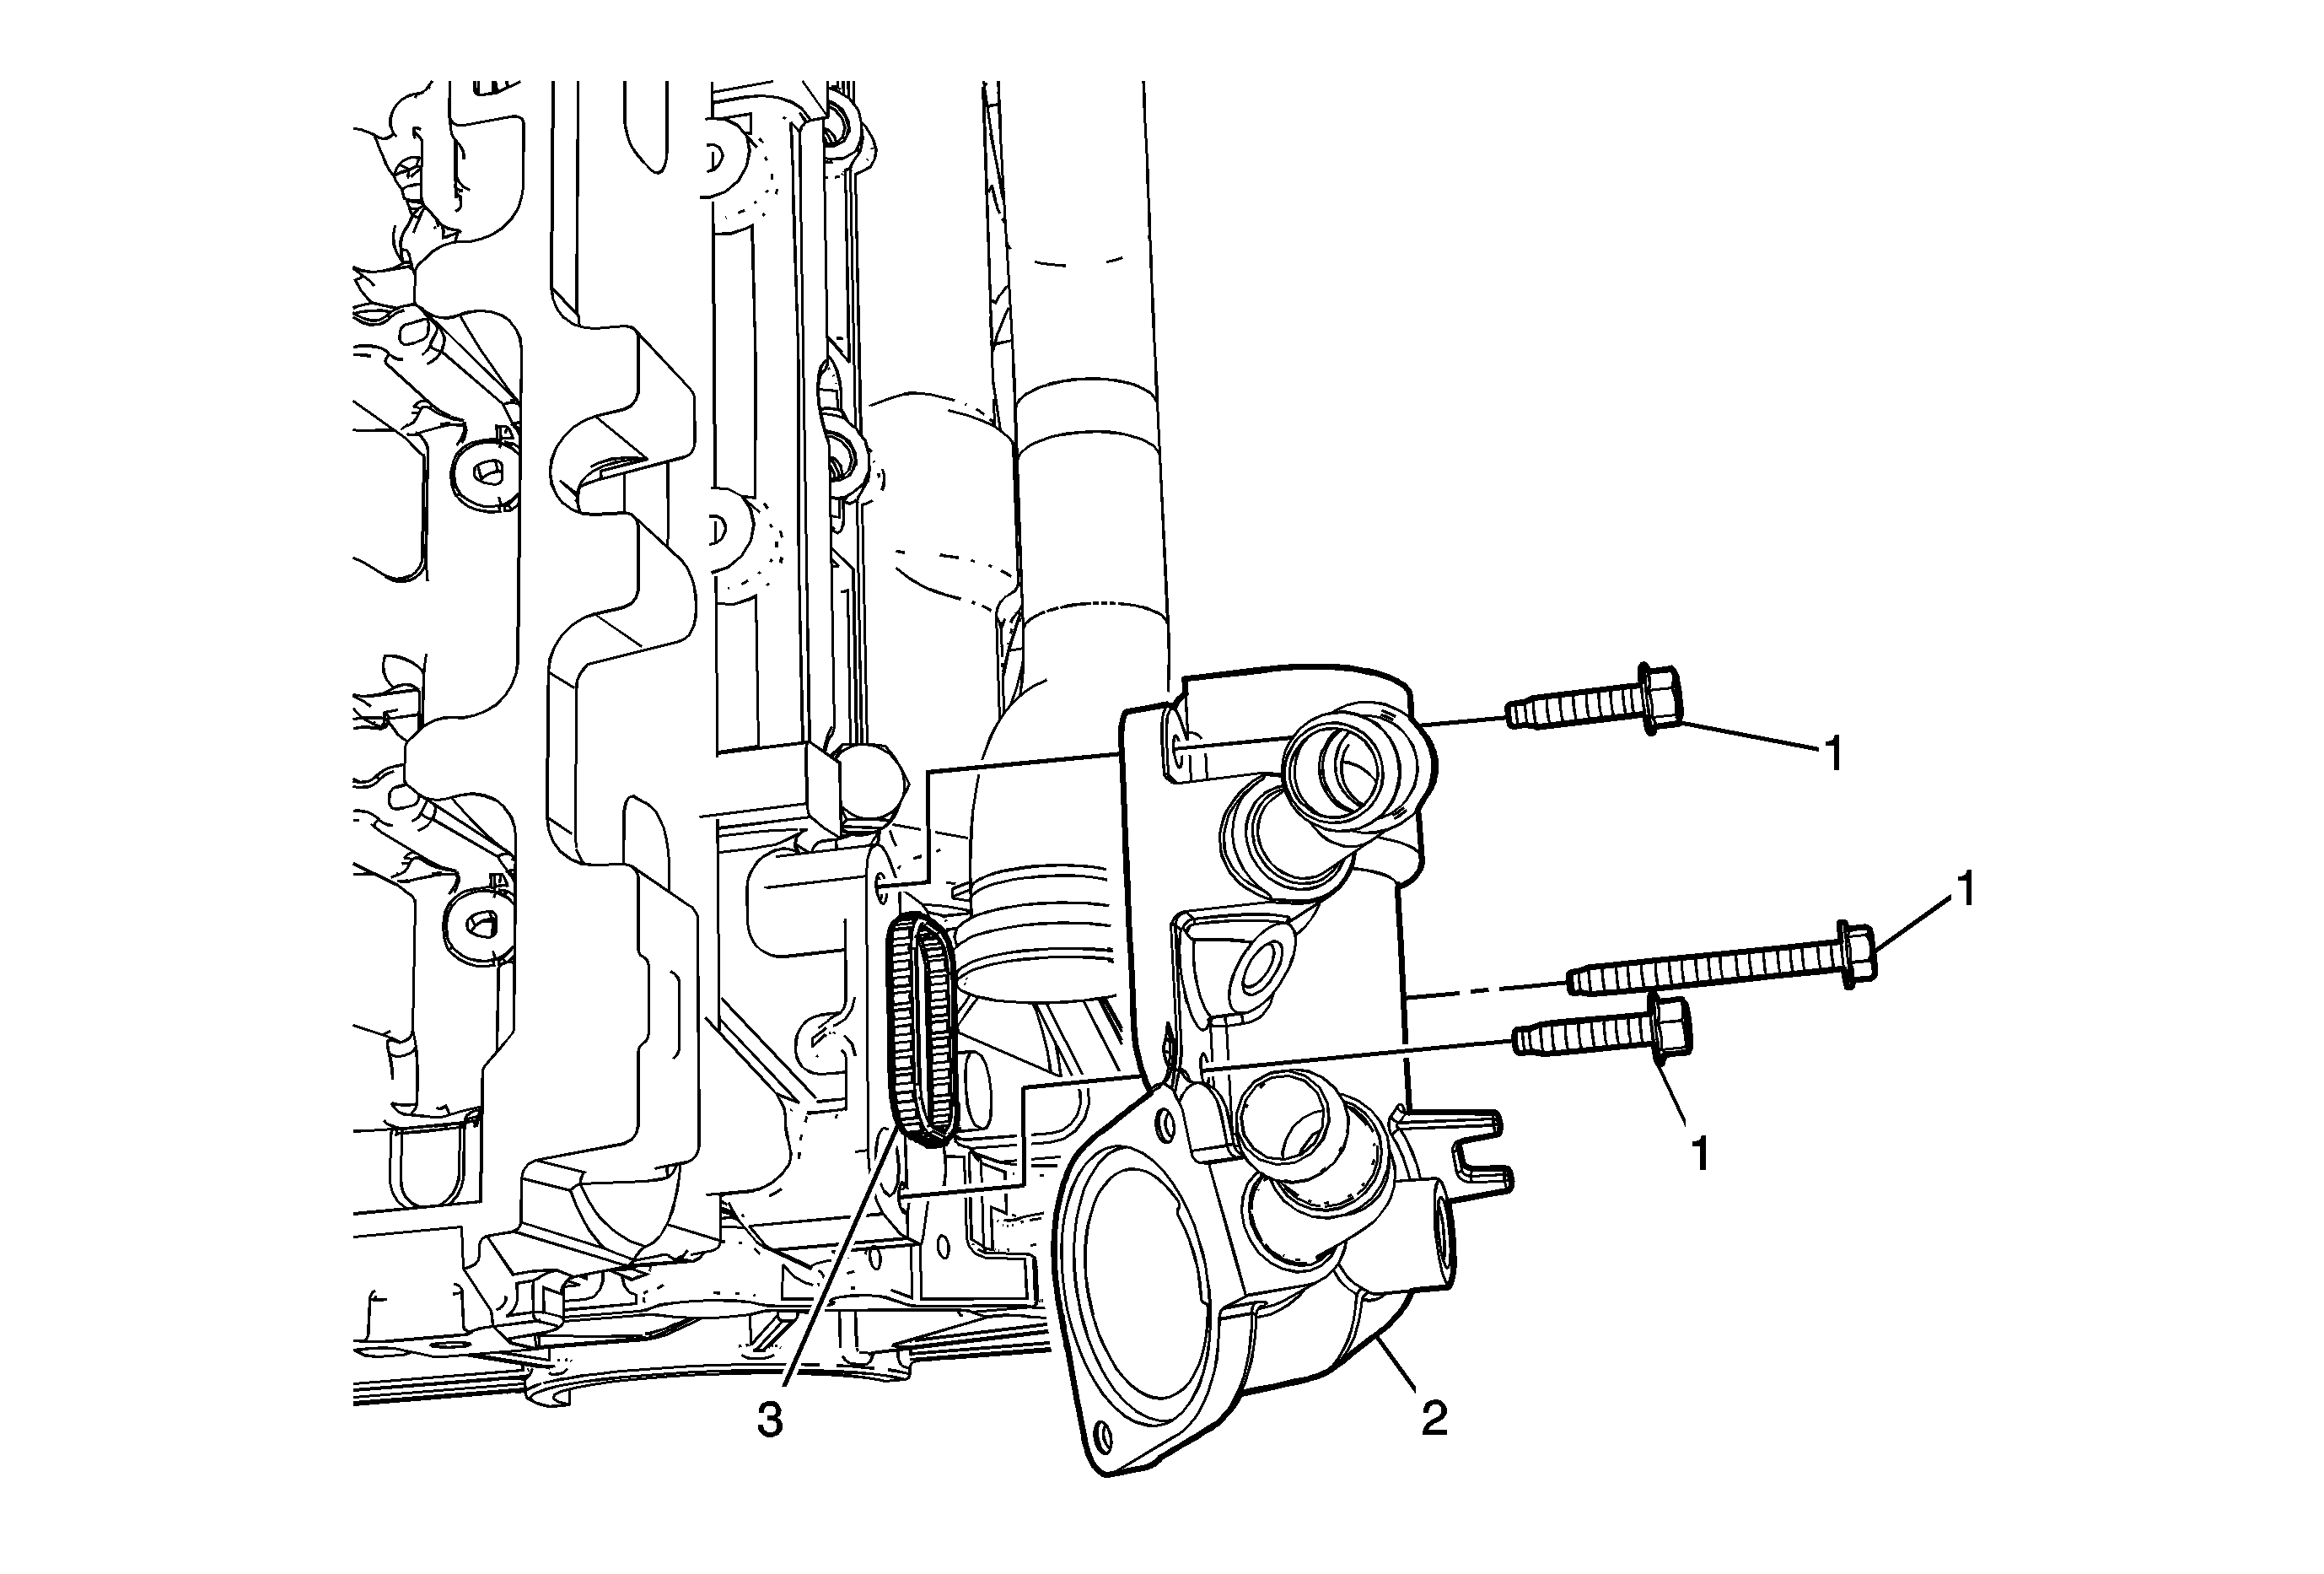
Callout | Component Name |
|---|---|
Preliminary Procedures
Note: If replacing the engine coolant thermostat housing, transfer the coolant temperature sensor. Refer to Engine Coolant Temperature Sensor Replacement. | |
1 | Thermostat Housing Bolt (Qty: 3) Notice: Refer to Fastener Notice in the Preface section. Tighten |
2 | Thermostat Housing |
3 | Water Inlet Seal ProcedureUse a new seal. |
Engine Coolant Thermostat Housing Replacement L61 /LE5
Removal Procedure
- Drain the cooling system. Refer to Cooling System Draining and Filling.
- Remove the air cleaner assembly. Refer to Air Cleaner Assembly Replacement for the 2.2L (L61) engine or Air Cleaner Assembly Replacement for the 2.4L engine.
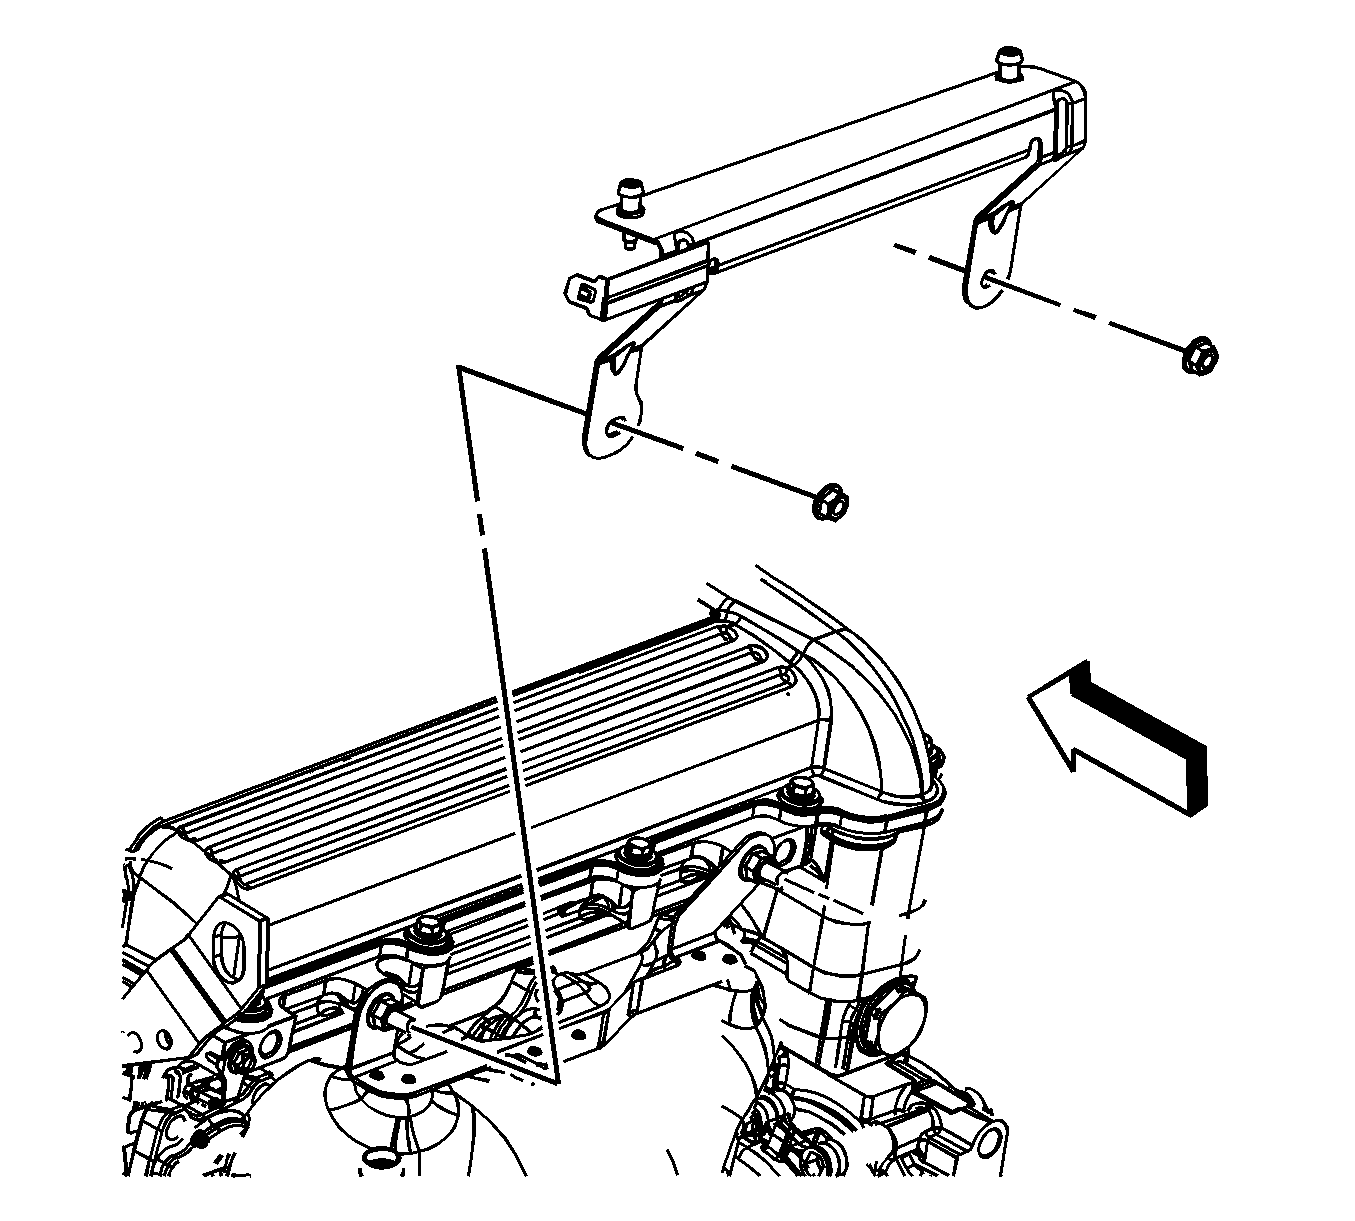
- Remove the air cleaner bracket nuts.
- Remove the air cleaner bracket.
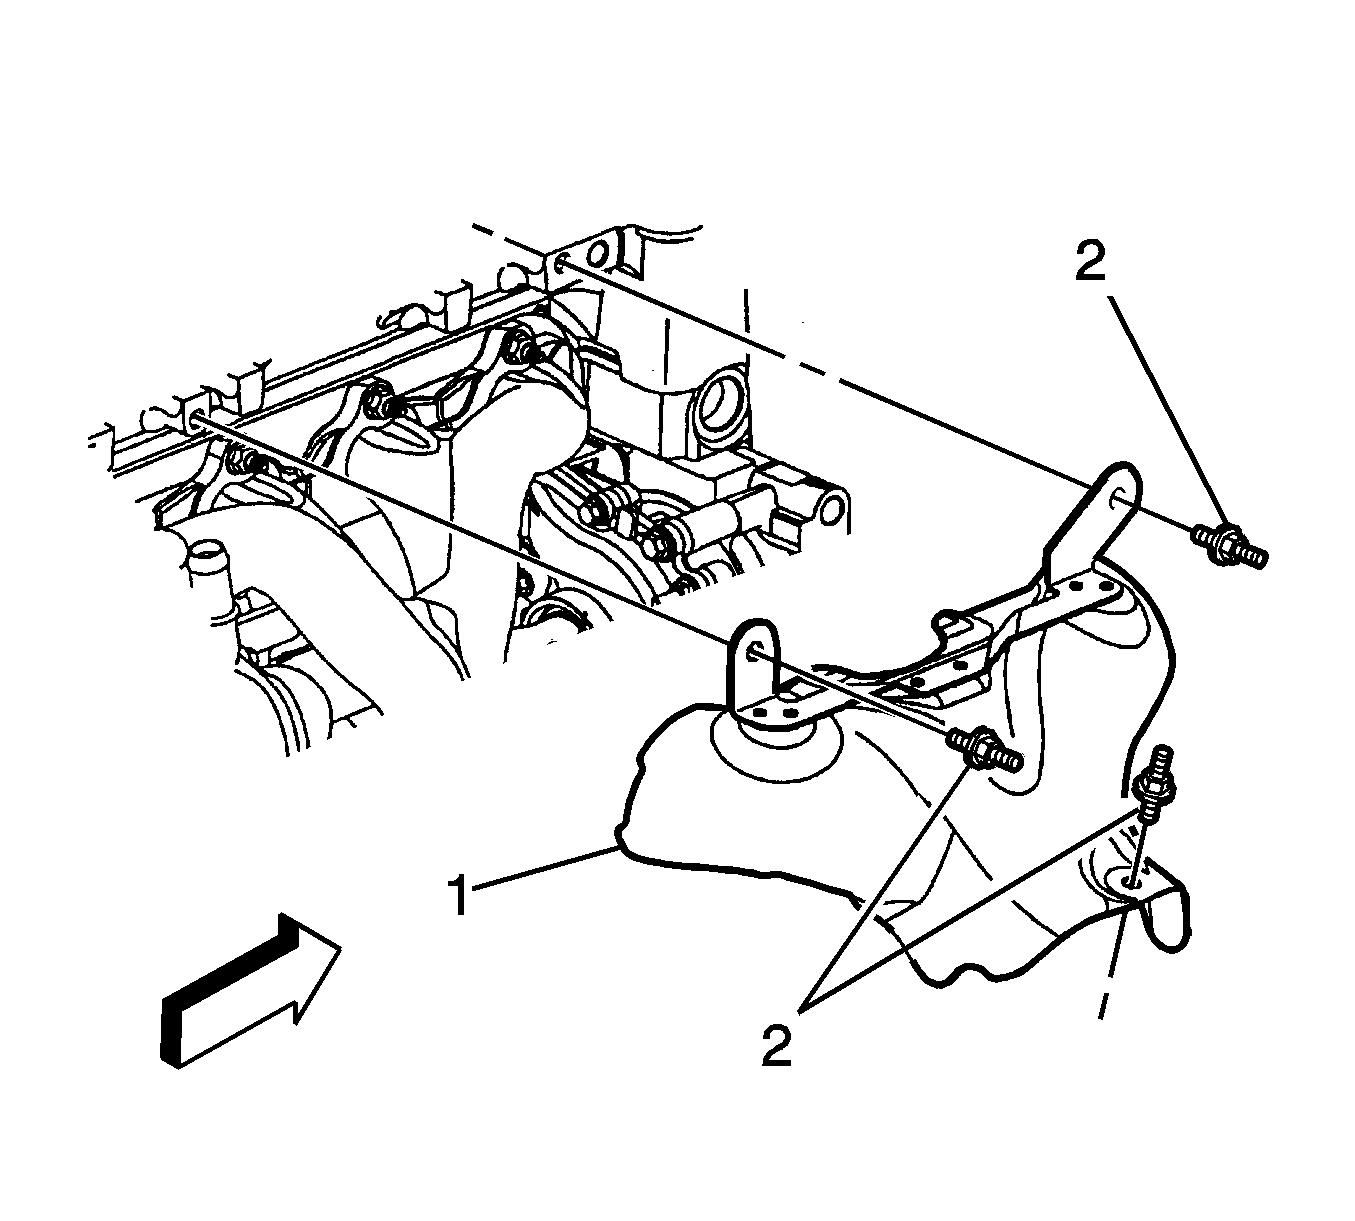
- Remove the exhaust heat shield studs (2).
- Remove the exhaust heat shield (1).
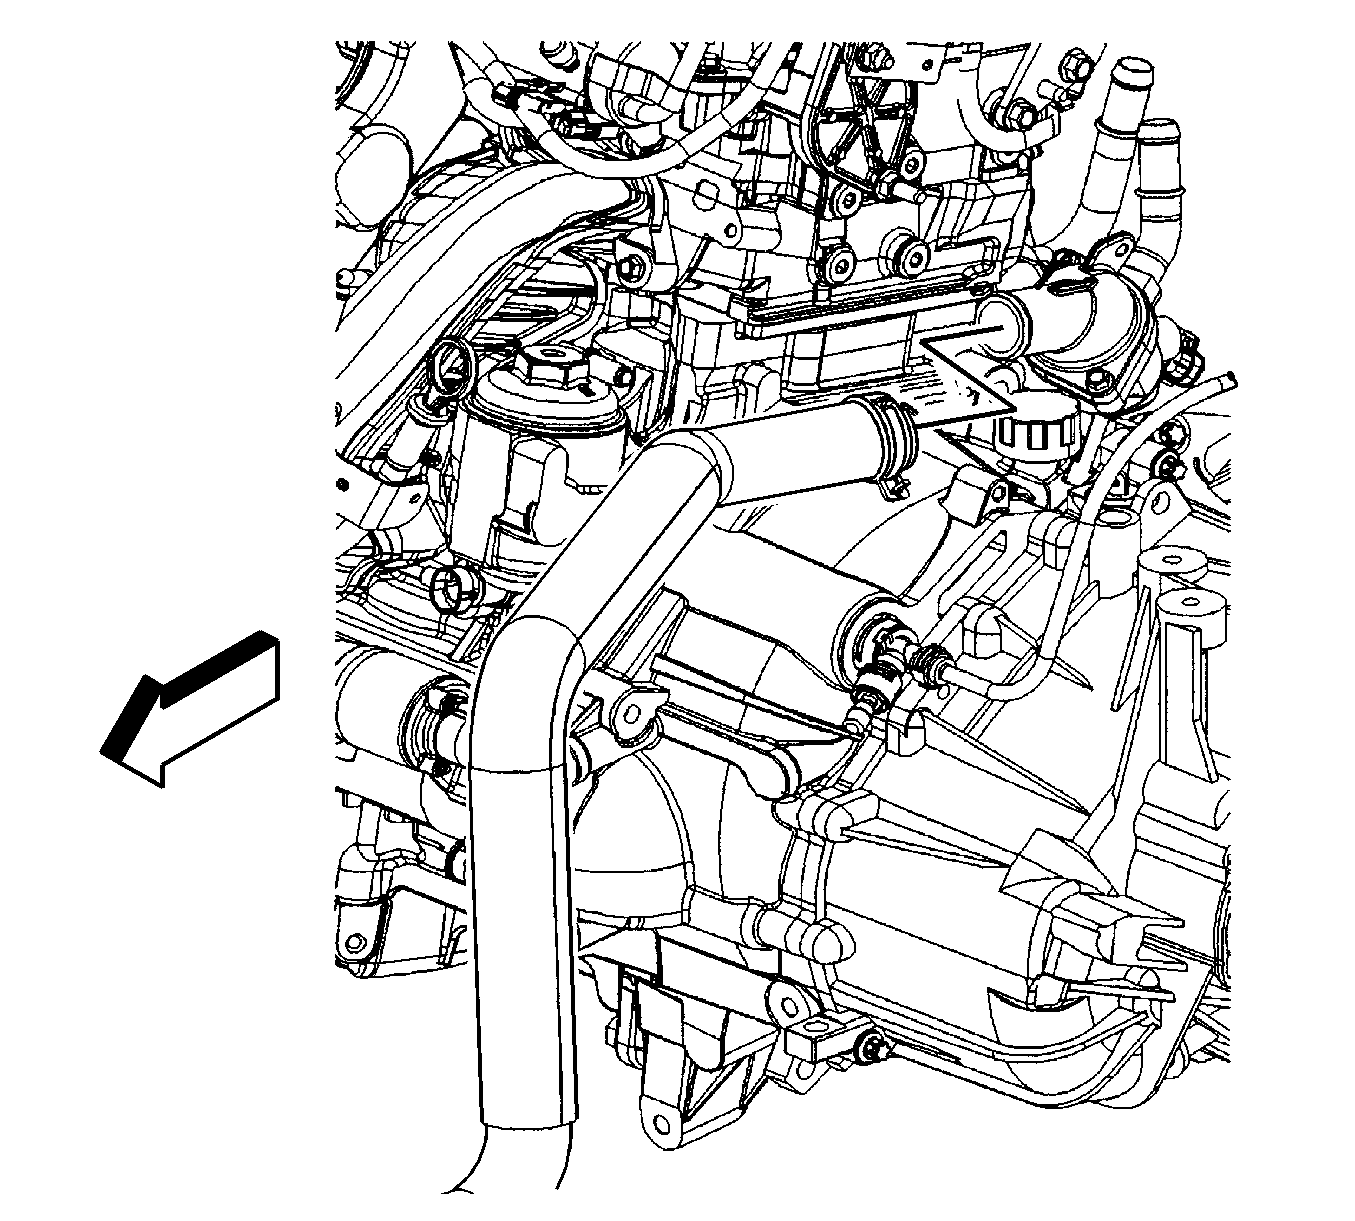
- Drain the coolant from the engine block at the water pump drain. After the coolant has drained, tighten the drain bolt.
- Lower the vehicle.
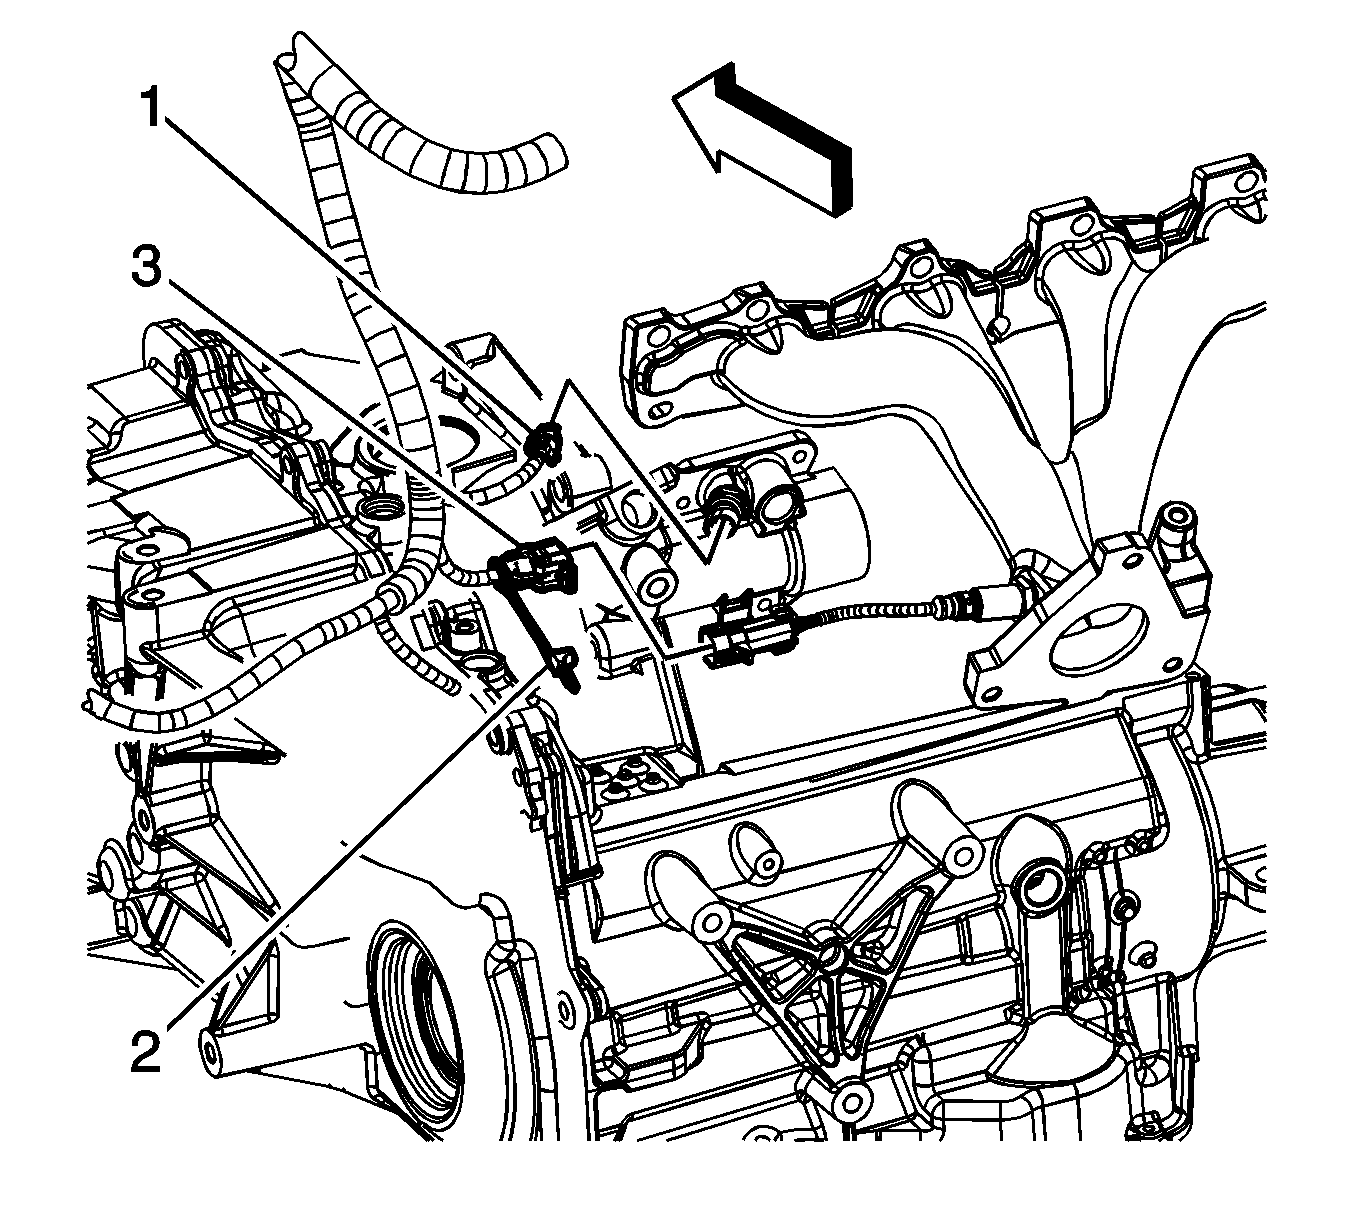
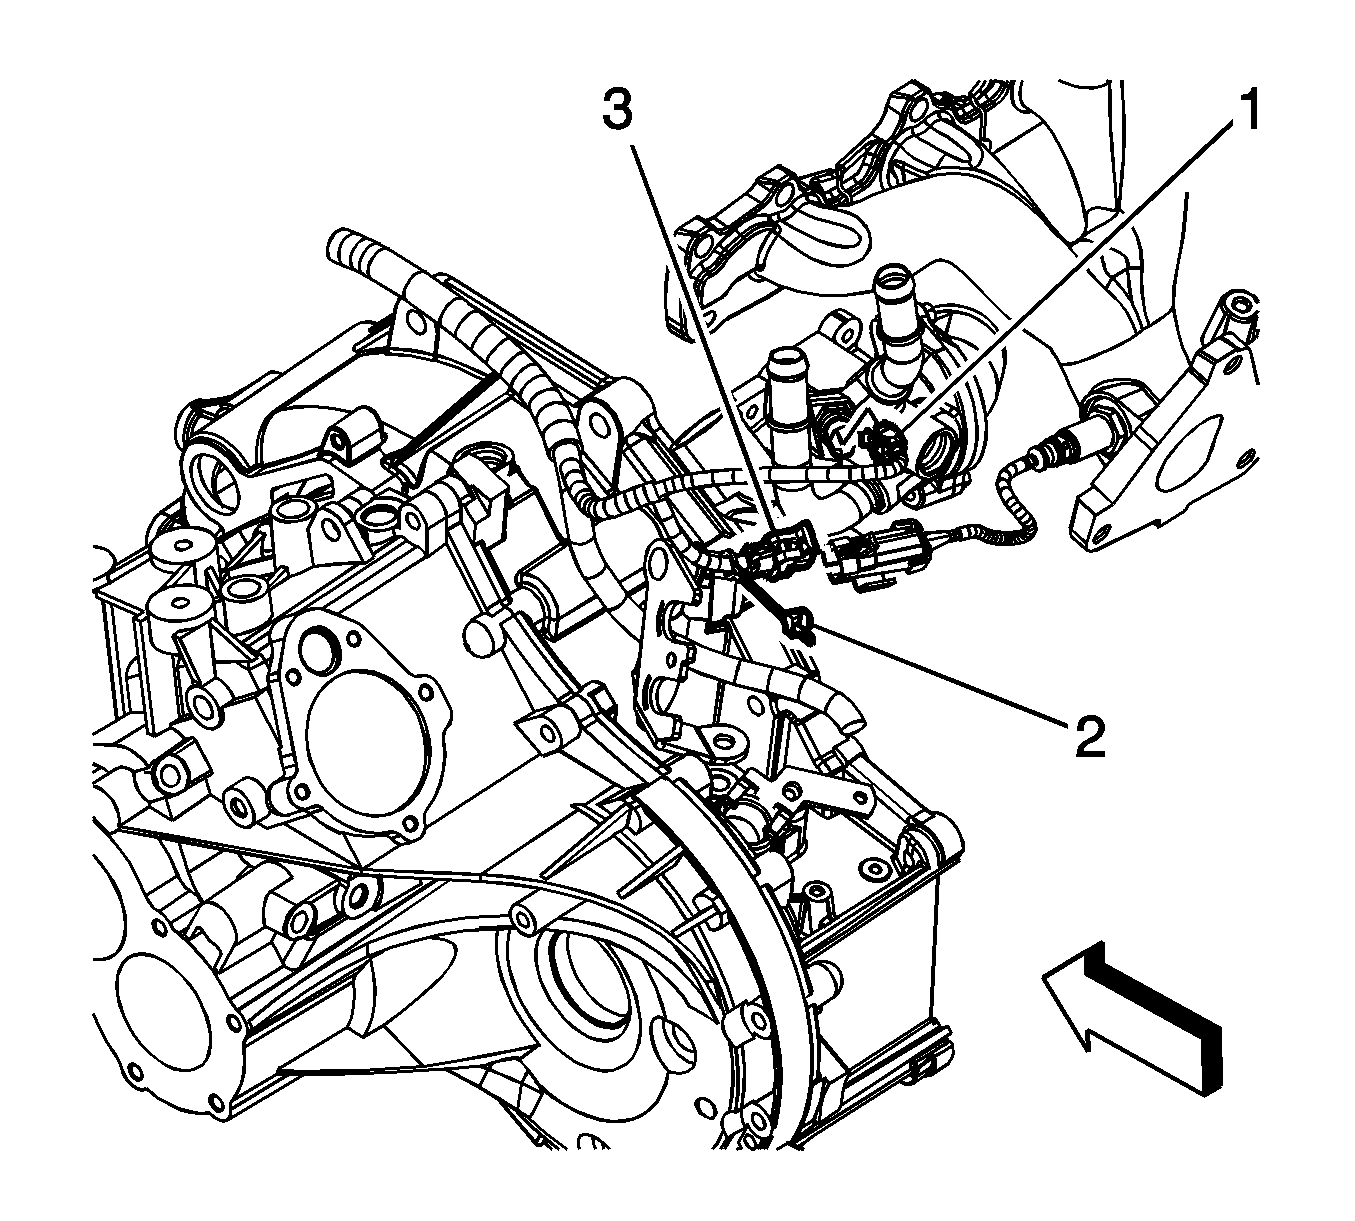
- If equipped with a automatic transaxle, perform the following steps, disconnect the engine coolant temperature (ECT) sensor electrical connector (1).
- Disconnect the heated oxygen sensor (HO2S) electrical connector clip from the thermostat housing.
- If equipped with a manual transaxle, disconnect the ECT sensor electrical connector (1).
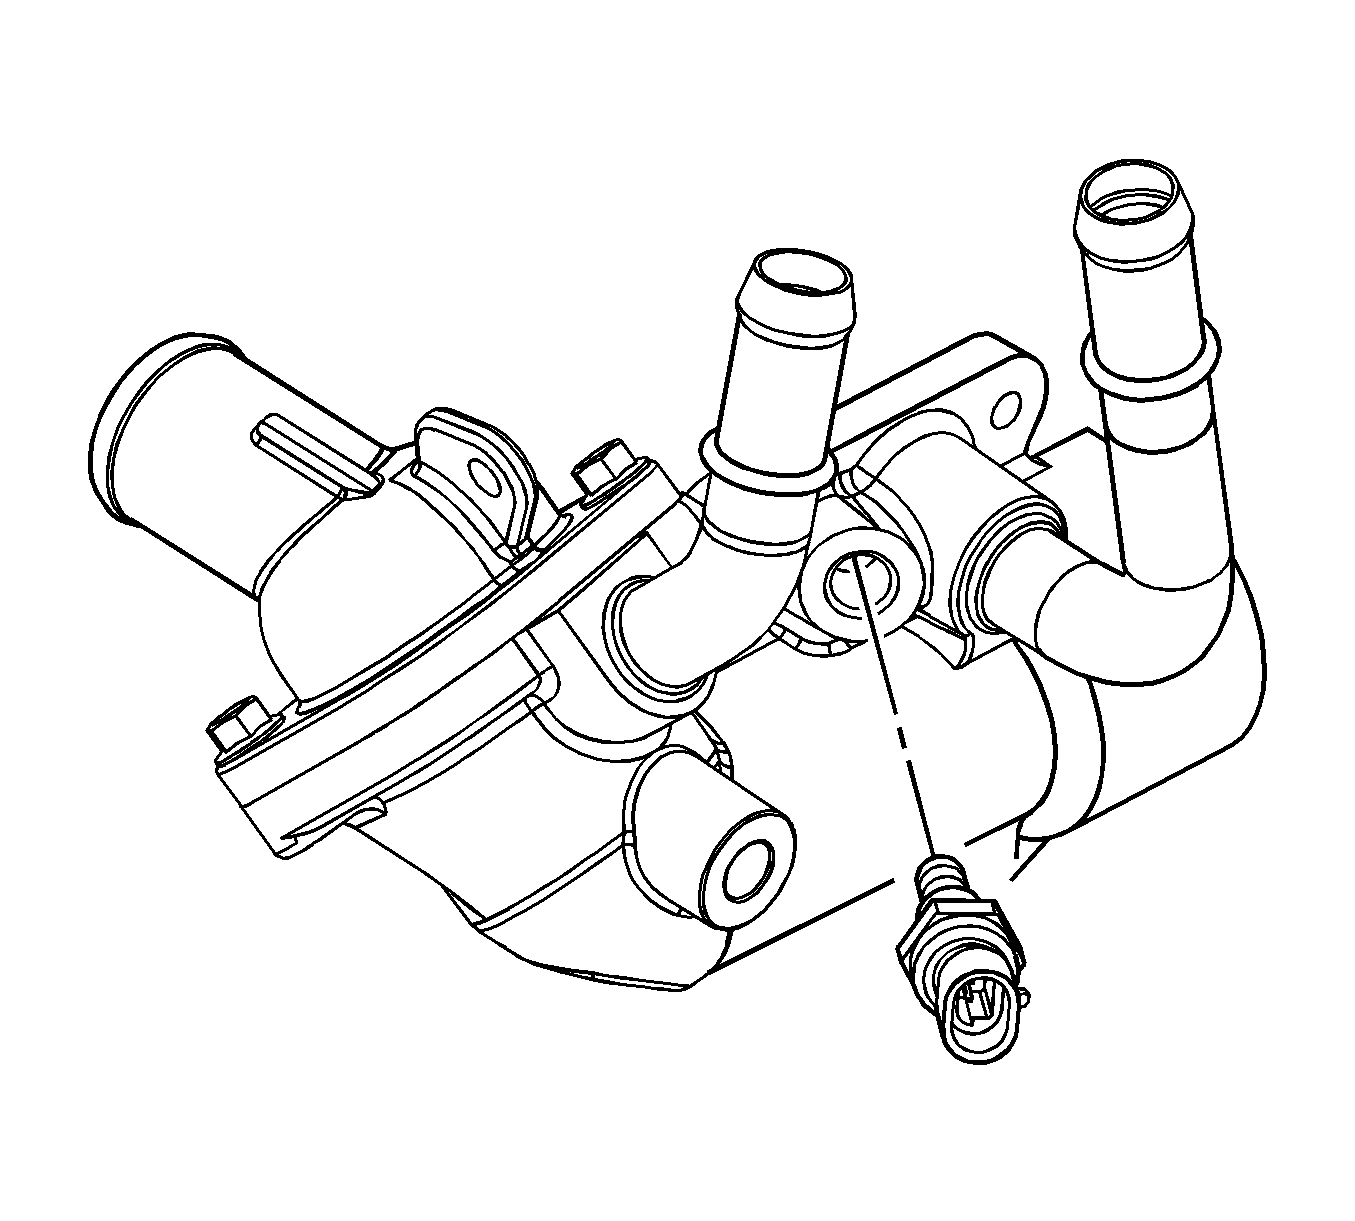
- Remove the ECT sensor.
- Reposition the radiator outlet hose clamp at the thermostat housing.
- Remove the radiator outlet hose from the thermostat housing.
- Reposition the heater inlet and outlet hose clamps at the thermostat housing pipes.
- Disconnect the heater inlet and outlet hoses from the thermostat housing pipes.
- Raise and support the vehicle. Refer to Lifting and Jacking the Vehicle .
- Remove the thermostat housing bolts.
- Remove the thermostat housing from the vehicle.
- Remove the water transfer pipe from the thermostat housing, if necessary.
- Remove and discard the water transfer pipe O-ring seals, if necessary.
- Remove the thermostat housing cover bolts and cover, if necessary.
- Remove the thermostat, if necessary.
- Remove and discard the thermostat housing O-ring seal, if necessary.
- Remove all debris and thread sealant from the engine coolant temperature sensor and bolt holes if the housing is being re-used.
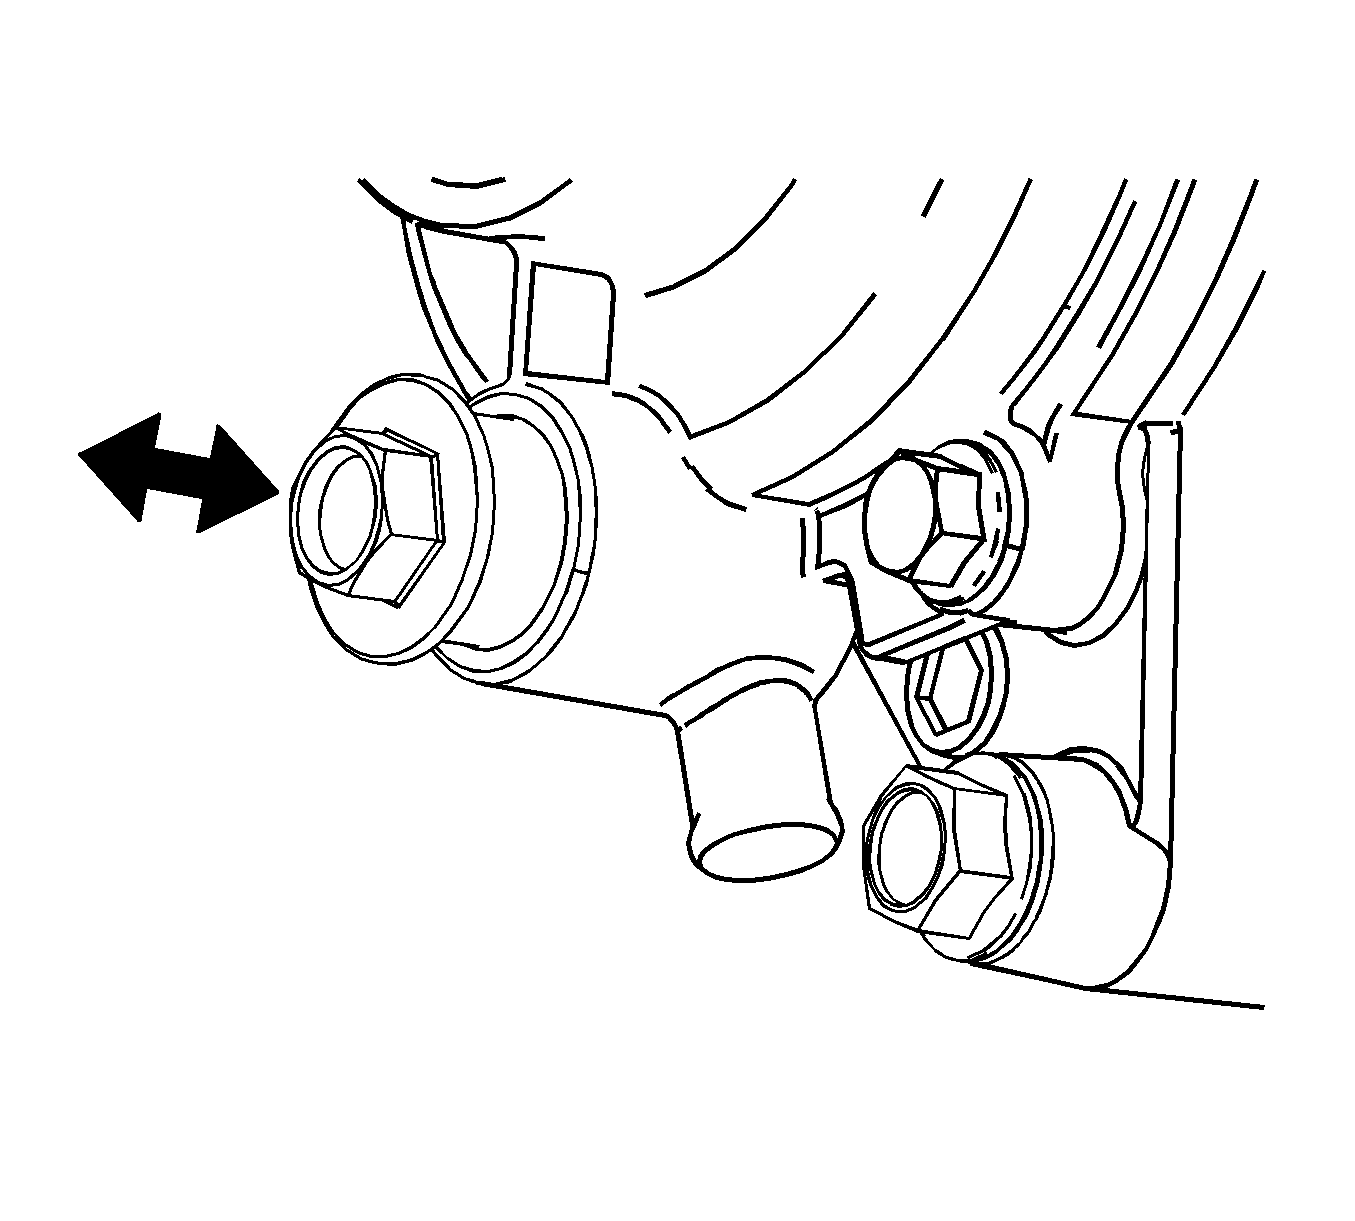
Important: A drain has been provided at the bottom of the water pump for engine block coolant drainage.
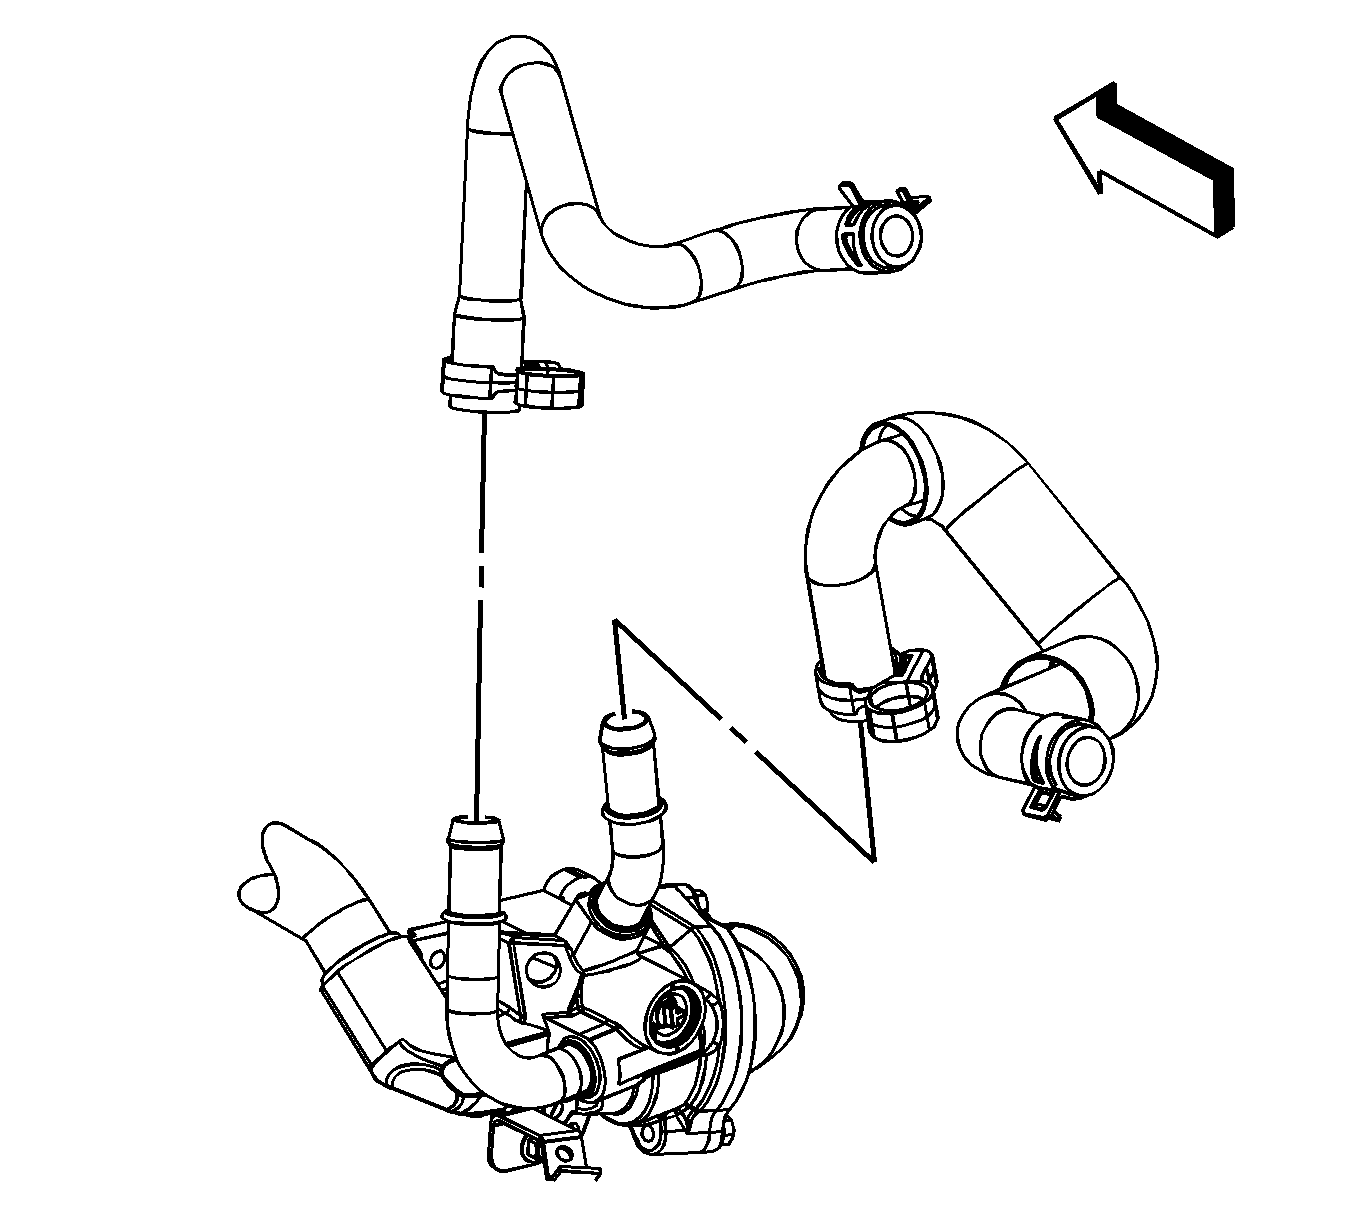
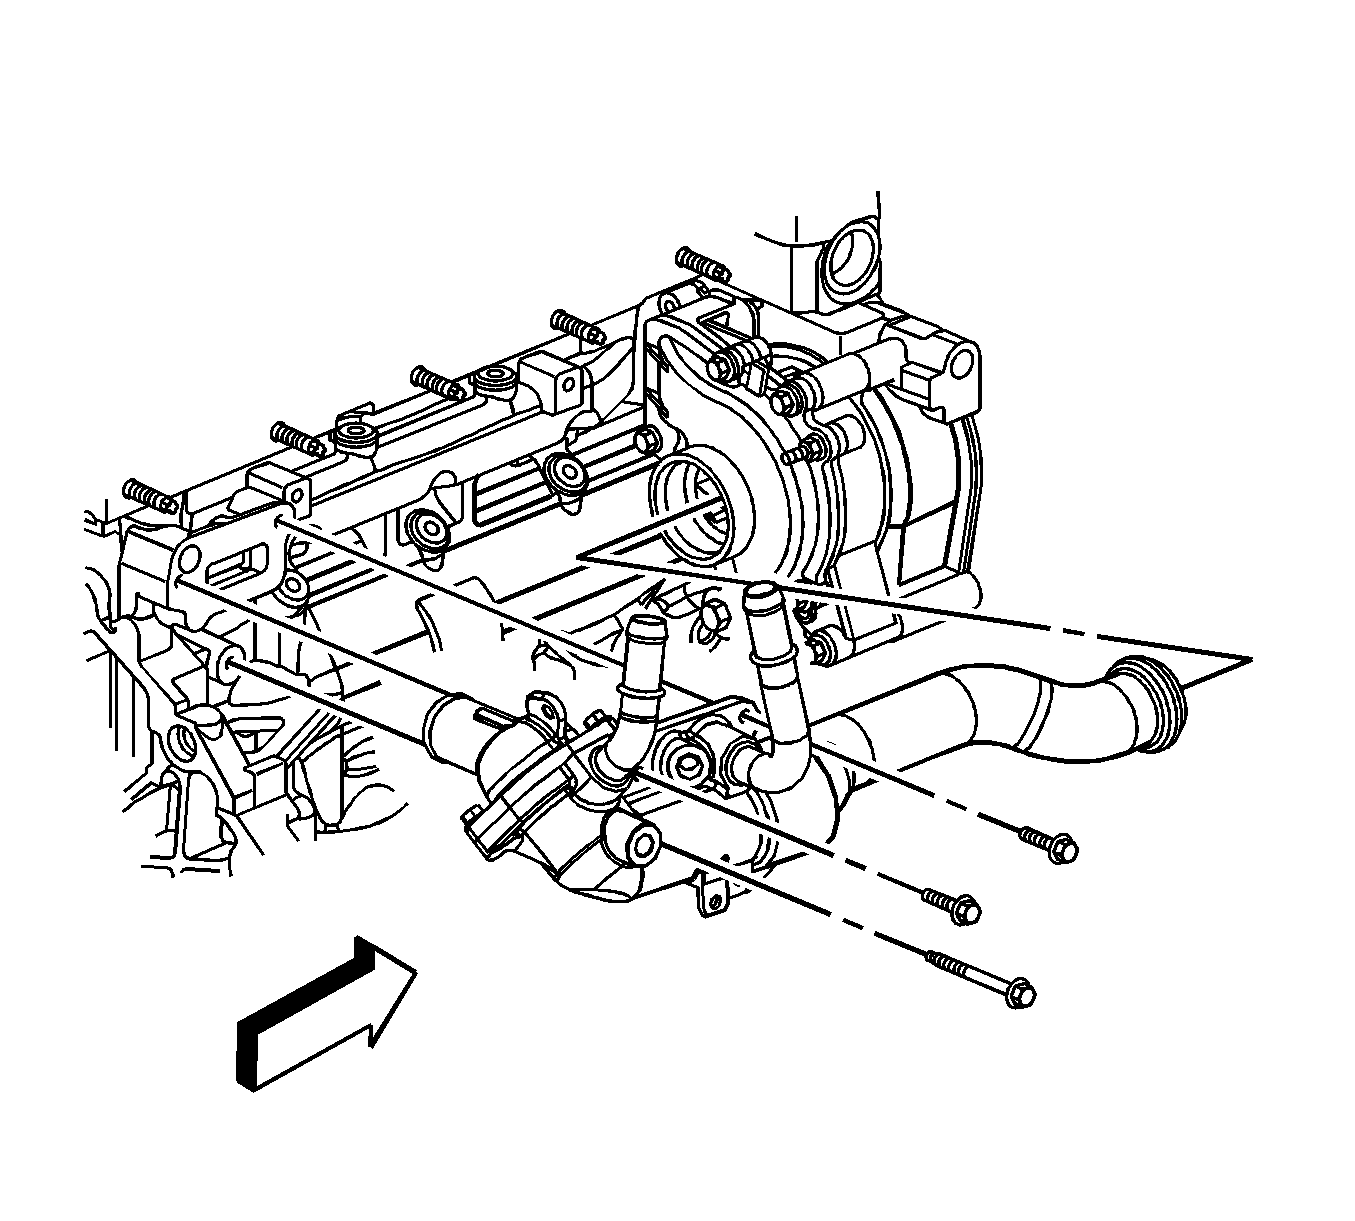
Important: Twist the water transfer pipe while pulling in order to remove it from the water pump.
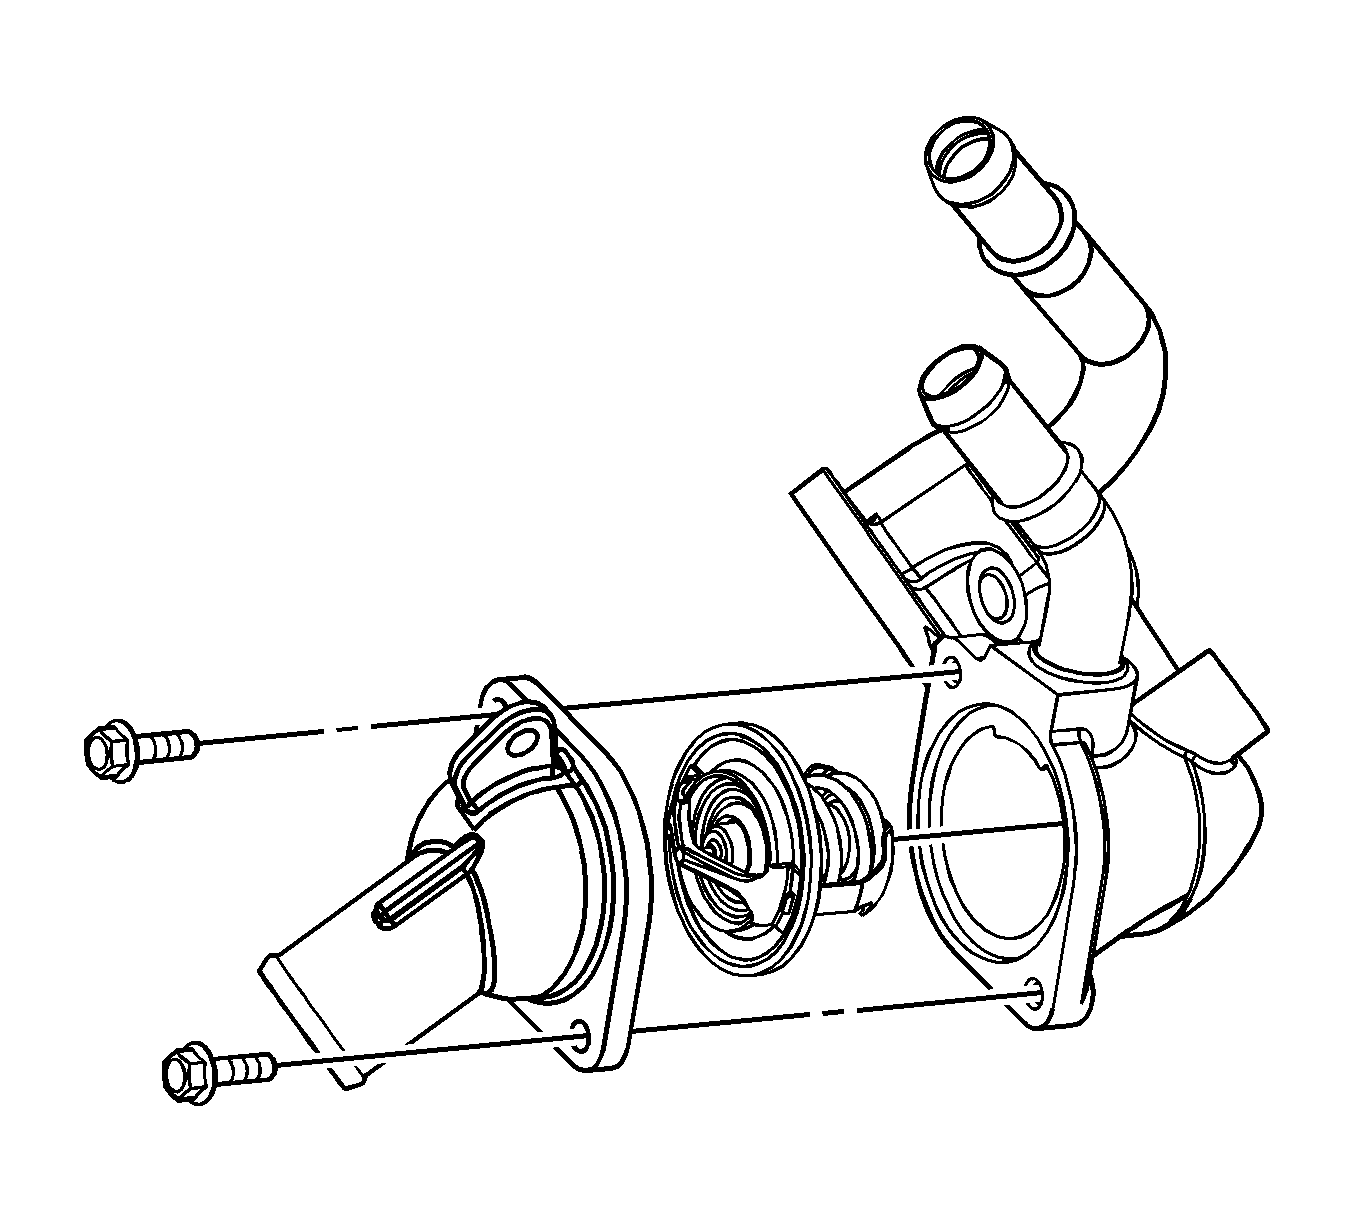
Installation Procedure
- Install a NEW thermostat housing cover O-ring seal into the recess groove.
- Install the thermostat, if necessary.
- Install the thermostat housing cover bolts, if necessary.
- Install a NEW thermostat housing to engine gasket onto the thermostat housing.
- Load the thermostat housing assembly into position.
- Install NEW O-ring seals onto the water feed pipe.
- Install the water feed pipe into the thermostat housing aligning locator tab.
- Align the water pipe to water pump.
- Seat the water feed O-ring seal by pushing inward toward the water pump. Take care not to tear or damage the O-ring.
- Position the thermostat housing against the engine.
- Install the thermostat housing bolts.
- Lower the vehicle.
- Connect the heater inlet and outlet hoses to the thermostat housing pipes.
- Position the heater inlet and outlet hose clamps at the thermostat housing pipes.
- Install the radiator outlet hose to the thermostat housing.
- Position the radiator outlet hose clamp at the thermostat housing.
- If reinstalling the old sensor, coat the threads with sealant. Refer to Adhesives, Fluids, Lubricants, and Sealers .
- Install the ECT sensor.
- If equipped with a manual transaxle, connect the ECT sensor electrical connector (1).
- If equipped with a automatic transaxle, perform the following steps, connect the ECT sensor electrical connector (1).
- Connect the HO2S electrical connector clip to the thermostat housing.
- Verify the drain valves at the radiator and water pump are closed.
- Fill the cooling system. Refer to Cooling System Draining and Filling .
- Lower the vehicle.
- Install the exhaust heat shield (2).
- Install the exhaust heat shield studs (1).
- Install the air cleaner bracket.
- Install the air cleaner bracket nuts.
- Install the air cleaner assembly. Refer to Air Cleaner Assembly Replacement for the 2.2L (L61) engine or Air Cleaner Assembly Replacement for the 2.4L engine.
- Verify the repair and inspect for any leaks.

Notice: Refer to Fastener Notice in the Preface section.
Tighten
Tighten the bolts to 10 N·m (89 lb in).

Important: The water feed pipe seals can be lightly lubricated with coolant to aid during installation.
Important: Lubricate the O-rings with coolant ONLY.
Tighten
Tighten the bolts to 10 N·m (89 lb in).


Tighten
Tighten the sensor to 20 N·m (15 lb ft).


Important: The vehicle must be level when filling the cooling system.

Tighten
Tighten the studs to 22 N·m (16 lb ft).

Tighten
Tighten the nuts to 10 N·m (89 lb in).
