For 1990-2009 cars only
Removal Procedure
- Remove the air cleaner assembly. Refer to Air Cleaner Assembly Replacement .
- Remove the windshield washer solvent reservoir. Refer to Windshield Washer Solvent Container Replacement .
- Support the engine with a hydraulic floor jack. Use a piece of wood between the floor jack and the oil pan.
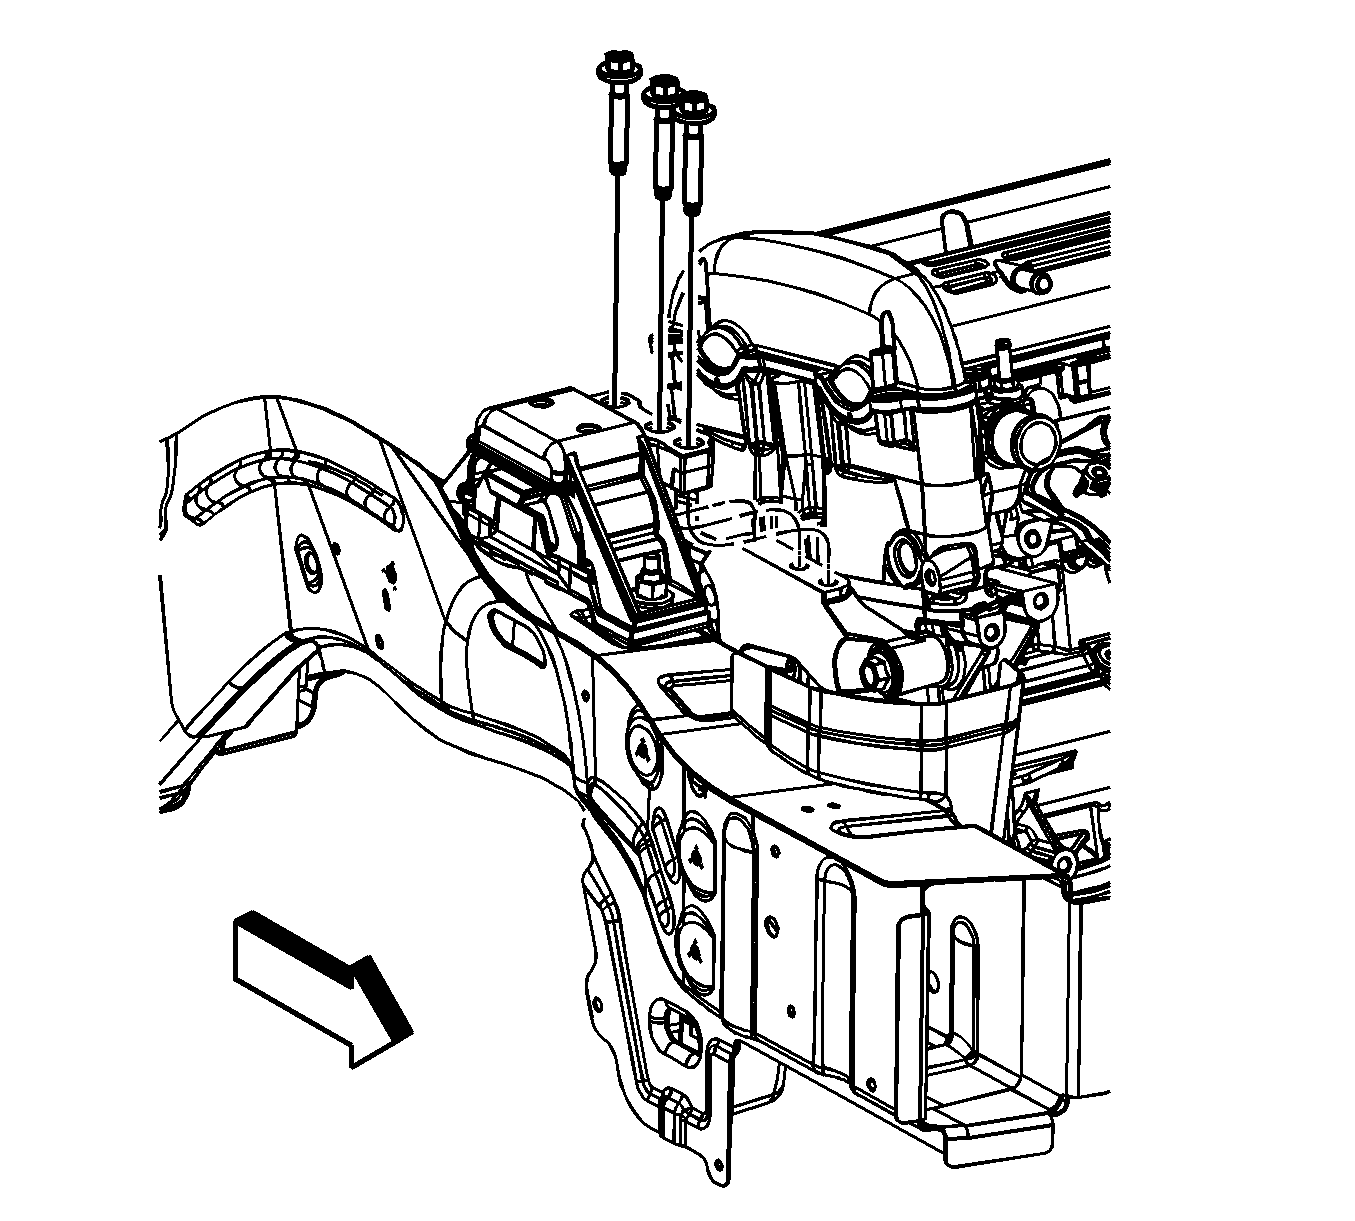
- Remove the engine mount to bracket bolts.
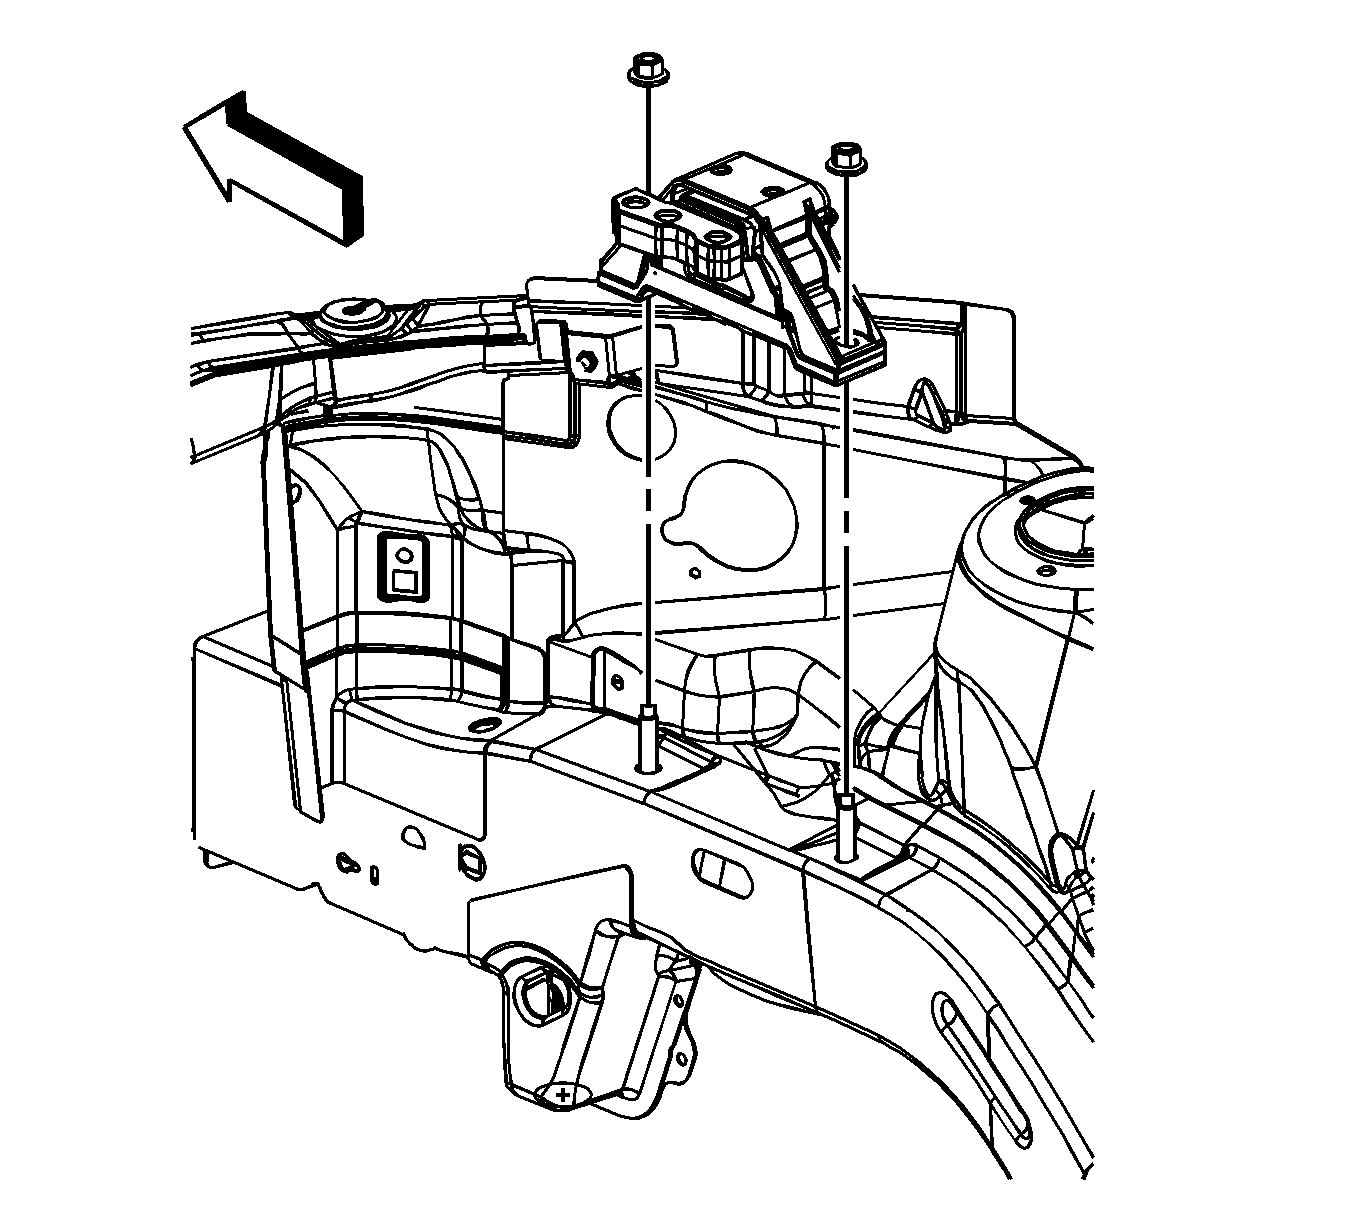
- Remove the engine mount to side rail nuts.
- Remove the engine mount from the engine compartment.


Installation Procedure
- Place the engine mount onto the side rail studs.
- Install the engine mount to side rail nuts.
- Install the engine mount to bracket bolts.
- Tighten the engine mount to bracket bolts.
- Remove the hydraulic floor jack from under the oil pan.
- Install the windshield washer solvent reservoir. Refer to Windshield Washer Solvent Container Replacement .
- Install the air cleaner assembly. Refer to Air Cleaner Assembly Replacement .

Notice: Refer to Fastener Notice in the Preface section.
Tighten
Tighten the nuts to 100 N·m (74 lb ft).

Important: The engine mount to bracket bolts must be hand started. Do not pry the engine mount to align the holes.
Tighten
Tighten the bolts to 65 N·m (48 lb ft).
