Brake Pedal Assembly Replacement Manual Transaxle
Removal Procedure
- Remove the instrument panel (I/P) insulator. Refer to Instrument Panel Insulator Replacement.
- Remove the intermediate steering shaft. Refer to Intermediate Steering Shaft Replacement.
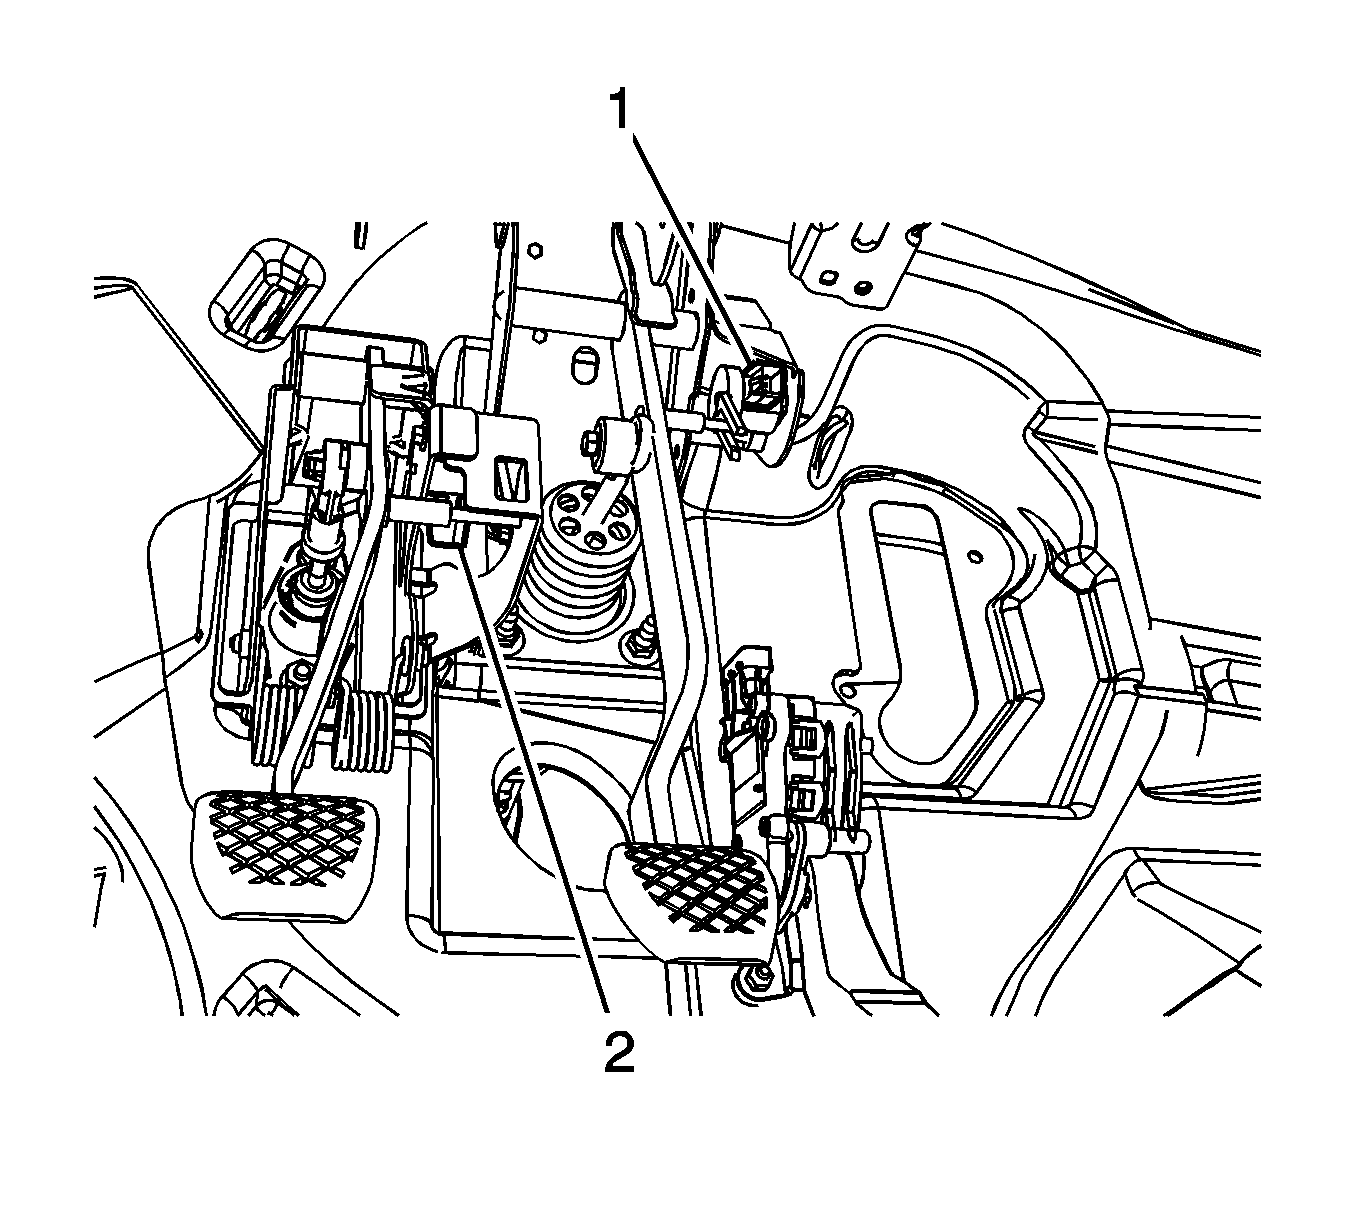
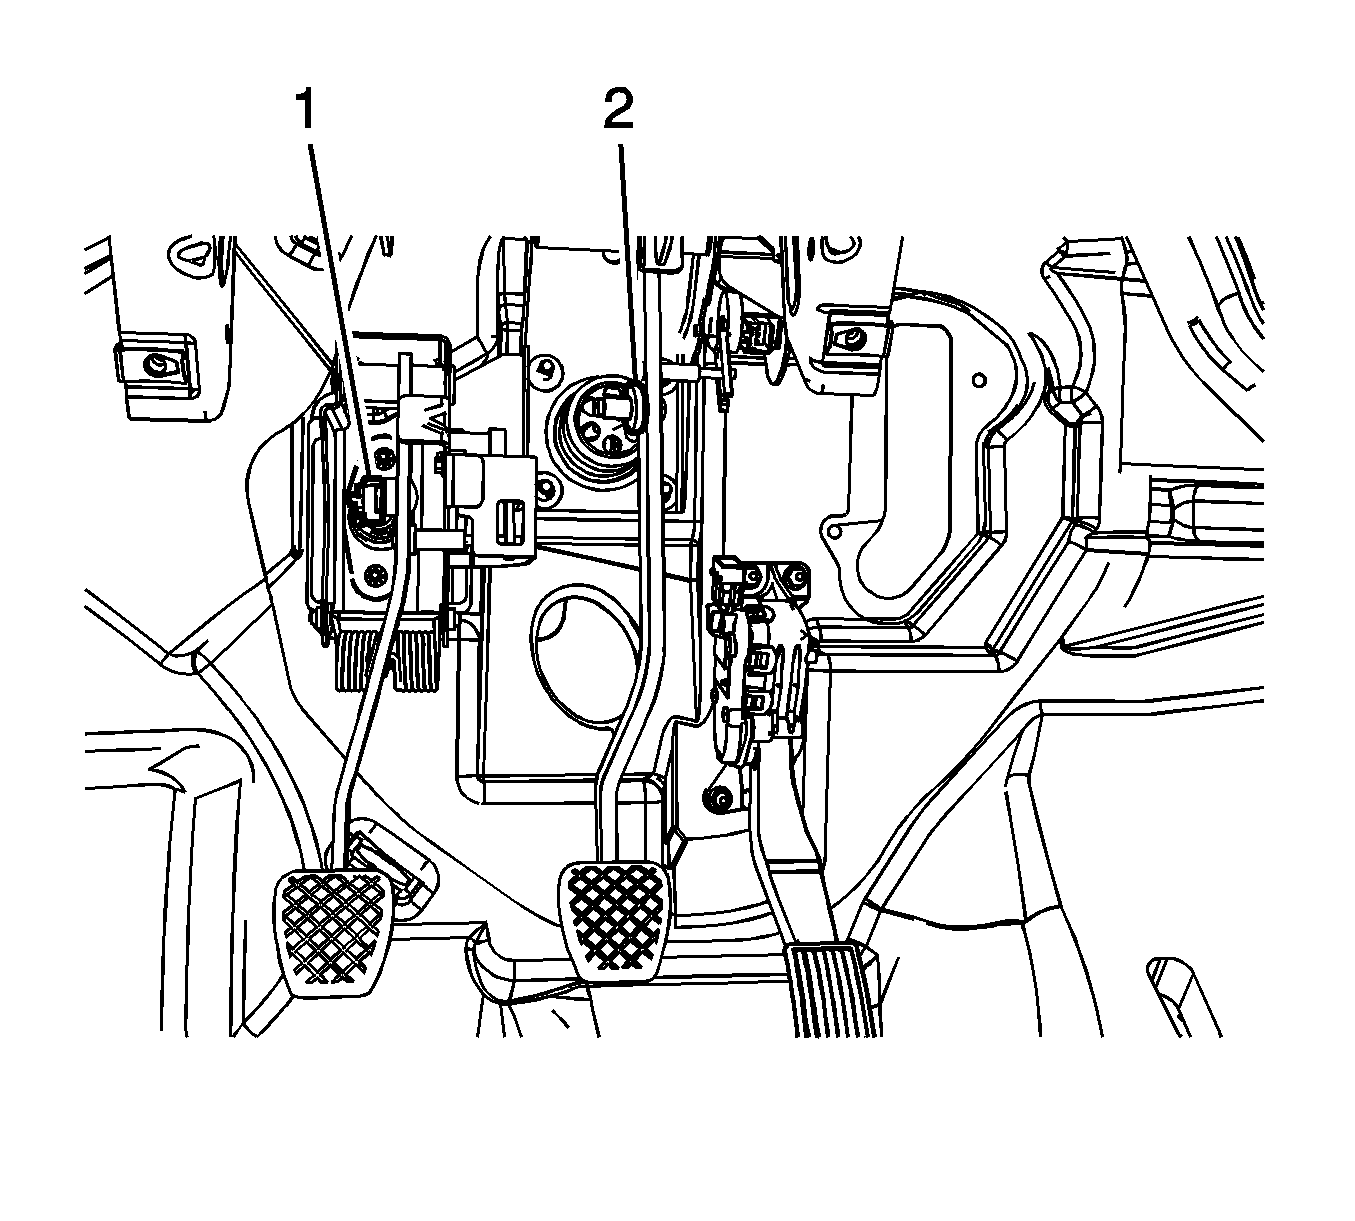
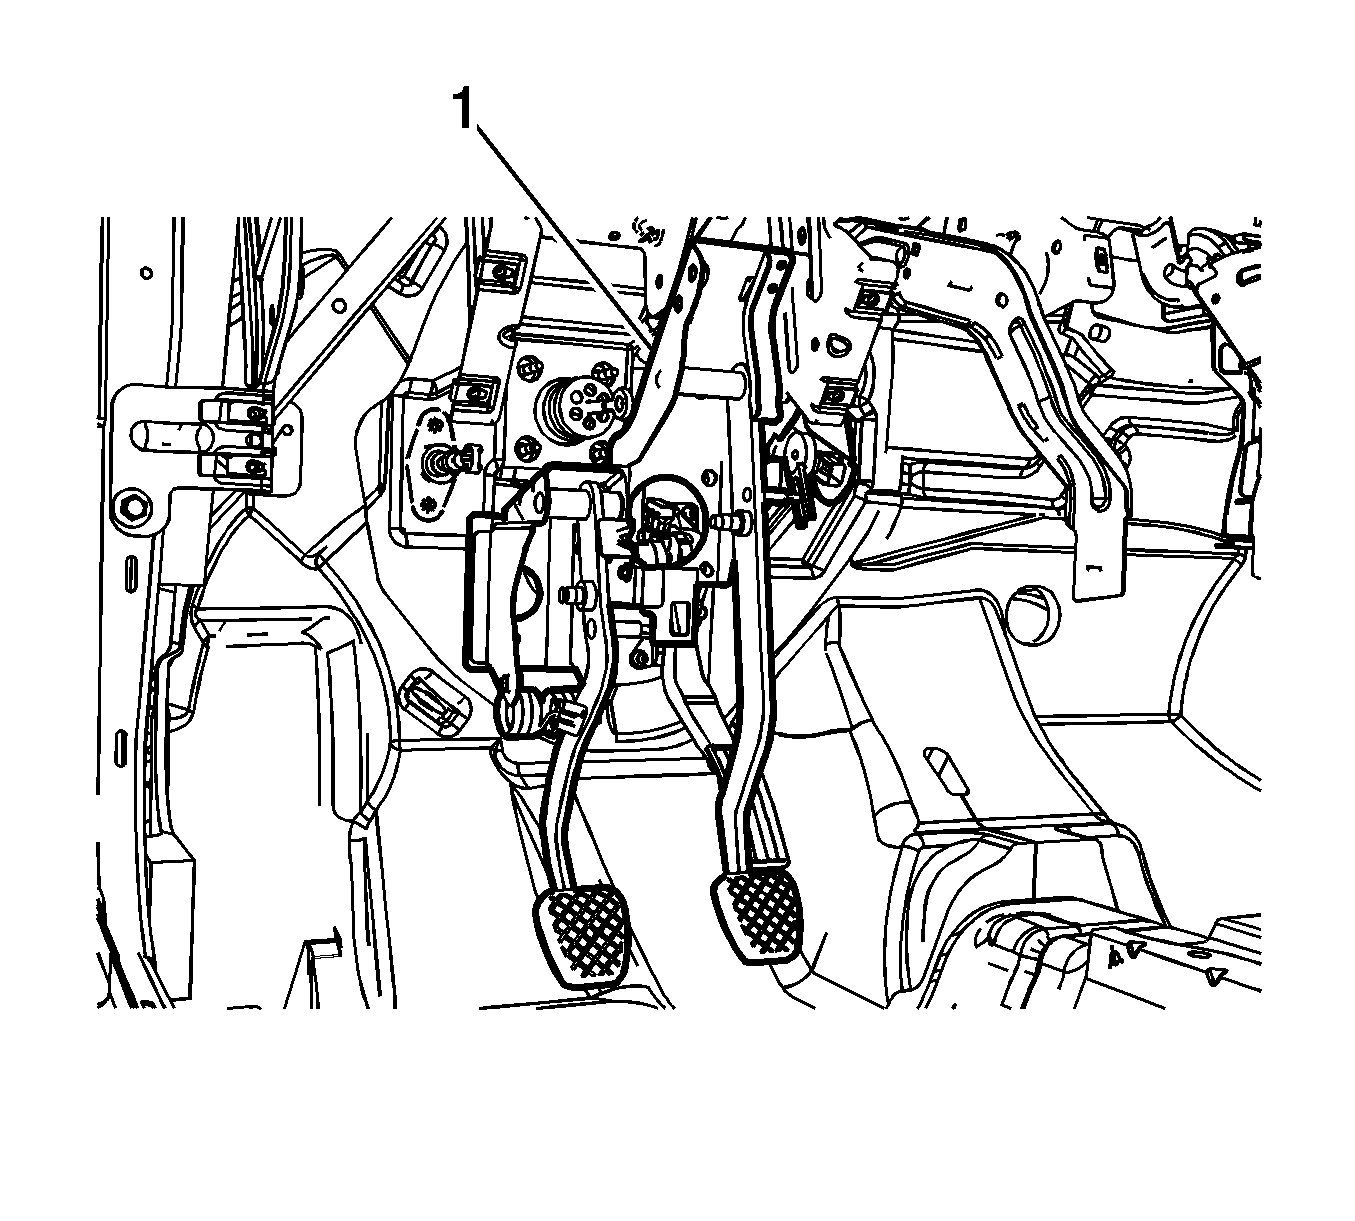
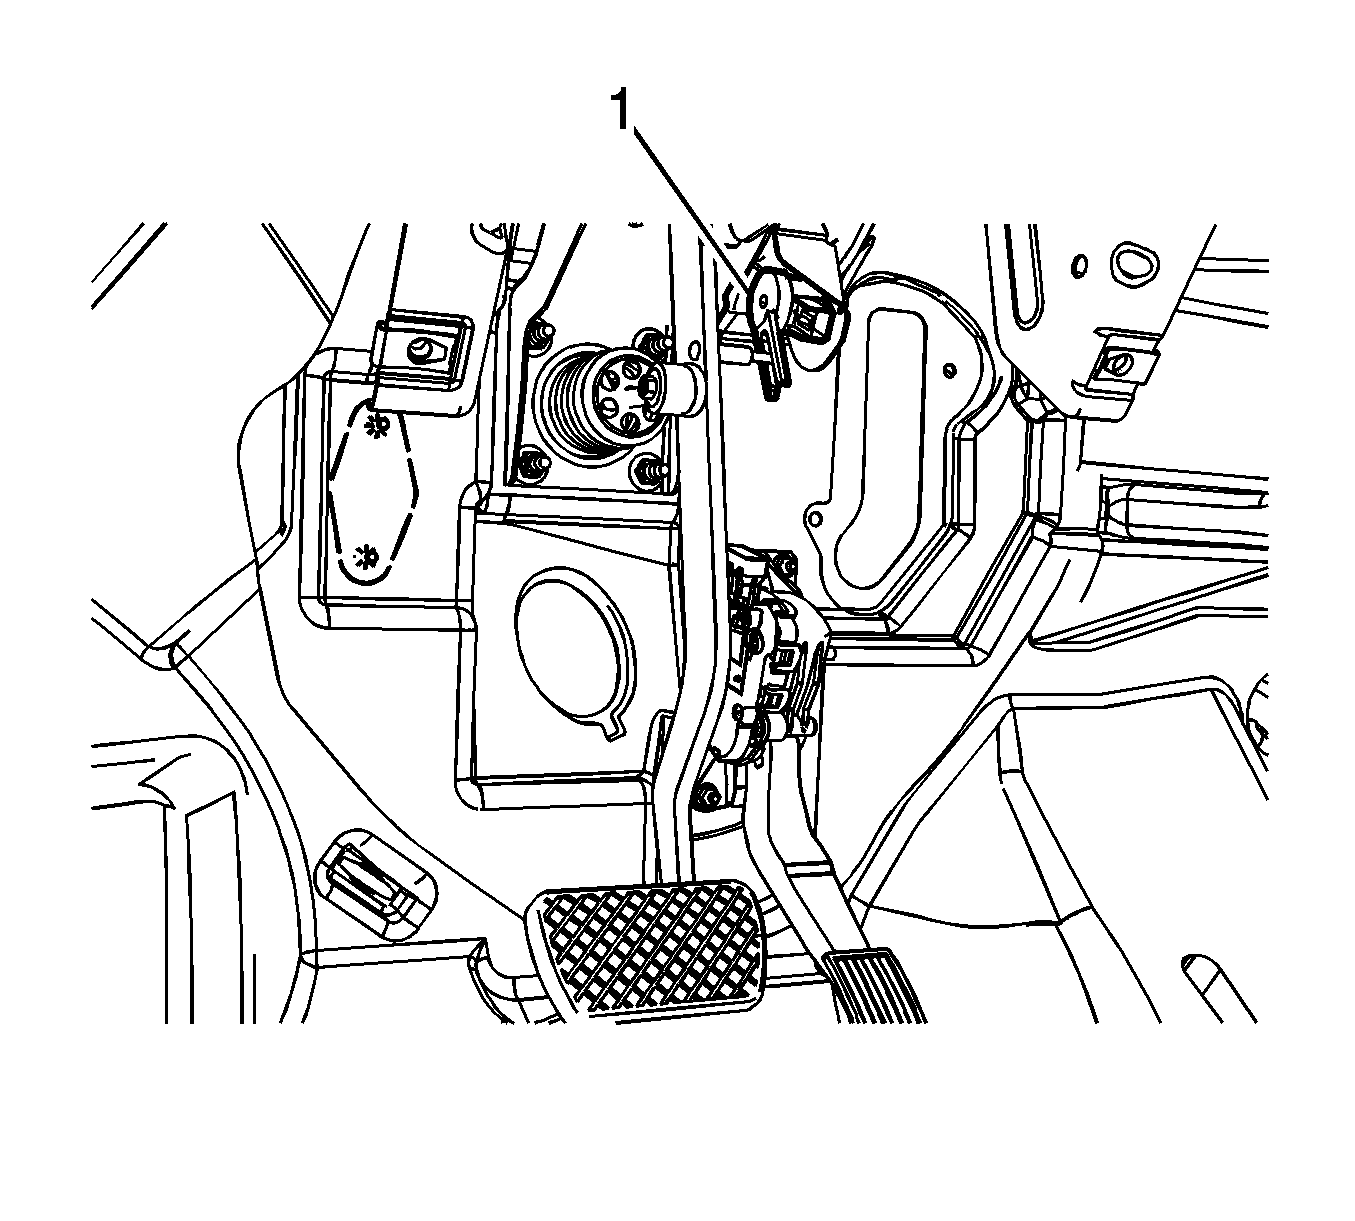
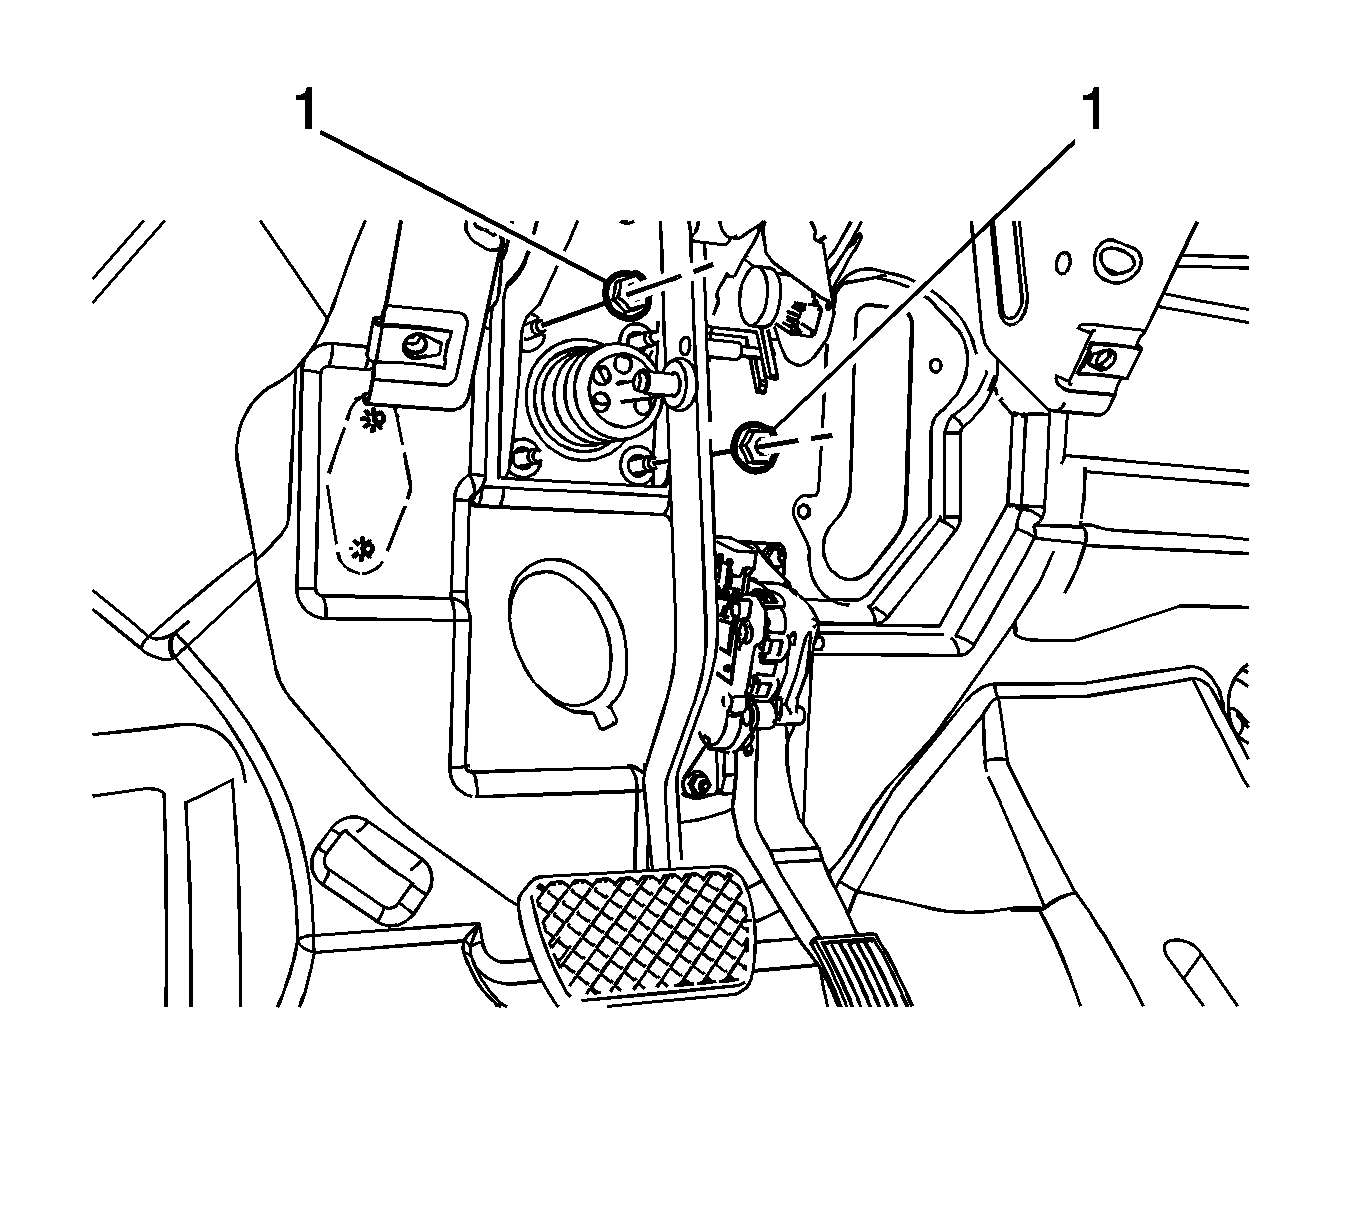
- Disconnect the brake pedal position sensor (1) electrical connector.
- Disconnect the clutch pedal position sensor (2) electrical connector.
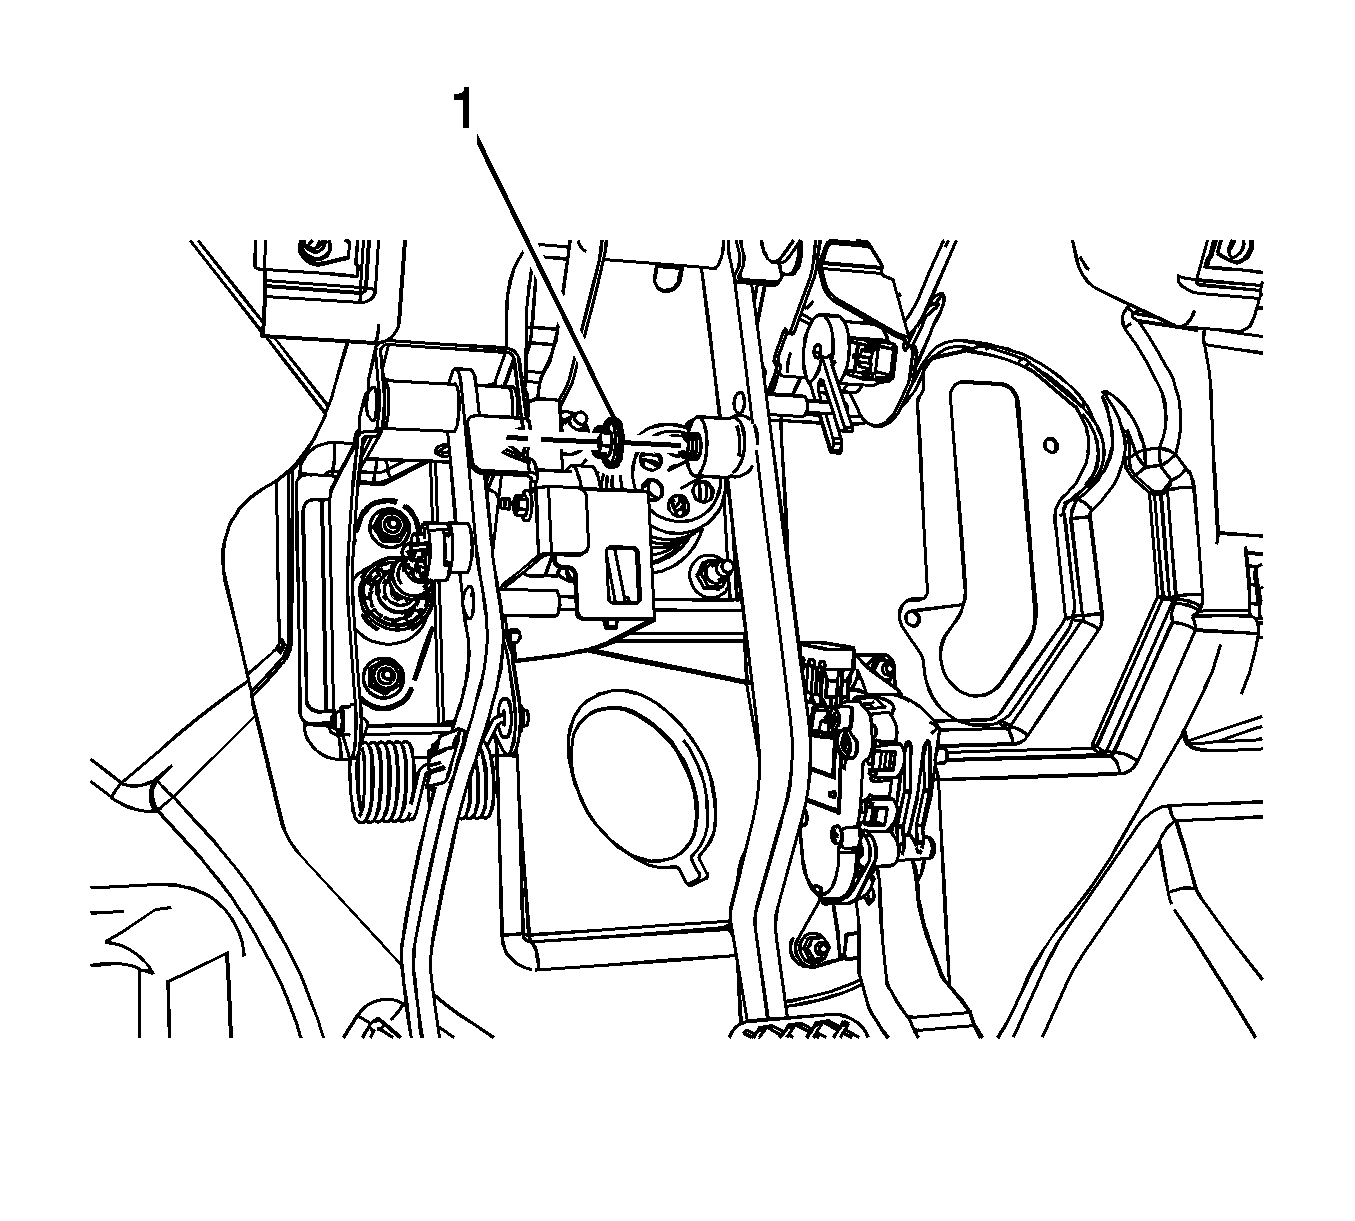
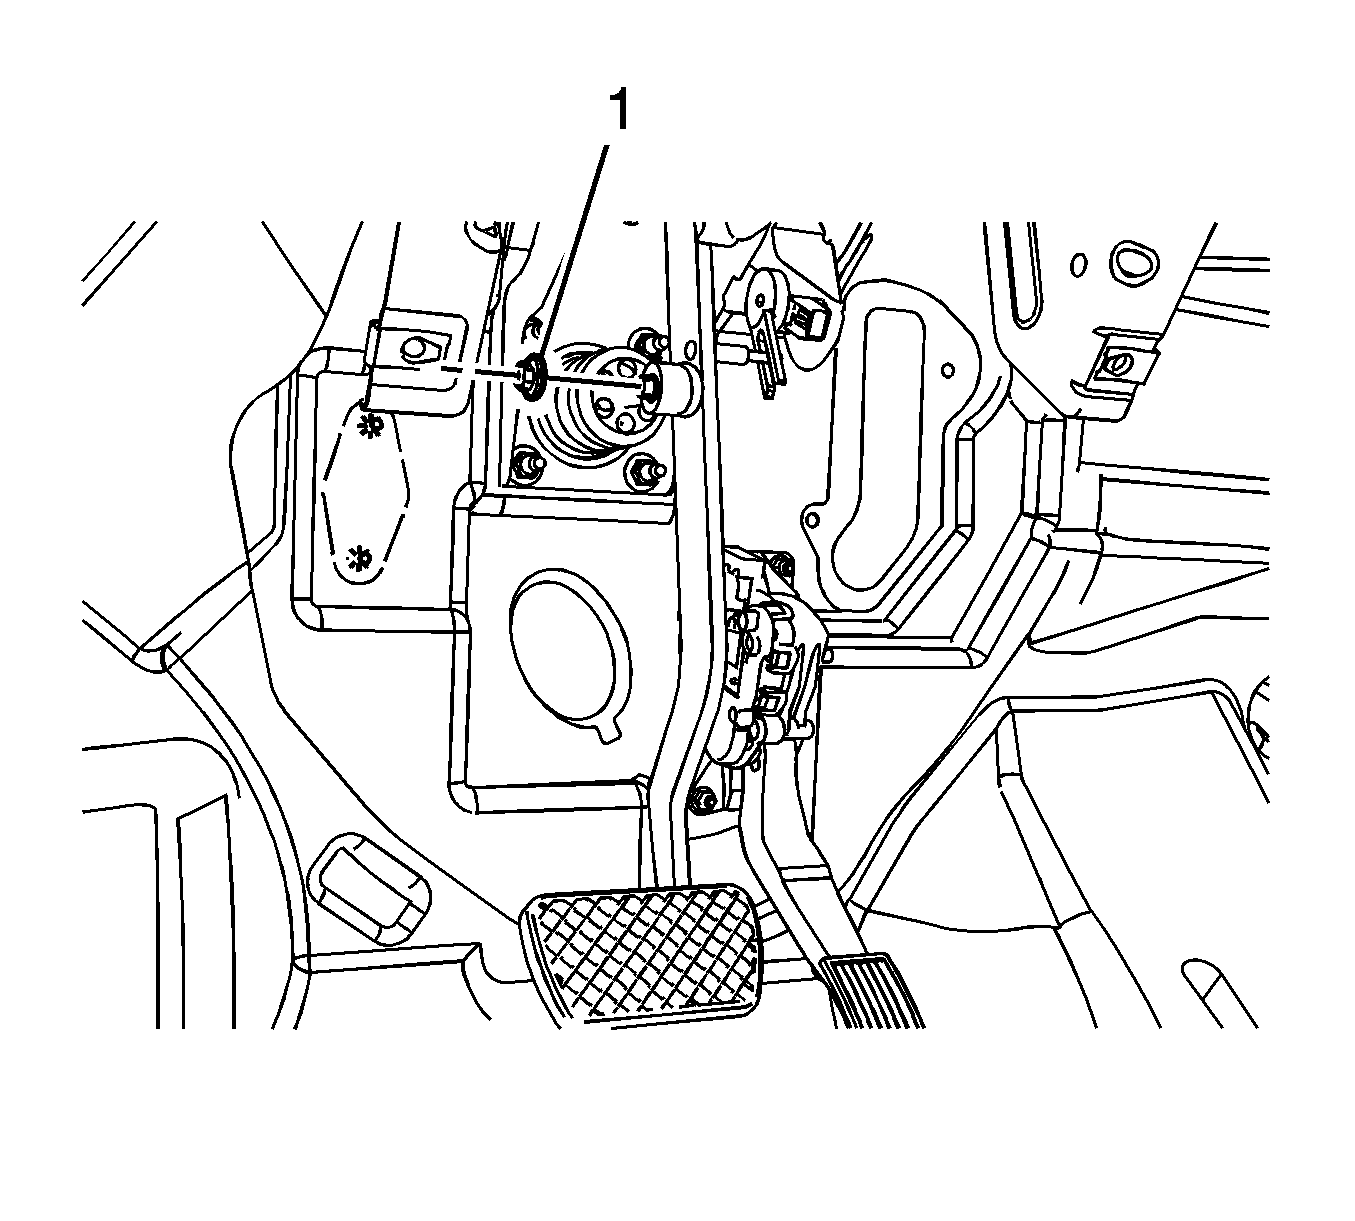
- Remove the brake pedal pushrod nut (1).
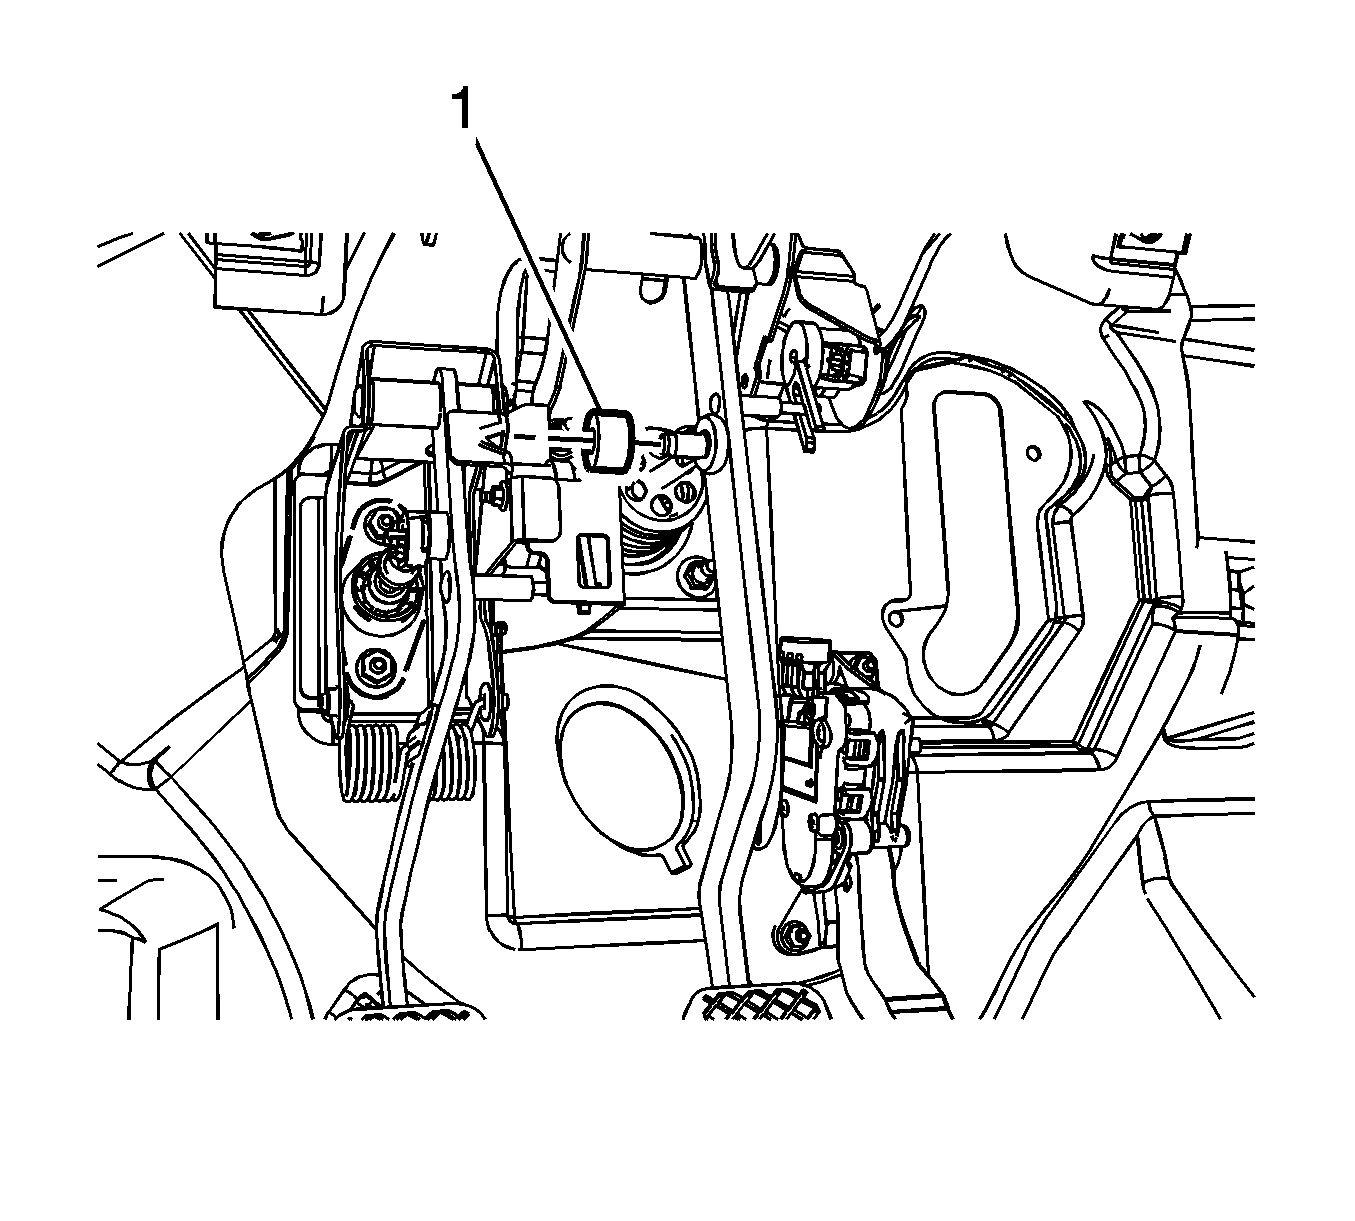
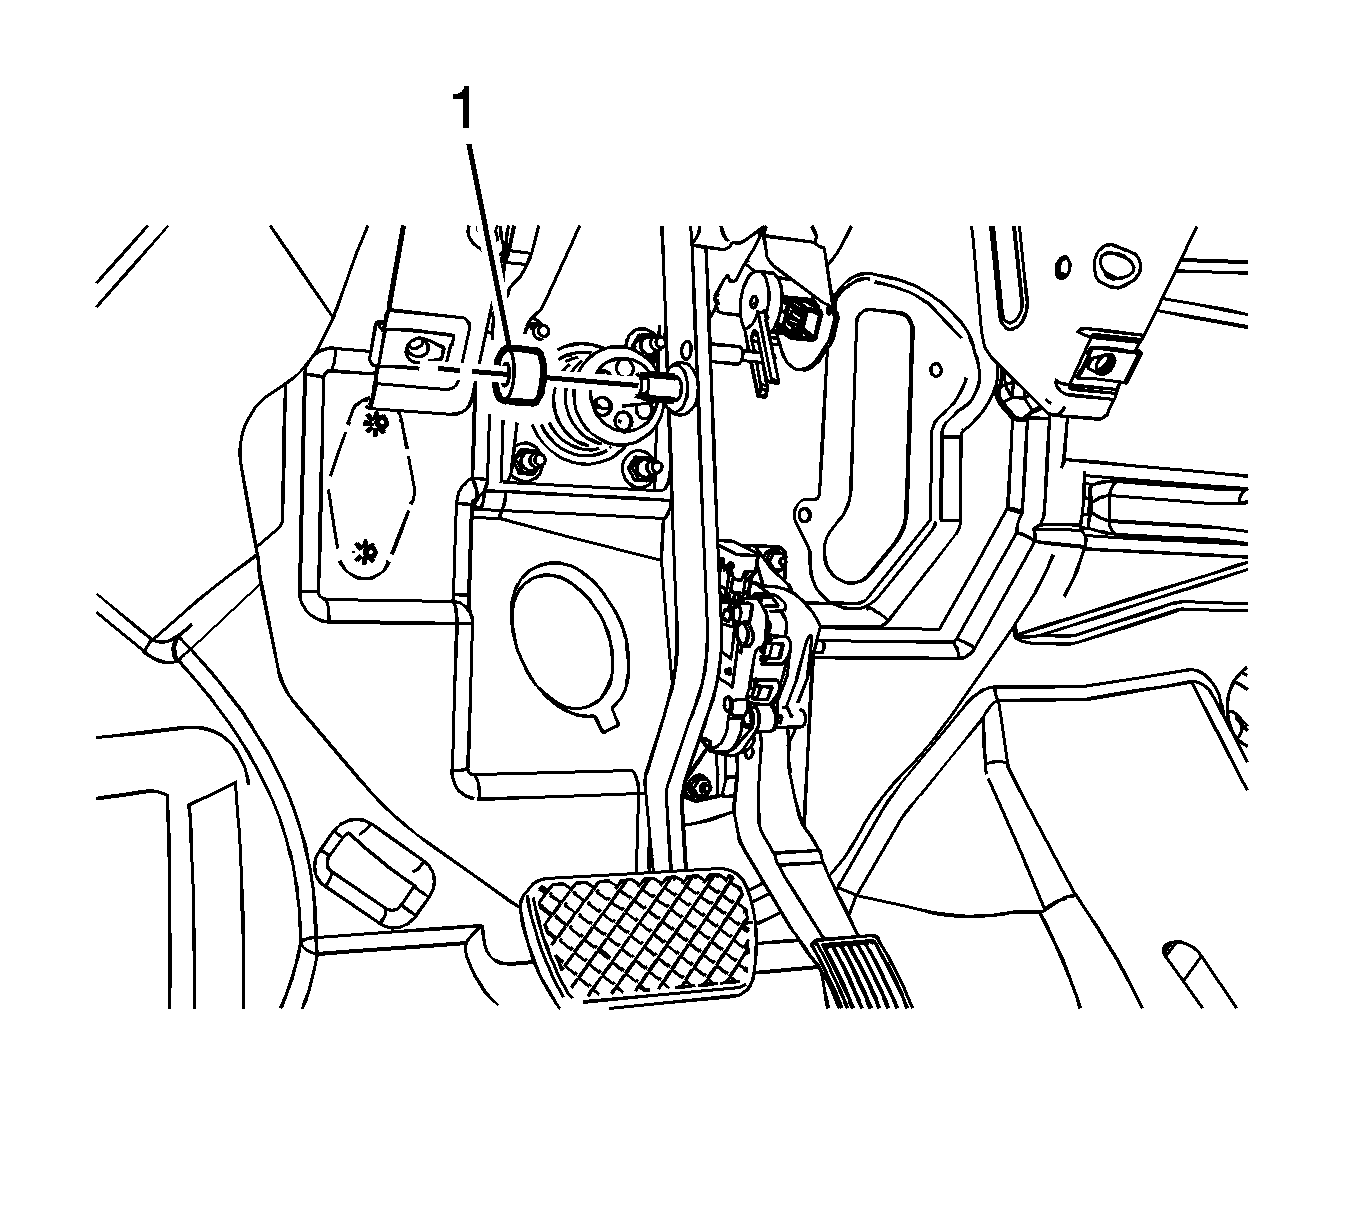
- Remove the brake pedal pushrod washer (1).
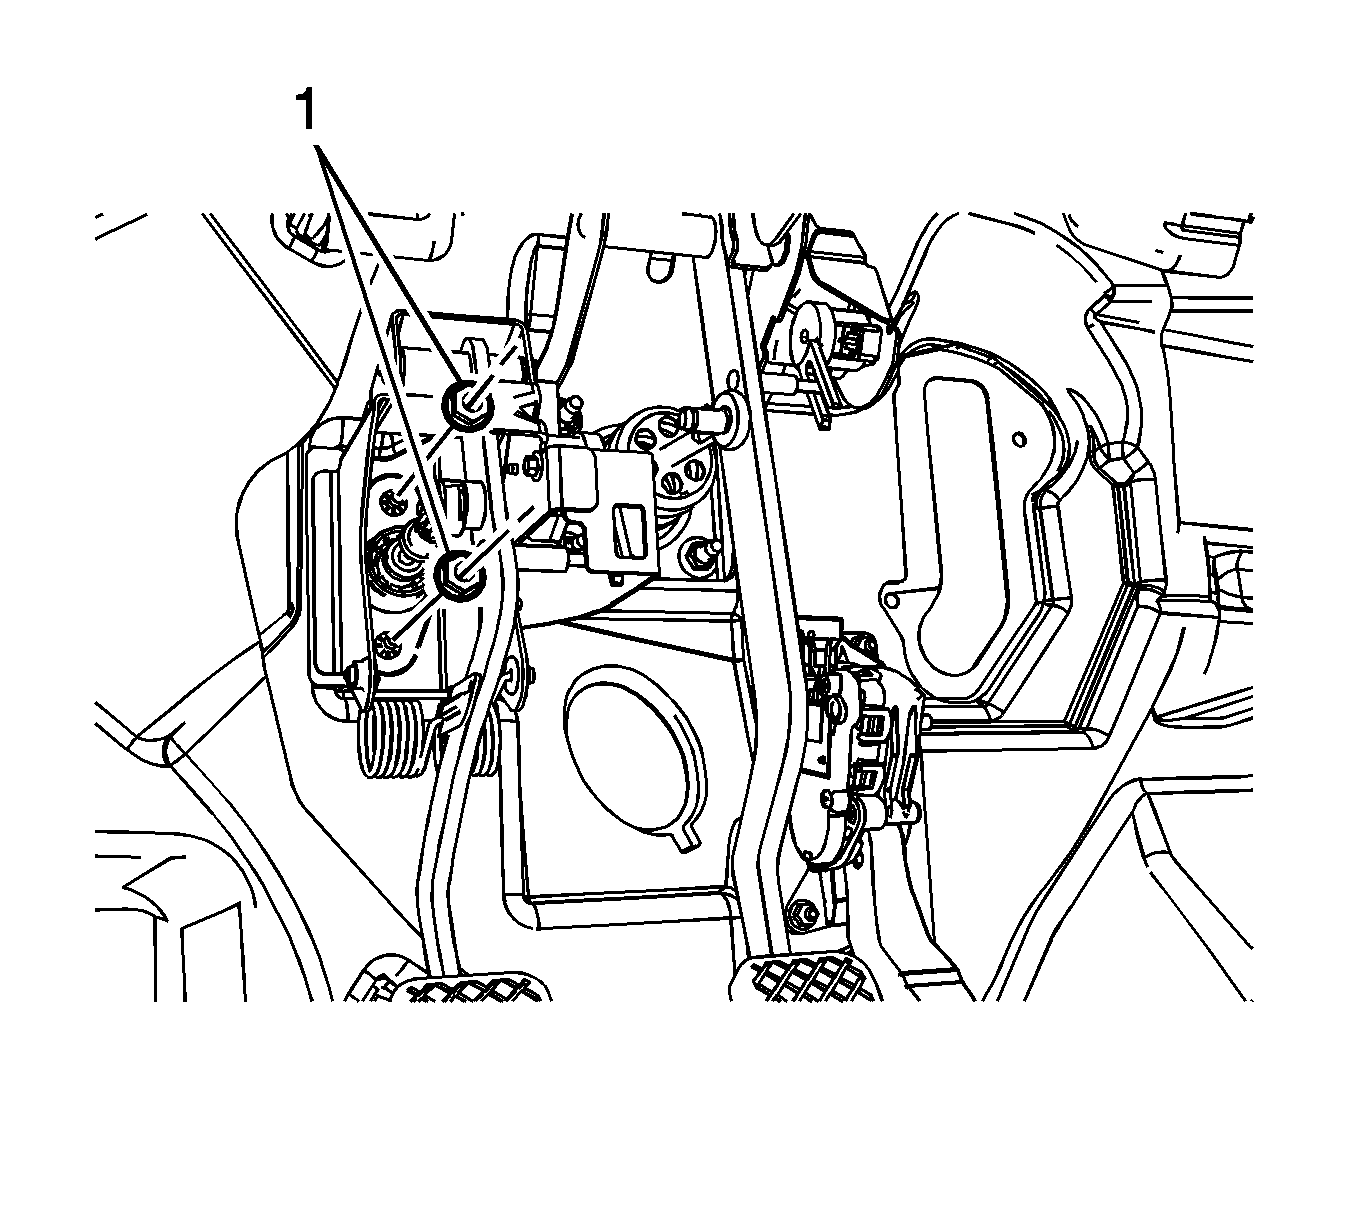
- Remove the clutch pedal bracket nuts (1).
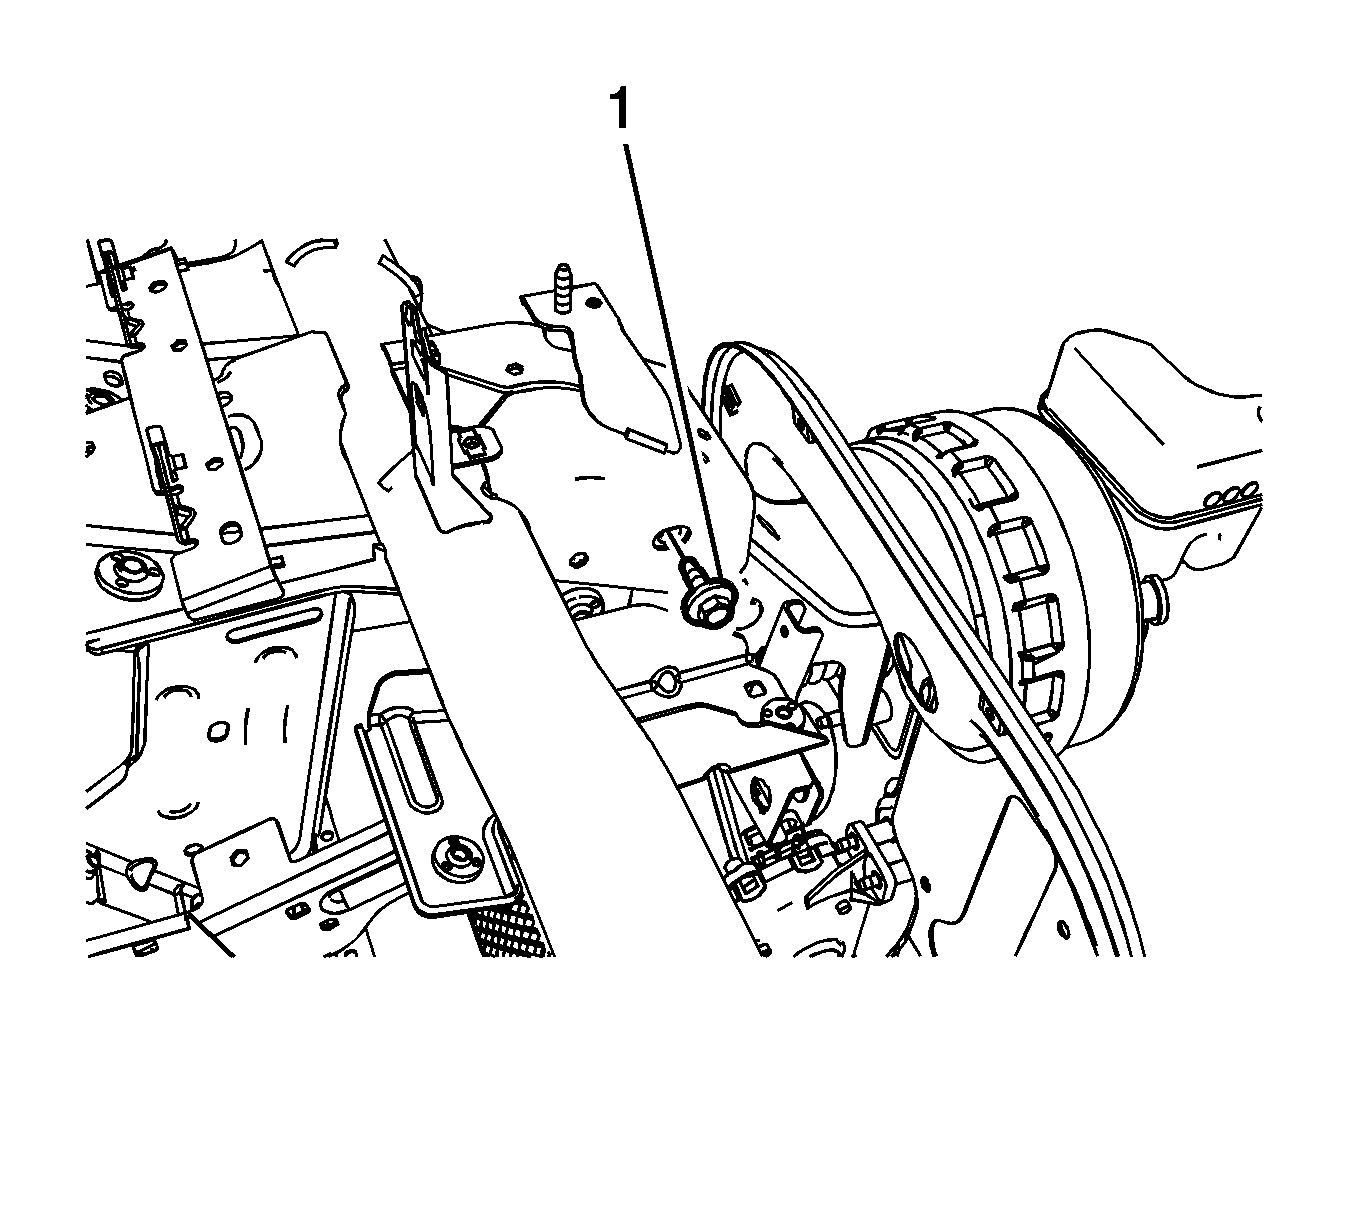
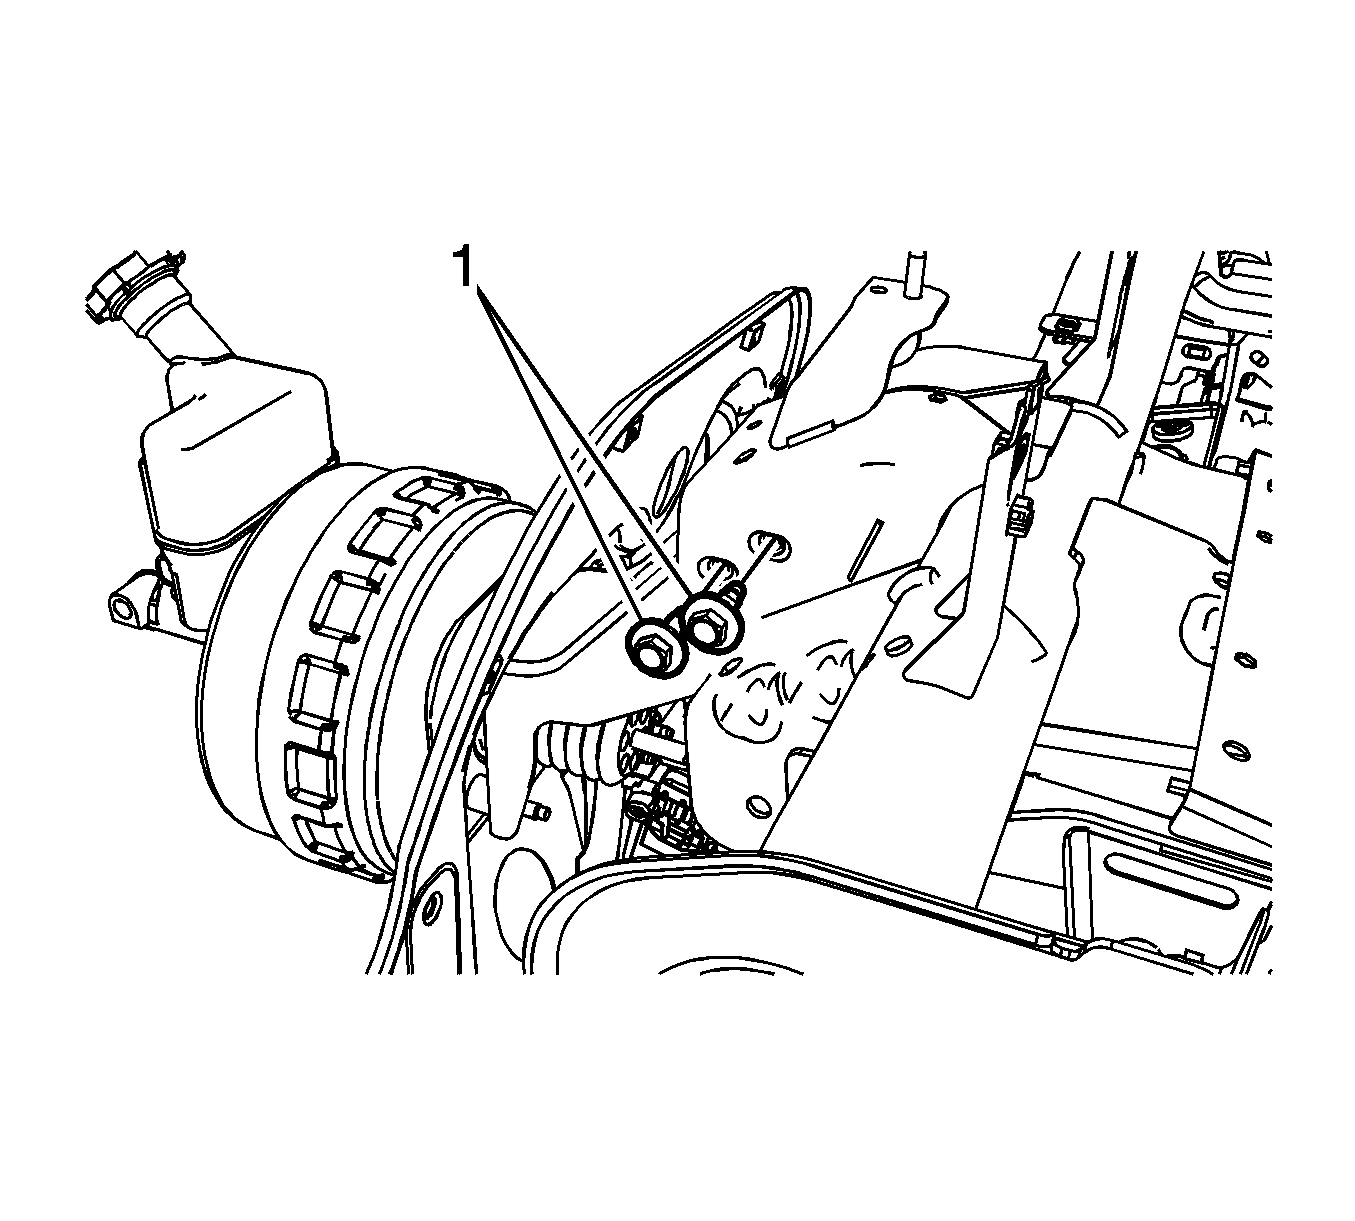
- Remove the vacuum brake booster nuts (1).
- Using a flat bladed tool, carefully lever the clutch pedal pushrod (1) off the clutch pedal ball stud.
- Remove the brake pedal pushrod (2) from the brake pedal pivot pin.
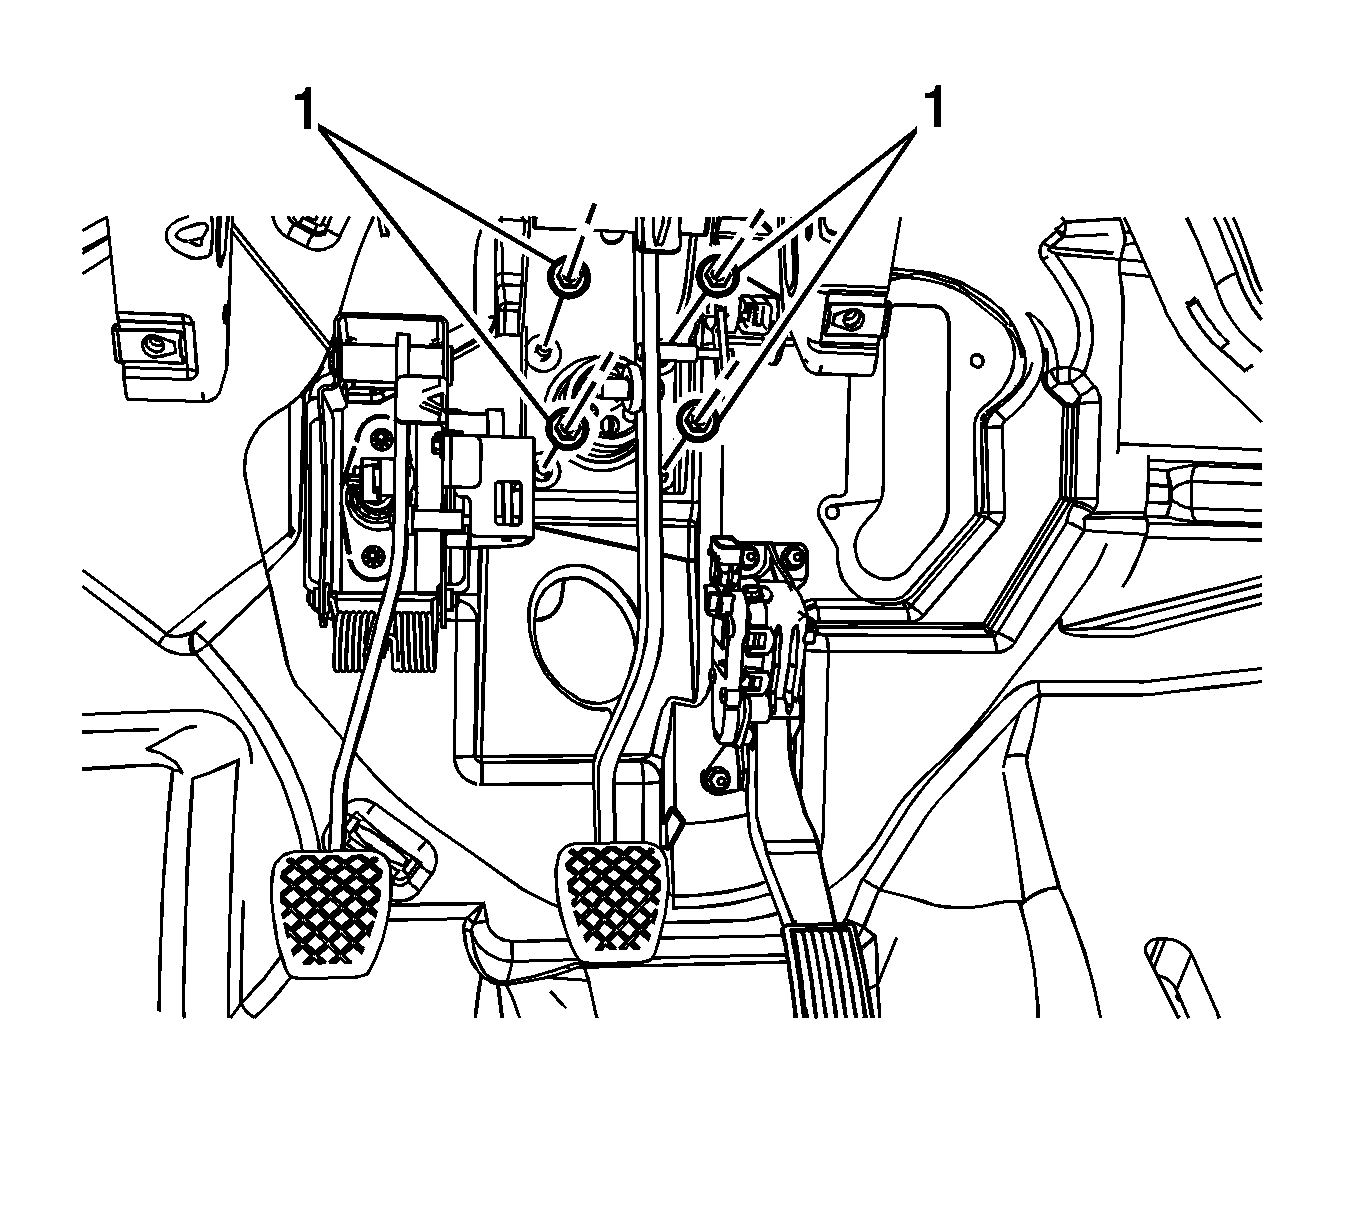
- Remove the RH upper brake pedal bracket bolt (1).
- Remove the 2 LH upper brake pedal bracket bolts (1).
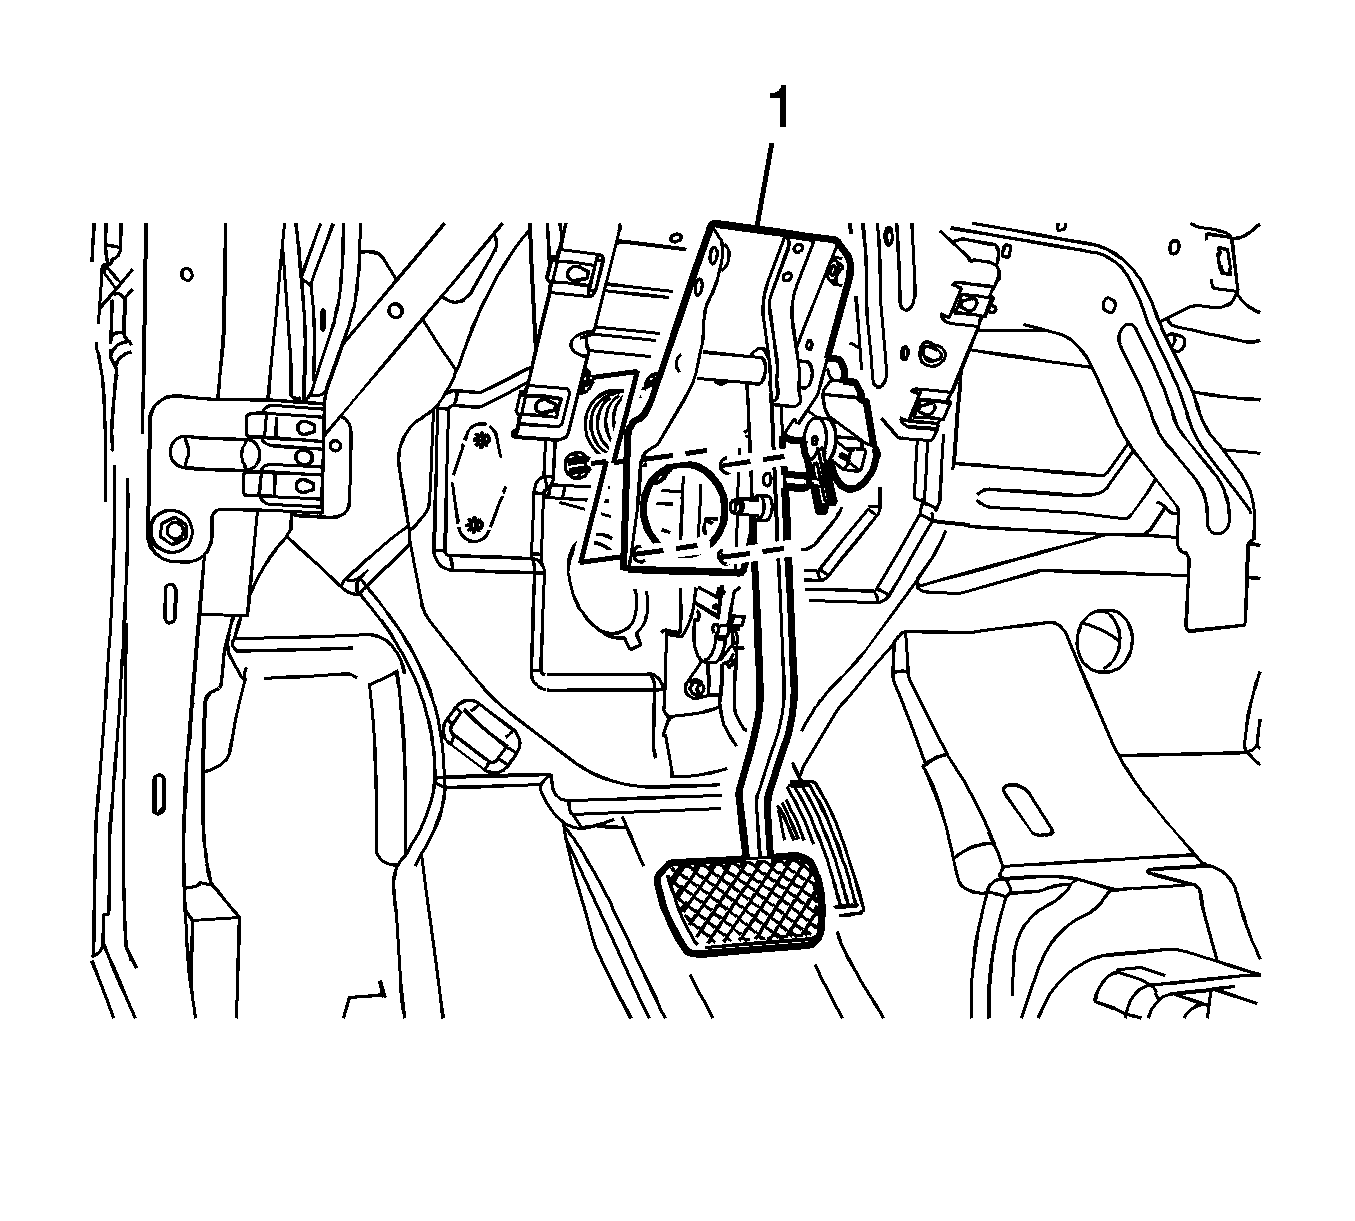
- Lower and remove the brake pedal and clutch pedal assembly (1).
Installation Procedure
- Raise and position the brake pedal and clutch pedal assembly (1) to the instrument panel tie bar.
- Loosely install the 2 LH upper brake pedal bracket bolts (1).
- Loosely install the RH upper brake pedal bracket bolt (1).
- Loosely install the vacuum brake booster nuts (1).
- Apply a thin coating of high temperature grease GM P/N 12345996 (Canadian P/N 10953501) to the pushrod pin on the brake pedal and to the pushrod pin on the clutch pedal.
- Secure the clutch pedal pushrod (1) to the clutch pedal ball stud.
- Connect the brake pedal pushrod (2) to the brake pedal pivot pin.
- Install the brake pedal pushrod washer (1).
- Loosely install the clutch pedal bracket nuts (1).
- Tighten the vacuum brake booster nuts.
- Tighten the clutch pedal bracket nuts.
- Tighten the LH and RH upper brake pedal bracket bolts.
- Install the brake pedal pushrod nut (1).
- Connect the brake pedal position sensor (1) electrical connector.
- Connect the clutch pedal position sensor (2) electrical connector.
- Install the intermediate steering shaft. Refer to Intermediate Steering Shaft Replacement.
- Calibrate the brake pedal position sensor. Refer to Brake Pedal Position Sensor Calibration.
- Install the I/P insulator. Refer to Instrument Panel Insulator Replacement.
Caution: Refer to Fastener Caution in the Preface section.
Tighten
Tighten the nuts to 22 N·m (16 lb ft).
Tighten
Tighten the nuts to 10 N·m (89 lb in).
Tighten
Tighten the bolts to 25 N·m (18 lb ft).
Tighten
Tighten the nut to 10 N·m (89 lb in).
Warning: Replacement or reprogramming of the ECM, or replacement of the clutch pedal position sensor (CPPS) or clutch pedal requires that a CPPS learn procedure be performed. Failure to perform the CPPS learn procedure may result in personal injury or damage to the vehicle or its components if the vehicle is in gear and the starter motor is accidentally engaged.
Brake Pedal Assembly Replacement Automatic Transaxle
Removal Procedure
- Remove the instrument panel (I/P) insulator. Refer to Instrument Panel Insulator Replacement.
- Disconnect the brake pedal position sensor (1) electrical connector.
- Remove the brake pedal pushrod nut (1).
- Remove the brake pedal pushrod washer (1).
- Remove the vacuum brake booster nuts (1).
- Remove the RH upper brake pedal bracket bolt (1).
- Remove the 2 LH upper brake pedal bracket bolts (1).
- Lower and remove the brake pedal assembly (1).
Installation Procedure
- Raise and position the brake pedal assembly (1) to the instrument panel tie bar.
- Loosely install the 2 LH upper brake pedal bracket bolts (1).
- Loosely install the RH upper brake pedal bracket bolt (1).
- Loosely install the vacuum brake booster nuts (1).
- Apply a thin coating of high temperature grease GM P/N 12345996 (Canadian P/N 10953501) to the pushrod pin on the brake pedal.
- Connect the brake pedal pushrod to the brake pedal pivot pin.
- Install the brake pedal pushrod washer (1).
- Tighten the vacuum brake booster nuts.
- Tighten the LH and RH upper brake pedal bracket bolts.
- Install the brake pedal pushrod nut (1).
- Connect the brake pedal position sensor (1) electrical connector.
- Calibrate the brake pedal position sensor. Refer to Brake Pedal Position Sensor Calibration.
- Install the I/P insulator. Refer to Instrument Panel Insulator Replacement.
Caution: Refer to Fastener Caution in the Preface section.
Tighten
Tighten the nuts to 22 N·m (16 lb ft).
Tighten
Tighten the bolts to 25 N·m (18 lb ft).
Tighten
Tighten the nut to 10 N·m (89 lb in).
