Water Pump Replacement LE5, L61
Special Tools
| • | J 25025-5 Dial Indicator Mounting Post |
| • | J 43651 Water Pump Holding Tool |
Removal Procedure
- Remove the thermostat housing. Refer to Engine Coolant Thermostat Housing Replacement.
- Remove the coolant heater. Refer to Coolant Heater Replacement.
- Remove the windshield washer solvent container. Refer to Windshield Washer Solvent Container Replacement.
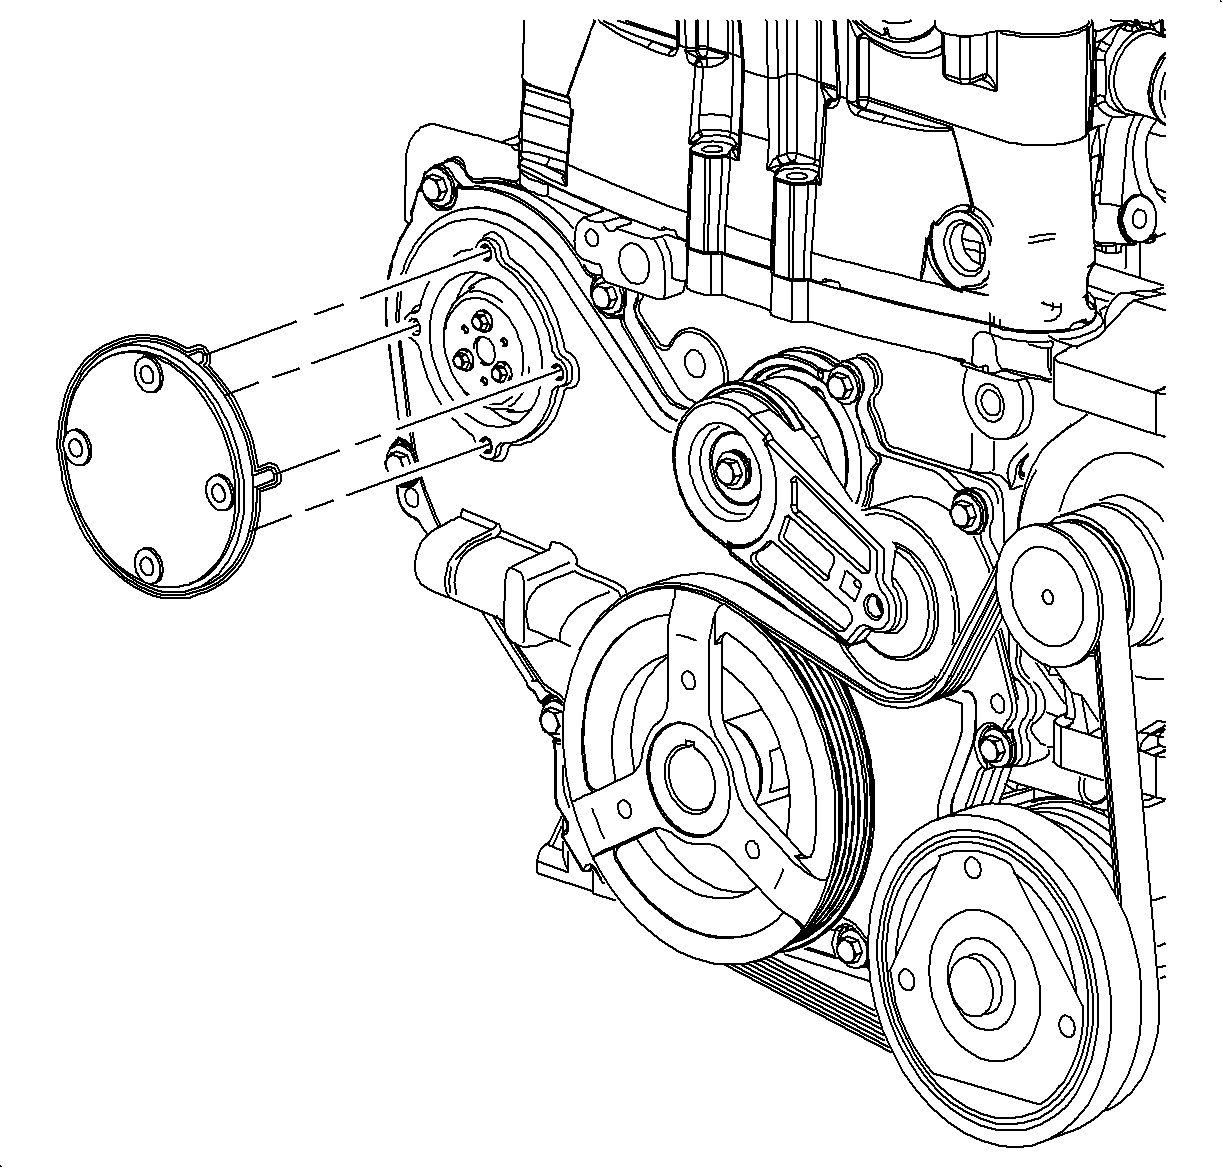
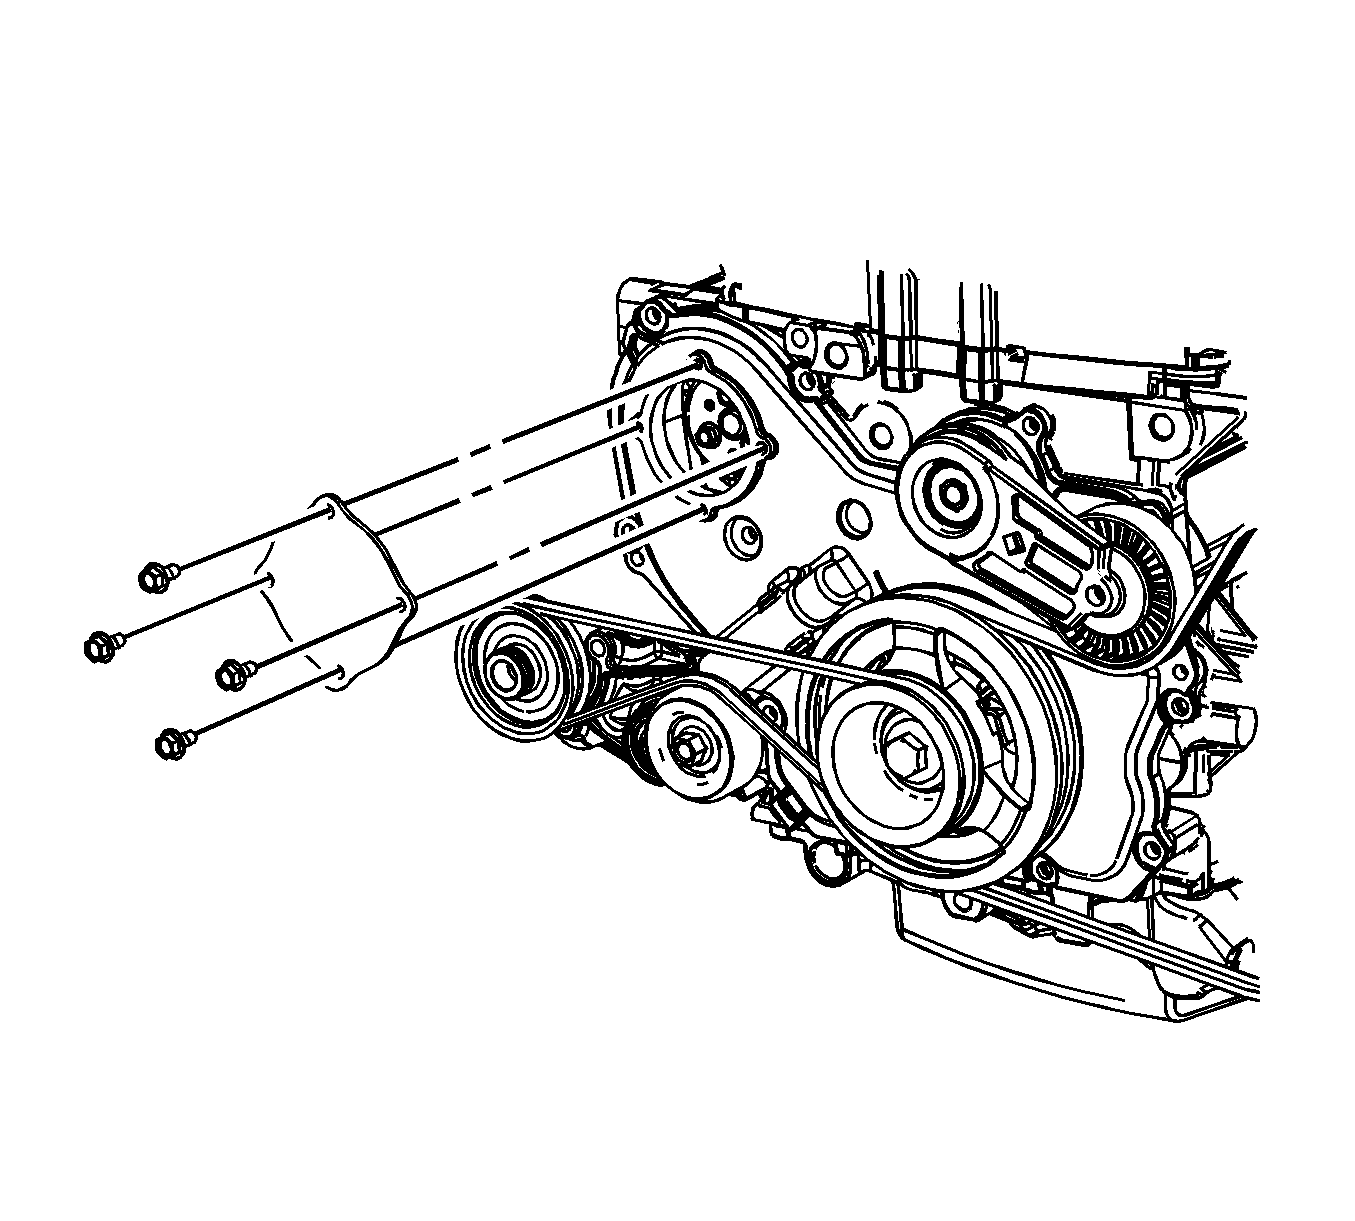
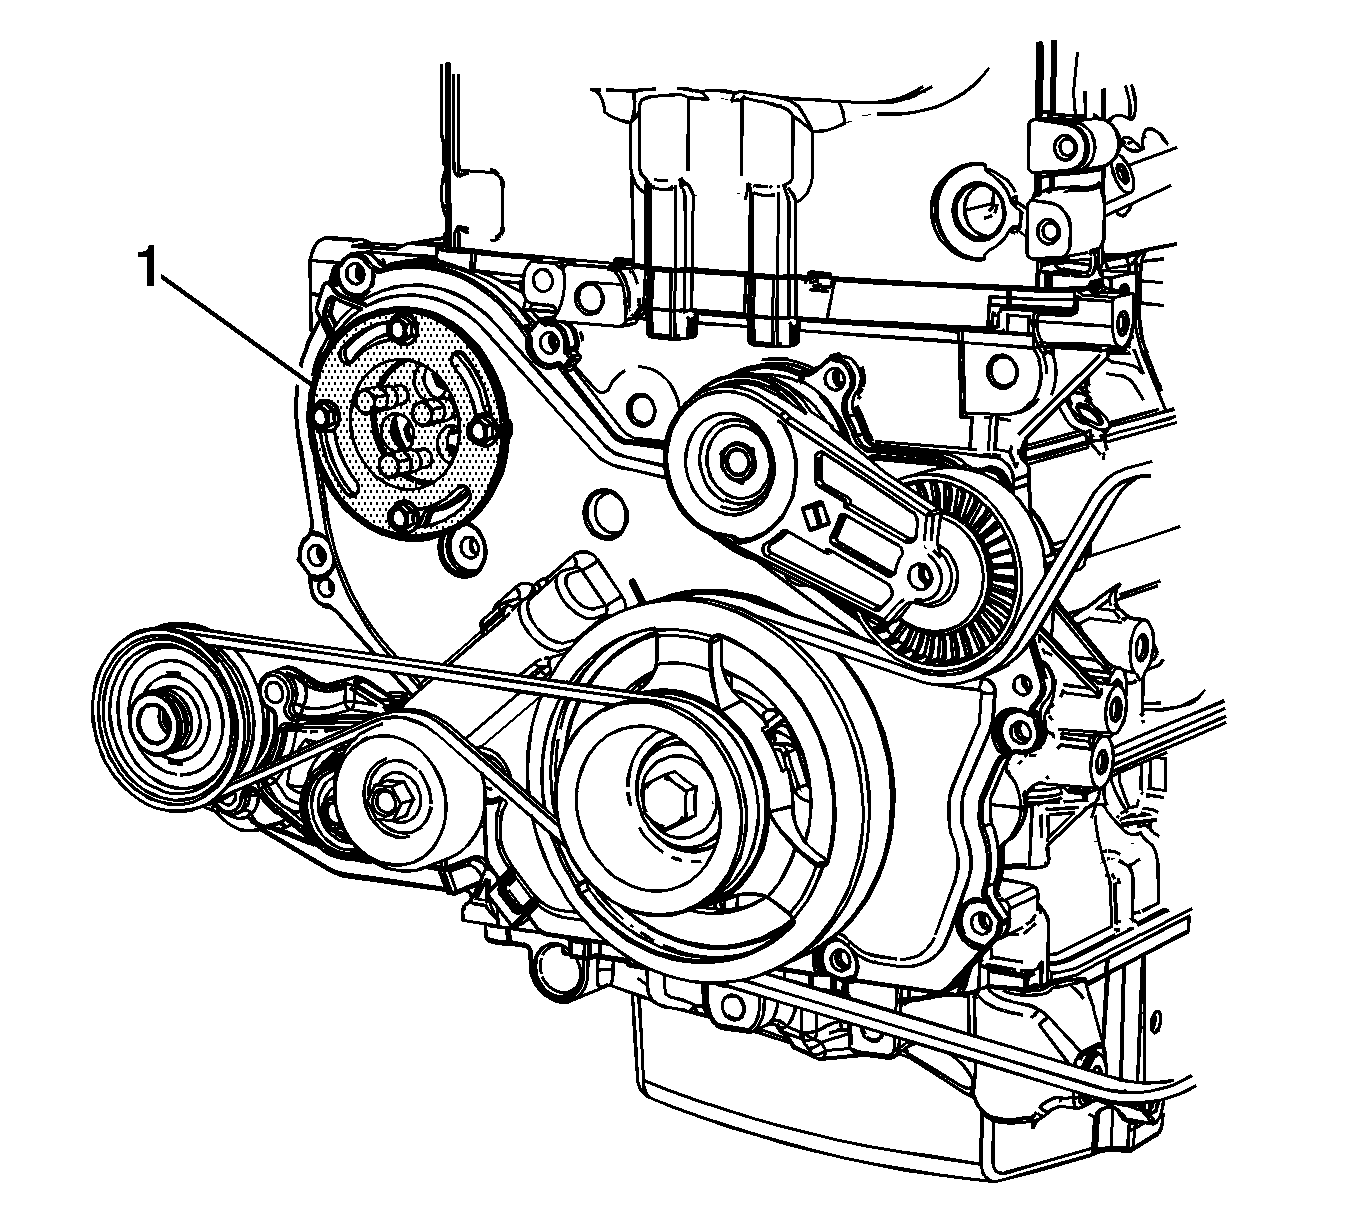
- Remove the water pump access plate from the front cover.
- Install the J 43651 into position.
- Tighten the bolts on the water pump holding tool into the threads on the water pump sprocket.
- Install the access cover bolts that were removed earlier to secure the water pump holding tool to the front cover assembly.
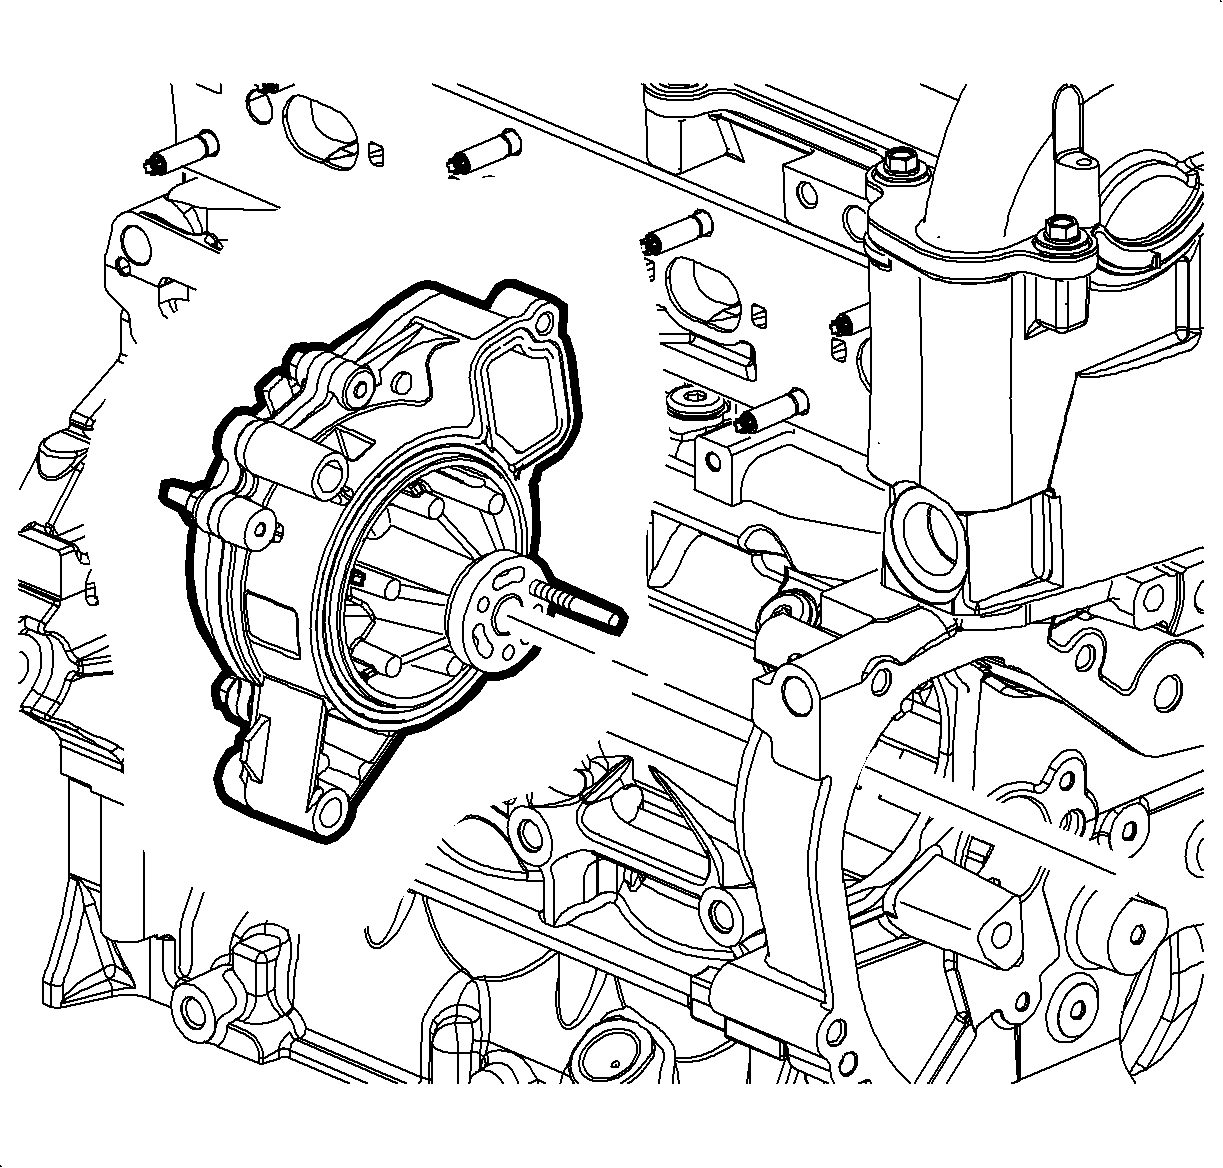
- Remove the 3 inner water pump sprocket to water pump blots.
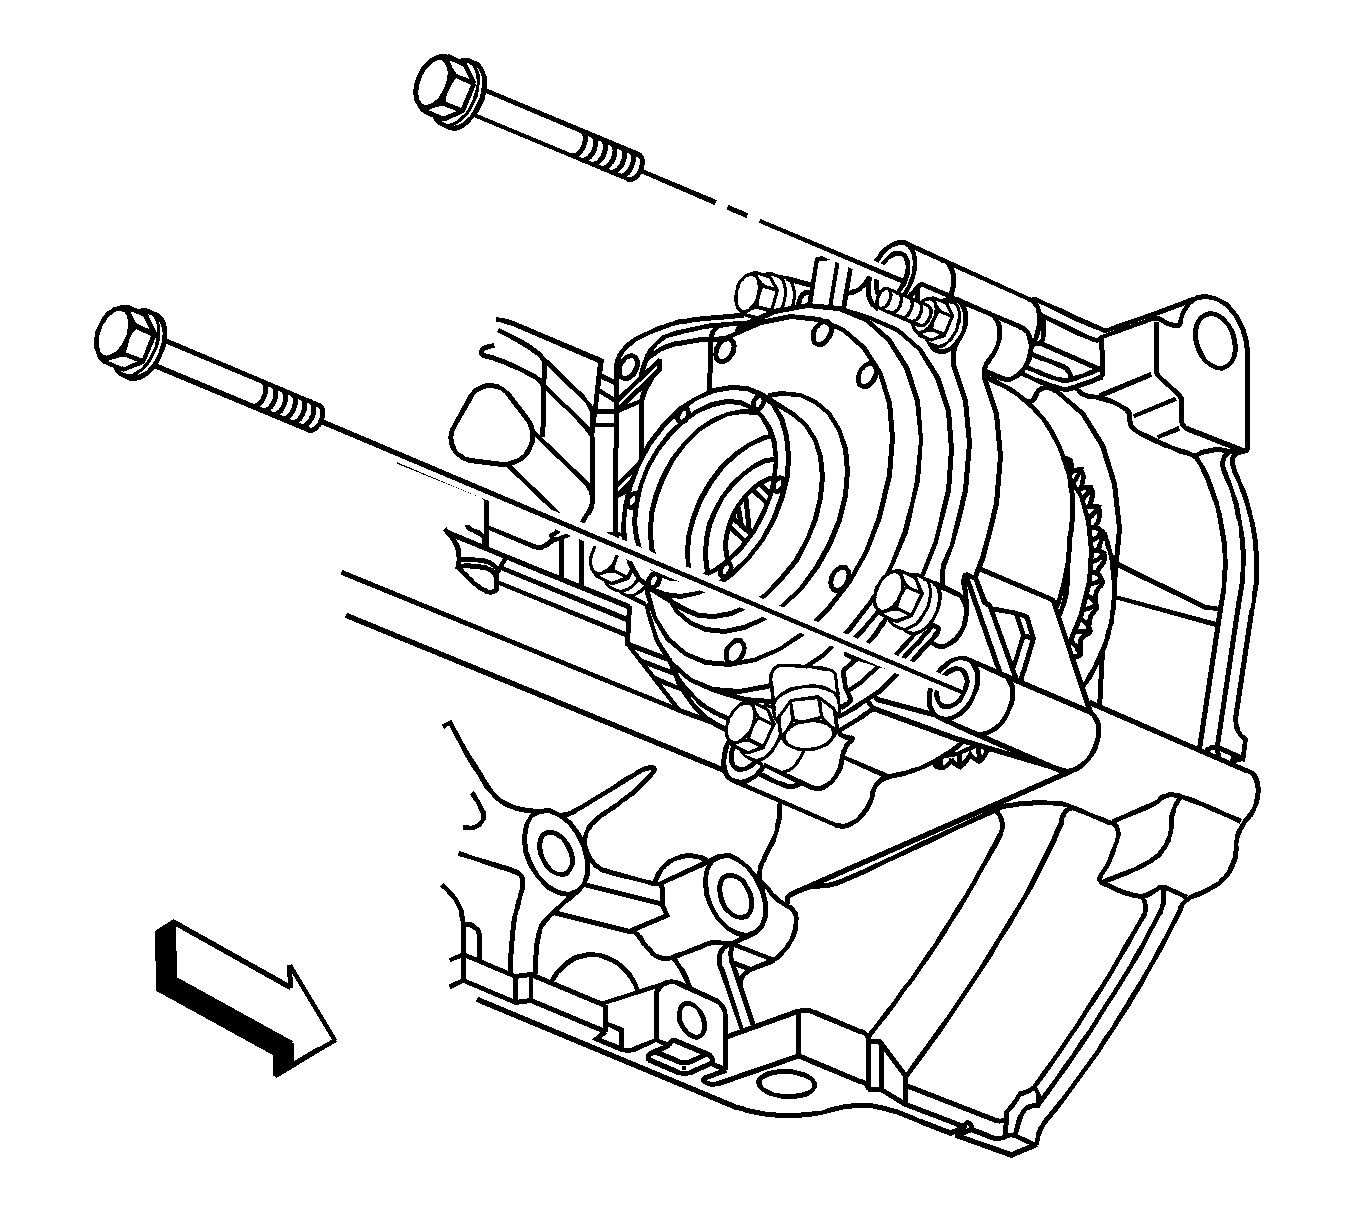
- Remove the 2 water pump bolts.
- Remove the rear 2 water pump bolts.
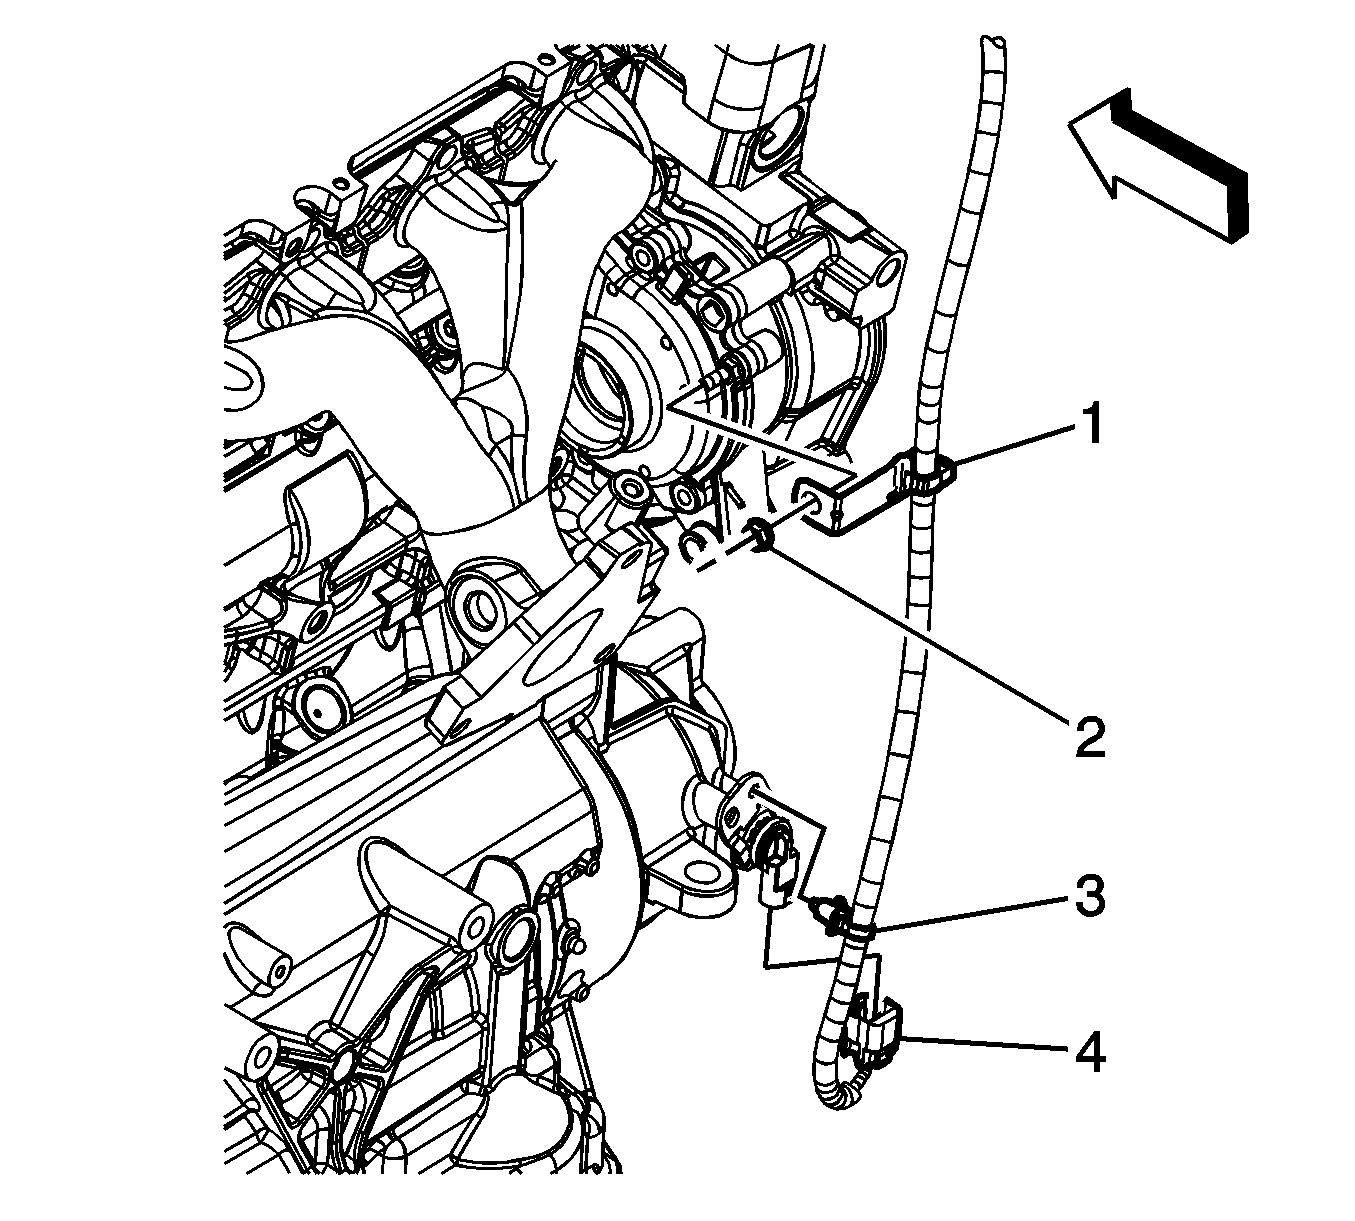
- Remove the engine harness clip nut (2) from the water pump stud.
- Remove the engine harness clip (1) from the stud.
- Remove the water pump.
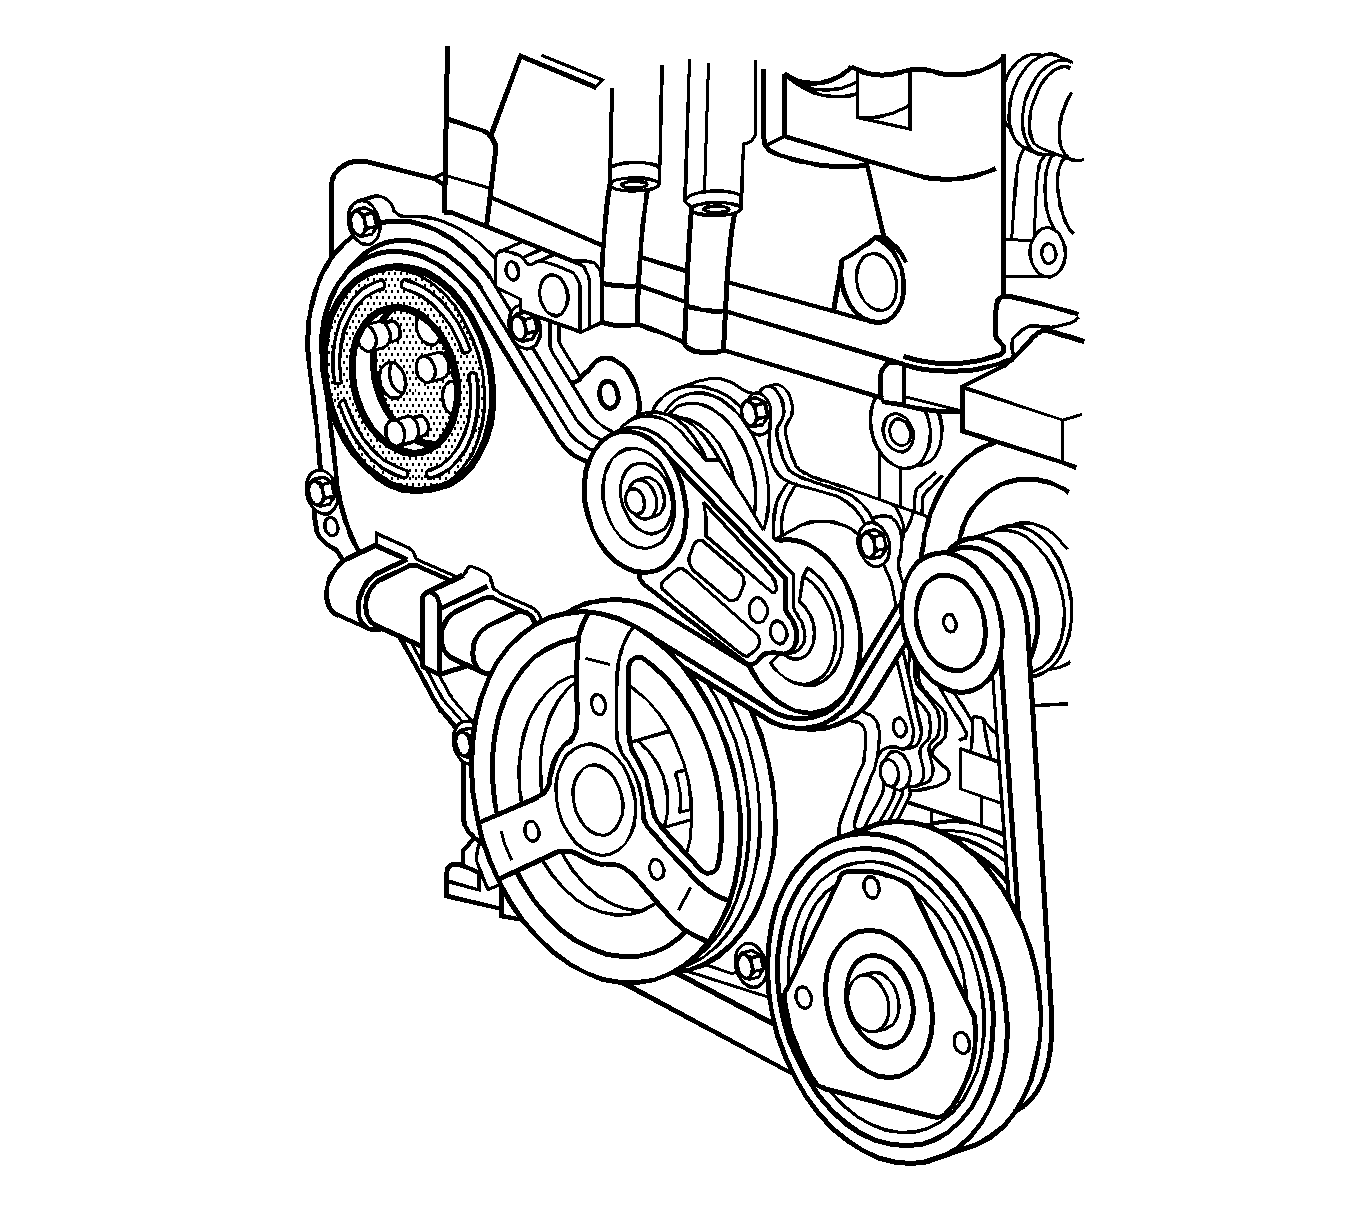
Note: The water pump holding tool supports the sprocket and chain during water pump service. The tool must be used or the balance shaft must be re-timed.
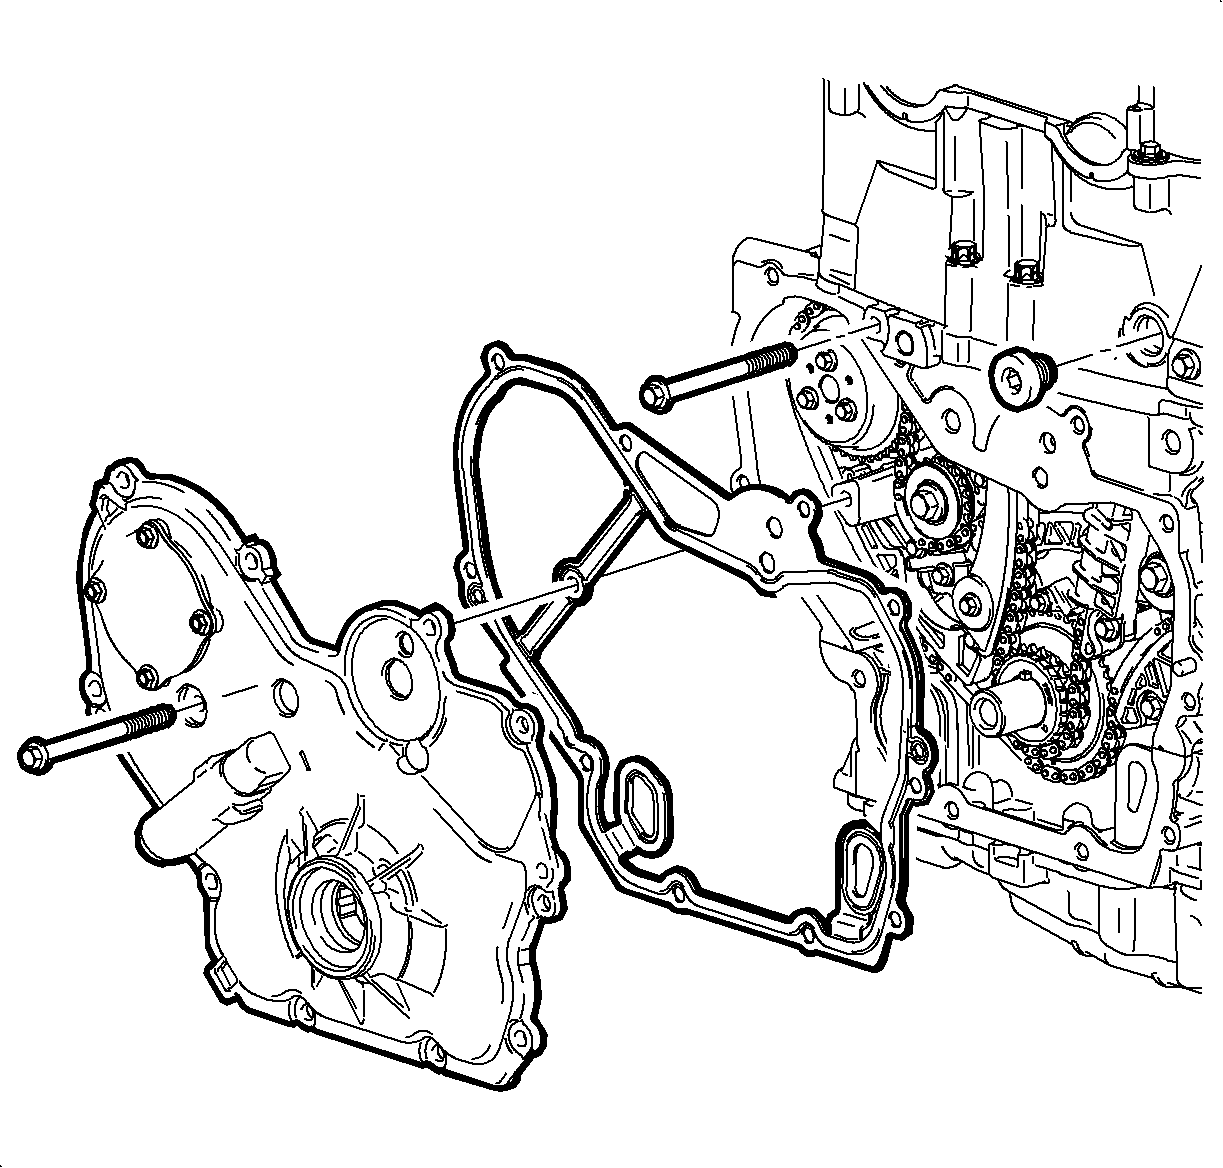
Note: Be sure to remove both water pump bolts from the front of the engine block.
Installation Procedure
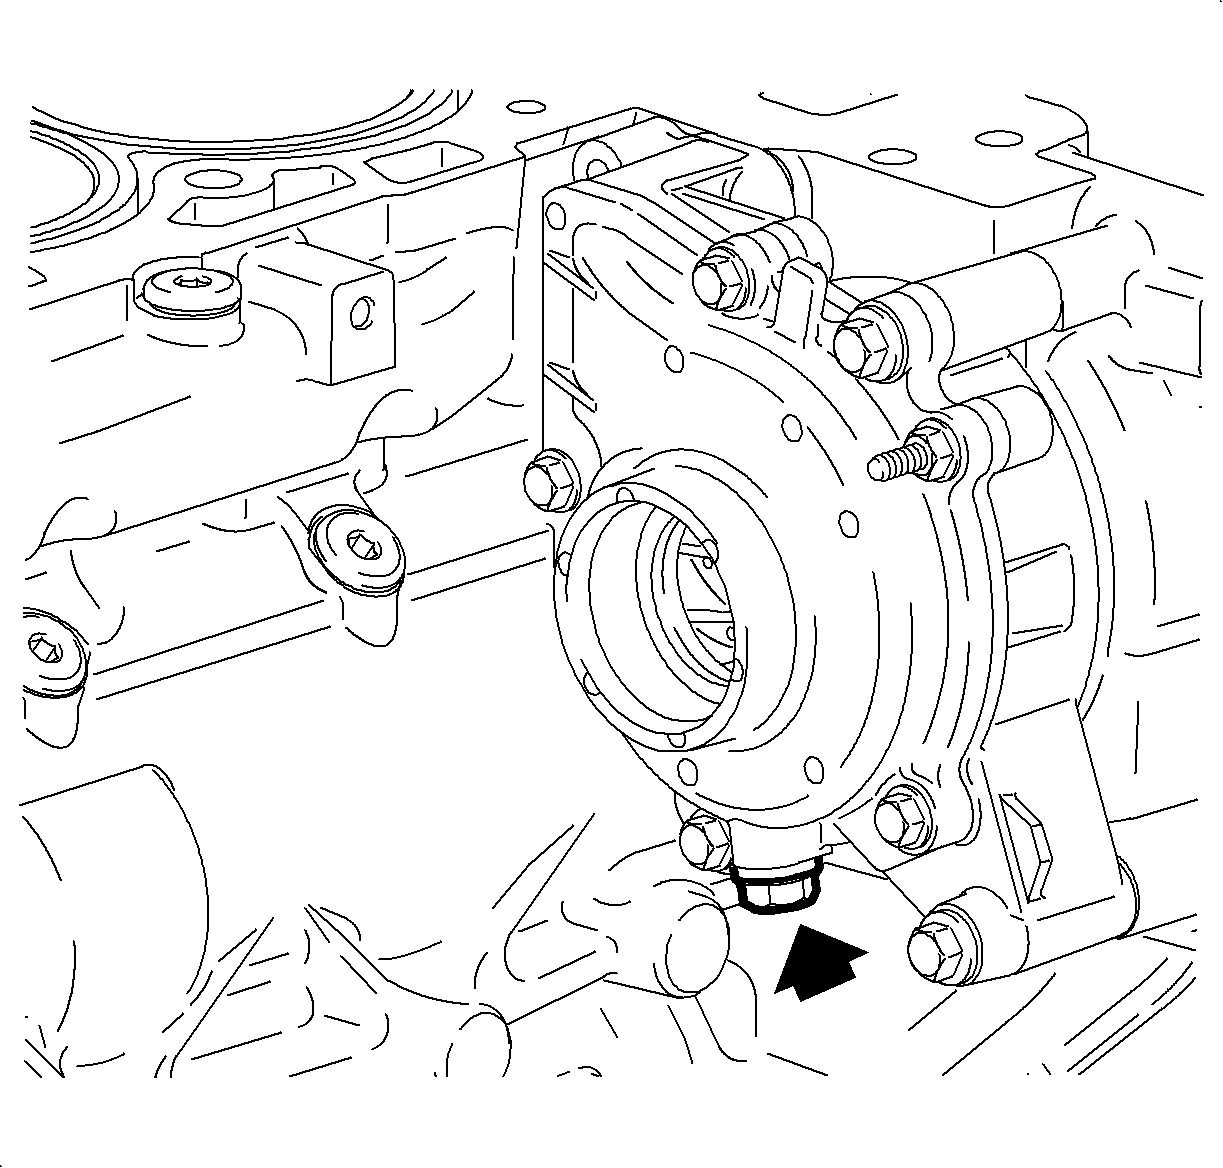
- Apply sealant to the water pump drain plug. Refer to Adhesives, Fluids, Lubricants, and Sealers or Adhesives, Fluids, Lubricants, and Sealers.
- Install the water pump drain plug and tighten to 22 N·m (16 lb ft).
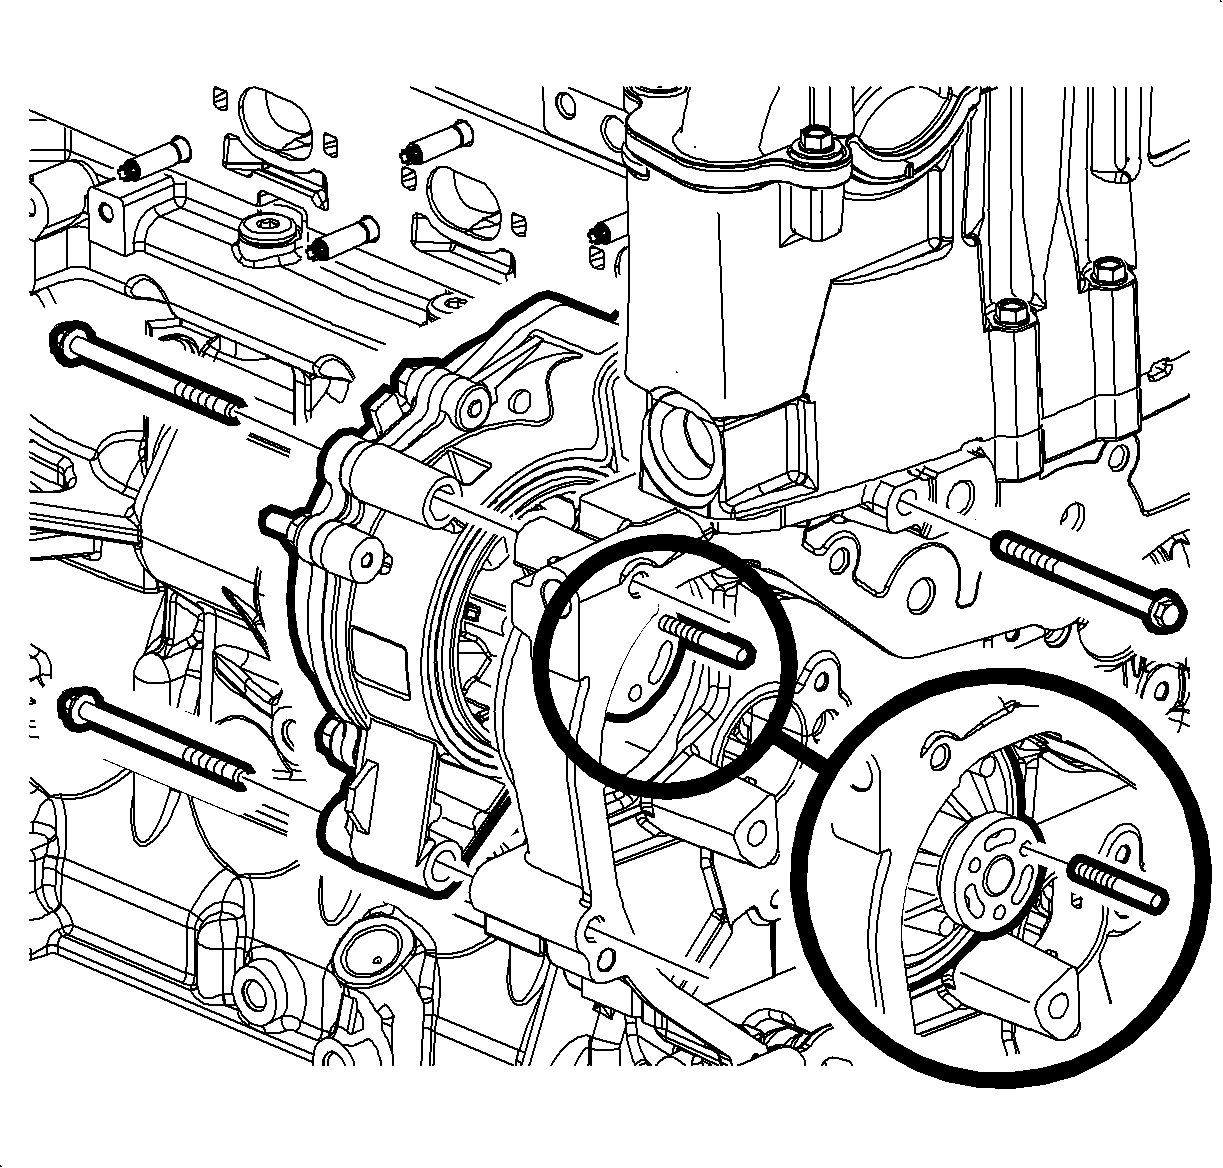
- Using the J 25025-5 or the guide pin that was created, align the pin with the water pump holding tool.
- Position the water pump against the engine block and hand tighten the water pump bolts.
- Install the inner water pump sprocket bolts. After 2 are snug, remove the guide pin and install the 3rd bolt.
- Tighten the water pump sprocket bolts last. Tighten the water pump sprocket bolts to 10 N·m (89 lb in).
- Remove the J 43651 .
- Install the water pump access plate and bolts and tighten to 10 N·m (89 lb in).
- Install the coolant heater. Refer to Coolant Heater Replacement.
- Install the windshield washer solvent container. Refer to Windshield Washer Solvent Container Replacement.
- Install the thermostat housing. Refer to Engine Coolant Thermostat Housing Replacement.
Caution: Refer to Fastener Caution in the Preface section.
Note:
• Prior to installing the water pump, read the entire procedure. This will help avoid balance shaft chain re-timing and ensure proper sealing. • A guide pin can be created using a M6 m x 6 mm stud to aid in water pump alignment.. Thread the pin into the water pump sprocket.
Tighten the water pump bolts to 25 N·m (18 lb ft).


Water Pump Replacement LNF
Special Tools
J 43651 Water Pump Holding Tool
Removal Procedure
- Remove the air cleaner assembly. Refer to Air Cleaner Assembly Replacement.
- Remove the thermostat housing. Refer to Engine Coolant Thermostat Housing Replacement.
- Remove the water pump access plate from the front cover.
- Drain the coolant from the water pump using the plug at the bottom of the pump.
- Install the J 43651 (1) into position.
- Tighten the bolts on the water pump holding tool into the threads on the water pump sprocket.
- Install the access cover bolts that were removed earlier to secure the water pump holding tool to the front cover assembly.
- Remove the 3 inner water pump sprocket to water pump blots.
- Remove the 2 water pump bolts.
- Remove the rear 2 water pump bolts.
- Remove the water pump.
- Remove and discard the water pump O-ring seal.

Note: A drain plug has been provided at the bottom of the water pump assembly for additional coolant drainage from the engine block and water pump.
Note: The water pump holding tool supports the sprocket and chain during water pump service. The tool must be used or the balance shaft must be re-timed.

Note: Be sure to remove both water pump bolts from the front of the engine block.


Installation Procedure
- Install a NEW water pump O-ring seal.
- Using the guide pin, align the pin with the water pump holding tool.
- Position the water pump against the engine block and hand tighten the water pump bolts.
- Install the inner water pump sprocket bolts. After 2 are snug, remove the guide pin and install the 3rd bolt.
- Tighten the water pump sprocket bolts last.
- Remove the J 43651 (1).
- Install the water pump access plate and bolts.
- Install the thermostat housing. Refer to Engine Coolant Thermostat Housing Replacement.
- Install the air cleaner assembly. Refer to Air Cleaner Assembly Replacement.

Note: Prior to installing the water pump, read the entire procedure. This will help avoid balance shaft chain re-timing and ensure proper sealing.
Note: A guide pin can be created to aid in water pump alignment. Use a M 6 m x 6 mm stud. Thread the pin into the water pump sprocket.
Caution: Refer to Fastener Caution in the Preface section.
Tighten
Tighten the bolts to 25 N·m (18 lb ft).
Tighten
Tighten the bolts to 10 N·m (89 lb in).


Tighten
Tighten the bolts to 10 N·m (89 lb in).
