ODOR FROM A/C AT START-UP PROCEDURE TO REPAIR DESCRIBED

Model and Year 1985-88 CHEVROLET MODELS WITH AIR CONDITIONING
Some customers may experience odors emitted from the air conditioning system primarily at start up in hot, humid climates. This odor may be the result of debris in the heater/evaporator case or microbial growth on the evaporator core. To repair this condition, the following equipment and procedure should be utilized:
Required Equipment:
GM Goodwrench air conditioning system disinfectant kit, P/N 25533404
Kent-Moore tool number J-36645 or equivalent Air conditioning Cleaning Gun
Rubber gloves
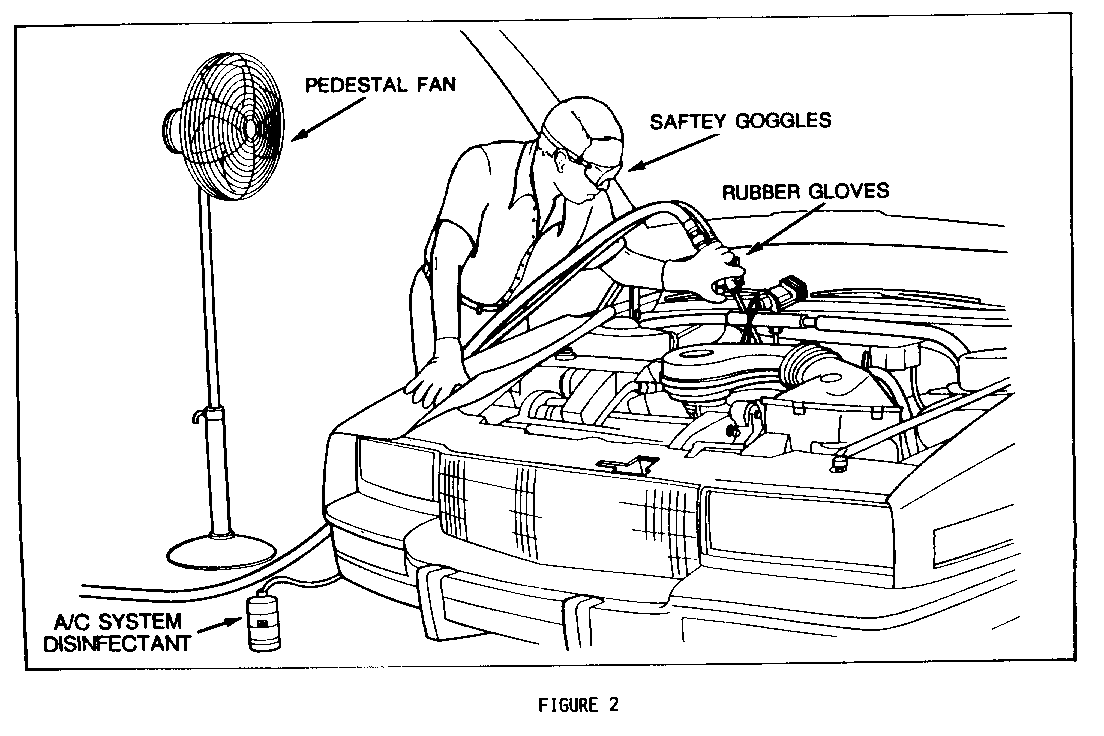
Safety goggles or face shield (ordinary safety glasses are not sufficient)
NIOSH-approved acid gas/organic vapor respirator with chlorine dioxide cartridges, 3M P/N C1842 or equivalent.
CAUTION:
------- Procedure should only be performed on a cold car to prevent the disinfectant from coming in contact with hot engine components.
Disinfectant can cause substantial but temporary eye injury. Do not get in eyes or on clothing. wash thoroughly with soap and water after handling disinfectant.
FIRST AID:
If disinfectant gets into eyes, hold eyelids open and flush with a steady, gentle stream of water for fifteen minutes. Obtain medical attention if irritation persists.
Procedure:
1. Put on rubber gloves, safety goggles, and NIOSH-approved respirator.
2. Pour the small bottle of the two-part GM Goodwrench air conditioning system disinfectant kit, P/N 25533404, into the large bottle. Seal and invert the large container once or twice to mix contents.
3. Connect battery charger to avoid draining the battery during cleaning procedure.
4. Check underneath vehicle to verify that drain outlet is not plugged.
5. Remove blower resistor as described in service manual, leaving wiring connectors attached.
WARNING:
Do not allow the metal coils of the blower resistor to become grounded to any metal surface as this may result in internal circuitry damage.
CAUTION:
Blower resistor may be hot.
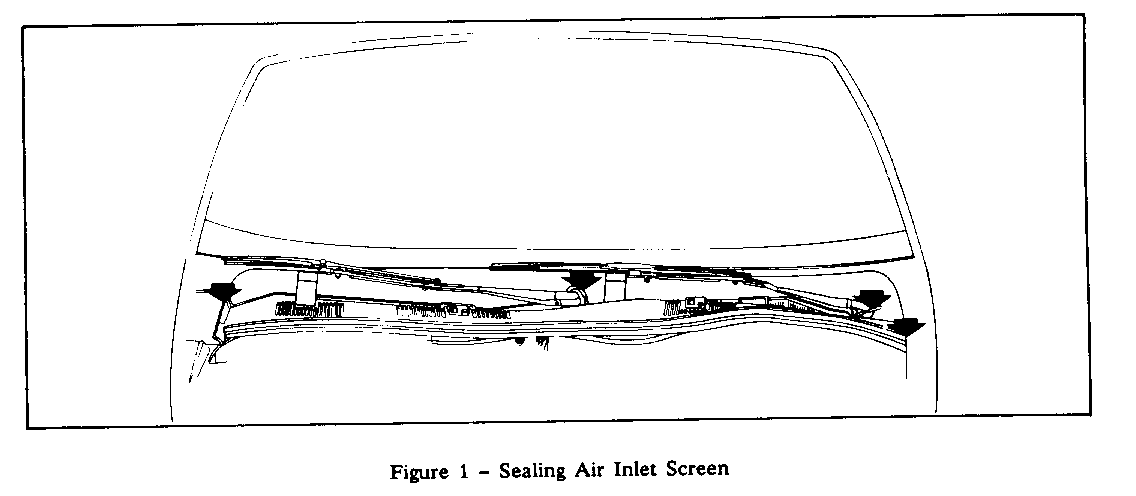
6. Check heater/evaporator case for debris. Remove any debris present through blower resistor opening. If debris is imbedded into the evaporator core face and cannot be removed, the core will have to be removed from the vehicle and cleaned. If a large amount of debris is present in the heater/evaporator case the air inlet screen will require sealing around the air intake in the cowl area.
7. Turn the ignition to the "ON" position but do not start vehicle.
8. Set mode selector to vent, blower switch to low speed and temperature lever to full cold.
9. Open all windows and doors. Exit vehicle.
CAUTION:
Do not enter vehicle until procedure is completed to avoid exposure to disinfectant.
10. Place drain pan with at least a two quart capacity below heater/evaporator drain hole to collect disinfectant and rinse water runoff.
11. Use Kent-Moore tool J-36645 or equivalent siphon-type parts cleaning spray gun capable of delivering two ounces/minute of liquid when driven with 80-90 psi of compressed air. Insert the nozzle of the spray gun through the blower resistor opening and insert siphon hose into container of disinfectant. Direct spray toward evaporator face taking extra care to ensure adequate coverage of the corners and edges, completely saturating the entire core. Use the entire container of solution.
NOTICE: Do not allow disinfectant to come into contact with hot resistor coils.
12. Reach into vehicle and turn the ignition to the "OFF" position and allow the core to soak for five minutes.
13. Double check underneath vehicle to verify proper drain operation. If necessary, unclog and increase drain plug slits with a razor blade or sharp knife.
14. Reach into the vehicle and turn the ignition to the "ON" position, but do not start vehicle.
15. Thoroughly rinse the evaporator core with one quart of clean water using the spray gun to remove any disinfectant residue.
16. Reach into the vehicle and turn the ignition to the "OFF" position and then reinstall the blower resistor.
NOTICE: Blower resistor may be hot.
17. Dispose of disinfectant and rinse water runoff collected in the drain pan in an approved manner.
NOTE: This procedure will eliminate debris or microbial growth which can cause odors but will not prevent the possibility that debris or microbes present in the environment may return.
For warranty purposes, use Labor Operation T6235 for 1.1 hours. If debris needs to be removed from heater/evaporator case and the air inlet screen needs to be sealed, use an add time of .2 hour. If evaporator drain needs to be unclogged, use an add time of .2 hour.
General Motors bulletins are intended for use by professional technicians, not a "do-it-yourselfer". They are written to inform those technicians of conditions that may occur on some vehicles, or to provide information that could assist in the proper service of a vehicle. Properly trained technicians have the equipment, tools, safety instructions and know-how to do a job properly and safely. If a condition is described, do not assume that the bulletin applies to your vehicle, or that your vehicle will have that condition. See a General Motors dealer servicing your brand of General Motors vehicle for information on whether your vehicle may benefit from the information.
