Pressure Flushing
Tools Required
| • | J 29532 Diaphragm
Type Brake Bleeder |
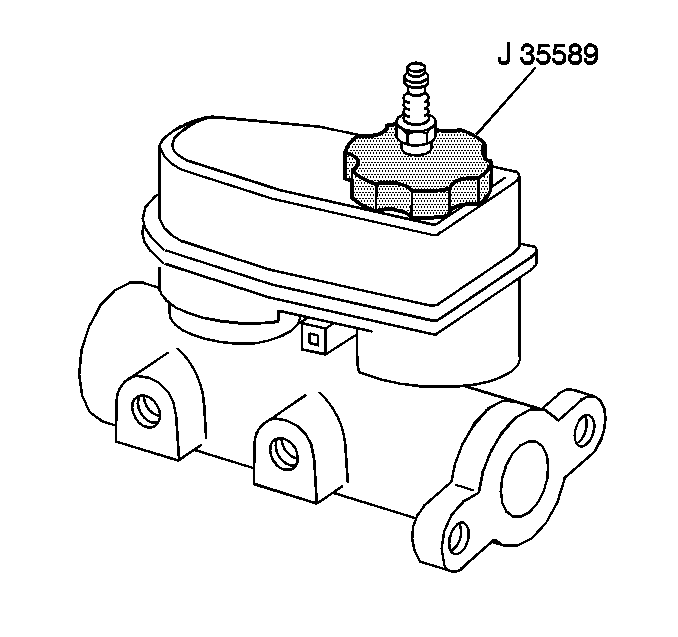
| • | J 35589 Compact
Brake Bleeder Adapter |

Notice: Pressure Bleeding equipment can be used to perform the flush procedure.
The pressure bleeding equipment used for flushing must be of the diaphragm
type. It must a have a rubber diaphragm between the air supply and the brake
fluid to prevent air, moisture, and other contaminants from entering the hydraulic
system.
- Clean the brake fluid reservoir cover and the surrounding area.
- Remove the brake fluid reservoir cover.
- Remove any remaining brake fluid in the reservoir.
- Fill the brake fluid reservoir with clean brake fluid. Refer to
Master Cylinder Reservoir Filling
.
- Install the J 35589
to the brake fluid reservoir.
- Connect the J 29532
brake fluid hose to the bleeder adapter.
- Adjust the pressure bleeding equipment to 35-70 kPa
(5-10 psi) and wait for approximately 30 seconds in order
to ensure there is no leakage.
- Adjust the pressure bleeding equipment to 205-240 kPa
(30-35 psi).
- Raise and suitably support the vehicle. Refer to
Lifting and Jacking the Vehicle
in General Information.

- Flush the brakes in the
following sequence:
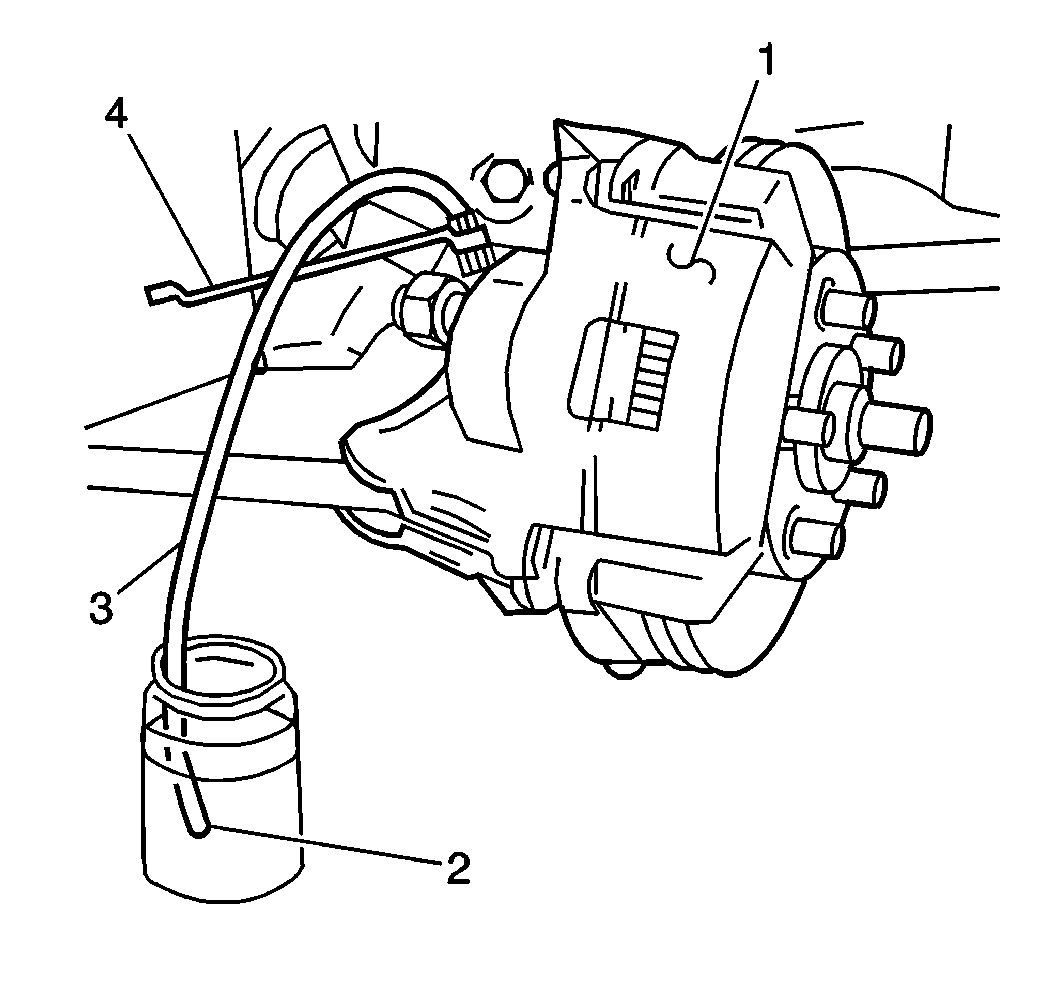
- Attach the bleeder hose (3) to the bleeder valve at each
wheel.
- Place the other end of the bleeder hose into a container (2)
in order to collect the draining brake fluid.
- Slowly open the bleeder valve and allow the fluid to flow.
- Close the valve when clean brake fluid begins to flow or at least
235 ml (8 oz) of fluid accumulates.
Tighten
- Tighten the front caliper bleeder valves to 13 N·m
(115 lb in).
- Tighten the rear caliper bleeder valves to 7 N·m
(62 lb in).
- Remove the bleeder adapter.
- Replace all of the following rubber components:
- Replace the brake pressure modulator valve. Refer to
Brake Pressure Modulator Valve Replacement
in Antilock Brake System.
- Inspect the brake fluid level in the reservoir. Fill the reservoir
to the correct level if necessary.
- Install the brake fluid reservoir cap.
- Bleed the entire brake hydraulic system. Refer to
Hydraulic Brake System Bleeding
.
- Lower the vehicle.
Manual Flushing

Important: Use a suitable container and/or shop rags in order to catch fluid and
prevent the fluid from contacting any painted surfaces.
- Clean the brake fluid reservoir cover and the surrounding area.
- Remove the brake fluid reservoir cover.
- Remove any remaining brake fluid in the brake fluid reservoir.
- Fill the brake fluid reservoir with clean brake fluid. Refer to
Master Cylinder Reservoir Filling
.
- Install the brake fluid reservoir cover.
- Raise and suitably support the vehicle. Refer to
Lifting and Jacking the Vehicle
in General Information.

- Flush the brakes in the
following sequence:
- Attach the bleeder hose (3) to the bleeder valve at each
wheel.
- Place the other end of the bleeder hose into a container (2)
in order to collect the draining brake fluid.
- Slowly open the bleeder valve and allow the fluid to flow.
- Close the valve when clean brake fluid begins to flow or at least
235 ml (8 oz) of fluid accumulates.
Tighten
- Tighten the front caliper bleeder valves to 13 N·m
(115 lb in).
- Tighten the rear caliper bleeder valves to 7 N·m
(62 lb in).
- Replace all the following rubber components:
- Replace the brake pressure modulator valve. Refer to
Brake Pressure Modulator Valve Replacement
in Antilock Brake System.
- Inspect the brake fluid level in the reservoir. Fill the reservoir
to the correct level if necessary.
- Install the brake fluid reservoir cap.
- Bleed the entire brake hydraulic system. Refer to
Hydraulic Brake System Bleeding
.
- Lower the vehicle.


