Compressor Shaft Seal Install V5 - Direct Mount
Tools Required
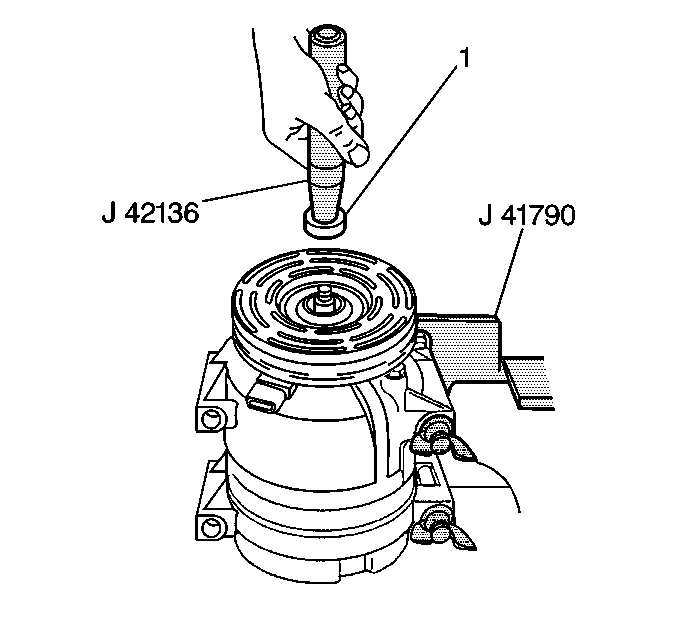
- Dip the new compressor
shaft seal (1) in clean 525 viscosity refrigerant oil and assemble the seal
onto the J 42136
, by turning the handle clockwise.
- Install the J 34614
onto the compressor shaft.
- Using a rotary motion, slide the new compressor shaft seal onto
the compressor shaft until the seal is fully seated.
- Remove the J 42136
by turning the handle counter clockwise.
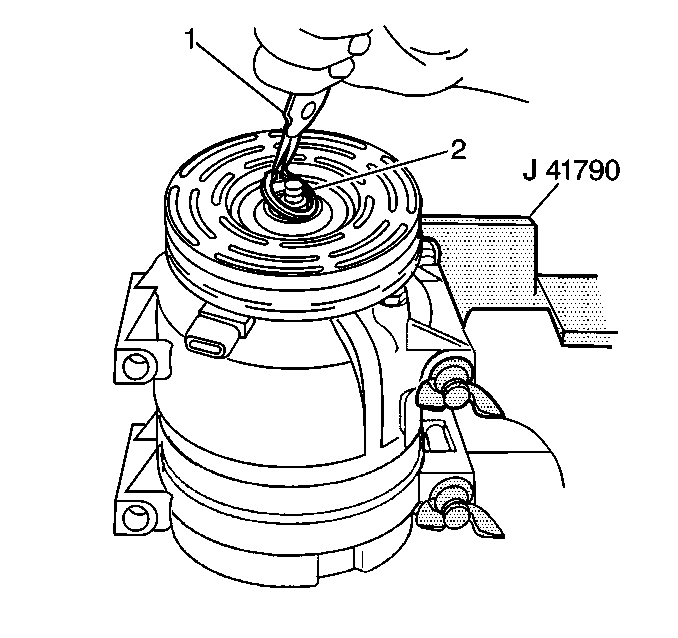
- Install a new compressor
shaft seal retaining ring (2), using internal snap ring pliers (1).
Ensure that the chamfer side of the retaining ring is facing up and
that the retaining ring snaps into the groove.
- Leak test the compressor. Refer to
Compressor Leak Testing
.
- Remove and clean any excess oil resulting from installing the
new seal parts from the shaft and inside the compressor neck.
- Install the compressor clutch plate and hub assembly. Refer to
Compressor Clutch Plate/Hub Assembly Install
.
- Remove the compressor from the J 41790-A
.
Compressor Shaft Seal Install V5 - Conventional Mount
Tools Required
Notice: Seals should not be re-used. Always use a new specification service
seal kit. Be sure that the seal to be installed is not scratched or damaged
in any way. Make sure that the seal is free of lint and dirt that could damage
the seal surface or prevent sealing.
- Thoroughly clean the seal O-ring groove in the front head.
- Dip the new seal O-ring in clean 525 viscosity refrigerant oil.
Notice: Any attempt to use makeshift or inadequate service tools
or equipment may result in damage and/or improper compressor operation.
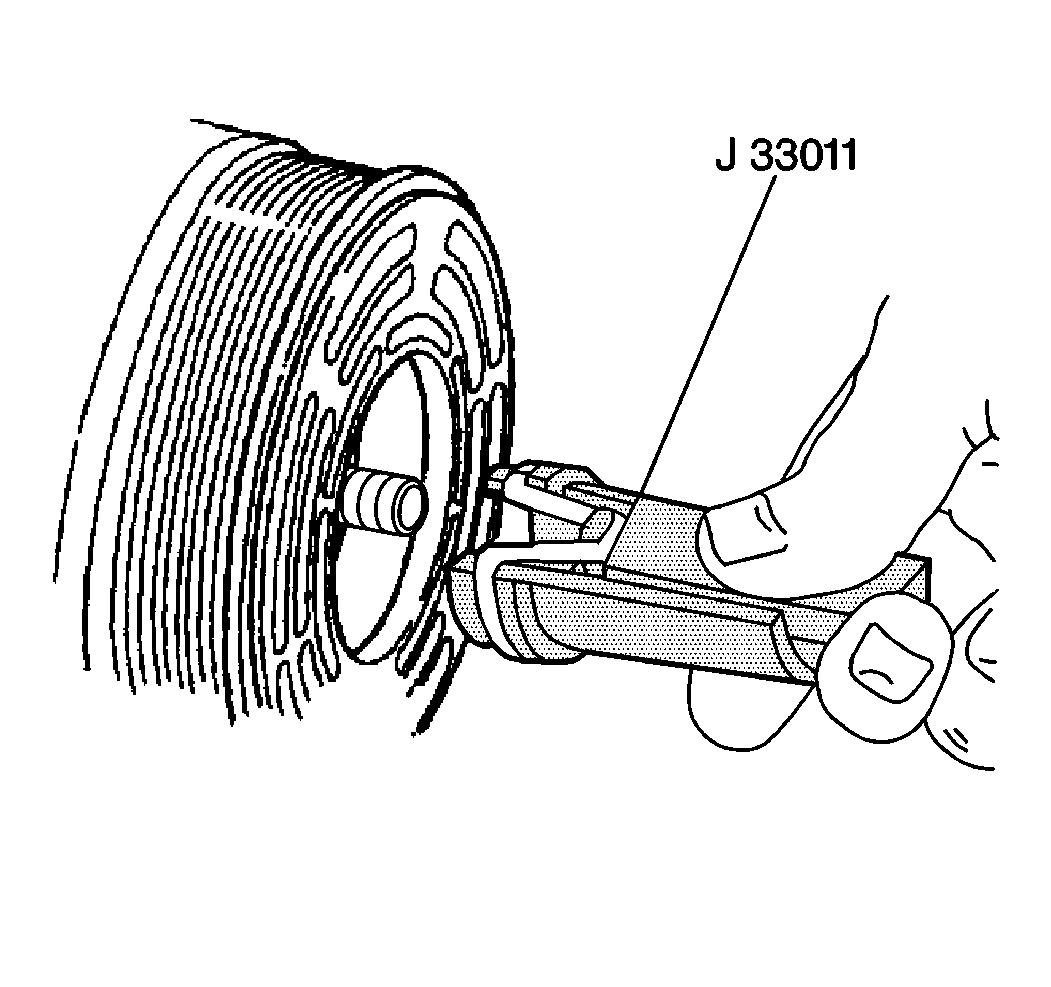
- Assemble the O-ring onto the J 33011
.
- Install the O-ring.
| 4.1. | Insert the J 33011
into the compressor neck until the installer bottoms out. |
| | Important: The top groove in the compressor neck is for the shaft seal retainer
ring.
|
| 4.2. | Lower the moveable slide of the J 33011
in order to release the O-ring into the seal O-ring lower grove. |
| 4.3. | Rotate the J 33011
in order to seat the O-ring. |
| 4.4. | Remove the installer. |
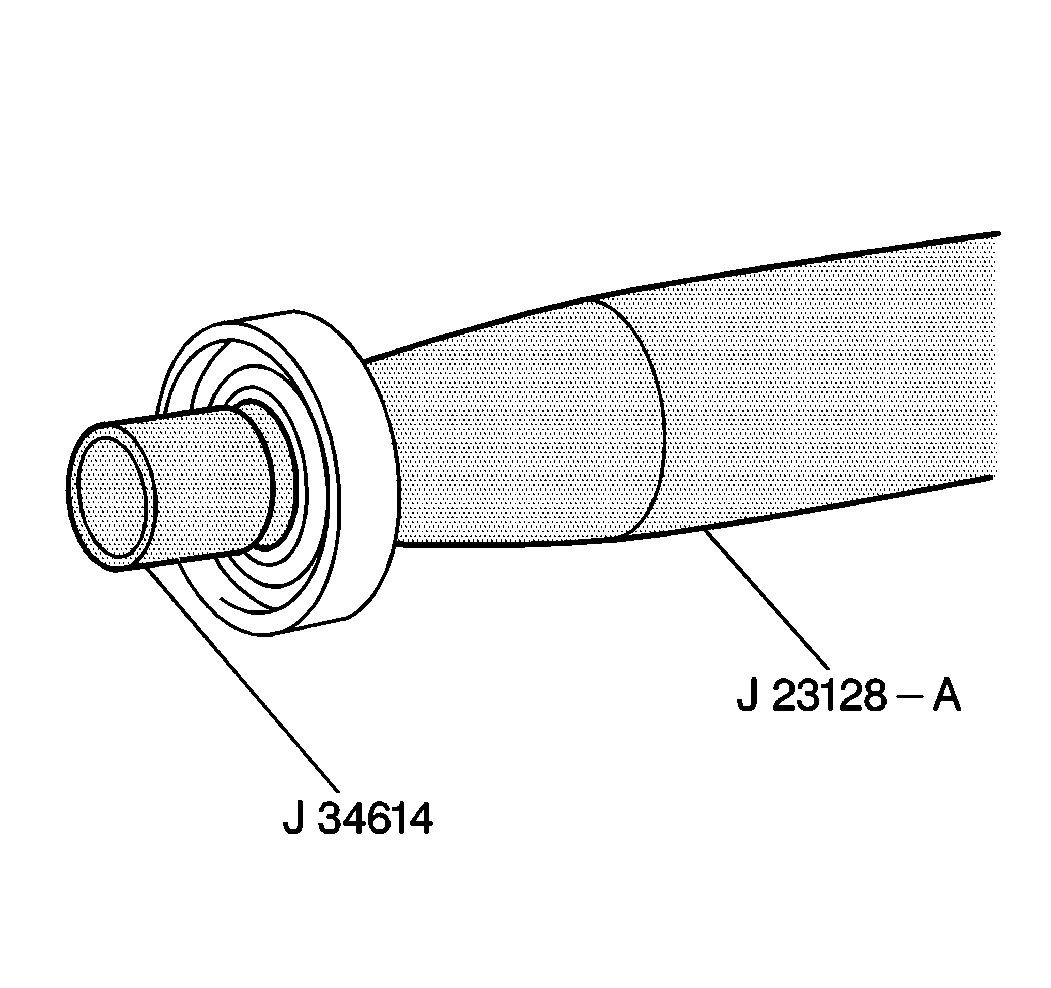
- Dip the new shaft seal in clean 525 viscosity refrigerant oil.
- Assemble the seal to the J 23128-A
by turning the handle clockwise.
| 6.1. | Ensure that the stamped steel case side of the lip seal engages
with the knurled tangs of the J 23128-A
. |
| 6.2. | Ensure that the flared-out side of the lip seal faces toward the
compressor. |
Notice: Use care when handling the seal protector. Do not nick the seal protector.
This may damage the seal during installation. Ensure that the bottom of the
seal protector is not flared. This may damage the seal during installation.
- Install the J 34614
on
the lip seal.
- Install the lip seal onto the shaft.
| 8.1. | Place the J 34614
over the end of the compressor shaft. |
| 8.2. | Slide the new seal onto the shaft using a rotary motion of the J 23128-A
. |
| 8.3. | Ensure that the seal makes good contact with the O-ring. |
Do not dislodge the O-ring.
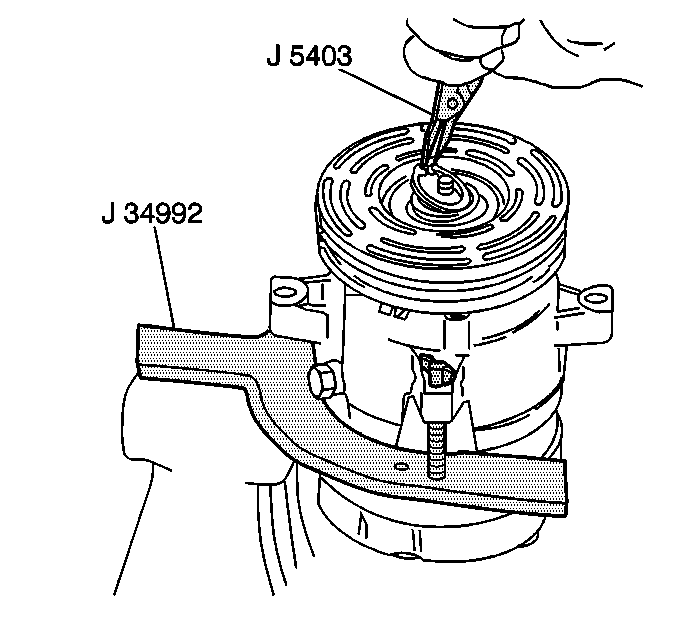
- Use the J 5403
in order to install the new seal retainer
ring with the flat side against the seal.
- Use the sleeve of theJ 33011
in order to press in the seal retainer ring. Ensure that the
ring snaps into the groove.
- Leak test the compressor. Refer to
Compressor Leak Testing
.
- Remove any excess oil from the shaft and the inside of the compressor
neck.
- Install the clutch plate and hub assembly. Refer to
Compressor Leak Testing
.
- Install the compressor and the compressor belt. Tighten the bracket.
- Evacuate and charge the refrigerant system using the J 39500-B
.


