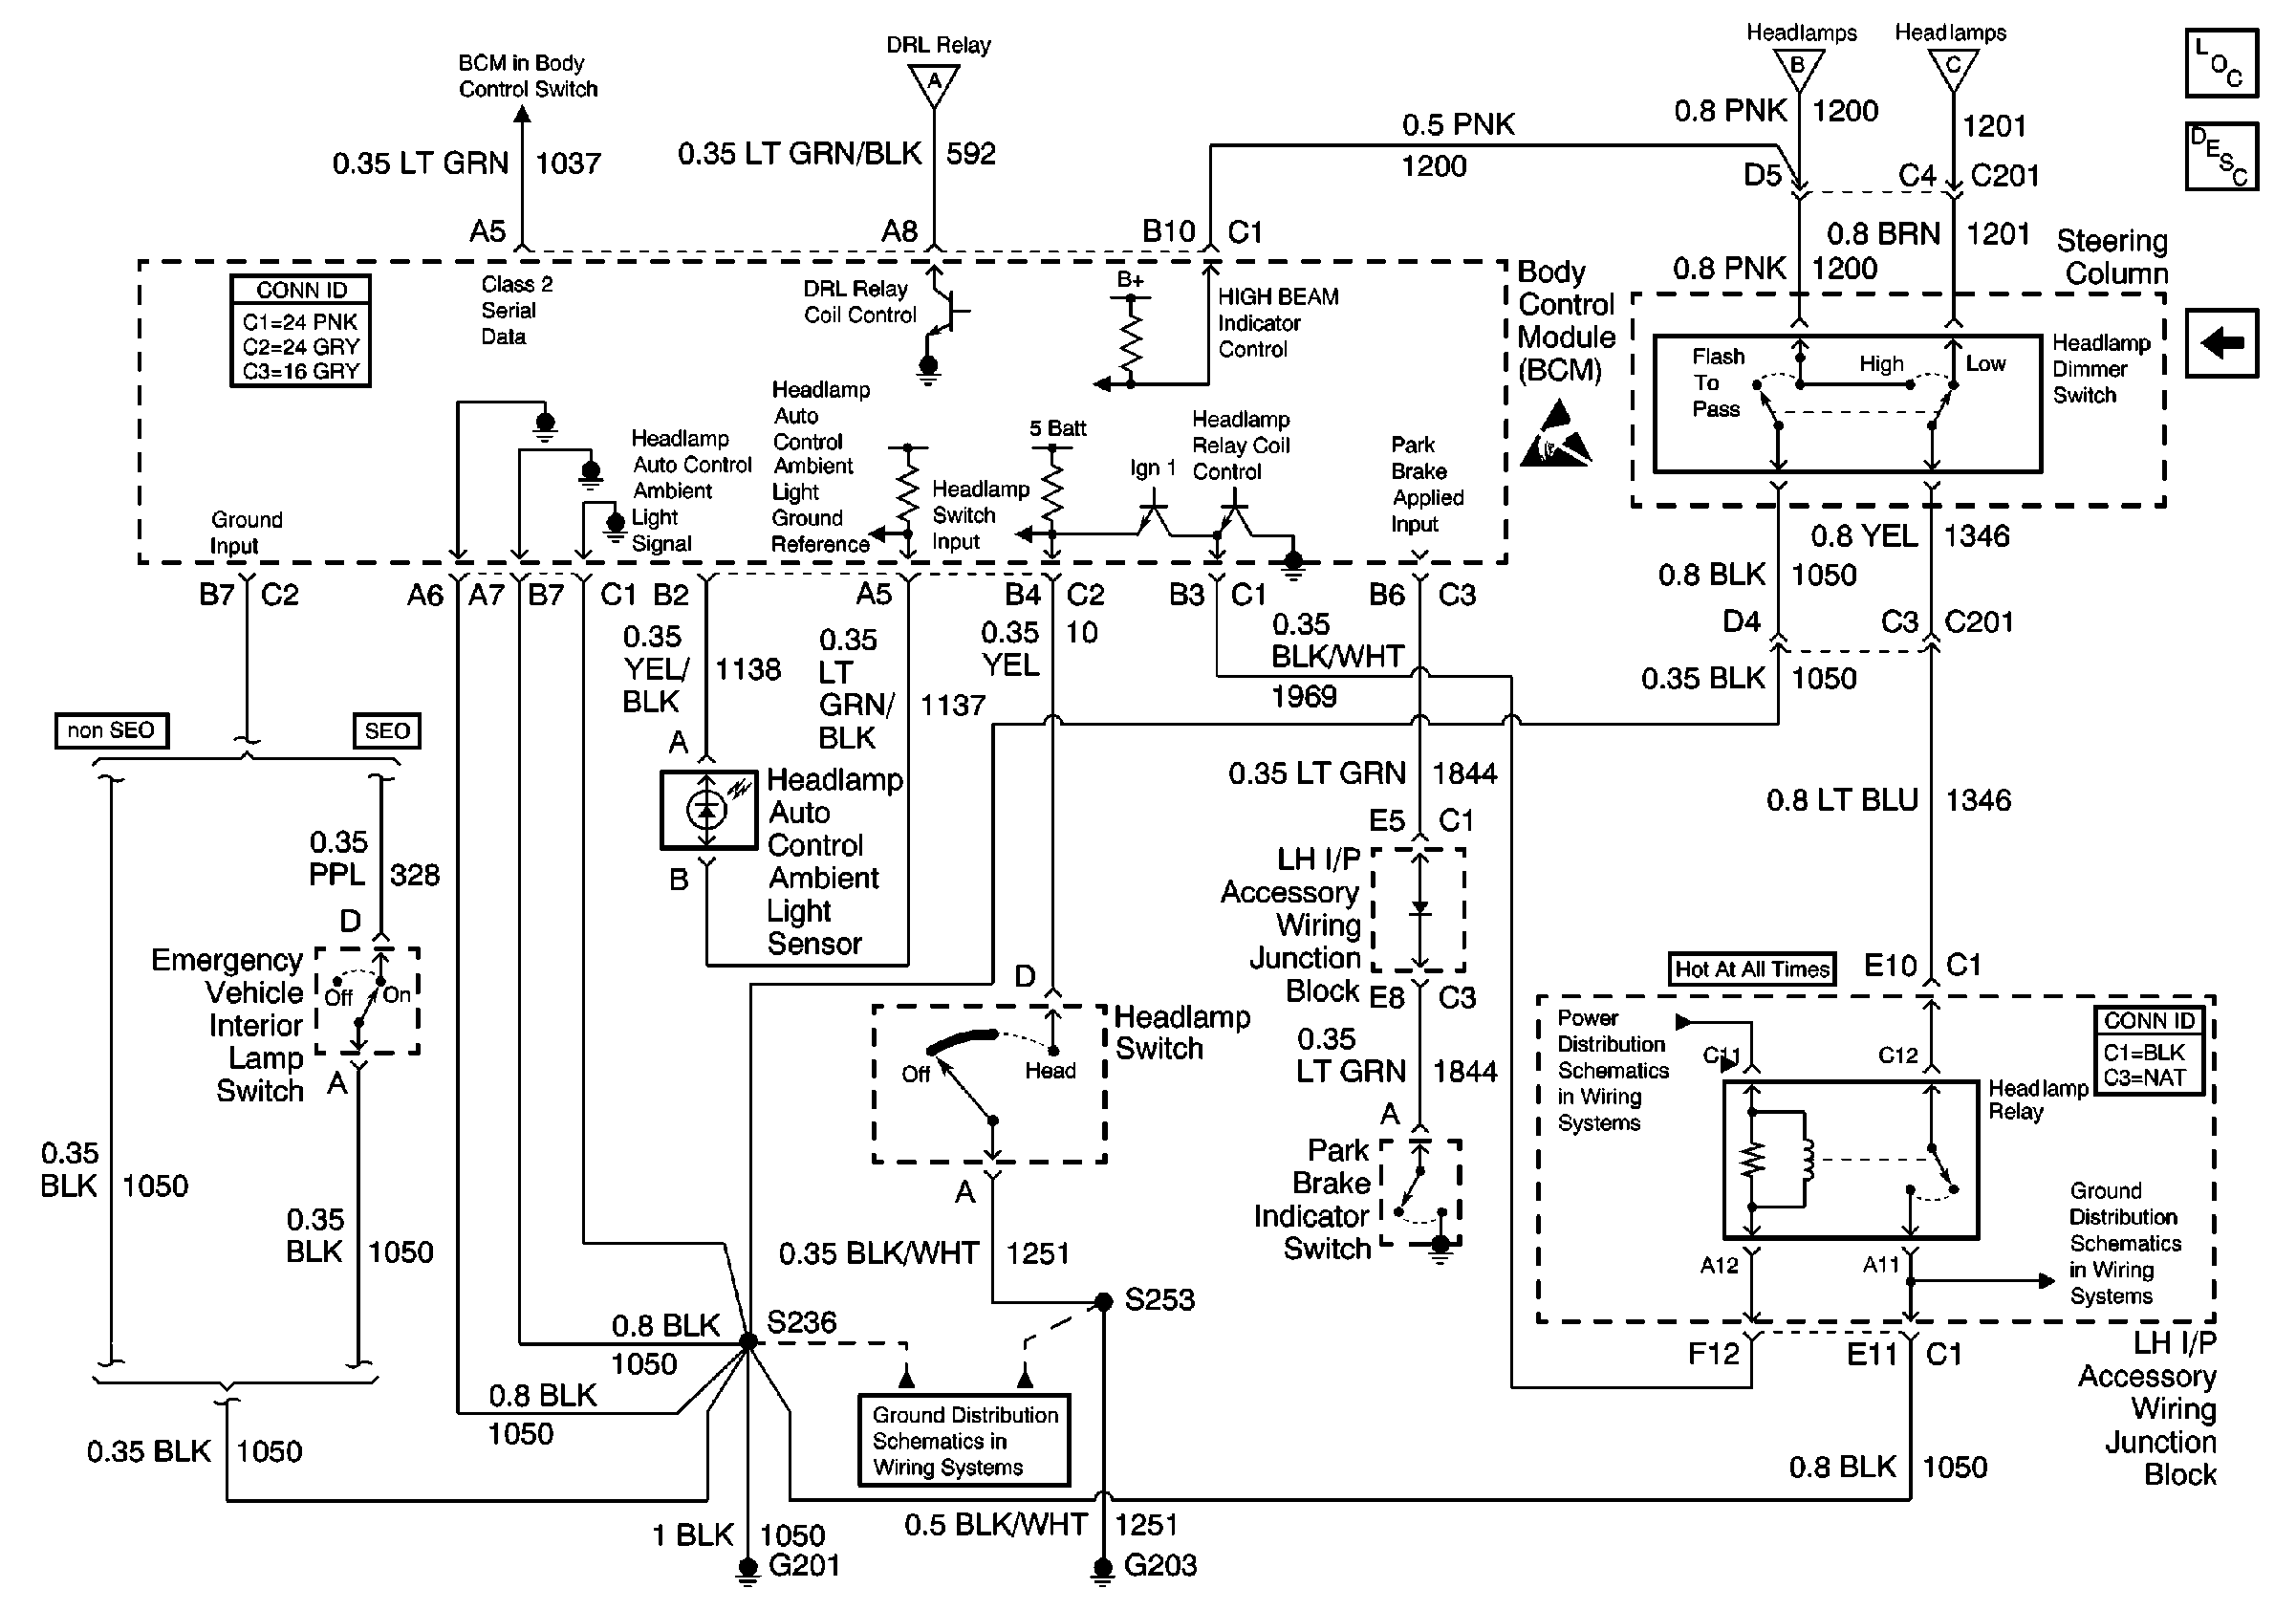
Refer to
Headlamps Control

Circuit Description
The Body Control Module (BCM) monitors the signal circuit of the high beam indicator control for high beam activity. When the high beam headlamps are commanded on by the DRL relay or the headlamp dimmer switch the high beam indicator control circuit is pulled to ground. B+ is applied to the DRL relay and the LH high beam headlamp from the DRL/EXT fuse and the RH high beam headlamp receives B+ from the EXT fuse.
Conditions for Running the DTC
The headlamps are not on and the DRL is not enabled.
Conditions for Setting the DTC
| • | The BCM detects a short to ground or open in the signal circuit of the high beam indicator control. When the headlamps are off and the DRL are off. |
| • | The condition above must be present for more than 0.3 seconds. |
Action Taken When the DTC Sets
The BCM stores DTC B2650 in memory.
Conditions for Clearing the DTC
DTC B2650 will clear after 100 consecutive ignition cycles if the condition for the malfunction is no longer present.
Diagnostic Aids
| • | If the DTC B2650 is a history DTC, the fault may be intermittent. Refer to Testing for Intermittent Conditions and Poor Connections Intermittents and Poor Connections in wiring systems. |
| • | The following conditions may cause an intermittent malfunction to occur: |
| - | An intermittent short to ground in the signal circuit of the high beam indicator control. |
| - | An intermittent open in the signal circuit of the high beam indicator control. |
Test Description
The number(s) below refer to the step number(s) on the diagnostic table.
-
Test the DRL relay for a stuck switch.
-
Tests the headlamp dimmer switch for an internal short or bad switch.
Step | Action | Yes | No |
|---|---|---|---|
1 | Did you perform the Lighting System Diagnostic System Check? | Go to Step 2 | Go to Diagnostic System Check - Lighting Systems in Lighting Systems. |
2 |
Does the scan tool display active? | Go to Diagnostic Aids | Go to Step 3 |
3 |
Does the test lamp illuminate? | Go to Step 5 | Go to Step 4 |
Does the test lamp illuminate? | Go to Step 9 | Go to Step 13 | |
Does the test lamp illuminate? | Go to Step 15 | Go to Step 6 | |
6 |
Does the test lamp illuminate? | Go to Step 9 | Go to Step 10 |
7 |
Does the test lamp illuminate? | Go to Step 8 | Go to Step 12 |
8 |
Does the test lamp illuminate? | Go to Step 10 | Go to Step 11 |
9 | Inspect for a poor connection at the harness connectors of the LH high beam headlamp. Refer to Testing for Intermittent Conditions and Poor Connections Testing for Intermittent and Poor Connections and Connector Repairs Connector Repairs in wiring systems. Did you find and correct the condition? | Go to Step 17 | Go to Step 16 |
10 | Inspect for a poor connection at the DRL Relay. Refer to Testing for Intermittent Conditions and Poor Connections Testing for Intermittent and Poor Connections and Connector Repairs Connector Repairs in wiring systems. Did you find and correct the condition? | Go to Step 17 | Go to Step 14 |
11 | Repair a poor connection or an open in the DRL switched ground circuit. Refer to Circuit Testing Circuit Testing in Wiring Systems and Wiring Repairs Wiring Repairs in Wiring Systems. Did you complete the repair? | Go to Step 17 | -- |
12 | Repair a poor connection or an open in the ground circuit of the DRL Relay. Refer to Circuit Testing Circuit Testing in Wiring Systems and Wiring Repairs Wiring Repairs in Wiring Systems. Did you complete the repair? | Go to Step 17 | -- |
13 | Repair a poor connection or an open in the high beam indicator control circuit. Refer to Circuit Testing Circuit Testing in Wiring Systems and Wiring Repairs Wiring Repairs in Wiring Systems. Did you complete the repair? | Go to Step 17 | -- |
14 | Replace the DRL relay. Did you complete the repair? | Go to Step 17 | -- |
15 | Replace the LH high beam headlamp bulb. Did you complete the repair? | Go to Step 17 | -- |
16 | Replace the LH headlamp assembly. Refer to Headlamp Assembly or Headlamp Bulb and/or Cornering, Sidemarker, Park, Turn Signal Bulb Replacement . Did you complete the repair? | Go to Step 17 | -- |
17 |
Does the DTC reset? | Go to Step 2 | System OK |
