Power Vacuum Brake Booster Replacement 3.8L
Tools Required
J 22805-B Power Brake Booster Holder
Removal Procedure
Caution: When replacing the power booster brake, make sure that the cruise control cable is not routed between the booster and the cowl. If the cable is damaged or pinched, it must be replaced. Failure to do this could result in personal injury.
- Remove the left instrument panel insulator.
- Disconnect the stop lamp switch electrical connector from the stop lamp switch.
- Remove the retaining clip and disconnect the brake booster pushrod from the brake pedal.
- Remove the cross vehicle brace. Refer to Cross Vehicle Brace Replacement in Body Front End.
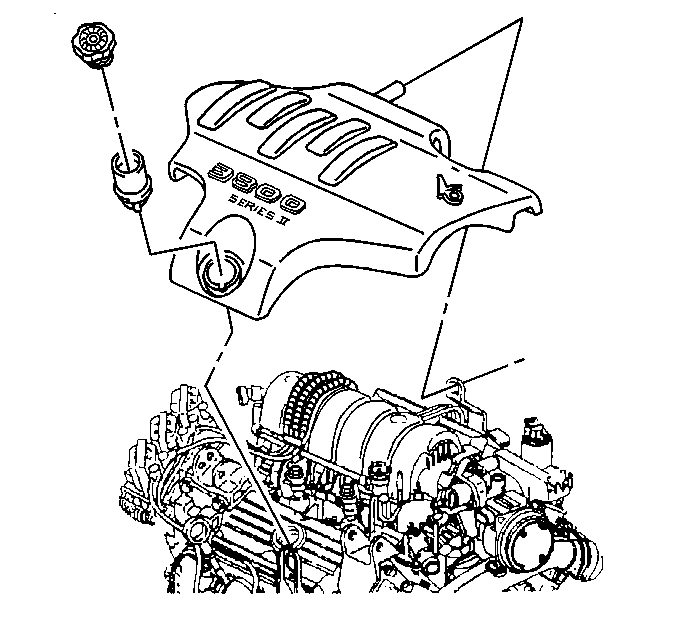
- Remove the fuel injector sight shield. Refer to Fuel Injector Sight Shield Replacement in Engine Mechanical - 3.8L.
- Disconnect the brake fluid level sensor electrical connector from the brake fluid level sensor.
- Remove the two master cylinder retaining nuts and position the master cylinder aside.
- Disconnect the vacuum brake booster check valve from the brake booster. Position aside the vacuum hose and the check valve as an assembly.
- Disconnect the throttle and cruise control cables from the throttle body.
- Remove the throttle bracket, throttle cable, and the cruise control cable from the throttle body as an assembly. Position the throttle bracket and cables aside.
- Rotate the engine forward for service access. Refer to Rotating the Engine for Service Access in Engine Mechanical - 3.8L.
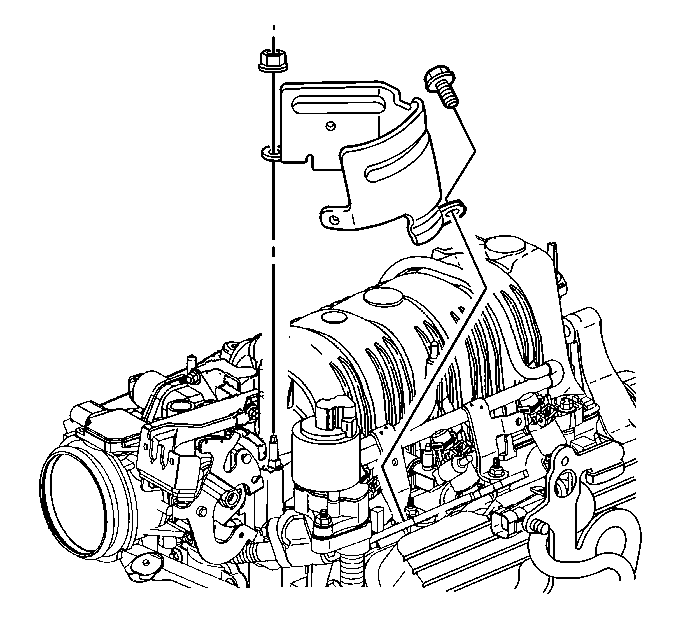
- Remove the EGR valve wiring harness heat shield.
- Remove the EGR valve. Refer to Exhaust Gas Recirculation Valve Replacement in Engine Controls - 3.8L.
- Remove the transmission fluid filler tube bracket retainer and position the filler tube aside. Refer to Transmission Fluid Filler Tube Replacement .
- Attach the J 22805-B to the booster using the master cylinder retaining nuts.
- Unlock the booster from the front of the cowl.
- Remove the vacuum brake booster.
Important: It is not necessary to disconnect the brake pipes from the master cylinder to the Brake Pressure Modulator Valve.
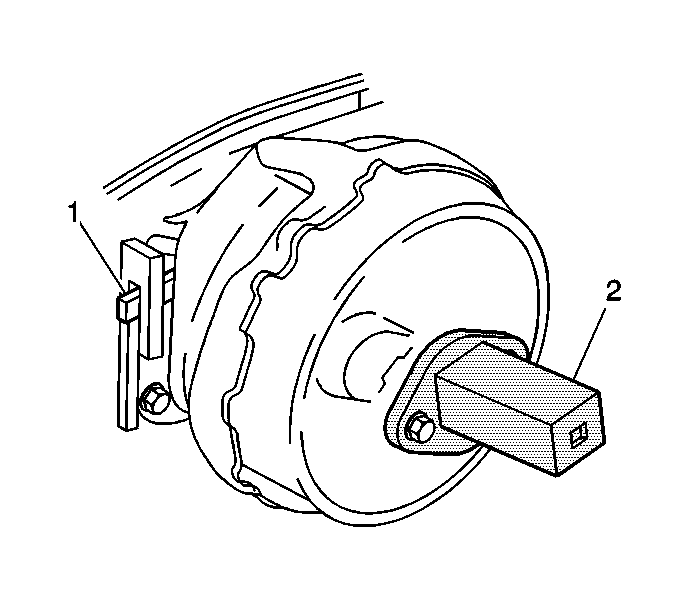
Use a flat bladed tool to depress the brake booster locking tab (1) out of the cowl mounting flange, while turning the booster counterclockwise with a ratchet on theJ 22805-B (2).
Installation Procedure
Notice: Internal components of this booster are not serviceable. The housing must not be unstaked and separated. Separating the housing will cause permanent deformation, preventing the booster from holding proper volume.
Notice: Inspect the locking flanges on booster and mounting plate. Replace the booster and mounting plate if the locking flanges are bent or damaged.
- Install the vacuum brake booster.
- Turn the vacuum brake booster clockwise with a ratchet on the J 22805-B (2). DO NOT use a flat bladed tool in the locking tab to install the vacuum brake booster. When the vacuum brake booster is correctly installed, the locking tab (1) slides up the flange and engages the locking notch.
- Remove the J 22805-B (2) from the installed vacuum brake booster.
- Install the transmission fluid filler tube bracket retainer and reposition the filler tube. Refer to Transmission Fluid Filler Tube Replacement .
- Install the EGR valve. Refer to Exhaust Gas Recirculation Valve Replacement in Engine Controls - 3.8L.
- Install the EGR valve wiring harness heat shield.
- Return the engine to the original rest position. Install the left and right engine mount struts. Refer to Engine Mount Strut Replacement - Left Side and Engine Mount Strut Replacement - Right Side in Engine Mechanical - 3.8L.
- Reposition the throttle bracket and cables to the throttle body. Install the throttle bracket, throttle cable, and the cruise control cable assembly to the throttle body .
- Connect the throttle and cruise control cables to the throttle body.
- Reposition and connect the vacuum hose and check valve assembly to the booster.
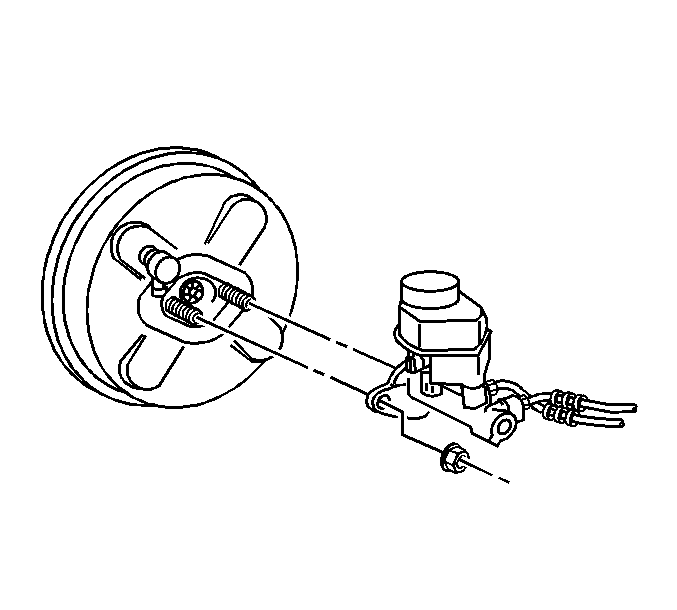
- Reposition the master cylinder onto the booster and install the master cylinder retaining nuts.
- Connect the brake fluid level sensor electrical connector to the brake fluid level sensor.
- Install the fuel injector sight shield. Refer to Fuel Injector Sight Shield Replacement in Engine Mechanical - 3.8L.
- Install the cross vehicle brace. Refer to Cross Vehicle Brace Replacement in Body Front End.
- Connect the brake booster pushrod to the brake pedal and install the retaining clip.
- Connect the stop lamp switch electrical connector to the stop lamp switch.
- Install the left instrument panel insulator.
Position the vacuum brake booster on the cowl counterclockwise from the final installation position so that the locking flanges on the vacuum brake booster and on the cowl mounting flange engage.
Important: Ensure that the locking tab and the flanges are in the fully engaged position.


Notice: Use the correct fastener in the correct location. Replacement fasteners must be the correct part number for that application. Fasteners requiring replacement or fasteners requiring the use of thread locking compound or sealant are identified in the service procedure. Do not use paints, lubricants, or corrosion inhibitors on fasteners or fastener joint surfaces unless specified. These coatings affect fastener torque and joint clamping force and may damage the fastener. Use the correct tightening sequence and specifications when installing fasteners in order to avoid damage to parts and systems.
Tighten
Tighten the EGR valve wiring harness heat shield nut and bolt to 10 N·m
(89 lb in).
Tighten
Tighten the nuts to 25 N·m (18 lb ft).

Power Vacuum Brake Booster Replacement 3.4L
Tools Required
J 22805-B Power Brake Booster Holder
Removal Procedure
Caution: When replacing the power booster brake, make sure that the cruise control cable is not routed between the booster and the cowl. If the cable is damaged or pinched, it must be replaced. Failure to do this could result in personal injury.
- Disconnect the negative battery cable. Refer to Battery Negative Cable Disconnection and Connection in Engine Electrical.
- Remove the left instrument panel insulator. Refer to Instrument Panel Insulator Panel Replacement - Left Side in Instrument Panel, Gages, and Console.
- Disconnect the stop lamp switch electrical connector from the stop lamp switch.
- Remove the retaining clip and disconnect the brake booster pushrod from the brake pedal.
- Partially drain the cooling system. Refer to Cooling System Draining and Filling in Engine Cooling.
- Remove the cross vehicle brace. Refer to Cross Vehicle Brace Replacement in Body Front End.
- Remove the air cleaner inlet duct. Refer to Air Cleaner Inlet Duct Replacement in Engine Controls - 3.4L.
- Relieve the fuel system pressure. Refer to Fuel Pressure Relief in Engine Controls - 3.4L.
- Disconnect the following pipes and position the pipes aside.
- Disconnect the coolant outlet (2) and the inlet (3) bypass hoses and position the hoses aside.
- Remove the heater inlet pipe.
- Rotate the engine forward for service access. Refer to Rotating the Engine for Service Access in Engine Mechanical - 3.4L.
- Disconnect the electrical connector from the brake fluid level sensor.
- Remove the two master cylinder retaining nuts, and position the master cylinder aside.
- Disconnect the vacuum check valve from the brake booster. Position aside the vacuum hose and the check valve as an assembly.
- Attach J 22805-B to the booster using the master cylinder retaining nuts.
- Unlock the booster from the cowl.
- Use a flat bladed tool to depress the brake booster locking tab (1) out of the cowl mounting flange, while turning the booster counterclockwise with a ratchet on J 22805-B (2).
- Remove the vacuum brake booster.
- Remove the J 22805-B (2) from the booster.
| • | The EVAP canister purge valve pipe |
| • | The fuel feed pipe |
| • | The return pipe |
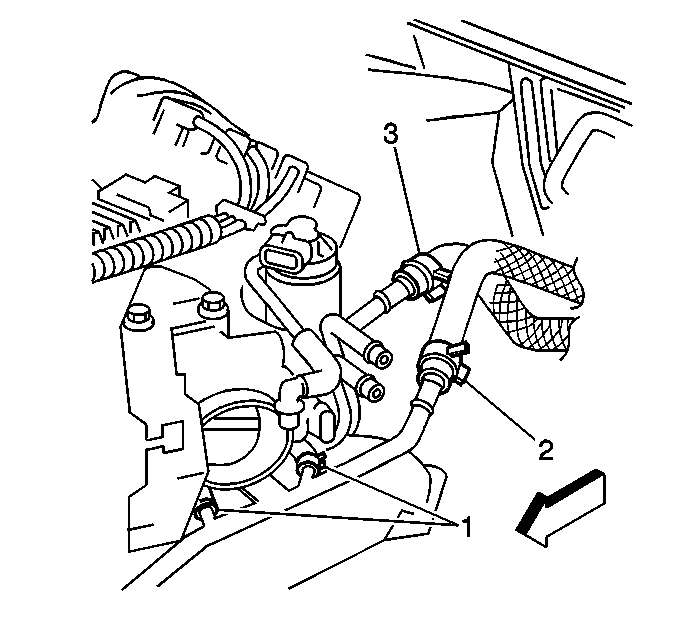

Important: It is not necessary to disconnect the brake pipes from the master cylinder to the BPMV.

Installation Procedure
- Install the vacuum brake booster.
- Turn the vacuum brake booster clockwise with a ratchet on the J 22805-B (2). Do NOT use a flat bladed tool to install the vacuum brake booster. When the booster is correctly installed, the locking tab (1) slides up the flange and engages the locking notch.
- Remove J 22805-B (2) from the installed vacuum brake booster.
- Reposition and connect the vacuum hose and check valve assembly to the booster.
- Reposition the master cylinder onto the booster and install the master cylinder retaining nuts.
- Connect the electrical connector to the brake fluid level sensor.
- Return the engine to the original rest position. Install the left and the right engine mount struts. Refer to Engine Mount Strut Replacement - Left Side and to Engine Mount Strut Replacement - Right Side in Engine Mechanical - 3.4L.
- Install the heater inlet pipe.
- Reposition and connect the coolant outlet (2) and the inlet (3) bypass hoses.
- Reposition and connect the following pipes:
- Install the air cleaner inlet duct. Refer to Air Cleaner Inlet Duct Replacement in Engine Controls - 3.4L.
- Install the cross vehicle brace. Refer to Cross Vehicle Brace Replacement in Body Front End.
- Fill the cooling system. Refer to Cooling System Draining and Filling in Engine Cooling.
- Connect the brake booster pushrod to the brake pedal and install the retaining clip.
- Connect the stop lamp switch electrical connector to the stop lamp switch.
- Install the left instrument panel insulator. Refer to Instrument Panel Insulator Panel Replacement - Left Side in Instrument Panel, Gages, and Console.
- Connect the negative battery cable. Refer to Battery Negative Cable Disconnection and Connection in Engine Electrical.
Notice: Internal components of this booster are not serviceable. The housing must not be unstaked and separated. Separating the housing will cause permanent deformation, preventing the booster from holding proper volume.
Notice: Inspect the locking flanges on booster and mounting plate. Replace the booster and mounting plate if the locking flanges are bent or damaged.
Important: Carefully push the pushrod eye through the hole so that you do not damage or dislodge the insulator boot.
Position the vacuum brake booster on the cowl counterclockwise from the final installation position so that the locking flanges on the components engage.

Important: Ensure that the locking tab and the flanges are in the full engaged position.
Notice: Refer to Fastener Notice in the Preface section.

Tighten
Tighten the retaining nuts to 33 N·m
(24 lb ft).

| • | The EVAP canister purge valve pipe |
| • | The fuel feed pipe |
| • | The return pipe |
