Coolant Heater Replacement for Chevrolet Impala 2003
Coolant Heater Replacement 3.4L
Removal Procedure
- Drain the cooling system. Refer to Cooling System Draining and Filling .
- Disconnect the coolant heater cord from the coolant heater.
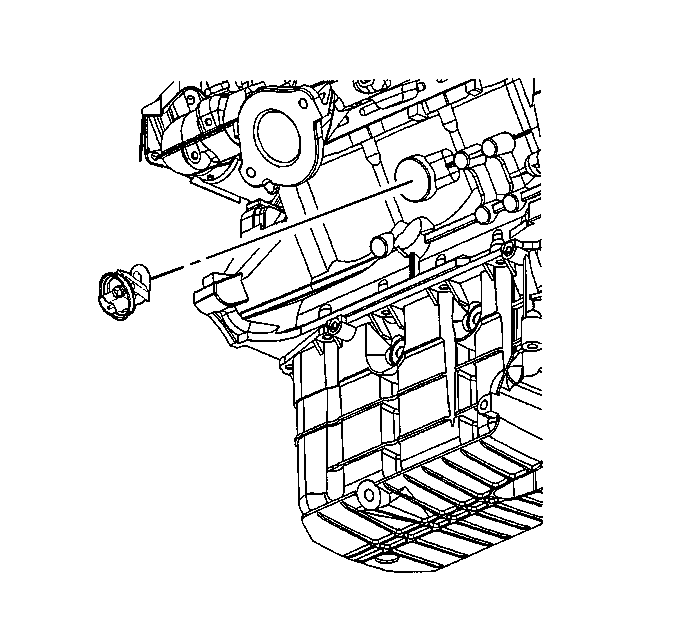
- Remove the engine block heater screw.
- Remove the engine block heater.
- Clean the engine block heater opening.
Installation Procedure
- Apply a coat of GM P/N 12346004, (Canadian P/N 10953480) thread sealant with Teflon or equivalent to the following:
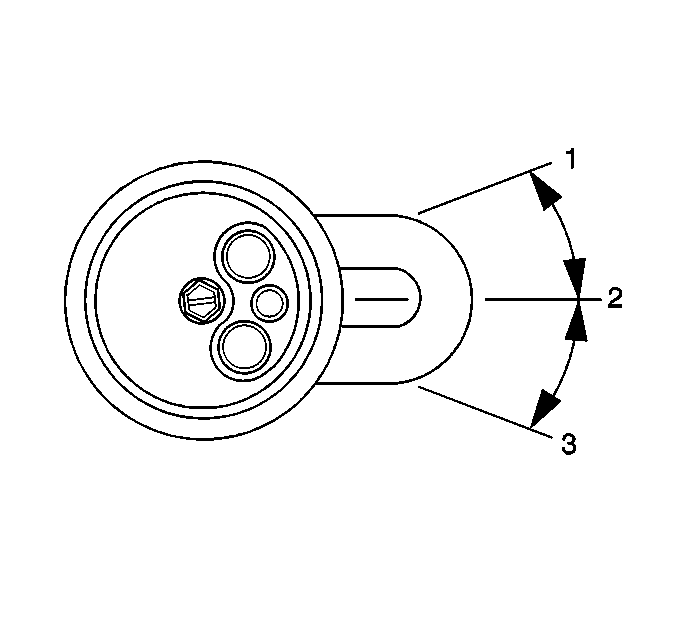
- Position the heating element at the 3 o'clock position (2).
- Install the engine block heater.
- Install the engine block heater screw.
- Connect the coolant heater cord to the coolant heater.
- Lower the vehicle.
- Fill the cooling system. Refer to Cooling System Draining and Filling .
| • | The engine block heater seal |
| • | The cleaned surface of the engine block heater hole |
Notice: Use the correct fastener in the correct location. Replacement fasteners must be the correct part number for that application. Fasteners requiring replacement or fasteners requiring the use of thread locking compound or sealant are identified in the service procedure. Do not use paints, lubricants, or corrosion inhibitors on fasteners or fastener joint surfaces unless specified. These coatings affect fastener torque and joint clamping force and may damage the fastener. Use the correct tightening sequence and specifications when installing fasteners in order to avoid damage to parts and systems.
Tighten
Tighten the screw to 2 N·m (18 lb in).
Coolant Heater Replacement 3.8L
Removal Procedure
- Drain the cooling system. Refer to Cooling System Draining and Filling .
- Disconnect the coolant heater cord from the coolant heater.
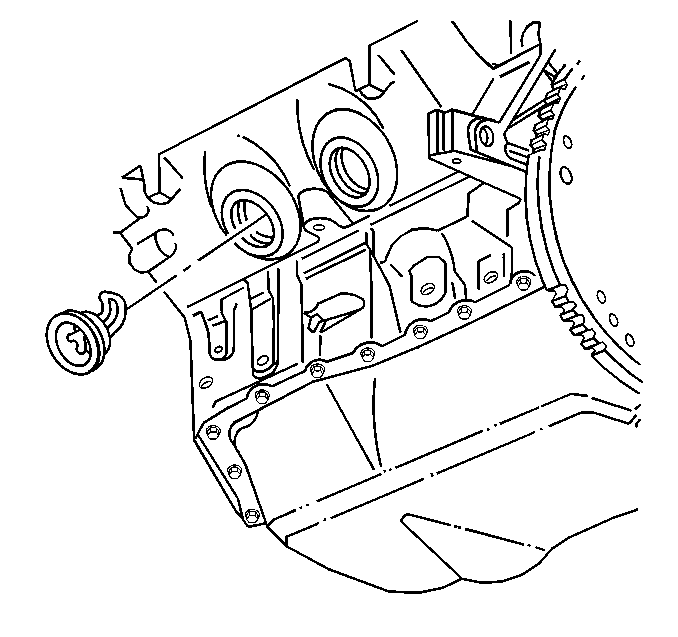
- Loosen the bolt at the coolant heater but do not remove.
- Remove the coolant heater.
- Remove and clean any burrs, compound, paint, or rough spots from the core plug hole.
Installation Procedure
- Apply a coat of GM P/N 12346004, (Canadian P/N 10953480) thread sealant with Teflon or equivalent to the O-ring and clean the surface of the plug opening.
- Install the coolant heater by pushing tight to the block.
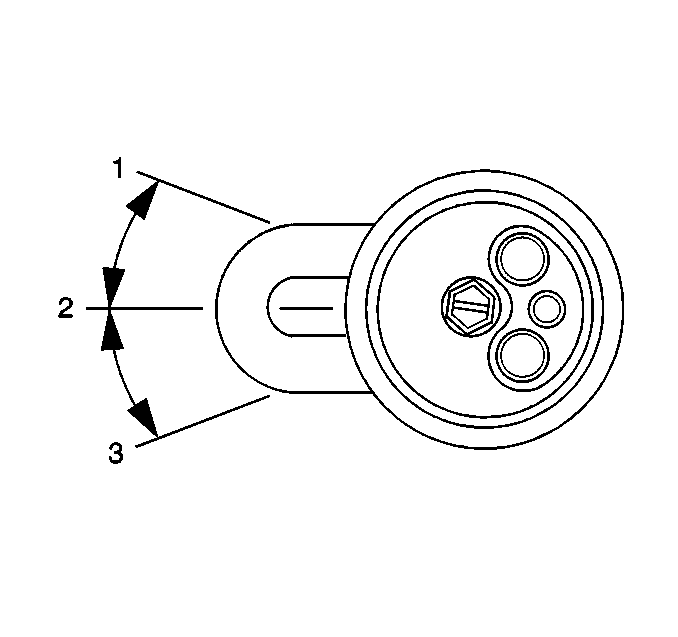
- Install the coolant heater so the element is at the 9 o'clock position (2).
- Tighten the coolant heater bolt until both locking wings draw tight against the inner wall of the engine block.
- Connect the coolant heater cord to the coolant heater.
- Fill the cooling system. Refer to Cooling System Draining and Filling .
Notice: Use the correct fastener in the correct location. Replacement fasteners must be the correct part number for that application. Fasteners requiring replacement or fasteners requiring the use of thread locking compound or sealant are identified in the service procedure. Do not use paints, lubricants, or corrosion inhibitors on fasteners or fastener joint surfaces unless specified. These coatings affect fastener torque and joint clamping force and may damage the fastener. Use the correct tightening sequence and specifications when installing fasteners in order to avoid damage to parts and systems.
Tighten
Tighten the bolt to 2 N·m (17 lb in).
Notice: The heater cord must not touch the engine, hot pipes, manifold, or any moving parts. Route the cord to the left front of the engine compartment securing with tie straps as necessary to prevent damage.
