For 1990-2009 cars only
Driver Information Center Replacement UG1, EXC, CF5
Removal Procedure
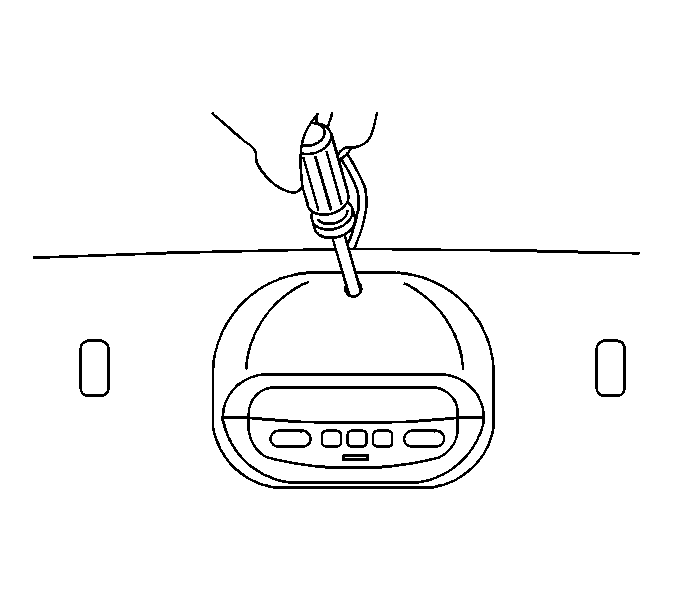
- Remove the roof console screw.
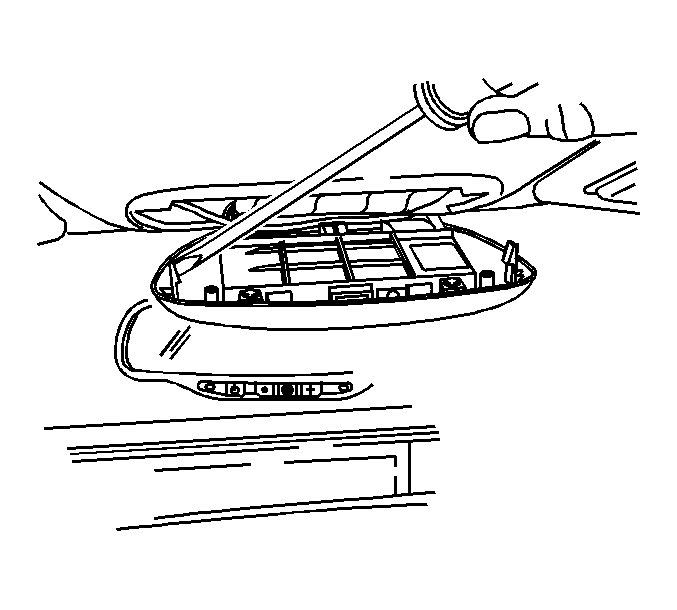
- Use a small, flat-bladed tool in order to release the 2 retainers. These retainers are located on each side of the assembly in front of the switches. Press the retainers outward to release the roof console.
- Lower the roof console from the headliner.
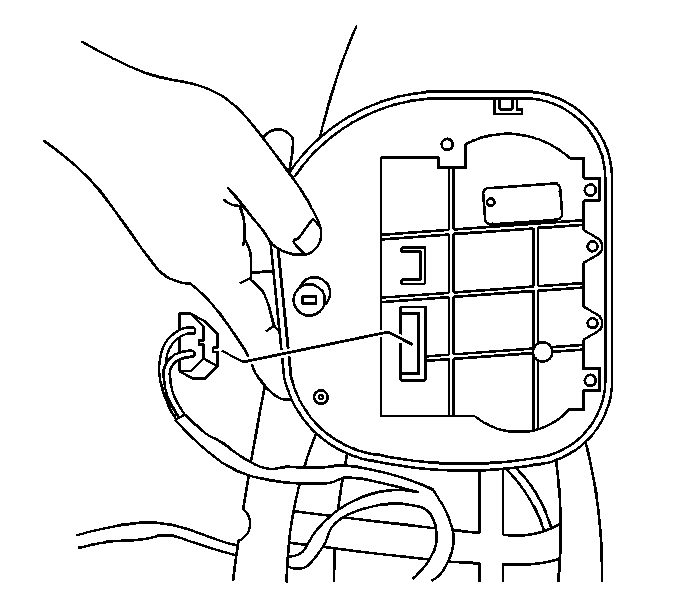
- Disconnect the electrical connectors from the roof console.
- Remove the roof console backing plate.
- Remove the roof console.

Important: The driver information center is serviced as part of the complete roof console.


Installation Procedure
- Apply foam tape to the wiring harness at the headliner.
- Install the roof console backing plate.
- Connect the electrical connectors to the roof console.
- Position the roof console to the roof console backing plate in the headliner.
- Install the roof console by pressing the console into place until the retainers are completely engaged.
- Install the roof console screw.
- Refer to Control Module References for programming and setup information.

Important: When installing the roof console, apply foam tape to the wiring harness. Secure the wiring harness in the proper position to the headliner.

Notice: Refer to Fastener Notice in the Preface section.
Tighten
Tighten the screw to 2 N·m (18 lb in).
Driver Information Center Replacement CF5
Removal Procedure
- Remove the roof console screw.
- Use a small, flat-bladed tool in order to release the 2 retainers. These retainers are located on each side of the assembly in front of the switches. Press the retainers outward to release the roof console.
- Lower the roof console from the headliner.
- Disconnect the electrical connectors from the roof console.
- Remove the roof console.
- Remove the sunshade anchors. Refer to Sunshade Anchor Replacement.
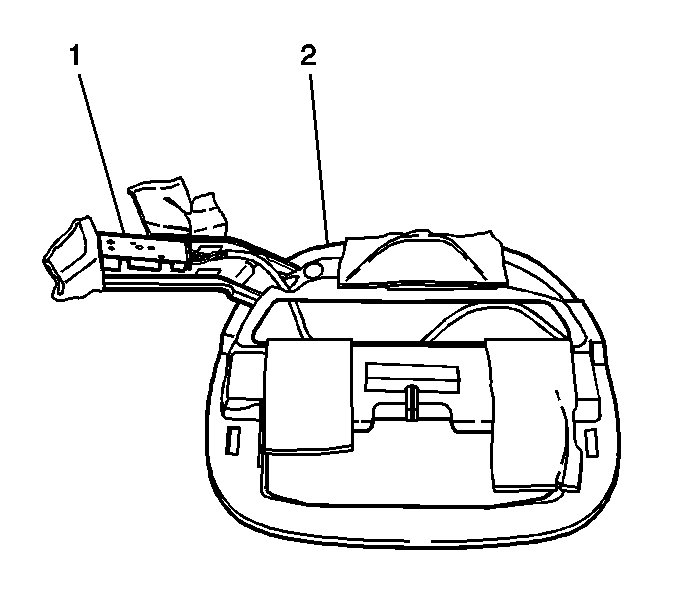
- Lower the headliner at the sunroof opening. Reach between the headliner and the roof to remove the foam tape from the wiring harness on the roof console backing plate. Refer to Headlining Trim Panel Replacement.
- Adjust the wiring harness for access.
- Slide the roof console backing plate (2) forward and remove the backing plate from the front of the headliner.

Important: The driver information center is serviced as part of the complete roof console.


Installation Procedure
- Position the roof console backing plate (2) to the headliner opening.
- Secure the wiring harness in the original position to the roof console backing plate.
- Connect the electrical connectors to the roof console.
- Install the headliner. Refer to Headlining Trim Panel Replacement.
- Install the sunshade anchors. Refer to Sunshade Anchor Replacement.
- Position the roof console to the roof console backing plate in the headliner.
- Install the roof console by pressing the console into place until the retainers are completely engaged.
- Install the to the roof console screw.
- Refer to Control Module References for programming and setup information.


Notice: Refer to Fastener Notice in the Preface section.
Tighten
Tighten the screw to 2 N·m (18 lb in).
