Removal Procedure
- Disconnect the negative battery cable. Refer to Battery Negative Cable Disconnection and Connection in Engine Electrical.
- Remove the upper intake manifold. Refer to Upper Intake Manifold Replacement .
- Remove the left valve rocker arm cover. Refer to Valve Rocker Arm Cover Replacement - Left Side .
- Remove the right valve rocker arm cover. Refer to Valve Rocker Arm Cover Replacement - Right Side .
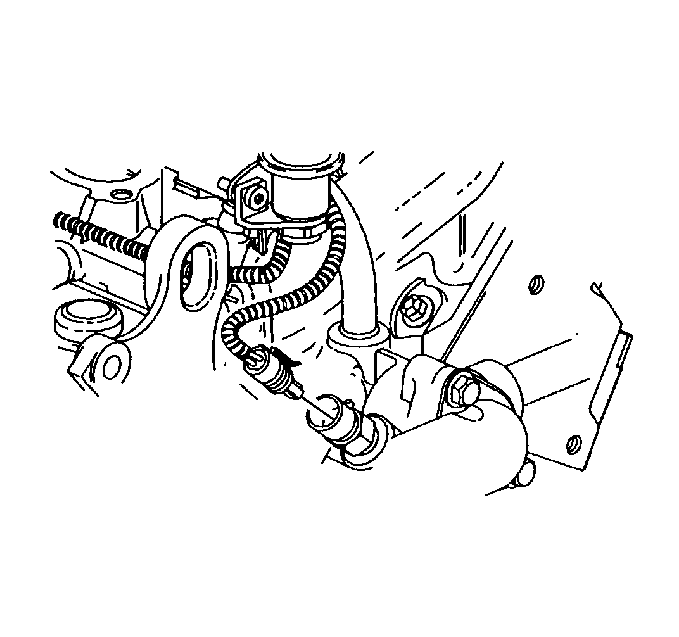
- Disconnect the engine coolant temperature (ECT) sensor electrical connector.
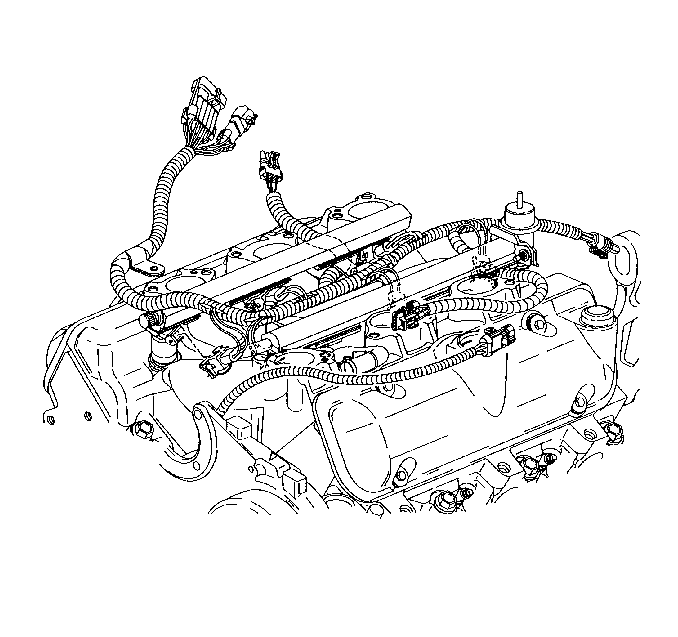
- Disconnect and remove the fuel injector and the manifold absolute pressure (MAP) sensor wiring harnesses.
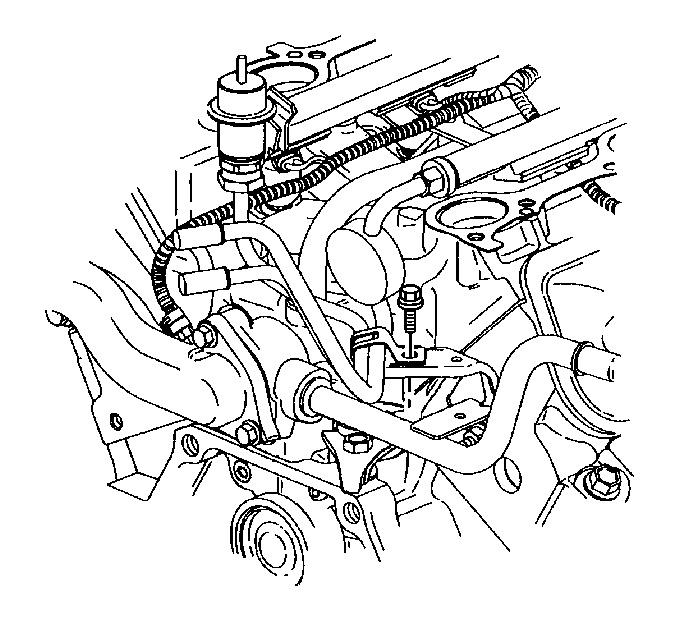
- Remove the fuel pipe clip bolt.
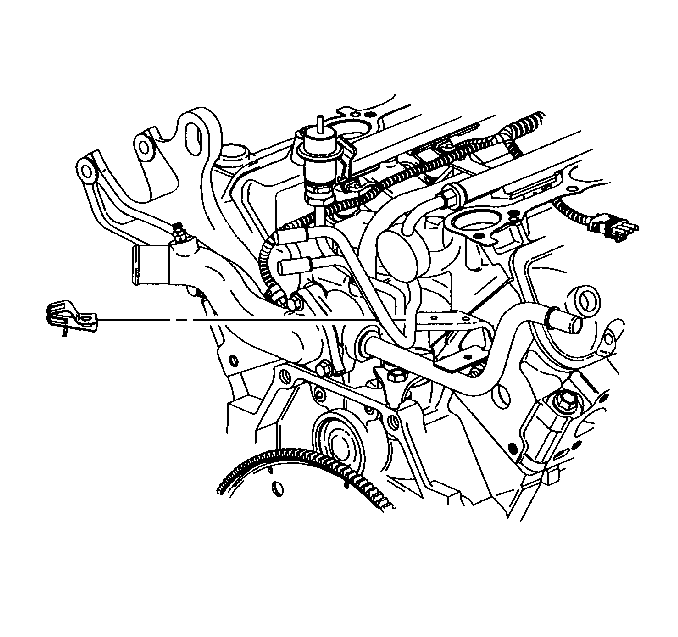
- Remove the fuel pipe clip.
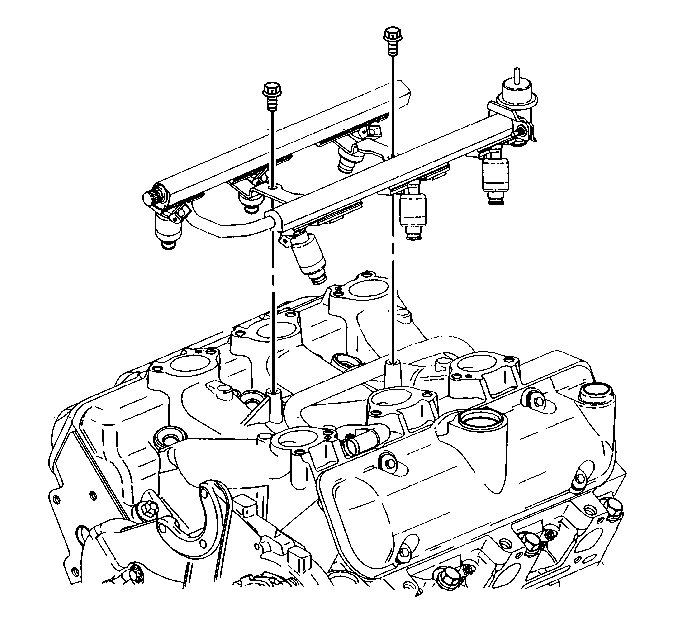
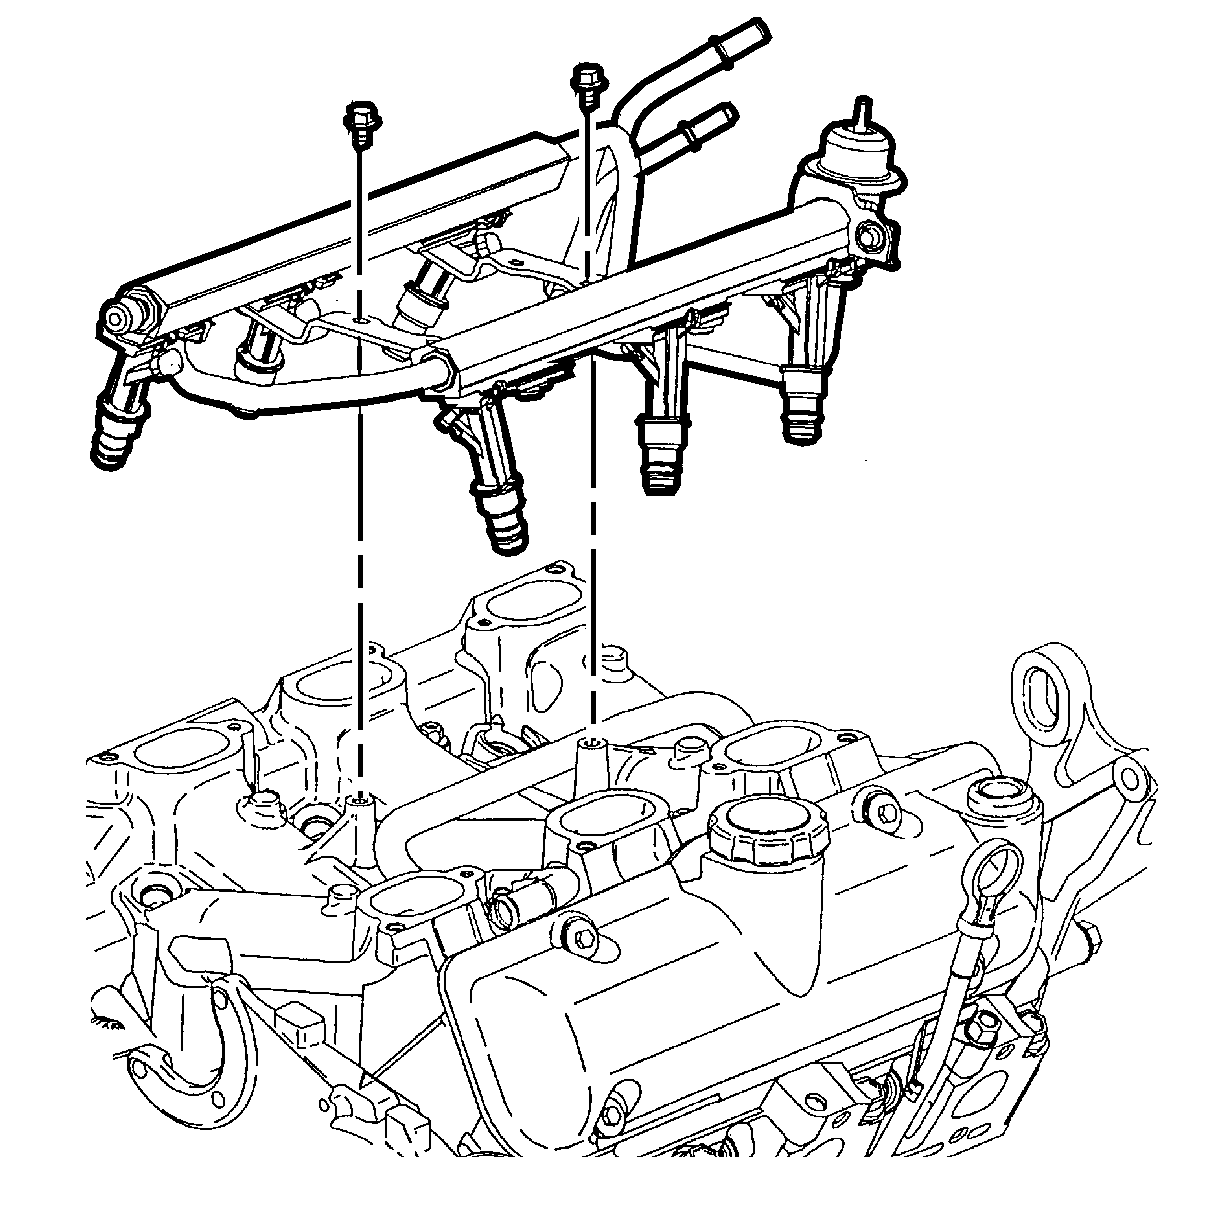
- Remove the fuel injector rail. Refer to Fuel Injection Fuel Rail Assembly Replacement in Engine Controls - 3.4L.
- Remove the power steering pump from the front engine cover and reposition. Refer to Power Steering Pump Replacement in Power Steering System.
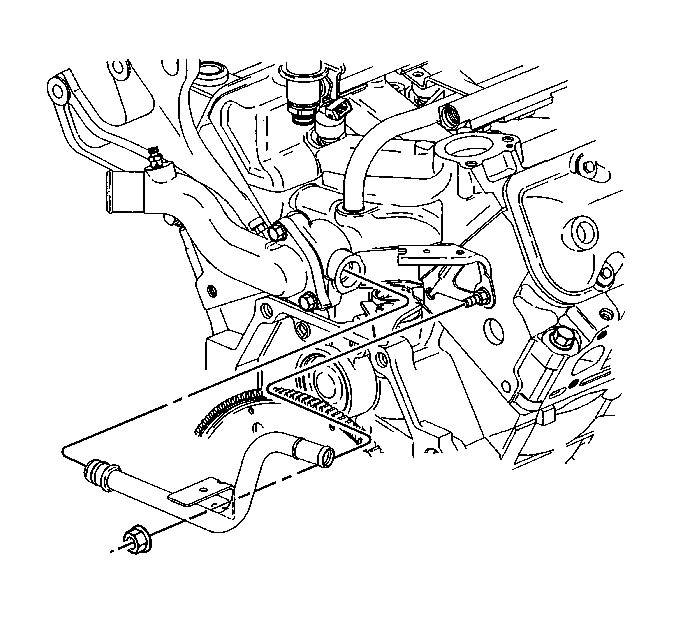
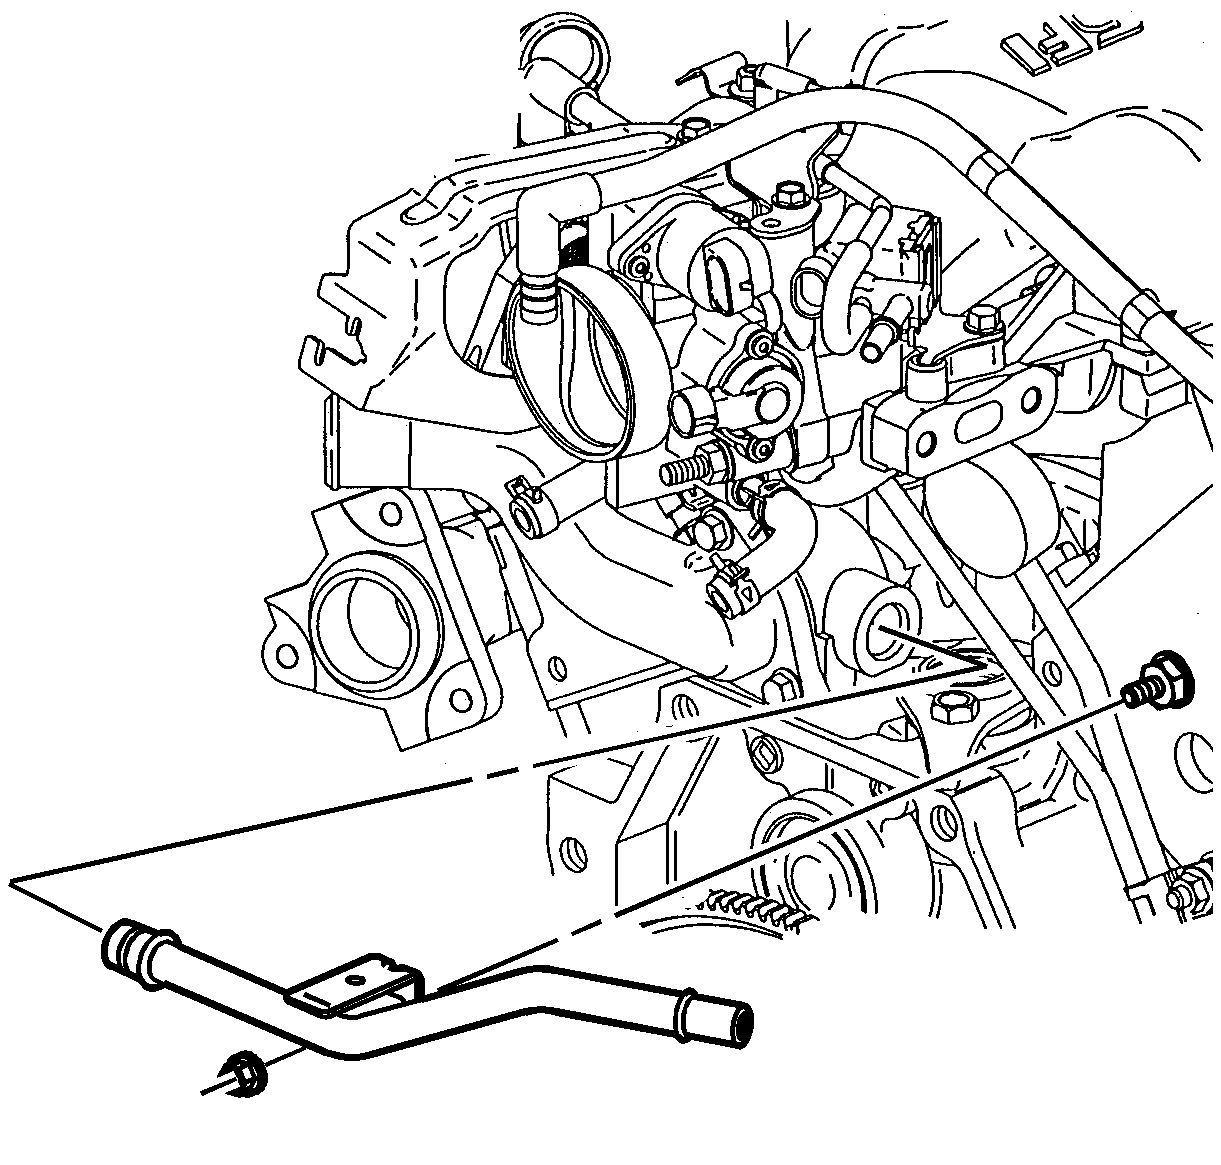
- Remove the heater inlet pipe with the heater hose from the lower intake manifold and reposition the pipe.
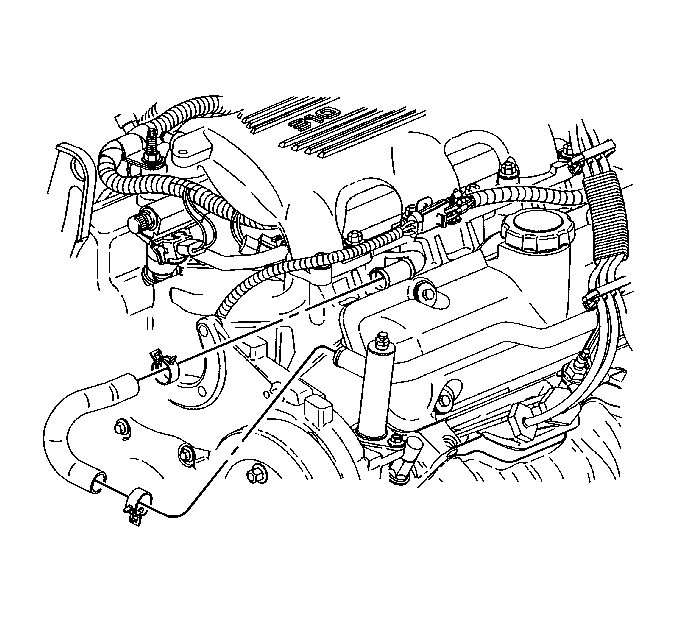
- Remove the radiator inlet hose from the engine. Refer to Radiator Inlet Hose Replacement in Engine Cooling.
- Remove the thermostat bypass hose from the thermostat bypass pipe and the lower intake manifold pipe.
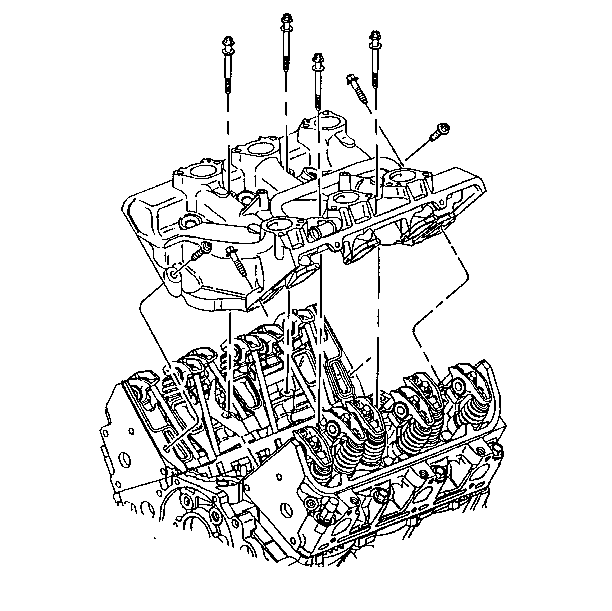
- Remove the lower intake manifold bolts and DISCARD the bolts.
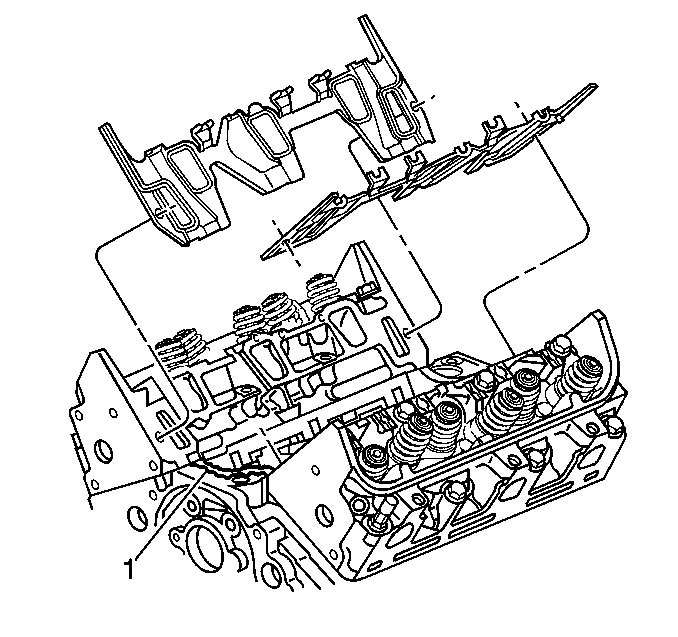
- Remove the lower intake manifold.
- Remove the valve rocker arms and pushrods. Refer to Valve Rocker Arm and Push Rod Replacement .
- Remove the lower intake manifold gaskets and seals.
- Clean the lower intake manifold gasket mating surfaces.
- Remove and clean all the RTV sealant from the lower intake manifold and the engine block (1).
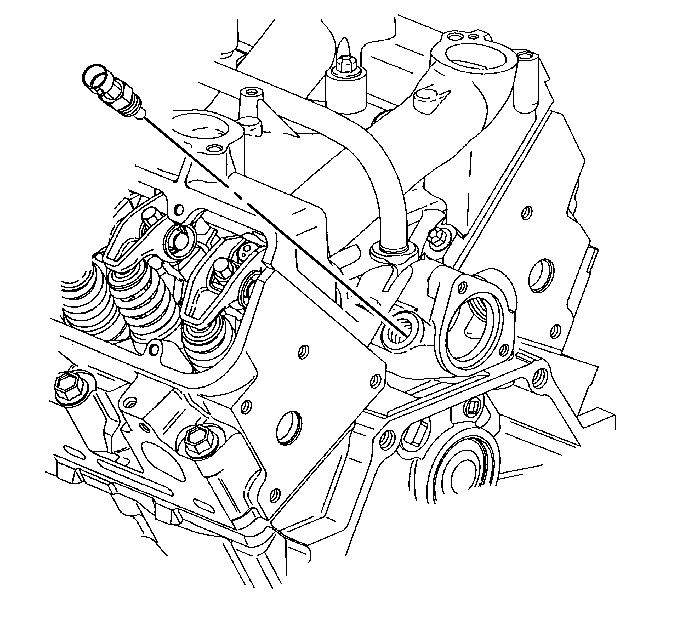
- Remove the ECT sensor.
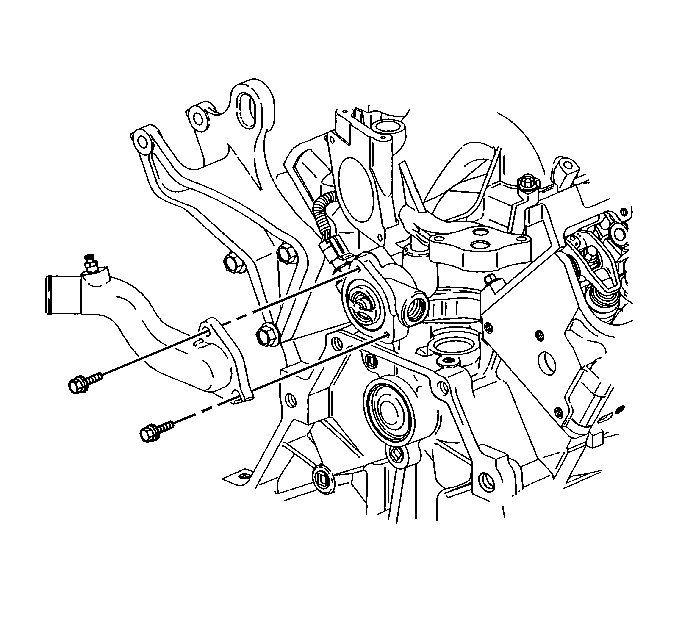
- Remove the water outlet bolts.
- Remove the water outlet.
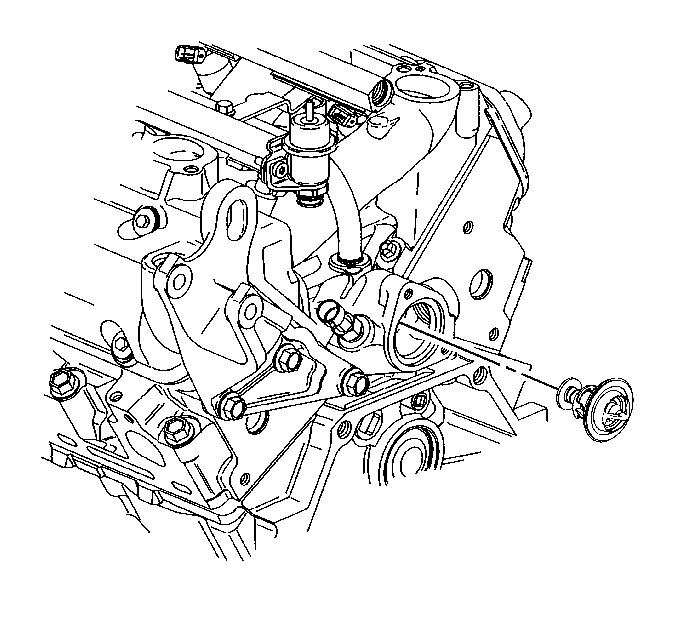
- Remove the thermostat.
Installation Procedure
- Install the thermostat.
- Install the water outlet.
- Install the water outlet bolts.
- Install the ECT sensor. Refer to Engine Coolant Temperature Sensor Replacement in Engine Cooling.
- Install the lower intake manifold gaskets.
- With gaskets in place apply a small drop 8-10 mm (0.31-0.39 in) of RTV Sealer, GM P/N 12346141 (Canadian P/N 89022195) or the equivalent, to the 4 corners if the intake manifold to block joint (1).
- Connect the 2 small drops with a bead of RTV Sealer that is between 8-10 mm (0.31-0.39 in) wide and 3.0-5.0 mm (0.12-0.20 in) thick (2).
- Install the valve rocker arms and pushrods. Refer to Valve Rocker Arm and Push Rod Replacement .
- Install NEW lower intake manifold and bolts.
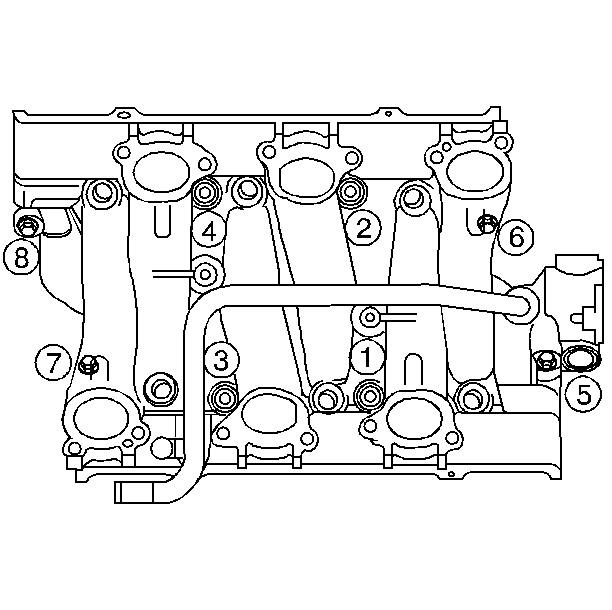
- Tighten the bolts (1, 2, 3, 4) on the first pass in sequence to 7 N·m (62 lb in).
- Tighten the bolts (5, 6, 7, 8) on the first pass in sequence to 13 N·m (115 lb in).
- Tighten the bolts (1, 2, 3, 4) on the final pass in sequence to 13 N·m (115 lb in).
- Tighten the bolts (5, 6, 7, 8) on the final pass in sequence to 25 N·m (18 lb ft).
- Install the thermostat bypass hose to the thermostat bypass pipe and lower intake manifold pipe.
- Install the radiator inlet hose to the engine. Refer to Radiator Inlet Hose Replacement in Engine Cooling.
- Install the heater inlet pipe.
- Install the heater inlet pipe nut.
- Install the power steering pump to the front engine cover. Refer to Power Steering Pump Replacement in Power Steering System.
- Install the fuel injector rail assembly.
- Install the fuel injector rail bolts.
- Install the fuel feed and return pipe retaining clip.
- Install the fuel feed and return pipe retaining clip bolt
- Install and connect the fuel injector and the MAP sensor wiring harnesses.
- Connect the ECT sensor electrical connector.
- Install the right valve rocker arm cover. Refer to Valve Rocker Arm Cover Replacement - Right Side .
- Install the left valve rocker arm cover. Refer to Valve Rocker Arm Cover Replacement - Left Side .
- Install the upper intake manifold. Refer to Upper Intake Manifold Replacement .
- Connect the negative battery cable. Refer to Battery Negative Cable Disconnection and Connection in Engine Electrical.
- Inspect for leaks.


Notice: Refer to Fastener Notice in the Preface section.
Tighten
Tighten the bolts to 25 N·m (18 lb ft).

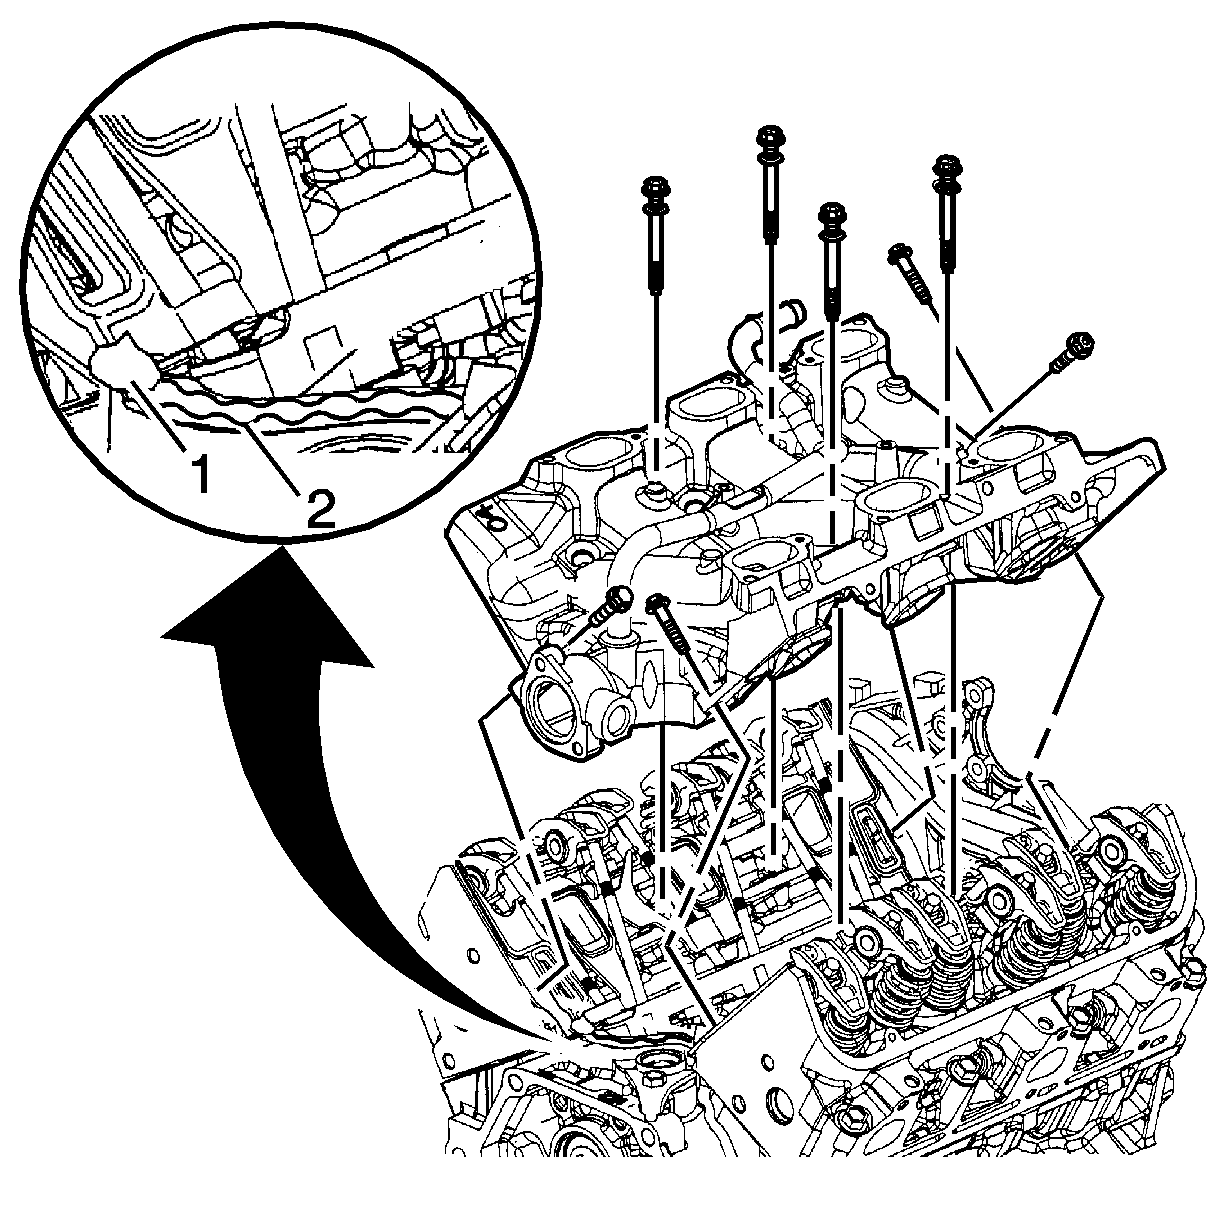
Important: All gasket-mating surfaces need to be free of oil, and foreign material. Use GM P/N 12346139 (Canadian P/N 10953463) or equivalent to clean surfaces.
Notice: Refer to Fastener Notice in the Preface section.
Important:
• Maximum gasket performance is achieved when using fasteners, which contain a thread locking patch. Failure to replace the fasteners MAY reduce gasket sealing capability. • All lower intake manifold bolts need to be cleaned and free of any foreign material, only new bolts are to be used. • Manufacturer recommends the center bolts be fully torqued before the diagonal bolts to assure proper seal ability. • Lower intake manifold bolts in location 6 and 7 should be torqued to specification using a crows foot type tool.
Tighten

Tighten
Tighten the heater inlet pipe nut to 25 N·m (18 lb ft).
Important:
• Do not press on the fuel pressure regulator valve when installing the fuel injector rail assembly. • Do not re-use the fuel injector O-ring seals. Install NEW fuel injector O-ring seals during assembly.
| 15.1. | Install the NEW fuel injector O-rings using GM P/N 12345616 (Canadian P/N 993182), or equivalent. |
| 15.2. | Install the injector nozzles into the lower intake manifold injector bores. |
| 15.3. | Press on the injector rail using the palms of both hands until the injectors are fully seated. |
Tighten
Tighten the injector rail bolts to 10 N·m (89 lb in).
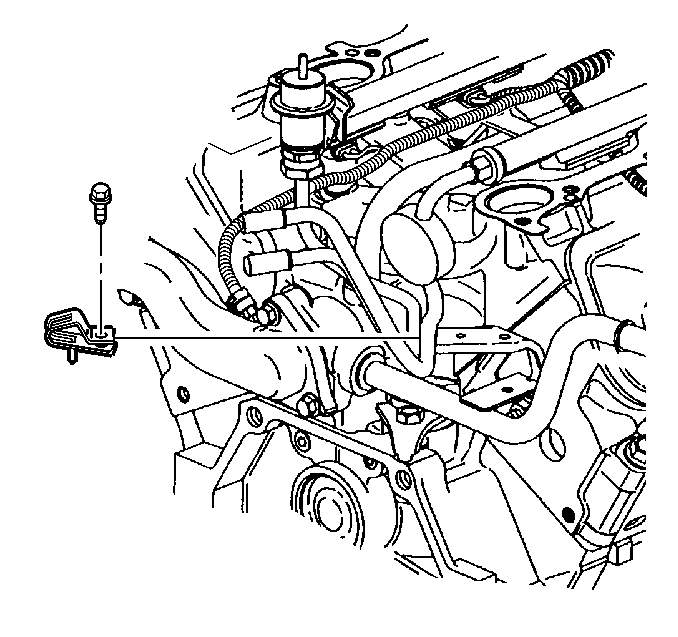
Tighten
Tighten the fuel feed and return pipe retaining clip bolt to 8 N·m (71 lb in).


