IP Dash or Bezel Squeak, Itch or Creak Noise While Driving (Install Flocking Tape and Anti-Squeak Tape)

| Subject: | IP Dash or Bezel Squeak, Itch or Creak Noise While Driving (Install Flocking Tape and Anti-Squeak Tape) |
| Models: | 2007-2008 Chevrolet Impala |
This bulletin is being revised to update the flocking tape installation procedures. Please discard Corporate Bulletin Number 07-08-49-011 (Section 08 - Body and Accessories).
Condition
Some customers may comment on a squeak, itch or creak noise coming from the left side of the instrument panel (IP) dash or bezel while driving.
Cause
This condition may be caused by the IP trim panel rear outer edge rubbing against the IP upper trim pad.
Correction
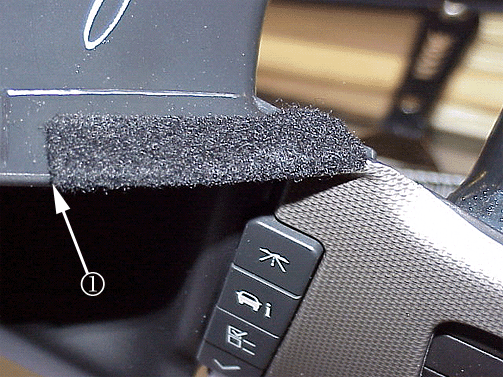
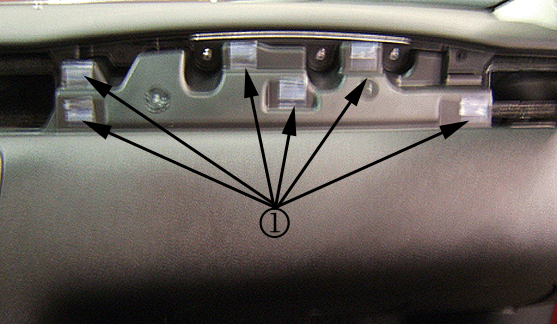
Important: If the vehicle already has the tape installed, it will be necessary to inspect the tape at the rear outer edges. The flocking tape should be wrapped around the rear outer edges (1) of the IP trim panel.
Install flocking tape and anti-squeak tape to the IP using the steps below.
- Remove the IP trim panel plate. Refer to Instrument Panel Plate Replacement in SI.
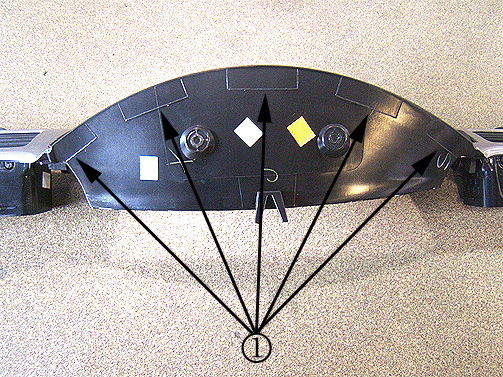
- Remove the old tape if it is not installed correctly and clean the five outlined plastic mold locations (1) with Kent® Acrysol™, P20005, or equivalent.
- Cut three pieces of Kent® KT-13486, or equivalent, flocking tape into 30 mm (1-1/8 in) wide x 57 mm (2-1/4 in) long sections.
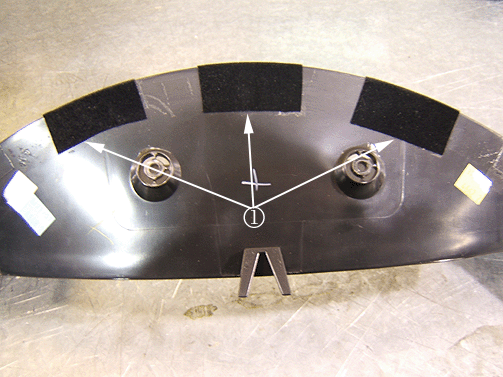
- Install the three pieces of flocking tape (1) by wrapping the rear outer edge of the IP trim panel at the three top outlined locations.
- Cut two pieces of Kent® KT-13486, or equivalent, flocking tape into 30 mm (1-1/8 in) wide x 80 mm (3-1/4 in) long sections.
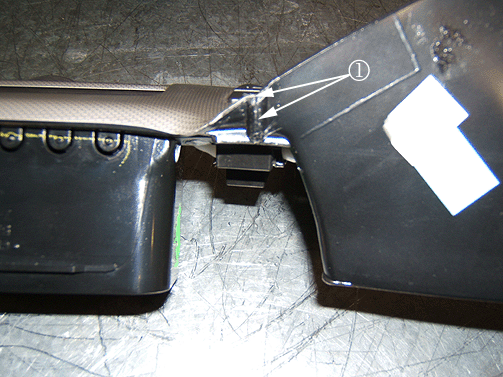
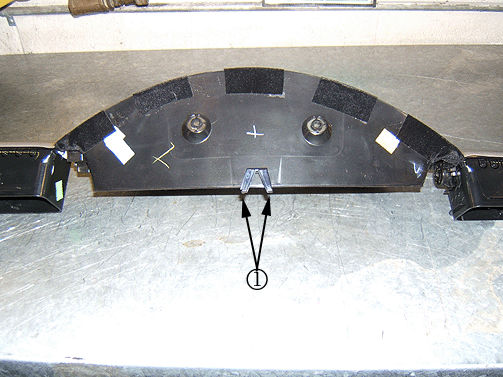
- Cut two pieces of Kent® KT-13512, or equivalent, anti-squeak tape into 25 mm (1 in) wide x 13 mm (½ in) long sections. Install the pieces of tape around the IP trim panel tabs (1).
- Cut ten pieces of Kent® KT-13512, or equivalent, anti-squeak tape into 25 mm (1 in) wide x 25 mm (1 in) long sections.
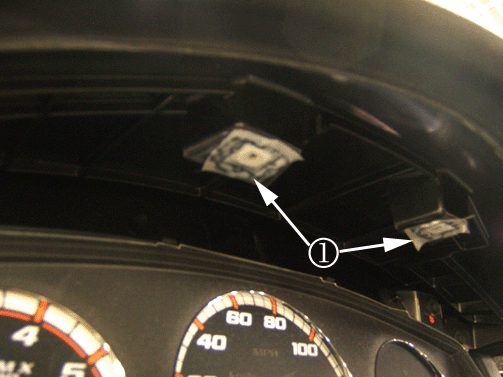
- Install two pieces of anti-squeak tape to the two upper IP retainers (1).
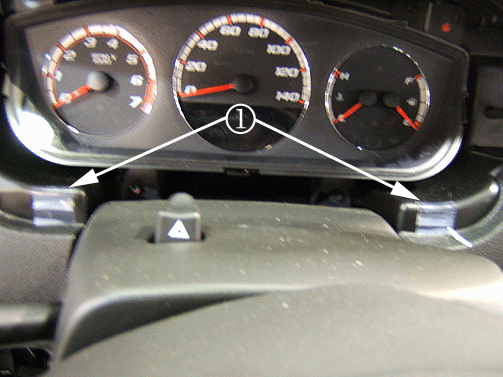
- Install two pieces of anti-squeak tape to the two knee bolster retainer locations (1).
- Install six pieces of anti-squeak tape to the six IP carrier retainer locations (1).
- Cut a slot in the center of the anti-squeak tape at all ten of the retainer locations.
- Install the IP trim plate. Refer to Instrument Panel Plate Replacement in SI.
- Verify the condition is corrected.
| 4.1. | Install a piece of the flocking tape to the top right inside corner of the IP panel by wrapping the rear outer edge of the IP trim and covering the complete inside corner bump (1) in the panel. |
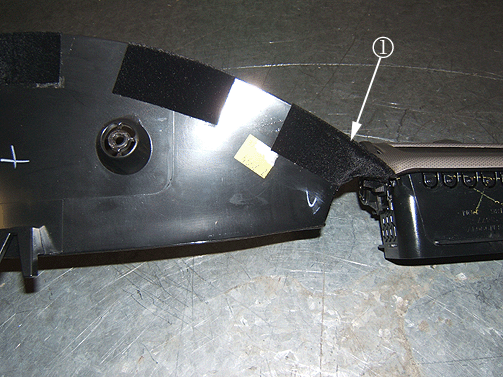
| 4.2. | Install the other piece of flocking tape (1) to the top left inside corner of the IP panel by wrapping the rear outer edge of the IP trim and covering the complete inside corner bump in the panel. |
Parts Information
Order BRS Tape and Anti-Squeak Film Tape from Kent® Automotive at 1-888-YES-KENT or online at www.kent-automotive.com.
Part Number | Description | Material Allowance |
|---|---|---|
KT-13486 | BRS Tape (30 mm x 10 ft roll) | $6.50 per vehicle ($6.62 in Canada) |
KT-13512 | Anti-Squeak Film Tape (1 in x 18 ft roll) | $1.30 per vehicle ($1.32 in Canada) |
Warranty Information
For vehicles repaired under warranty, use:
Labor Operation | Description | Labor Time |
|---|---|---|
C2328 | Plate, Instrument Panel Trim - Cluster -- R&R or Replace | Use Published Labor Operation Time |
Add | Install Flocking Tape and Anti-Squeak Tape | 0.1 hr |
