Removal Procedure
- Disconnect the negative battery cable. Refer to Battery Negative Cable Disconnection and Connection.
- Remove the upper intake manifold. Refer to Upper Intake Manifold Replacement.
- Remove the left valve rocker arm cover. Refer to Valve Rocker Arm Cover Replacement - Left Side.
- Remove the right valve rocker arm cover. Refer to Valve Rocker Arm Cover Replacement - Right Side.
- Disconnect the fuel feed line from the fuel rail. Refer to Metal Collar Quick Connect Fitting Service.
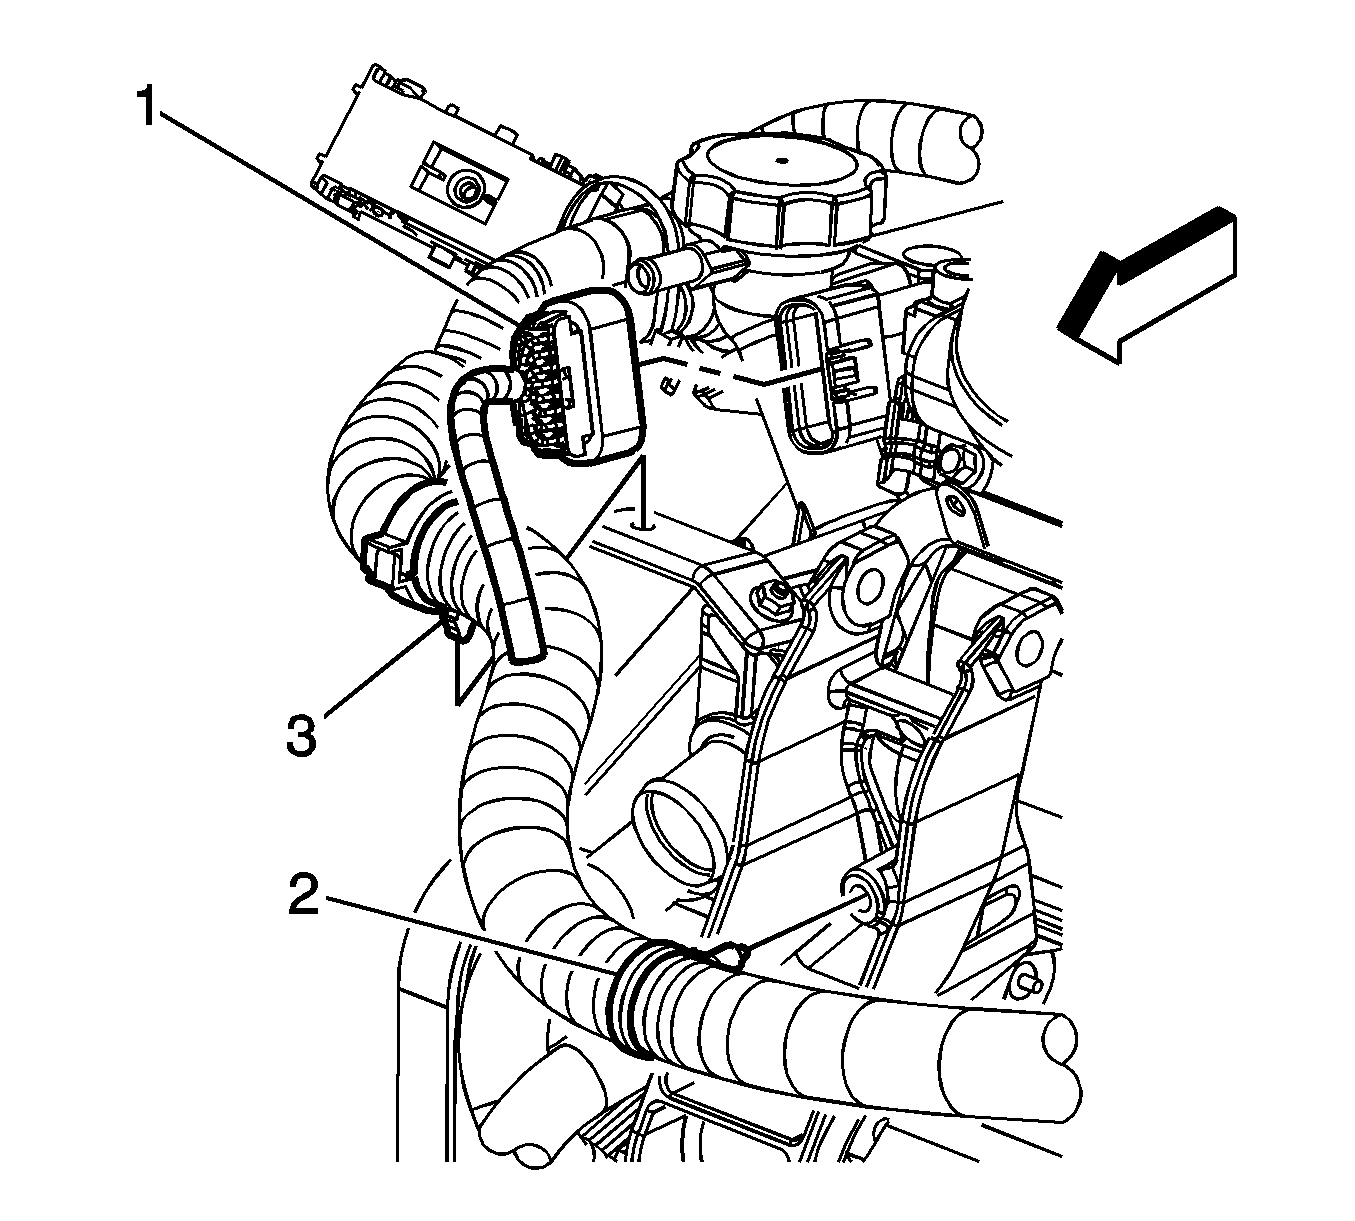
- Disconnect fuel injector inline connector (1).
- Remove the fuel injector harness connector bracket retainer from the intake manifold.
- Disconnect the engine coolant temperature (ECT) electrical connector.
- Disconnect the camshaft position (CMP) sensor electrical connector.
- Remove two lifter oil manifold assembly (LOMA) electrical connector bolts (1) from the lower intake manifold if equipped..
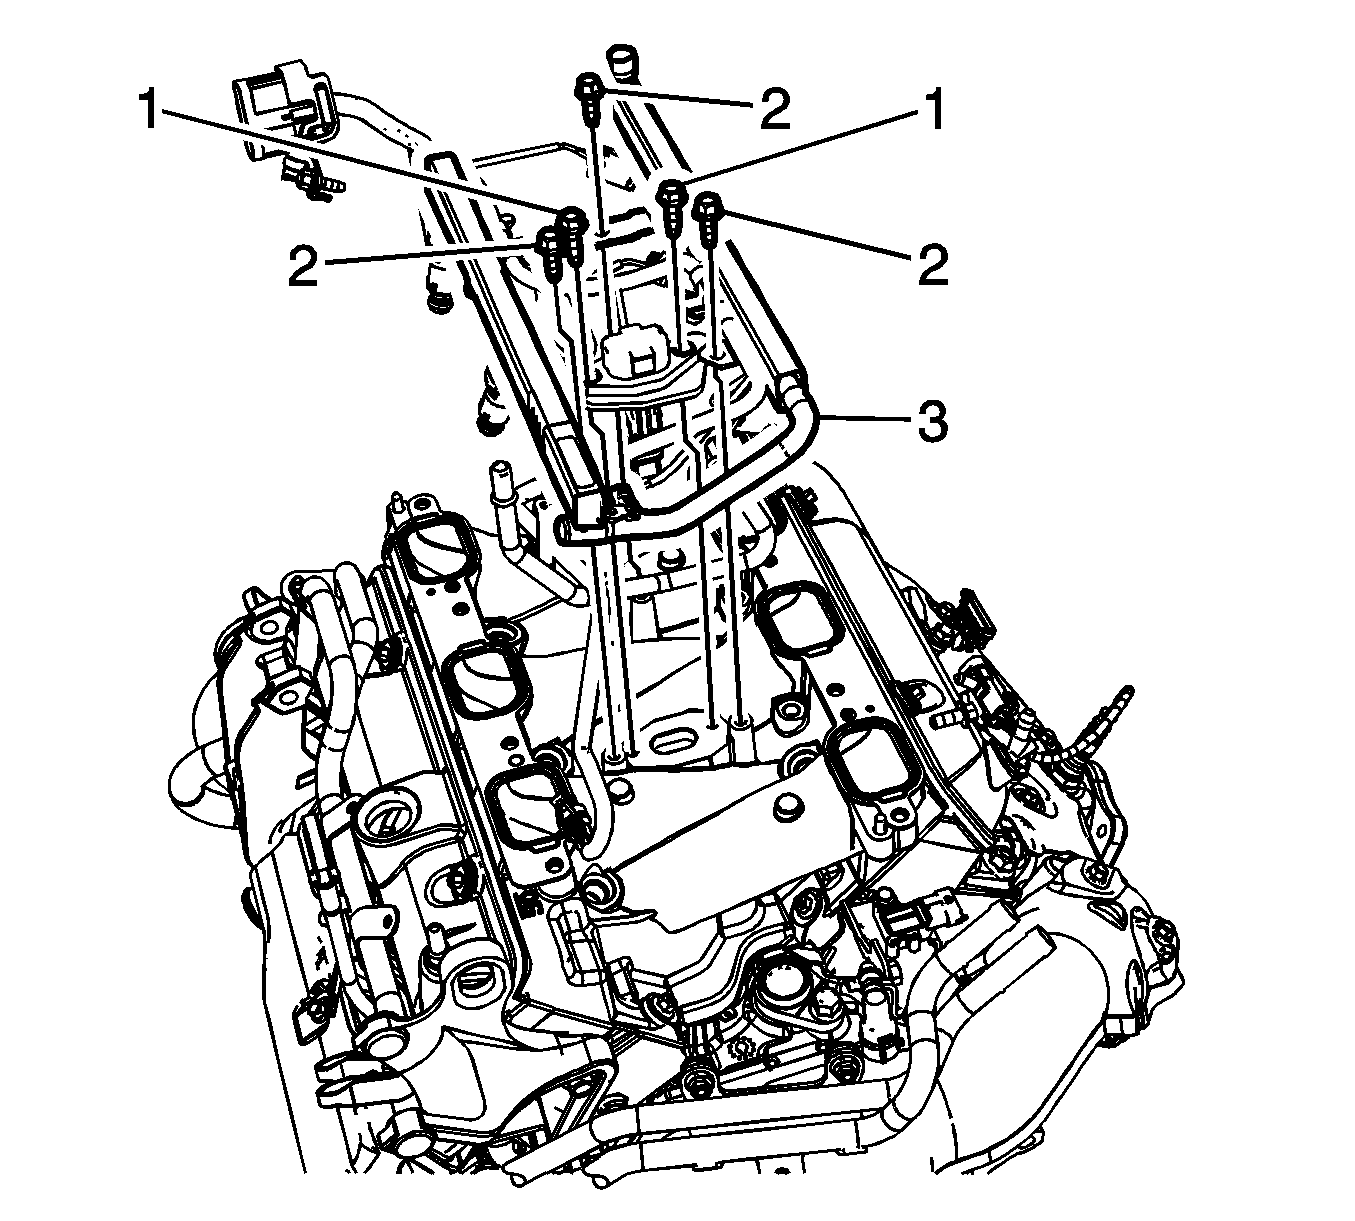
- Remove the fuel injector rail bolts (2).
- Remove power steering pump. Refer to Power Steering Pump Replacement
- Remove the fuel rail (3) and LOMA.
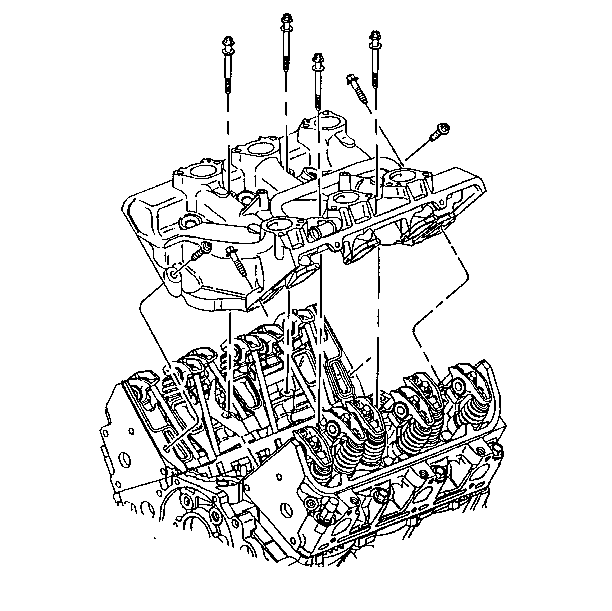
- Remove the lower intake manifold bolts.
- Remove the lower intake manifold.
- Loosen the valve rocker arm bolts.
- Remove the valve rocker arms.
- Remove the push rods.
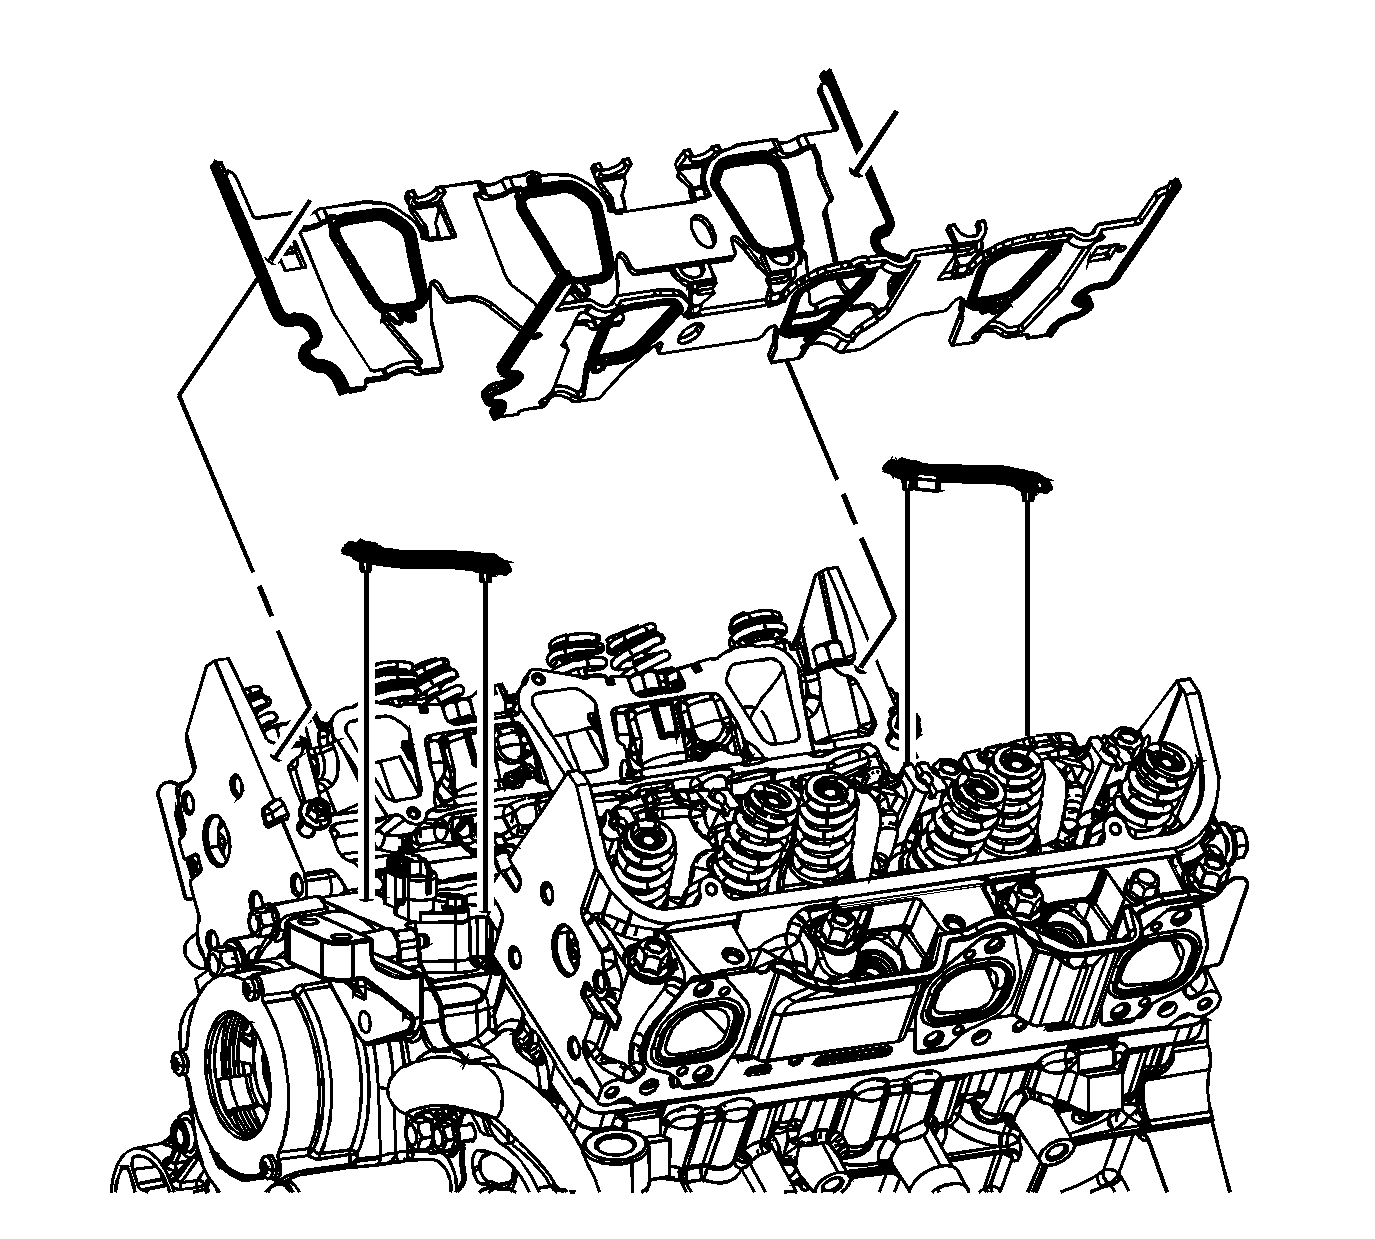
- Remove the lower intake manifold gaskets and seals.
- Clean the lower intake manifold gasket and seal surfaces on the cylinder heads and the engine block.
- Clean the gasket and seal surfaces on the lower intake manifold with degreaser.
- Remove all the loose room temperature vulcanizing (RTV) sealer.
Note: This engine uses a sequential multiport fuel injection system. Injector wiring harness connectors must be connected to their appropriate fuel injector or exhaust emissions and engine performance may be seriously affected.

Note: Place the valve train components in a rack in order to ensure that the components are installed in the same location from which they where removed.
| • | The intake push rods measure 147.51 mm (5.81 in). |
| • | The exhaust push rods measure 154.87 mm (6.1 in). |
Installation Procedure
- Install the lower intake manifold gaskets and seals.
- Coat the ends of the push rods using prelube. Refer to Adhesives, Fluids, Lubricants, and Sealers.
- Install the push rods in their original location.
- Coat the rocker arm friction surfaces using prelube. Refer to Adhesives, Fluids, Lubricants, and Sealers.
- Install the valve rocker arms in their original positions.
- Install the valve rocker arm bolts.
- With the NEW gaskets and seals in place, apply a small drop, 8-10 mm (0.031-0.39 in) of RTV sealer to the 4 corners of the intake manifold to engine block joints (1). Refer to Adhesives, Fluids, Lubricants, and Sealers.
- Install the lower intake manifold.
- Apply sealer to the lower intake manifold bolt threads. Refer to Adhesives, Fluids, Lubricants, and Sealers.
- Install the lower intake manifold bolts.
- Tighten the lower intake manifold bolts in the sequence shown.
- Tighten the bolts (1, 2, 3, 4) in sequence to 16 N·m (12 lb ft).
- Tighten the bolts (5, 6, 7, 8) in sequence to 25 N·m (18 lb ft).
- Inspect the fuel rail, fuel injectors, and fuel injector O-rings for damage and replace as necessary.
- Lubricate the fuel injector O-rings using engine oil. Refer to Adhesives, Fluids, Lubricants, and Sealers.
- Install the injector nozzles into the lower intake manifold injector bores.
- Install the LOMA then press on the injector rail (3) using the palms of both hands until the injector are fully seated.
- Install the fuel injector rail bolts (2).
- Connect the CMP sensor electrical connector.
- Connect the ECT electrical connector.
- Position the fuel injector harness connector bracket to the intake manifold.
- Install the fuel injector harness connector bracket bolt.
- Install two LOMA electrical connector bolts (1) to the lower intake manifold.
- Connect fuel injector inline connector (1).
- Connect the fuel feed line to the fuel rail. Refer to Metal Collar Quick Connect Fitting Service.
- Install the right valve rocker arm cover. Refer to Valve Rocker Arm Cover Replacement - Right Side.
- Install the left valve rocker arm cover. Refer to Valve Rocker Arm Cover Replacement - Left Side.
- Install the upper intake manifold. Refer to Upper Intake Manifold Replacement.
- Connect the negative battery cable. Refer to Battery Negative Cable Disconnection and Connection.
Note:
• All gasket mating surfaces need to be free of oil and foreign material. Use cleaner to clean the surfaces. Refer to
Adhesives, Fluids, Lubricants, and Sealers. • RTV sealer is NOT to be placed under the lower intake manifold gaskets.
Note: The intake valve push rods measure 147.51 mm (5.81 in) and the exhaust valve push rods measure 154.87 mm (6.10 in).
Caution: Refer to Fastener Caution in the Preface section.
Note: Shims (P/N 88894006) may be required under the valve rocker arm pedestals if reconditioning has been performed on the cylinder head or its components.
Tighten
Tighten the bolts to 34 N·m (25 lb ft).
Note: The LOMA connector must be disconnected from the lower intake manifold before installing the lower intake manifold.
Caution: Maximum gasket performance is achieved when using new fasteners, which contain a thread-locking patch. If the fasteners are not replaced, a thread locking chemical must be applied to the fastener threads. Failure to replace the fasteners or apply a thread-locking chemical MAY reduce gasket sealing capability.
Caution: Failure to tighten vertical bolts before the diagonal bolts may cause an oil leak.
Tighten
Tighten
Tighten the bolts to 10 N·m (89 lb in).
Tighten
Tighten the bolt to 8 N·m (71 lb in).
Tighten
Tighten the bolts to 10 N·m (89 lb in).
