For 1990-2009 cars only
Removal Procedure
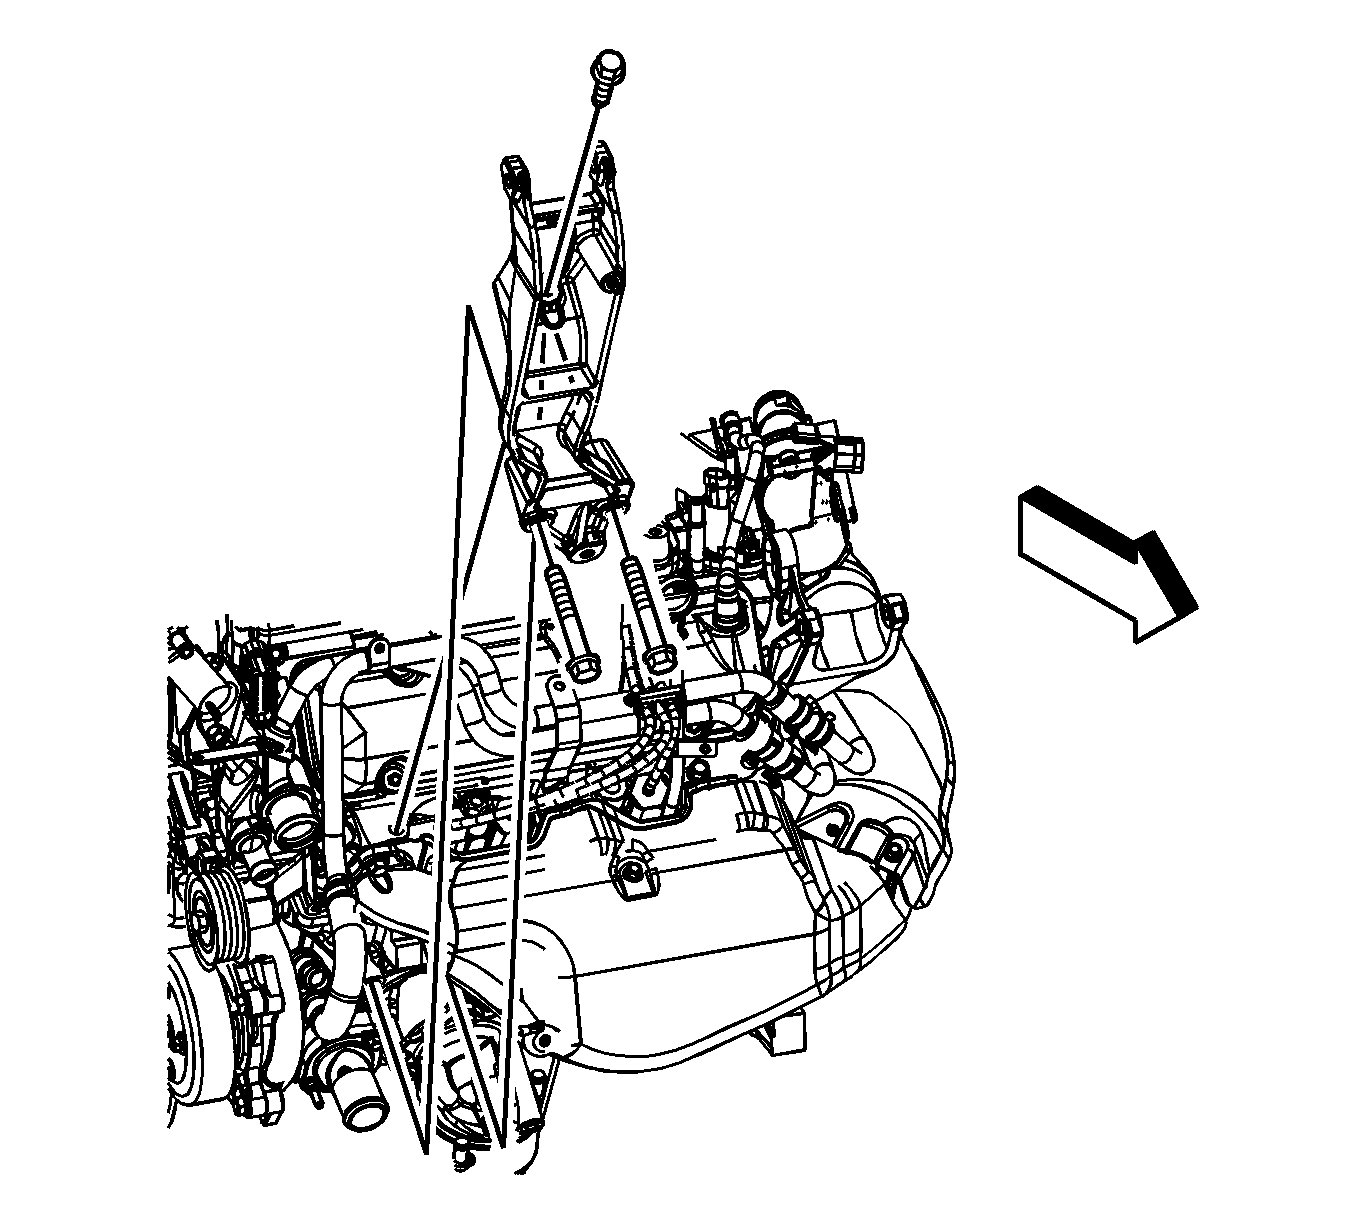
- Remove the engine mount strut. Refer to Engine Mount Strut Replacement.
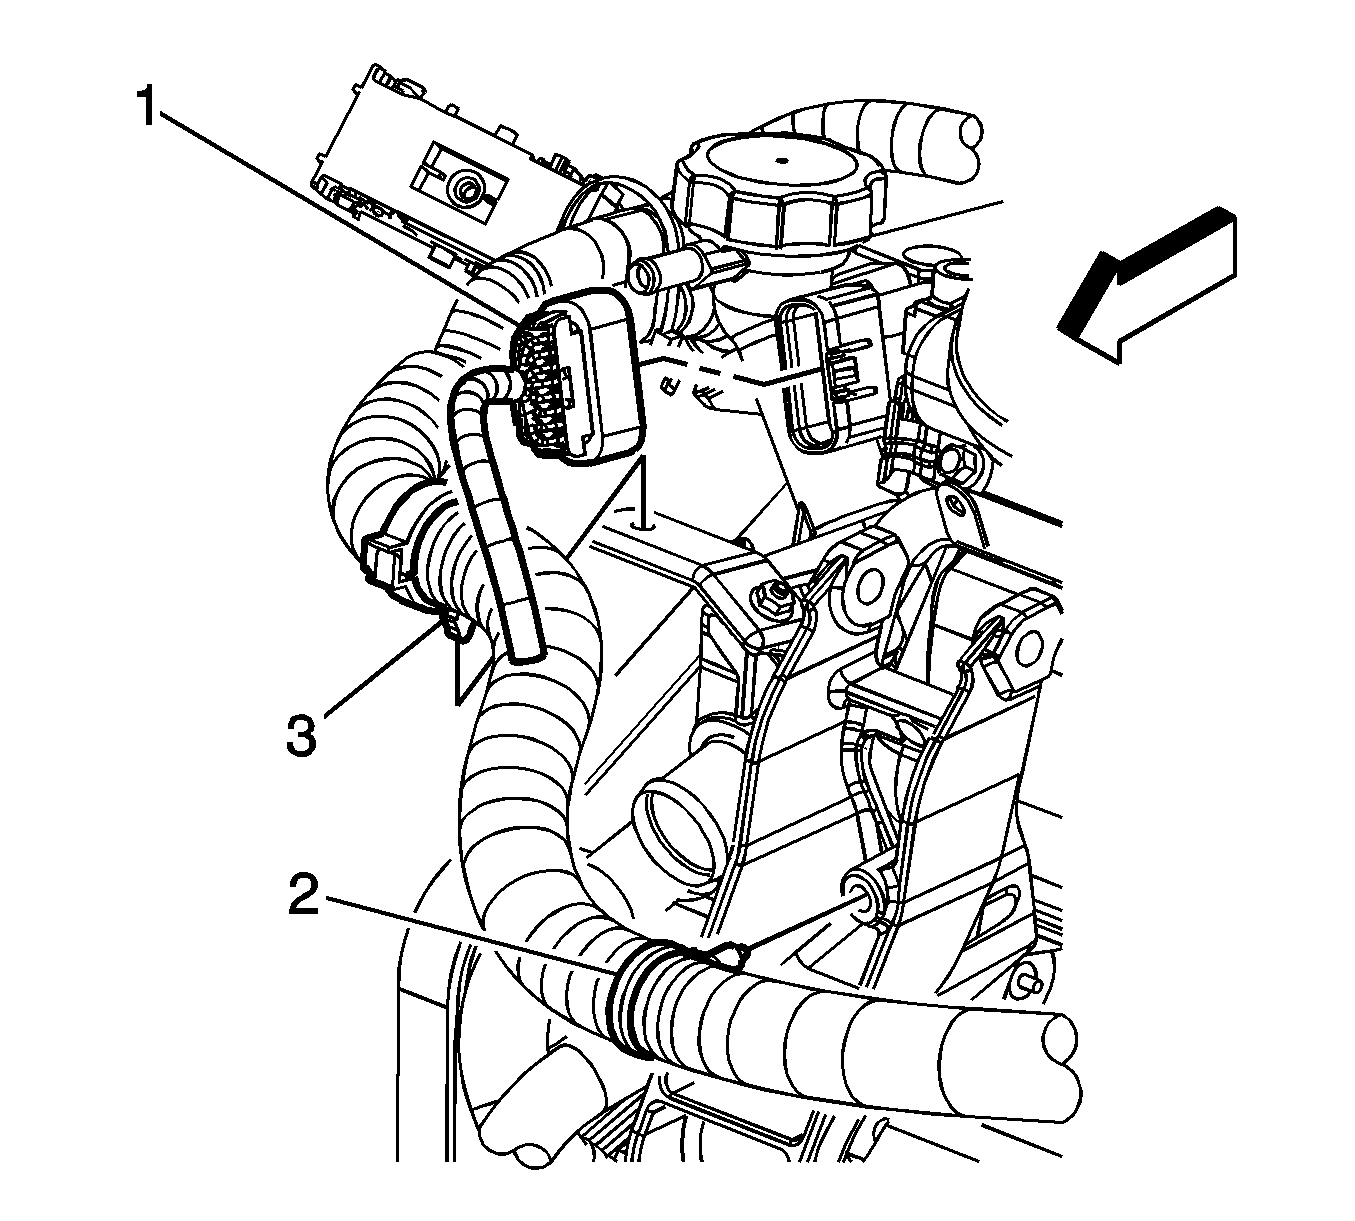
- Remove the engine harness clip (2) from the strut bracket.
- Raise and support the vehicle. Refer to Lifting and Jacking the Vehicle.
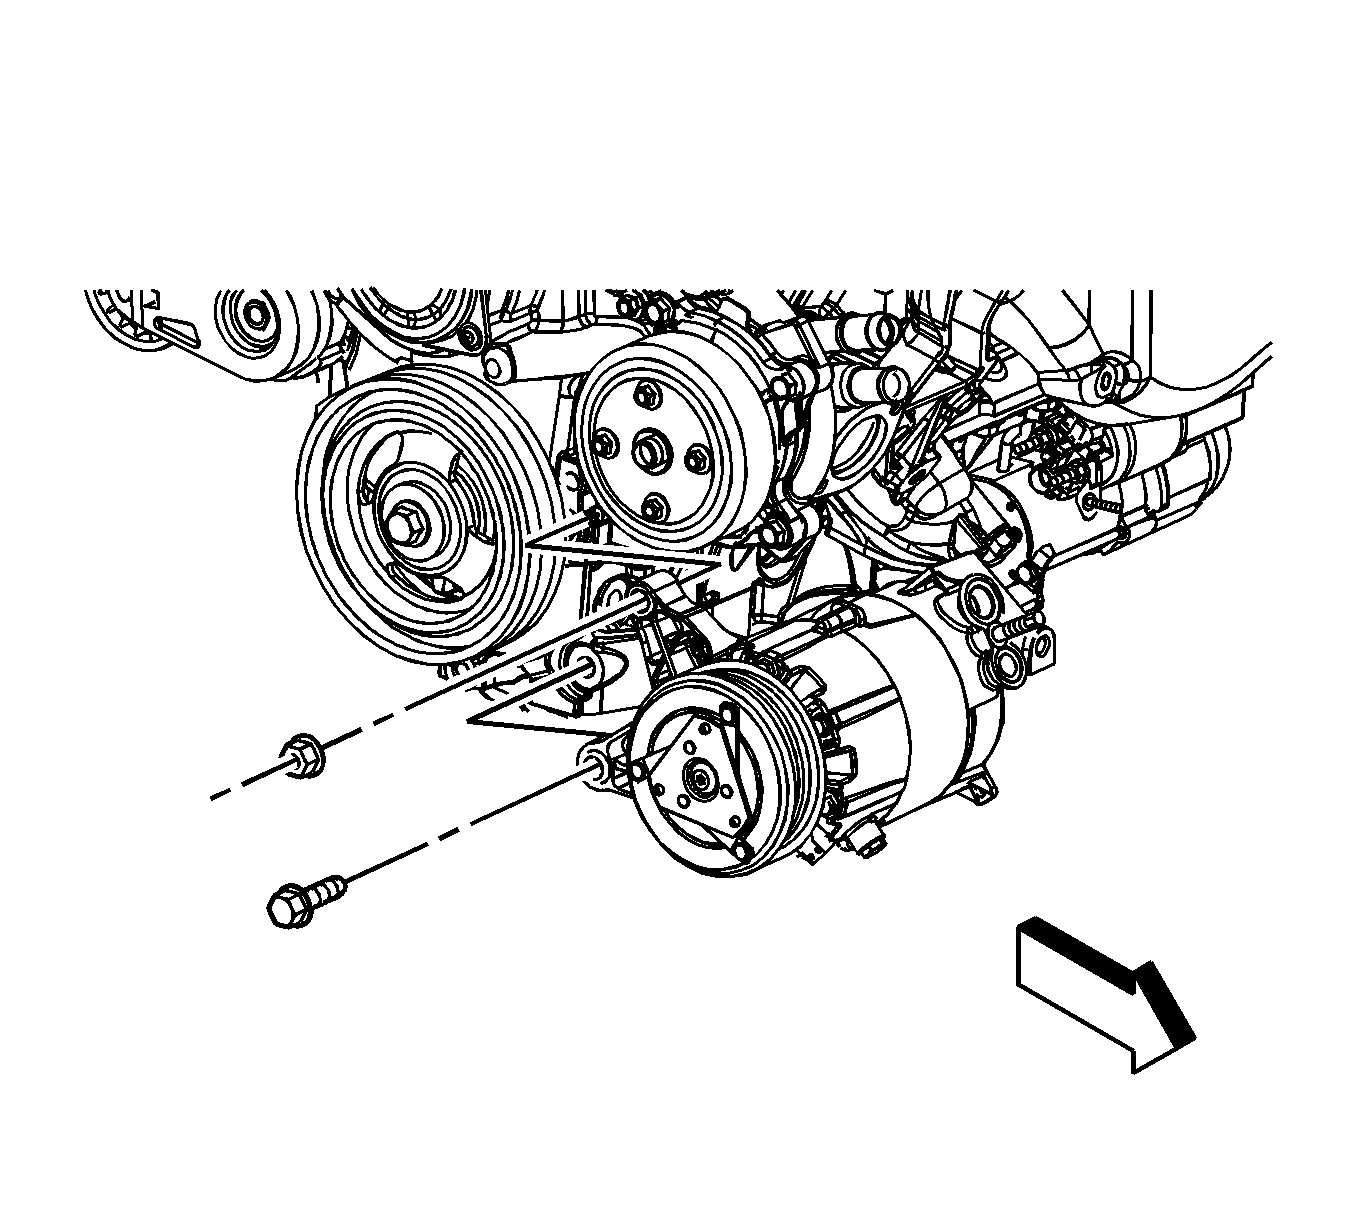
- Remove the air conditioning (A/C) compressor front bolt/nut.
- Remove the A/C compressor rear bolt.
- Reposition the A/C compressor.
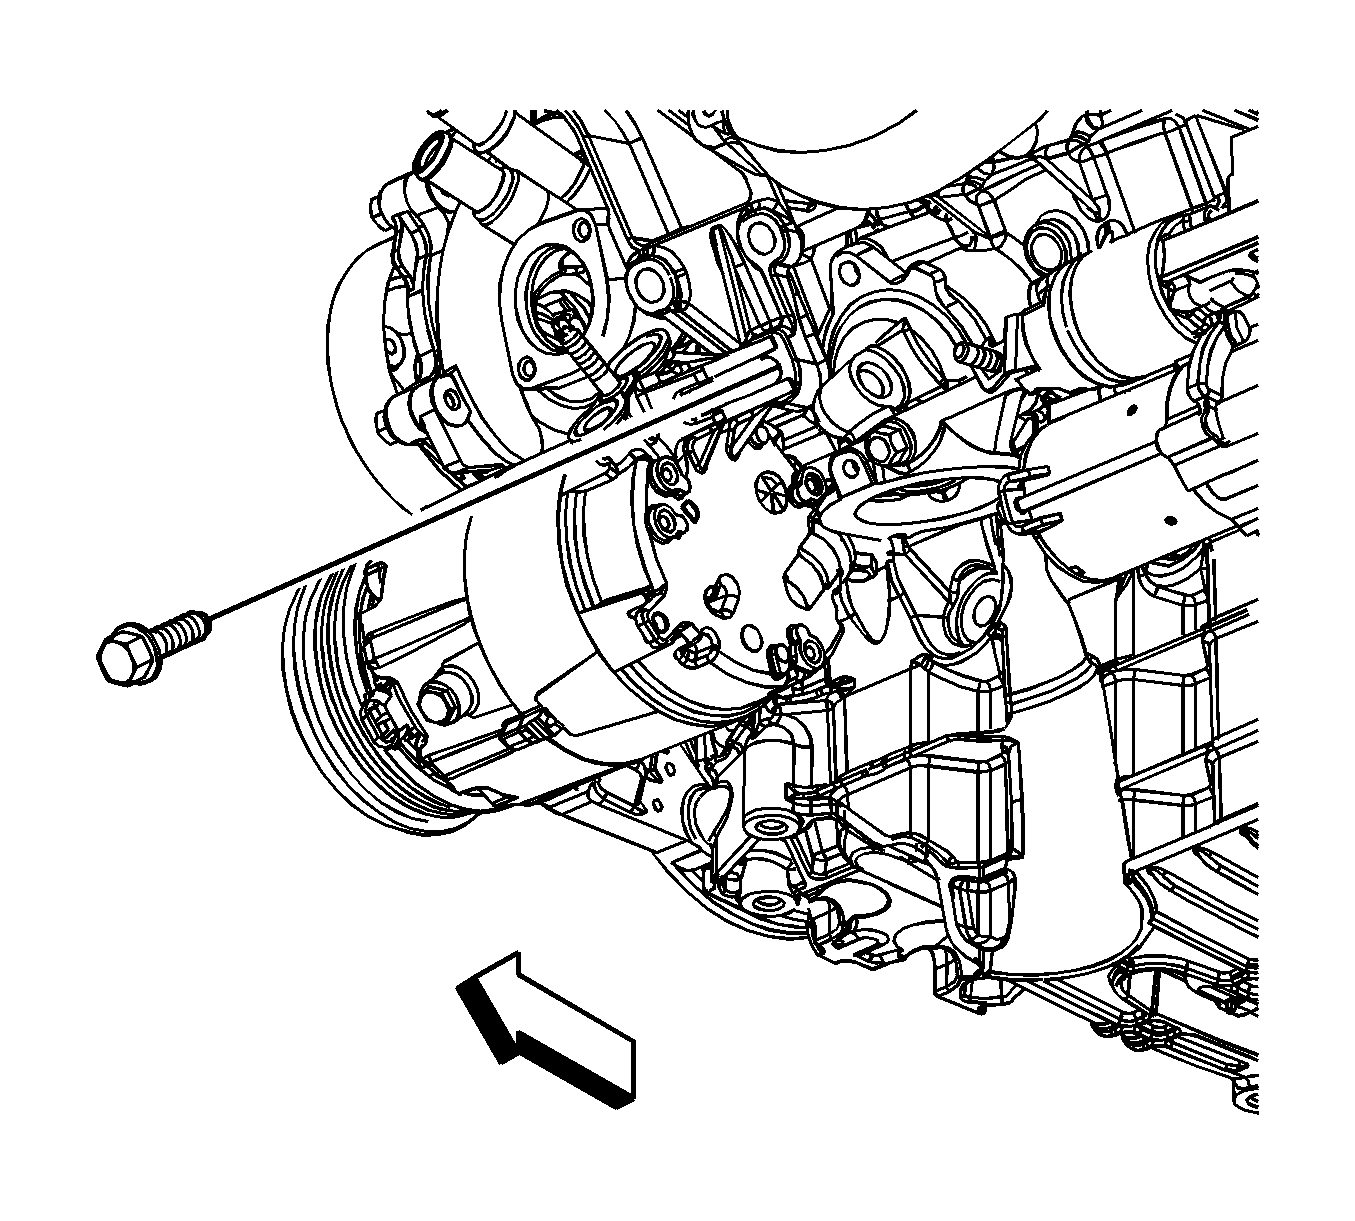
- Remove the engine mount strut bracket to engine lower bolts.
- Lower the vehicle.
- Remove the engine mount strut bracket to engine upper bolt.
- Remove the engine mount strut bracket.
Installation Procedure
- Install the engine mount strut bracket.
- Loosely install the engine mount strut bracket to engine upper bolt.
- Raise and support the vehicle.
- Install the engine mount strut bracket to engine lower bolts.
- Position the A/C compressor to the engine block.
- Install until snug, the A/C compressor front nut and bolt.
- Install until snug, the A/C compressor rear bolt.
- Tighten the A/C compressor nut first, then the rear bolt and finally the front bolt.
- Lower the vehicle.
- Tighten the engine mount strut bracket to engine upper bolt.
- Install the engine harness clip (2) to the strut bracket.
- Install the engine mount strut. Refer to Engine Mount Strut Replacement.
Caution: Refer to Fastener Caution in the Preface section.
Tighten
Tighten the bolts to 50 N·m (37 lb ft).
Tighten
Tighten the bolts/nut to 50 N·m (37 lb ft).
Tighten
Tighten the bolts to 25 N·m (18 lb ft).
