For 1990-2009 cars only
Removal Procedure
- Remove the exhaust crossover pipe. Refer to Exhaust Crossover Pipe Replacement.
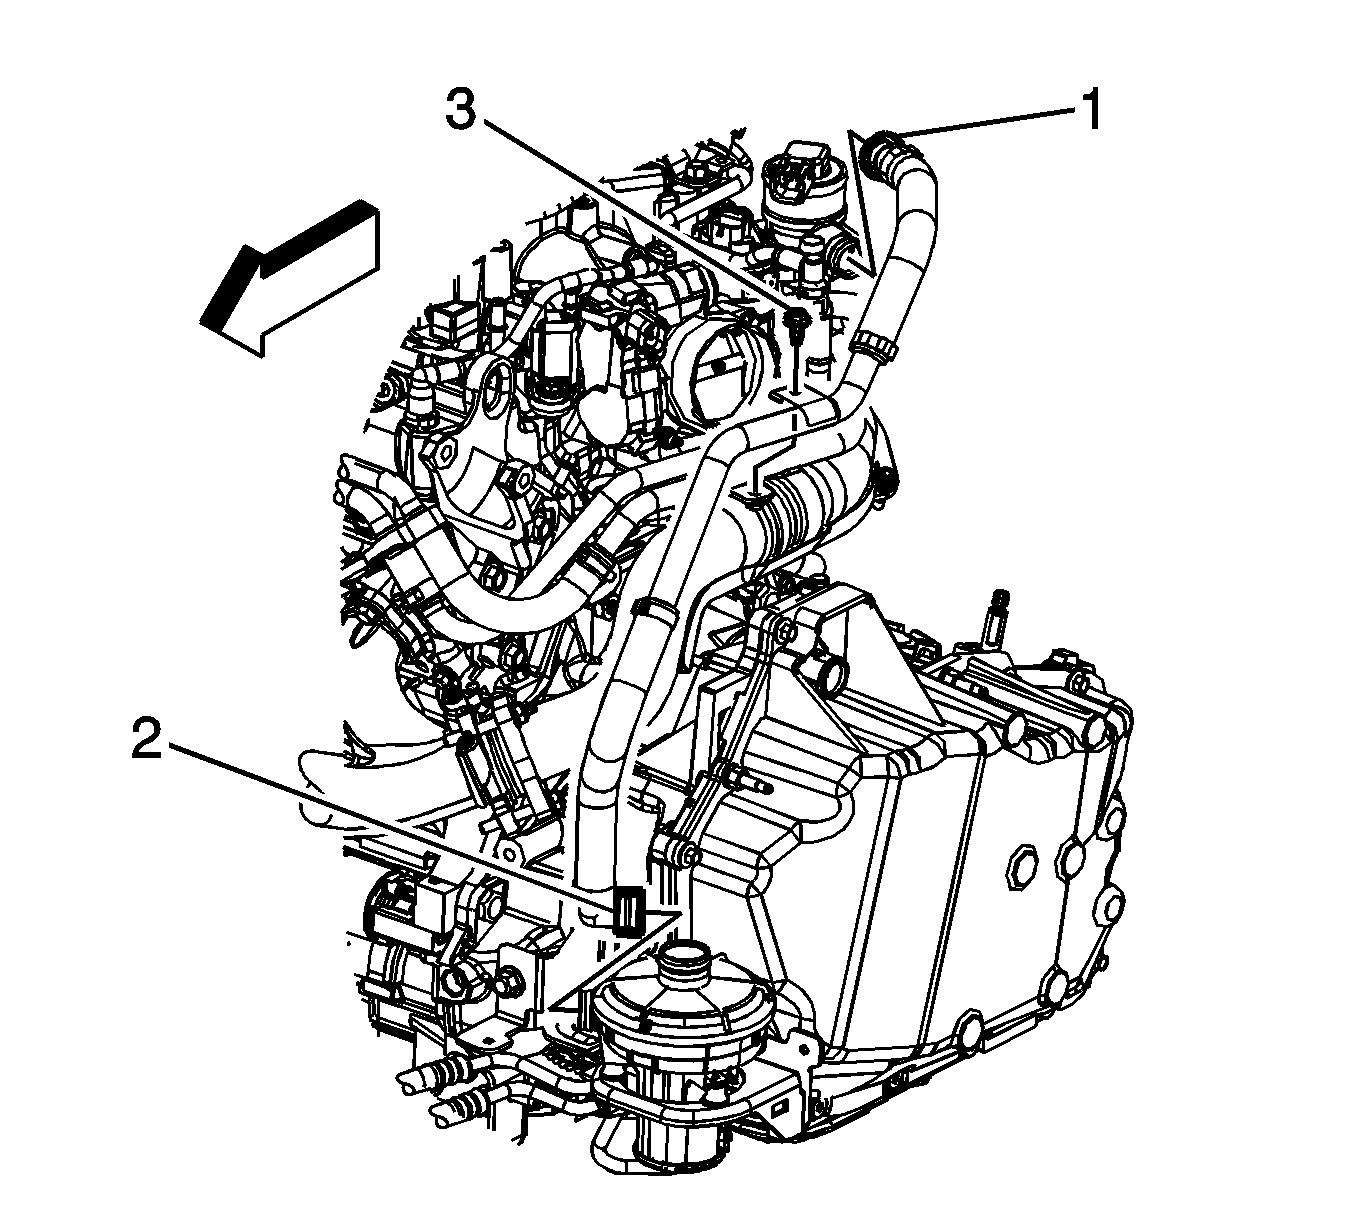
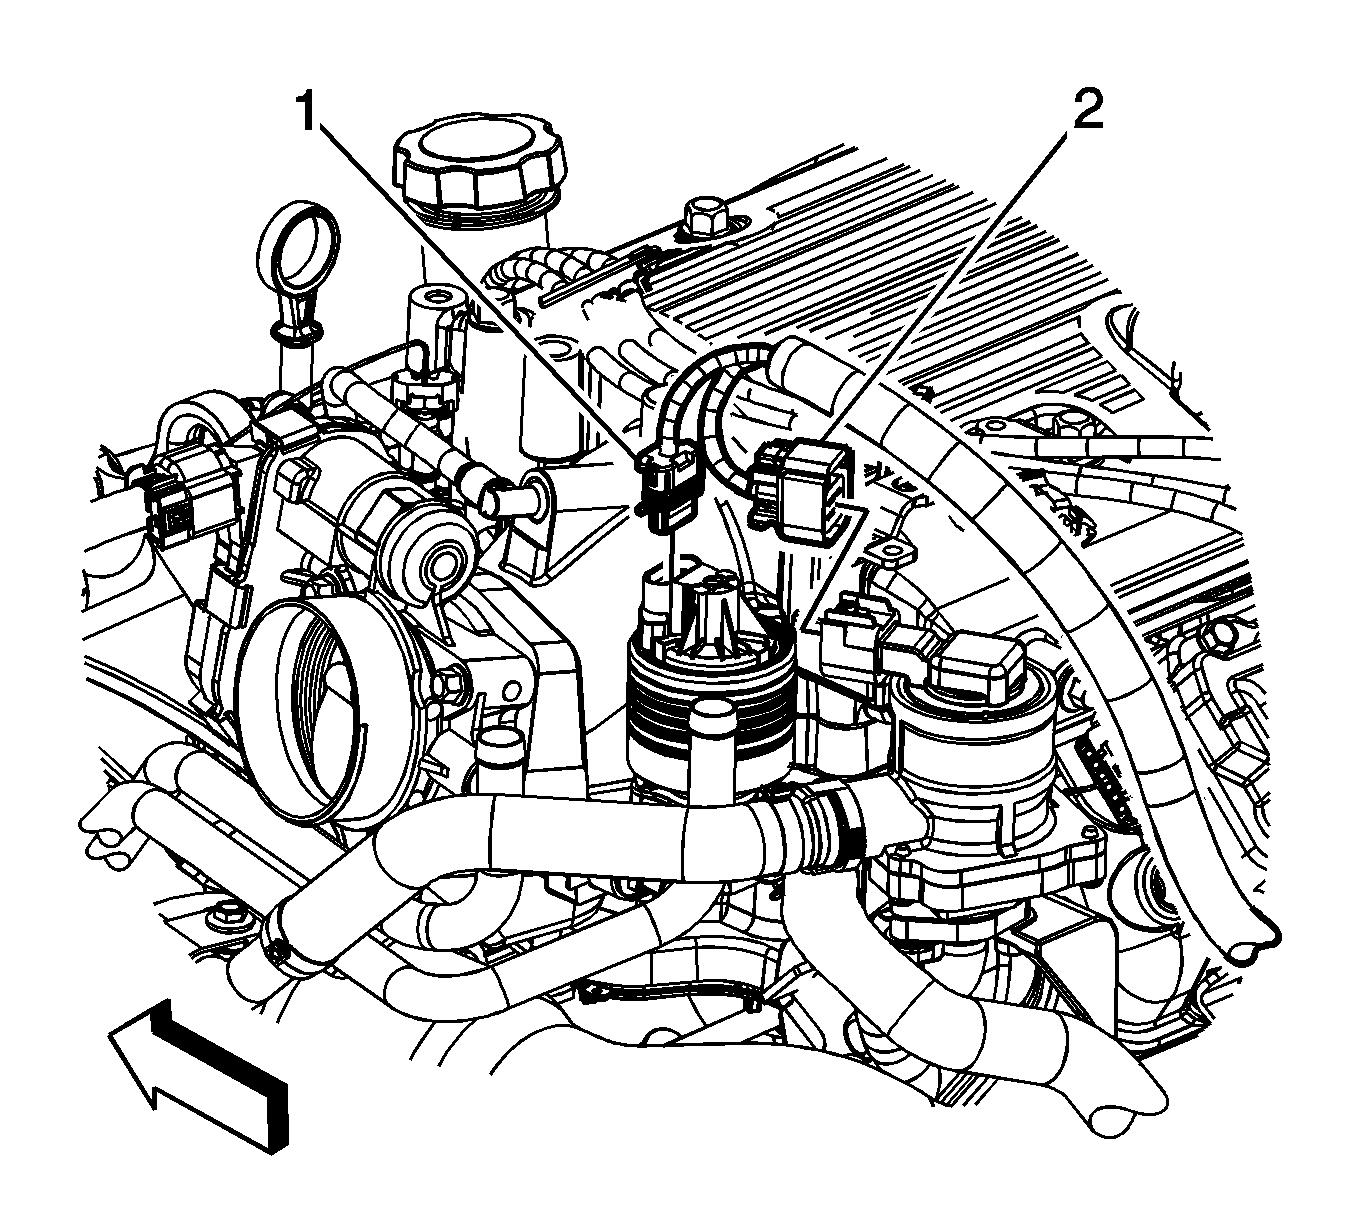
- Disconnect the secondary air injection (AIR) feed tube quick connect fitting (1) from the AIR shutoff/check valve. Refer to Plastic Collar Quick Connect Fitting Service.
- Remove the AIR feed tube bolt (3) from the heater inlet/outlet pipe bracket.
- Disconnect the engine wiring harness electrical connector (2) from the AIR shutoff/check valve.
- Raise and suitably support the vehicle. Refer to Lifting and Jacking the Vehicle.
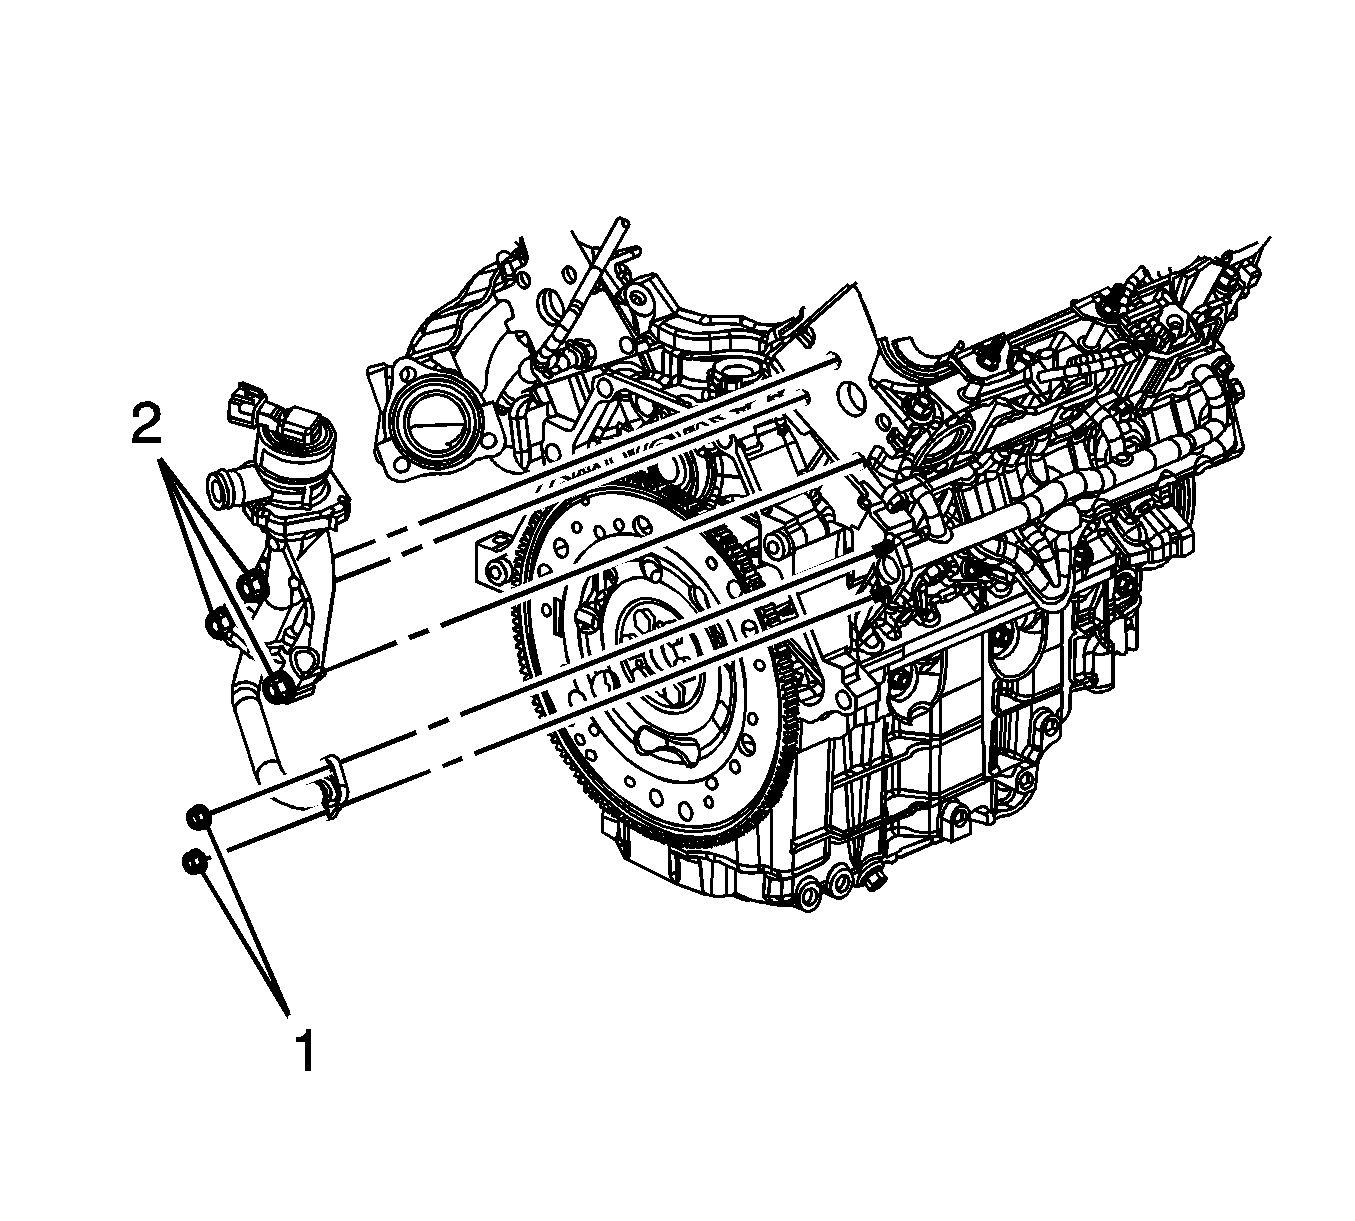
- Remove the AIR shutoff/check valve nuts (1).
- Lower the vehicle.
- Remove the AIR shutoff/check valve bolts (2).
- Remove the AIR check valve and gasket. Discard the gasket.


Installation Procedure
- Install a NEW gasket onto the AIR pipe studs.
- Position and install the AIR check valve.
- Install the AIR shutoff/check valve bolts (2).
- Raise and support the vehicle.
- Install the AIR shutoff/check valve nuts (1).
- Lower the vehicle.
- Connect the engine wiring harness electrical connector (2) to the AIR shutoff/check valve.
- Connect the AIR feed tube quick connect fitting (1) to the AIR shutoff/check valve. Refer to Plastic Collar Quick Connect Fitting Service.
- Install the AIR feed tube bolt (3) to the heater inlet/outlet pipe bracket.
- Install the exhaust crossover pipe. Refer to Exhaust Crossover Pipe Replacement.

Caution: Refer to Fastener Caution in the Preface section.
Tighten
Tighten the bolts to 50 N·m (37 lb ft).
Tighten
Tighten the nuts to 10 N·m (89 lb in).


Tighten
Tighten the bolt to 10 N·m (89 lb in).
