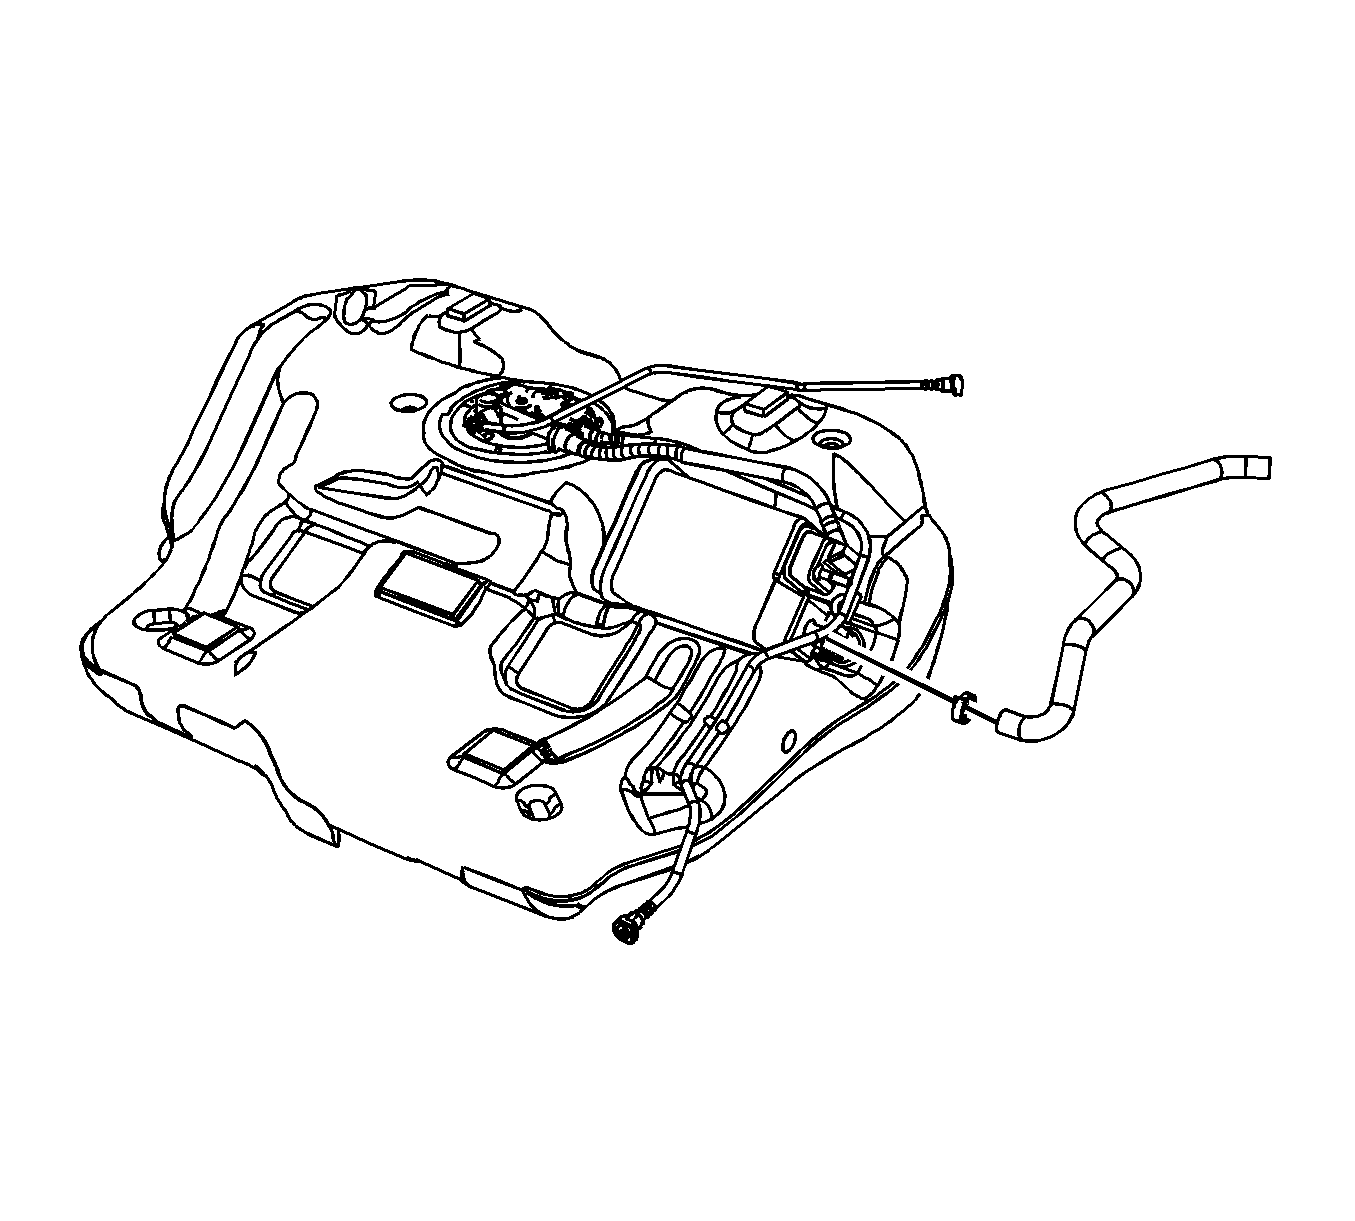
Evaporative Emission Canister Replacement NC7
Removal Procedure
- Remove the fuel tank. Refer to Fuel Tank Replacement.
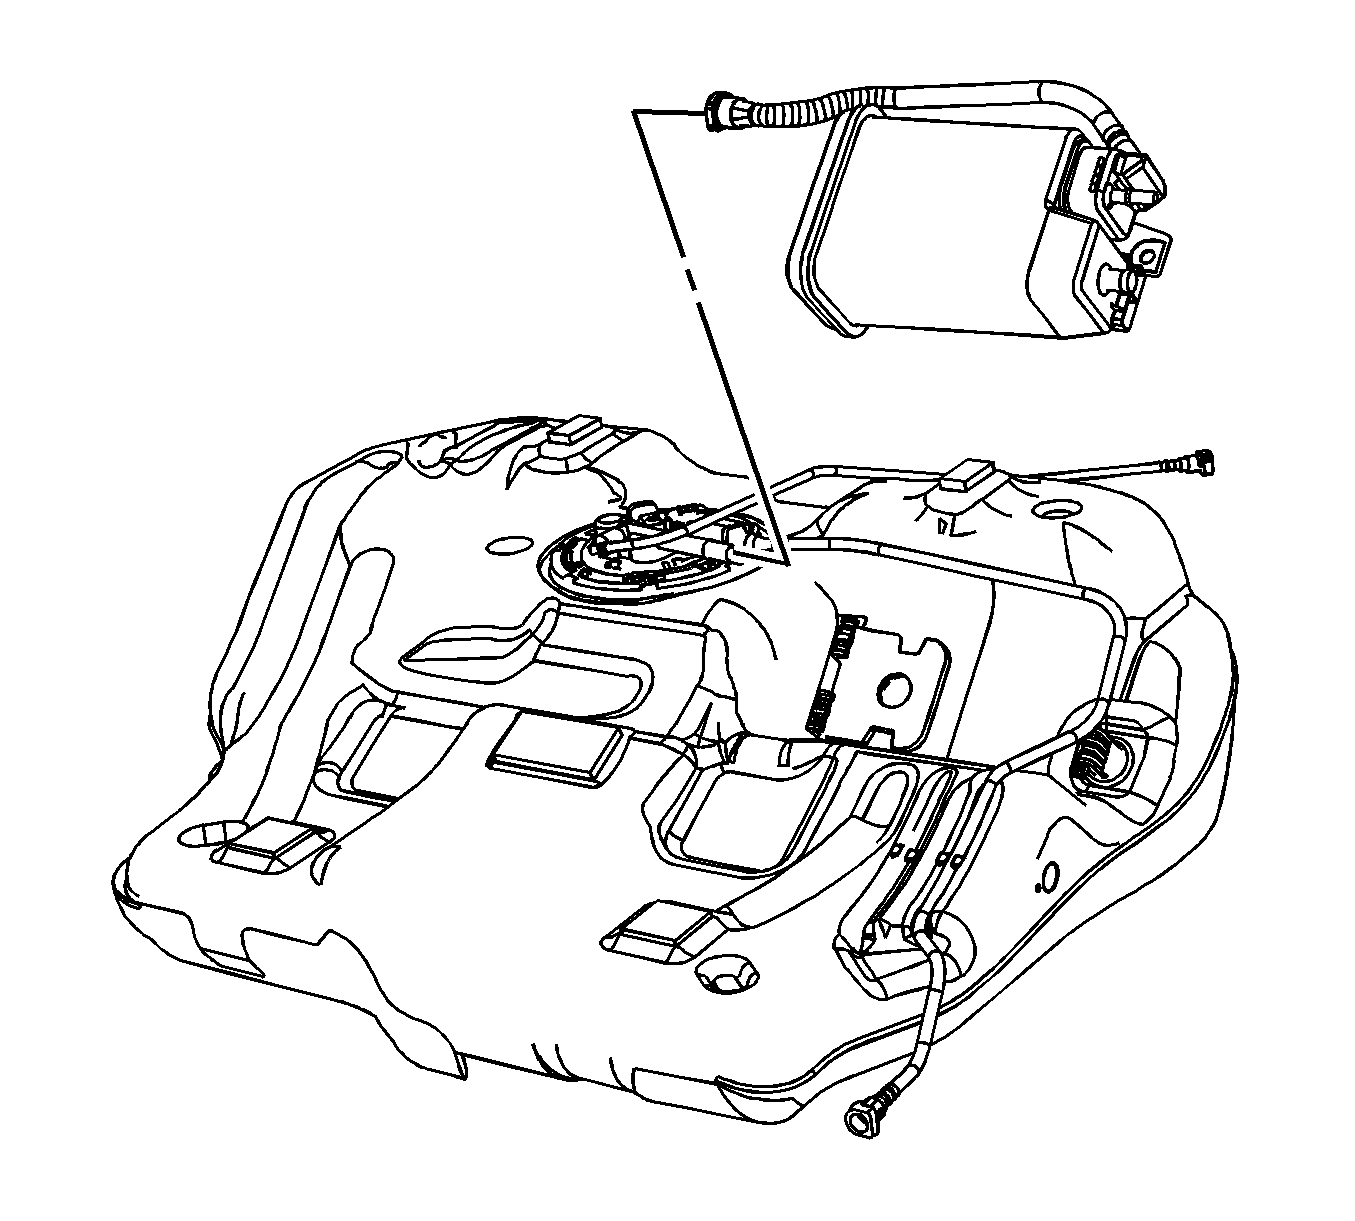
- Disconnect the evaporative emission (EVAP) line (3) from the canister. Refer to Plastic Collar Quick Connect Fitting Service.
- Reposition the EVAP canister hose clamp.
- Remove the EVAP canister hose.
- Disconnect the canister EVAP line from the fuel sender. Refer to Plastic Collar Quick Connect Fitting Service.
- Squeeze the small retainer in front of the canister in order to disengage the canister.
- Remove the EVAP canister.

Installation Procedure
Caution:
• Do not attempt to straighten kinked nylon pipes. Replace any kinked nylon pipes in order to prevent damage to the vehicle. • Do not attempt to repair sections of nylon pipes. Replace damaged nylon pipes. • Replace the vapor pipes with original equipment or parts that meet GM specifications. • Replace the vapor hoses with original equipment or parts meeting GM specifications. Use only reinforced fuel-resistant hose identified with the word Fluoroelastomer or GM 6163M on the hose.
- Install the EVAP canister.
- Squeeze the small retainer in front of the canister in order to engage the canister.
- Connect the canister EVAP line to the fuel sender. Refer to Plastic Collar Quick Connect Fitting Service.
- Install the EVAP canister hose.
- Position the EVAP canister hose clamp.
- Connect the EVAP line (3) to the canister. Refer to Plastic Collar Quick Connect Fitting Service.
- Install the fuel tank. Refer to Fuel Tank Replacement.
Evaporative Emission Canister Replacement NU6
Removal Procedure
- Remove the fuel tank. Refer to Fuel Tank Replacement.
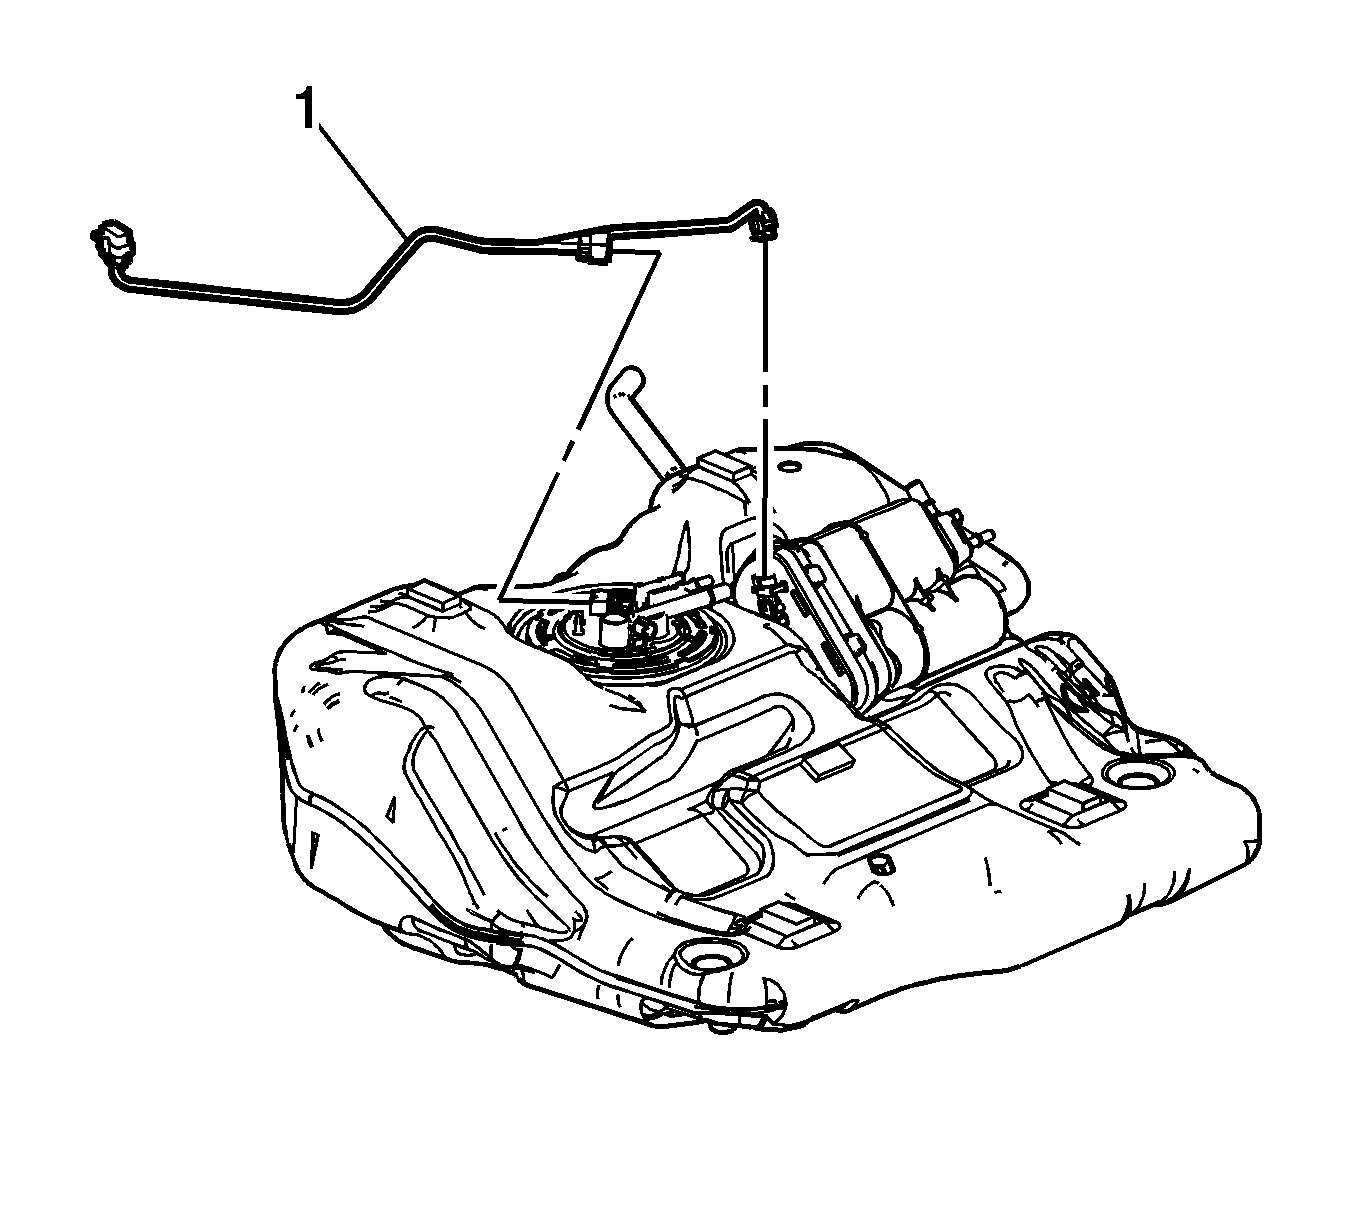
- Disconnect the EVAP line (1) quick connect fittings from the fuel tank module and the EVAP canister. Refer to Plastic Collar Quick Connect Fitting Service.
- Remove the EVAP line assembly (1).
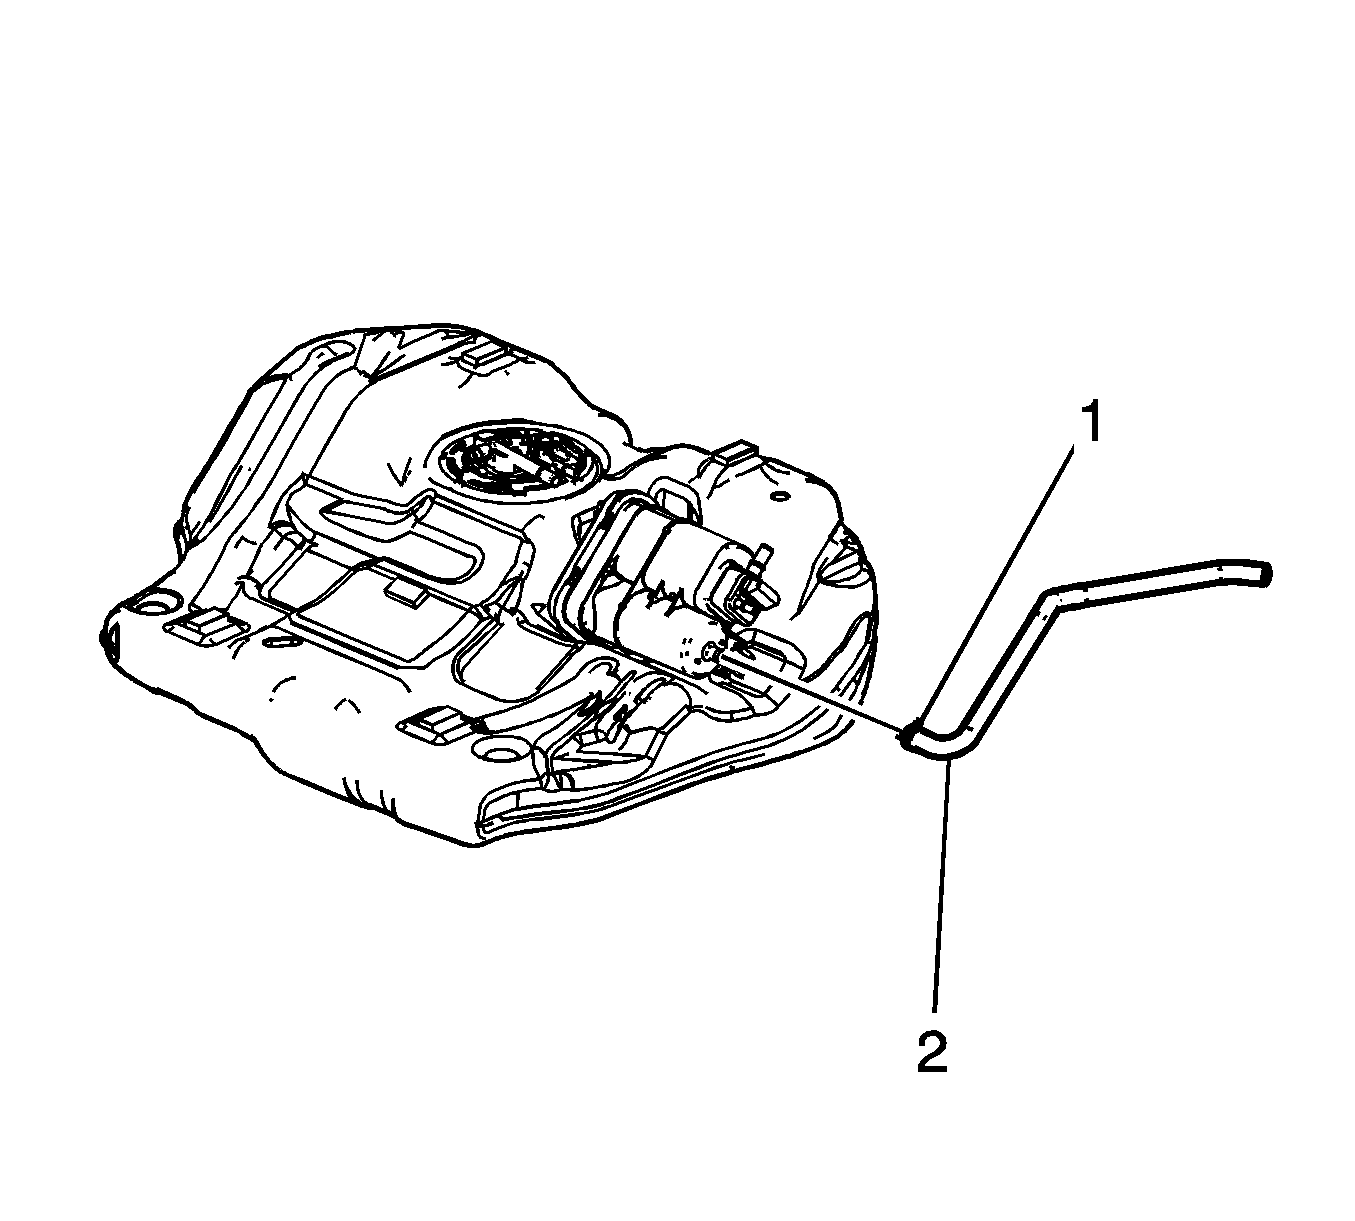
- Disconnect the fuel feed line (2) from the fuel tank module. Refer to Plastic Collar Quick Connect Fitting Service.
- Disengage the fuel feed line from the retaining feature (3) built into the fuel tank and remove the fuel line (2).
- Disconnect the fuel tank wiring harness (1) electrical connectors from the fuel tank module and the fuel pressure sensor.
- Reposition the EVAP canister hose clamp (1).
- Remove the EVAP canister hose (2).
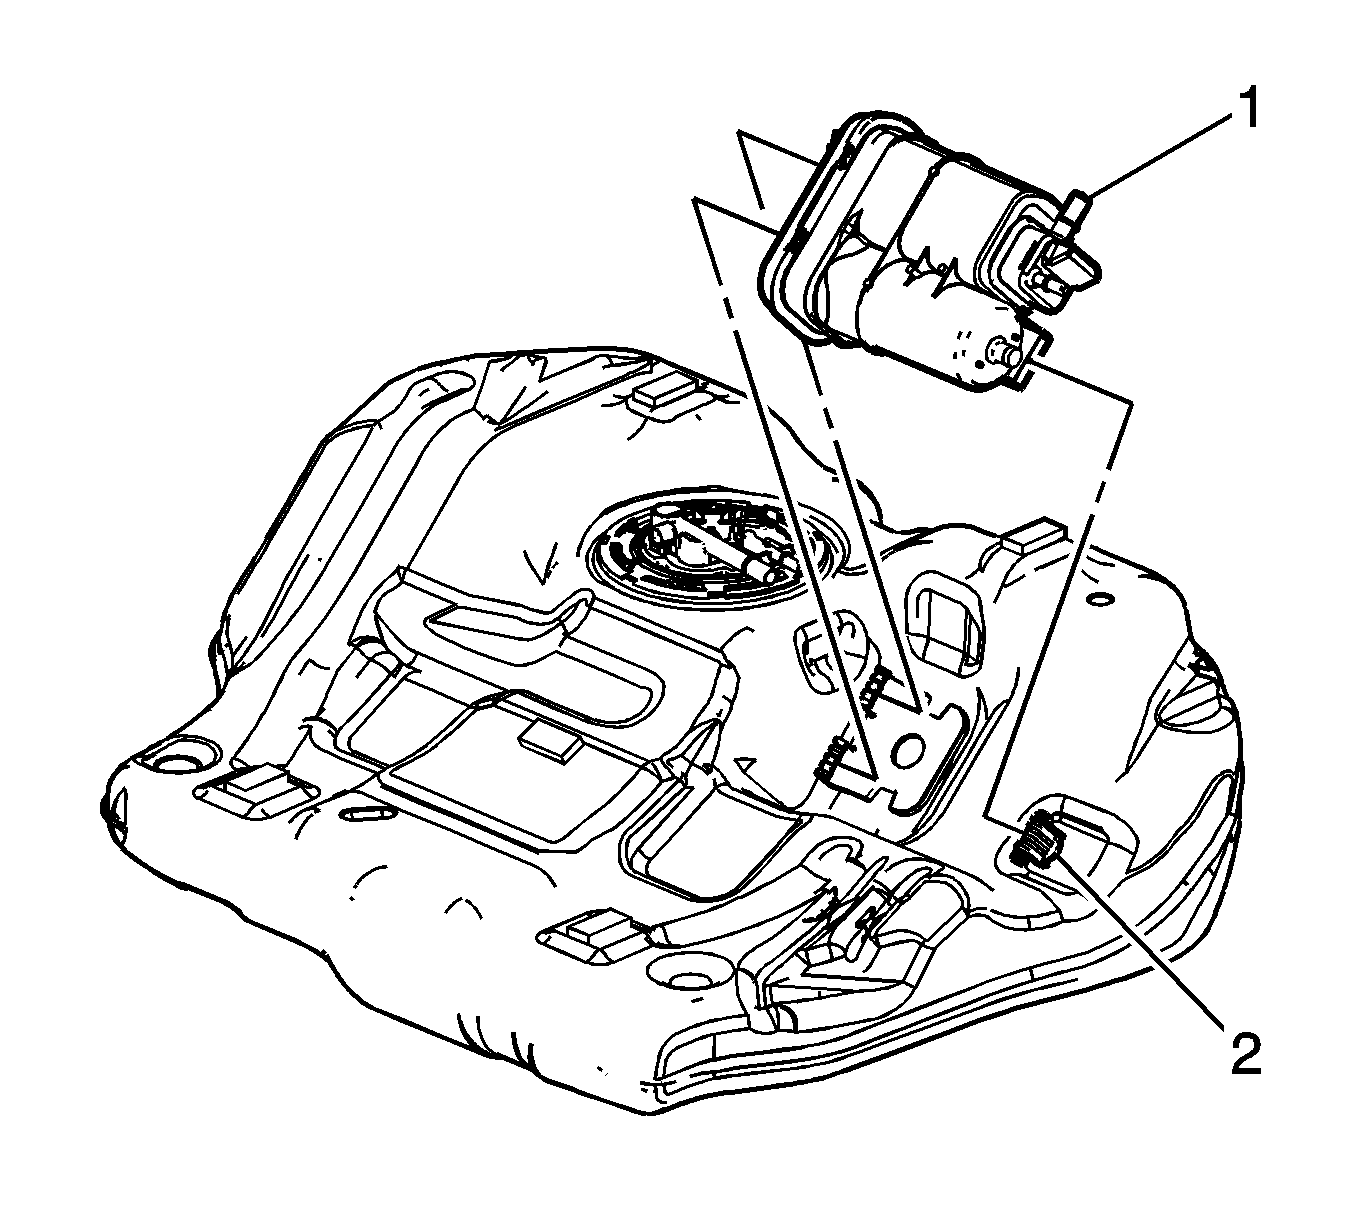
- Squeeze the small retainer in front of the canister (2) in order to disengage the canister.
- Remove the EVAP canister (1).
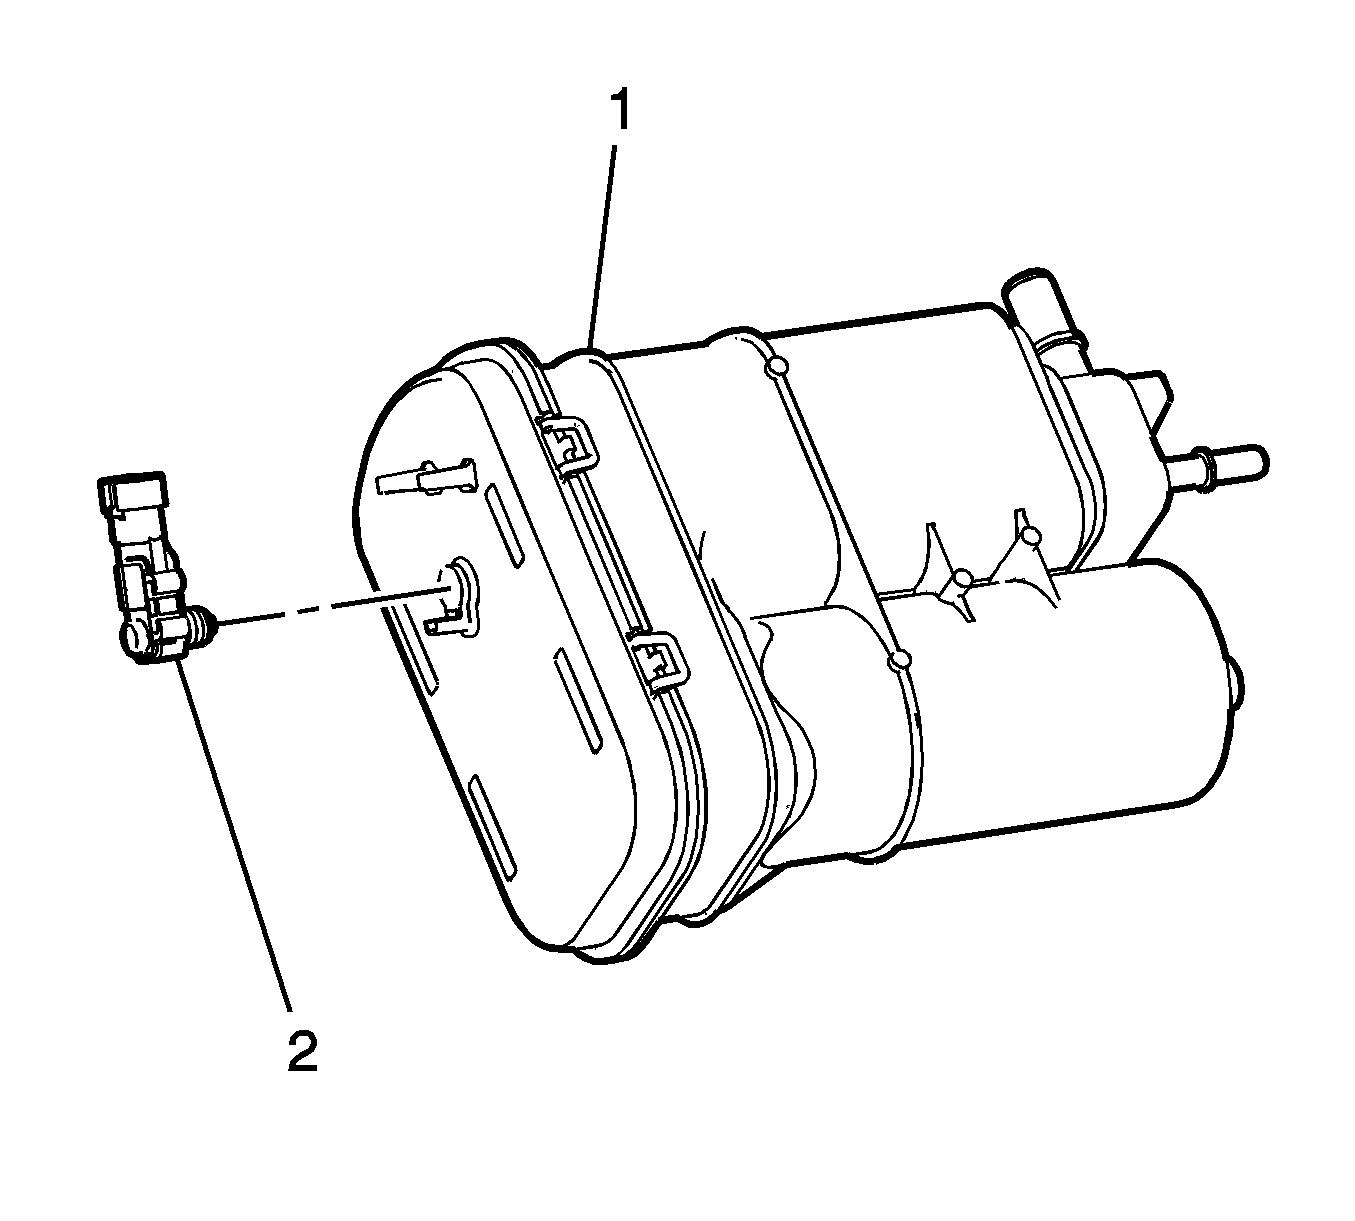
- Using a small flat bladed tool, gently pry the fuel pressure sensor (2) out of the EVAP canister (1).

Note: Note the routing of the lines for installation.
Installation Procedure
Caution:
• Do not attempt to straighten kinked nylon pipes. Replace any kinked nylon pipes in order to prevent damage to the vehicle. • Do not attempt to repair sections of nylon pipes. Replace damaged nylon pipes. • Replace the vapor pipes with original equipment or parts that meet GM specifications. • Replace the vapor hoses with original equipment or parts meeting GM specifications. Use only reinforced fuel-resistant hose identified with the word Fluoroelastomer or GM 6163M on the hose.
- Lubricate the fuel pressure seal with a very small amount of clean engine oil.
- Install the fuel pressure sensor (2) to the EVAP canister (1).
- Install the EVAP canister (1).
- Squeeze the small retainer in front of the canister (2) in order to engage the canister.
- Install the EVAP canister hose (2).
- Position the EVAP canister hose clamp (1).
- Connect the fuel tank wiring harness (1) electrical connectors to the fuel tank module and the fuel pressure sensor.
- Install and connect the fuel feed line (2) to the fuel tank module. Refer to Plastic Collar Quick Connect Fitting Service.
- Engage the fuel feed line to the retaining feature (3) built into the fuel tank.
- Install and connect the EVAP line (1) quick connect fittings to the fuel tank module and the EVAP canister. Refer to Plastic Collar Quick Connect Fitting Service.
- Install the fuel tank. Refer to Fuel Tank Replacement.
