For 1990-2009 cars only
Removal Procedure
- Raise and support the vehicle. Refer to Lifting and Jacking the Vehicle.
- Remove the tire and wheel assembly. Refer to Tire and Wheel Removal and Installation.
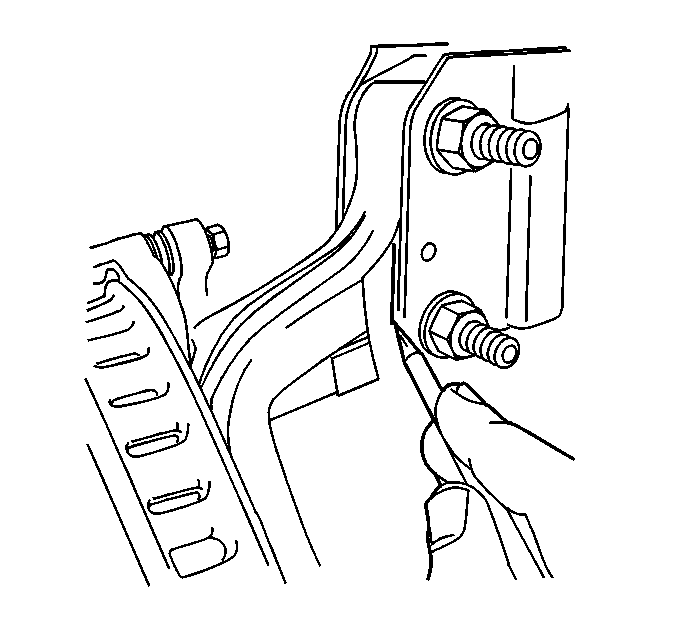
- Scribe the strut to the knuckle.
- Remove the bearing/hub assembly. Refer to Rear Wheel Bearing and Hub Replacement.
- Remove the rear wheel spindle rods from the knuckle. Refer to Rear Wheel Spindle Rod Replacement.
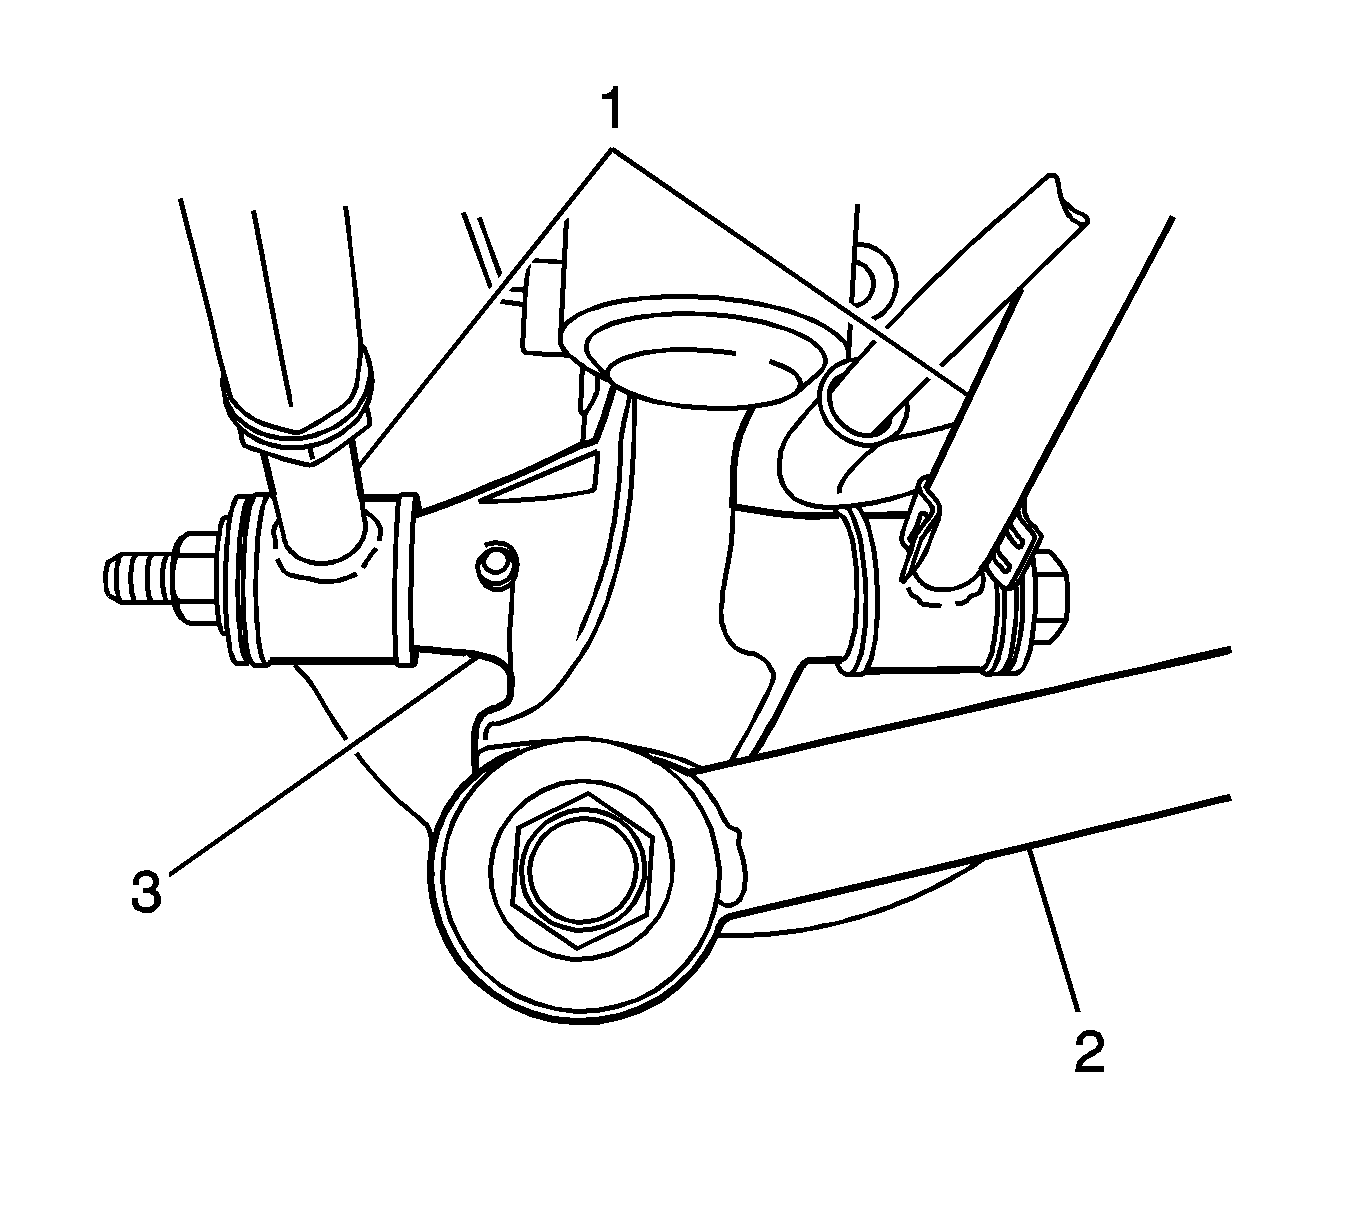
- Remove the trailing arm (2) from the knuckle (3). Refer to Trailing Arm Replacement.
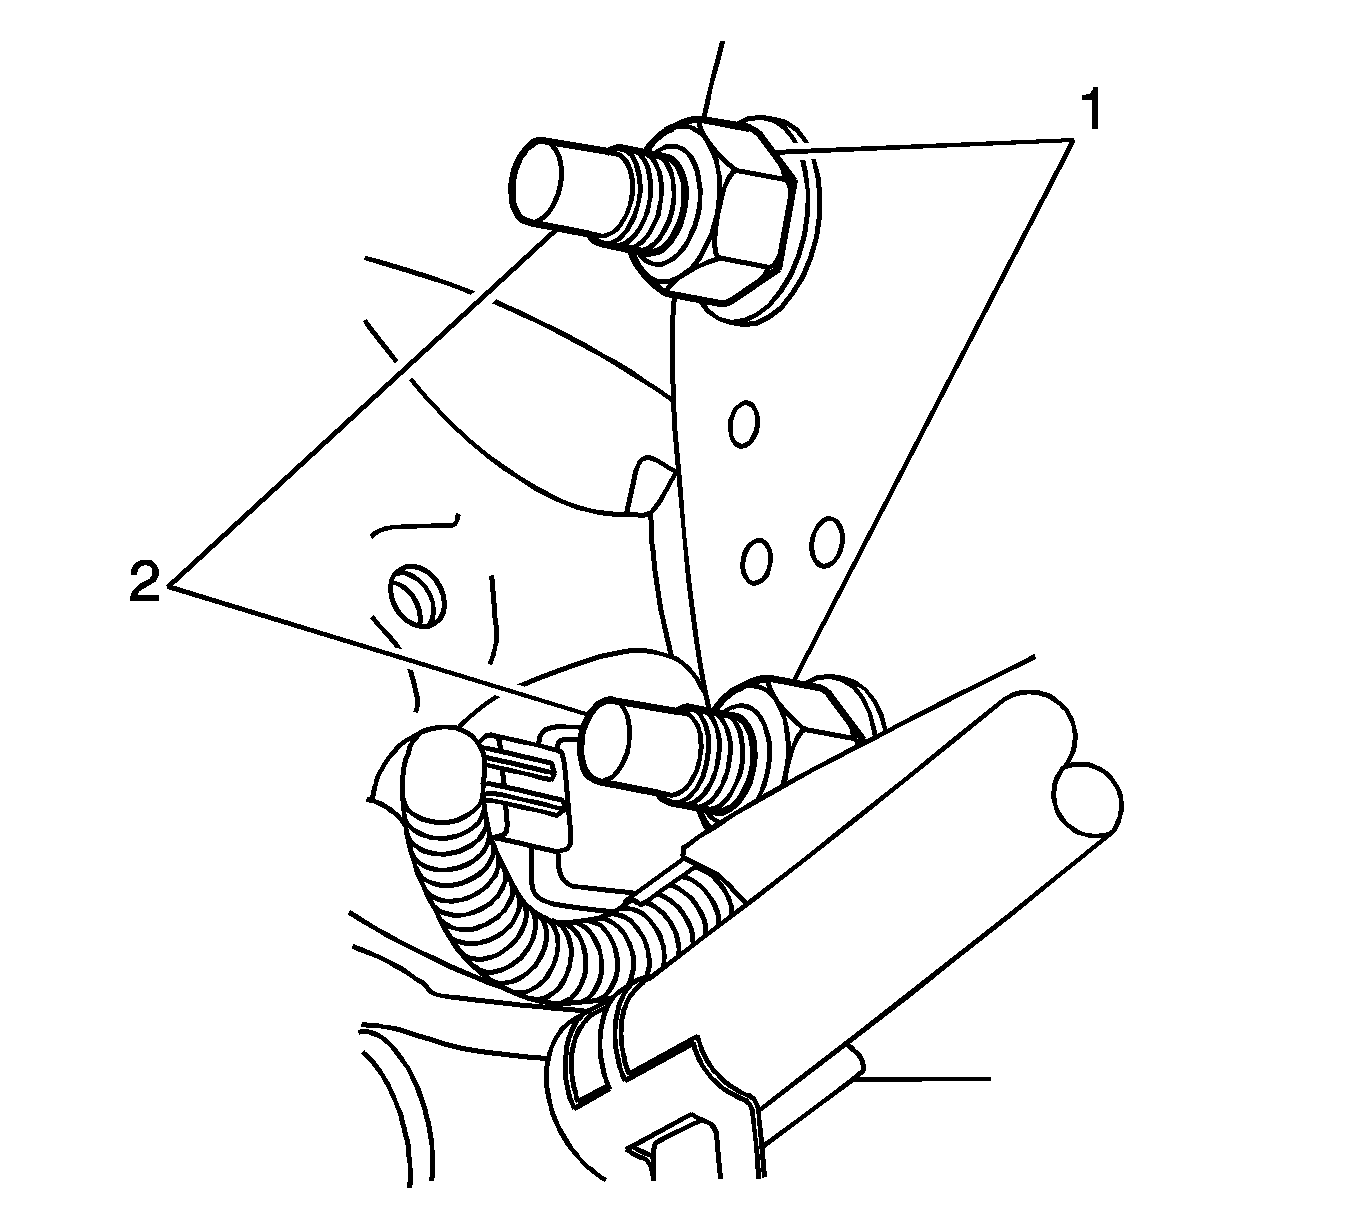
- Remove the rear strut to knuckle bolts (2) and the nuts (1). Refer to Strut Assembly Replacement.
- Remove the knuckle from the vehicle.

Note: If removing the knuckle to service other suspension components, perform the following step.


Installation Procedure
- Install the knuckle to the vehicle.
- Hand start the strut to knuckle bolts (2) and nuts (1). Do not tighten the nuts at this time.
- Connect the rear suspension trailing arm (2) to the knuckle (3). Refer to Trailing Arm Replacement.
- Connect the rear wheel spindle rods to the knuckle. Refer to Rear Wheel Spindle Rod Replacement.
- Install the bearing/hub assembly. Refer to Rear Wheel Bearing and Hub Replacement.
- Tighten the strut to knuckle bolts (2) and nuts (1).
- Install the tire and wheel assembly. Refer to Tire and Wheel Removal and Installation.
- Remove the support and lower the vehicle.
- Inspect the rear wheel alignment, adjust if necessary. Refer to Wheel Alignment Measurement.

Note: If reinstalling the original knuckle, align the rear strut with the scribe marks on the knuckle.


Caution: Refer to Fastener Caution in the Preface section.
Tighten
Tighten bolts to 120 N·m (89 lb ft).
