For 1990-2009 cars only
Special Tools
J 39400-A Halogen Leak Detector
Removal Procedure
- Recover the refrigerant from the A/C system. Refer to Refrigerant Recovery and Recharging.
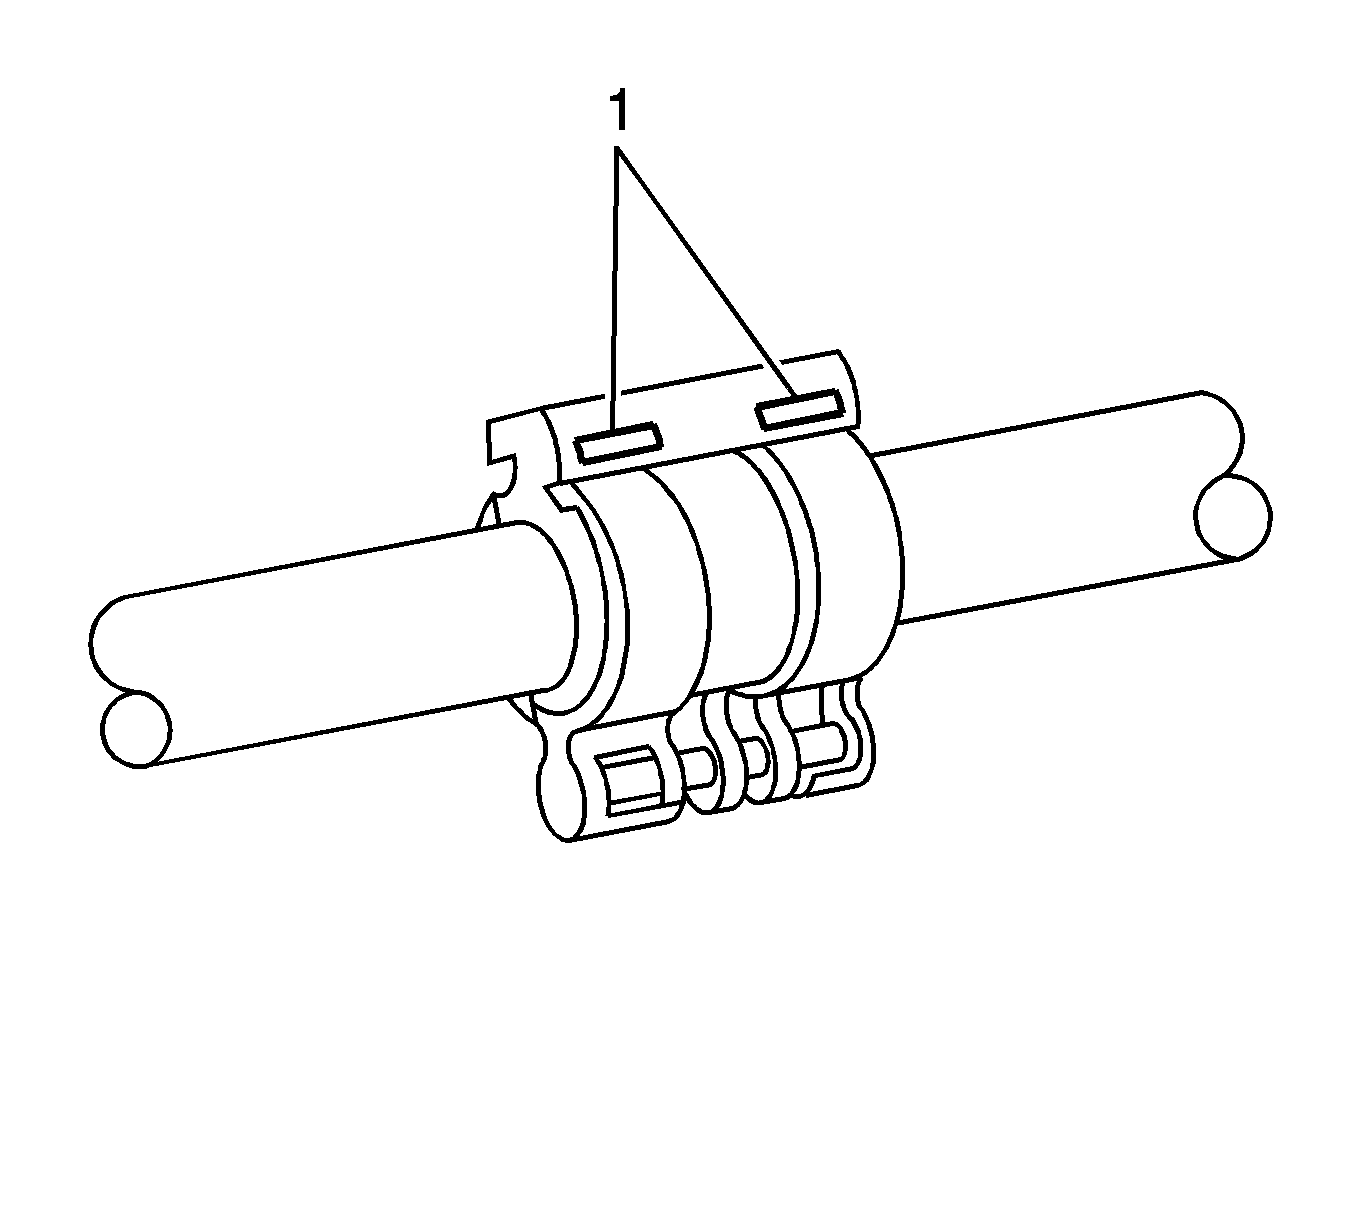
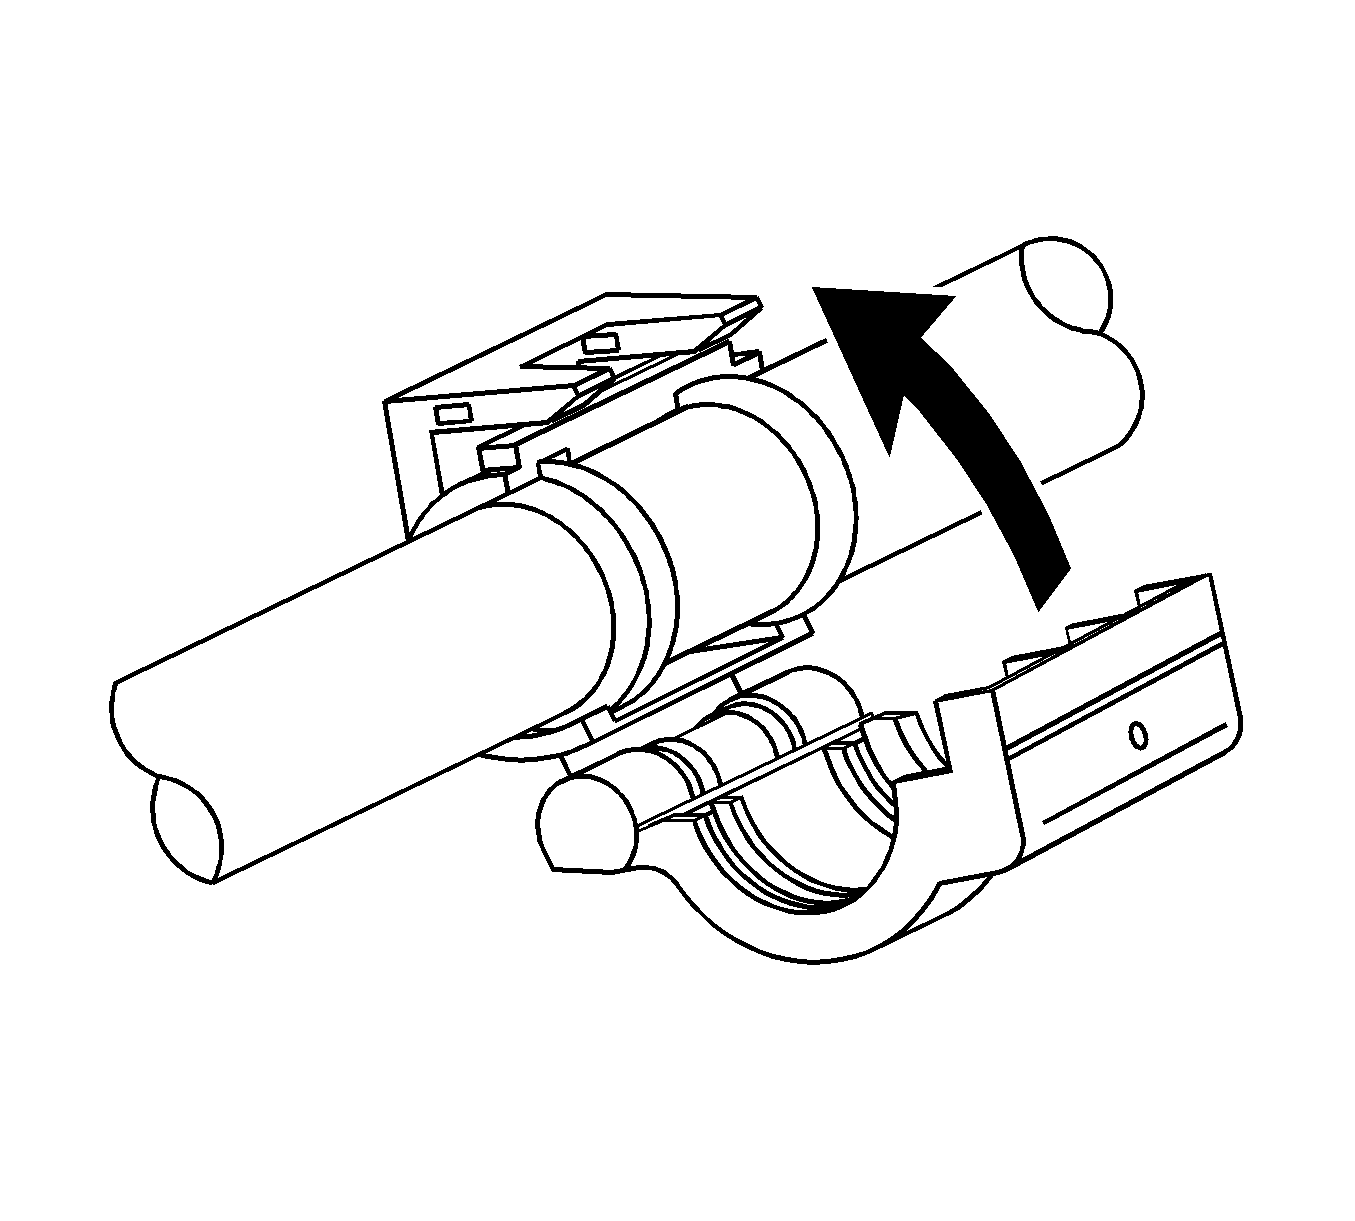
- Locate the A/C coupling assembly's locking tab access slots (1).
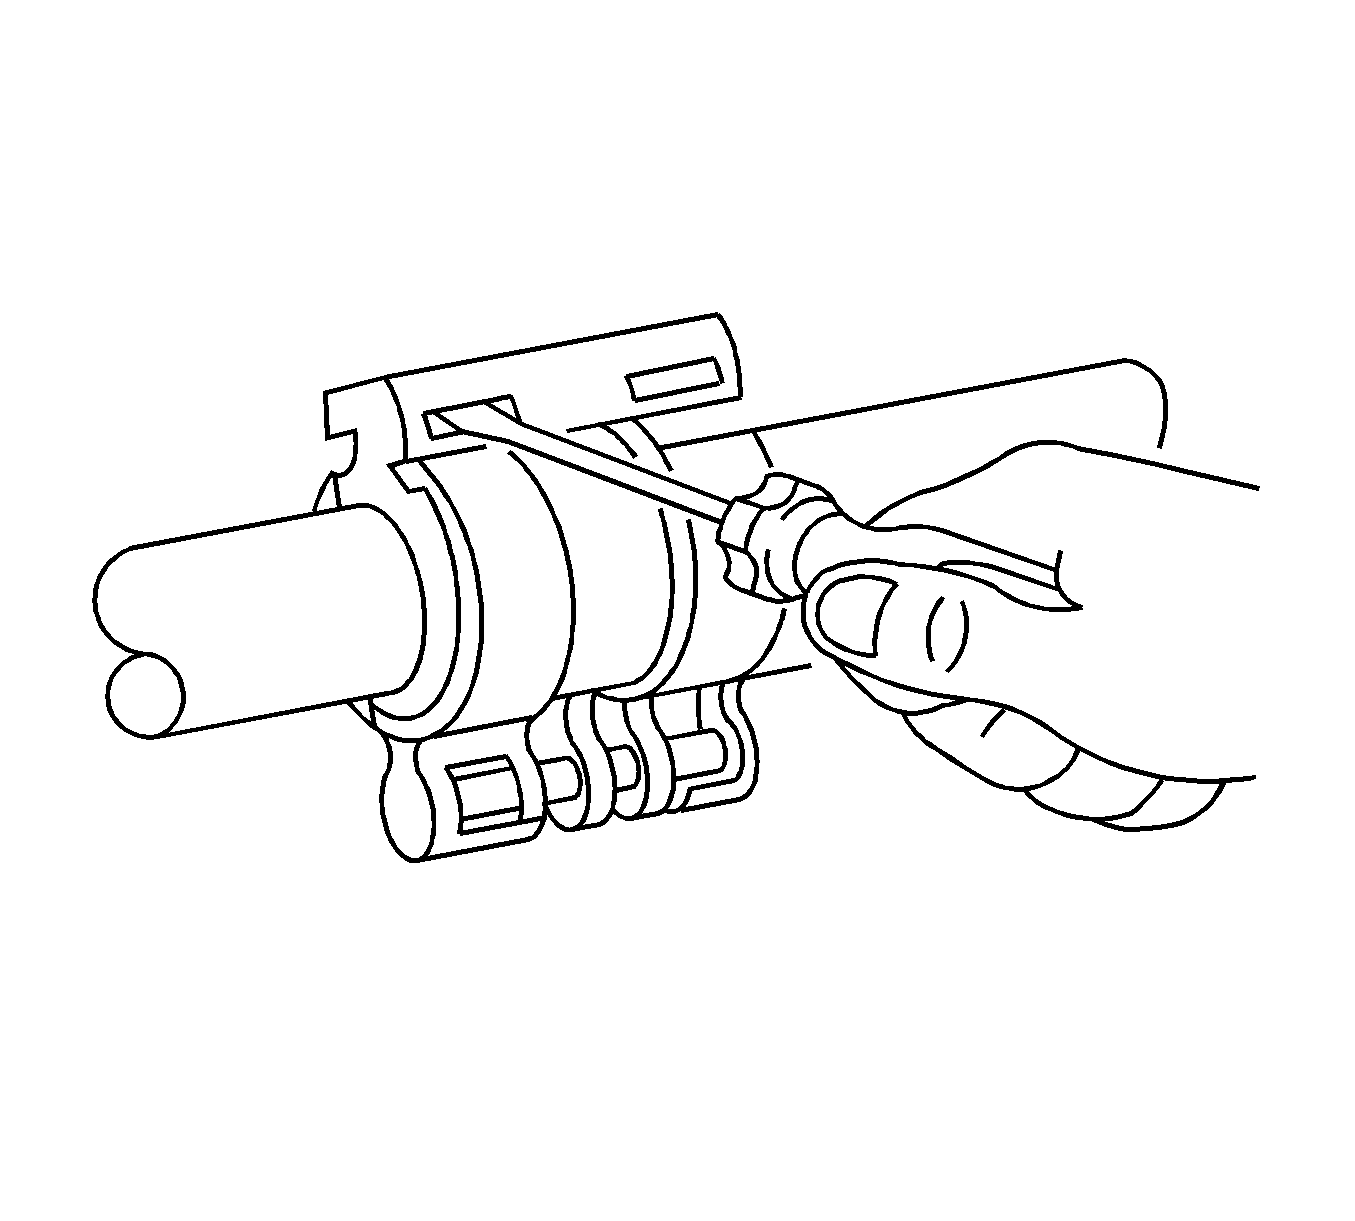
- Carefully insert a small flat bladed screwdriver into the first locking tab access slot and gently lift the locking tab to release the lock.
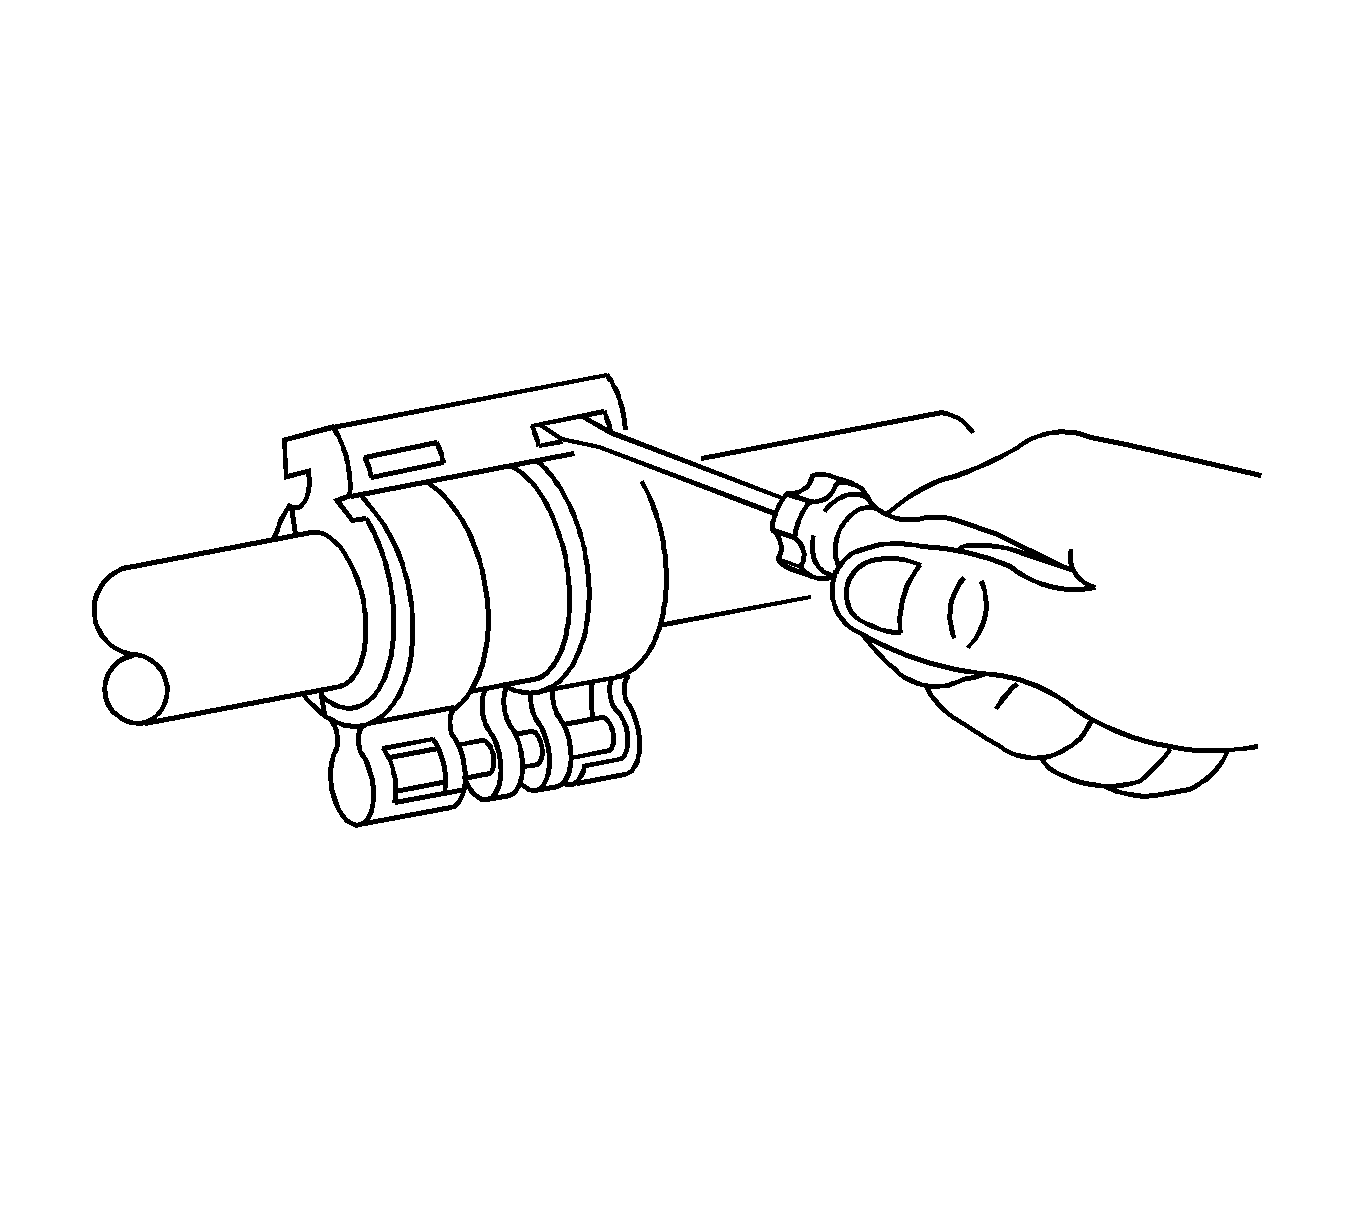
- Carefully insert a small flat bladed screwdriver into the second locking tab access slot and gently lift the locking tab to release the lock.
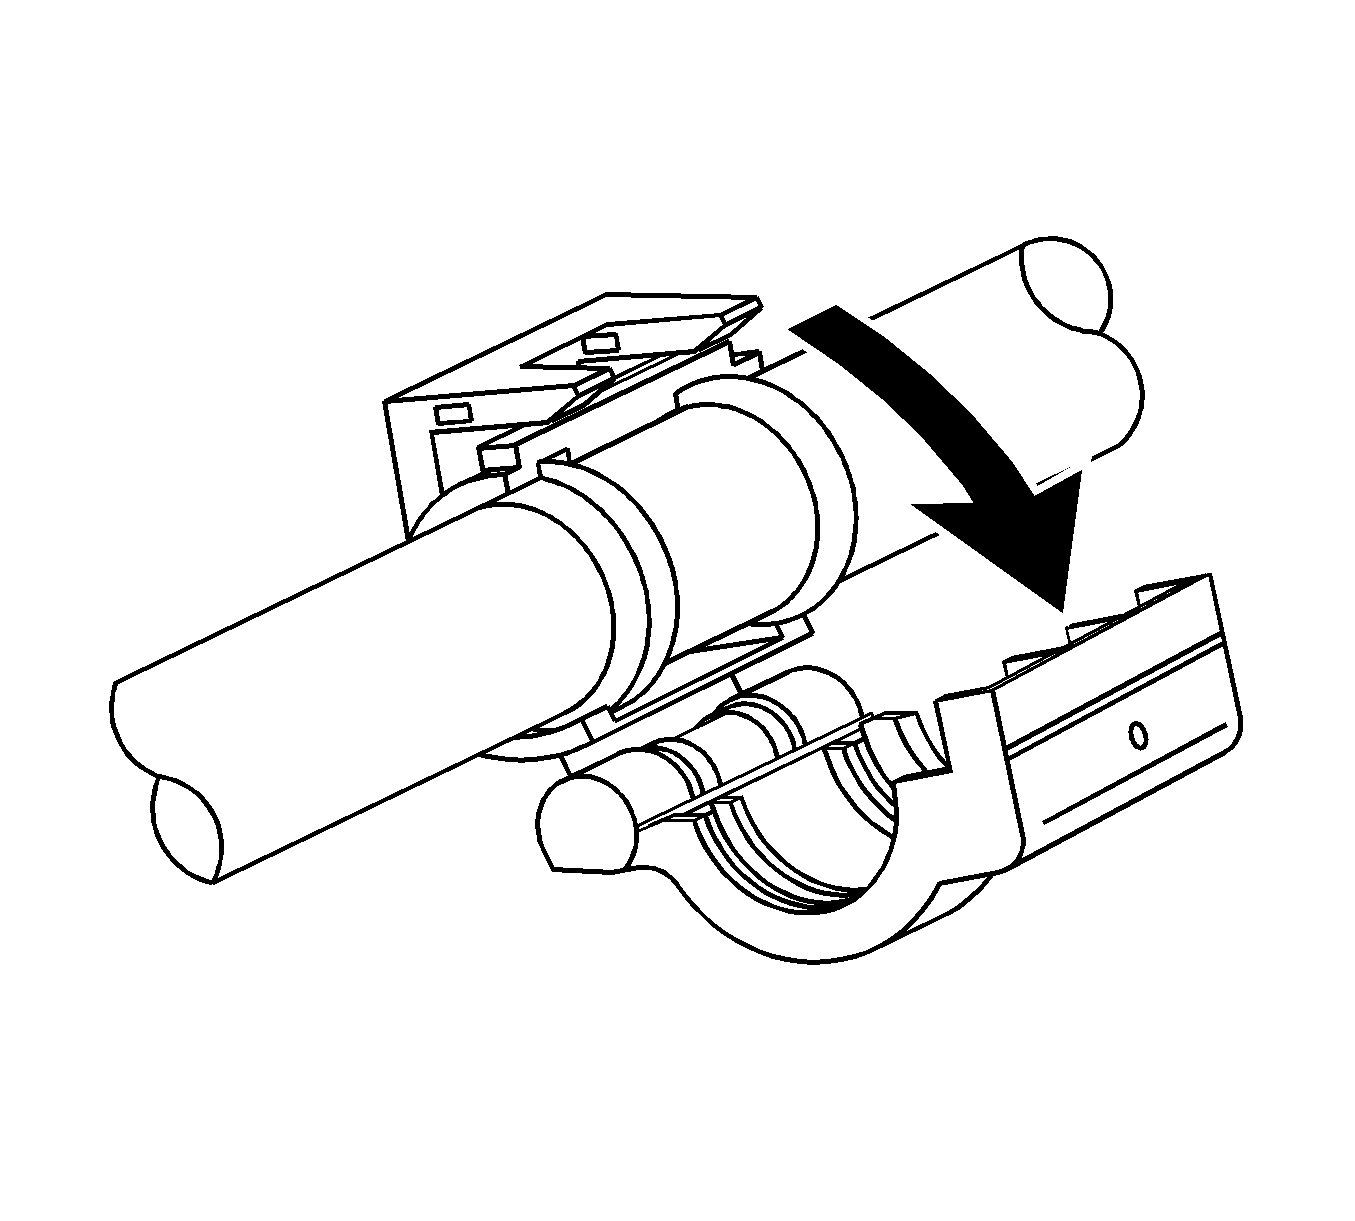
- Open and remove the A/C coupling assembly from the A/C refrigerant component.
Note: When separating the A/C coupling assembly, apply light pressure between the two halves of the coupling to prevent the locking tabs from reengaging.
Installation Procedure
- Install the A/C coupling assembly to the A/C refrigerant component.
- Close the A/C coupling assembly.
- Evacuate and recharge the A/C system. Refer to Refrigerant Recovery and Recharging.
- Leak test the fittings of the component using J 39400-A Halogen Leak Detector .
Note: Inspect the A/C coupling assembly locking tabs for damage or wear. Replace the A/C coupler assembly if any conditions exist.
Note: Ensure that the A/C coupling assembly is latched securely to the A/C refrigerant component.
