For 1990-2009 cars only
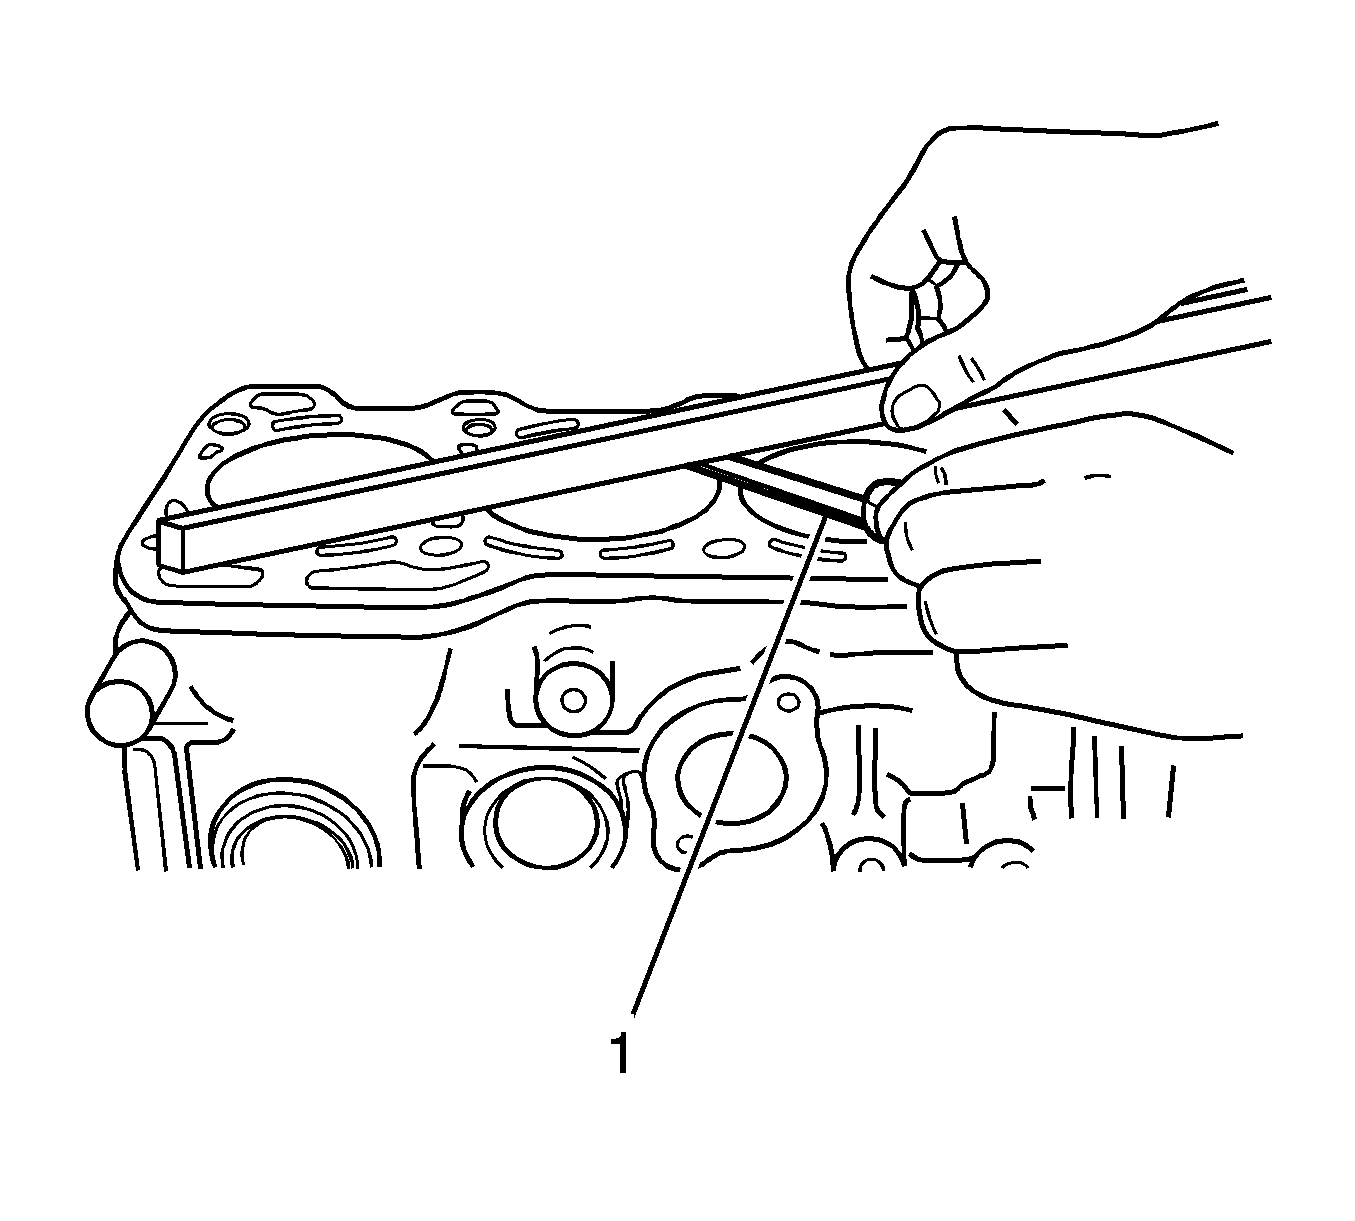
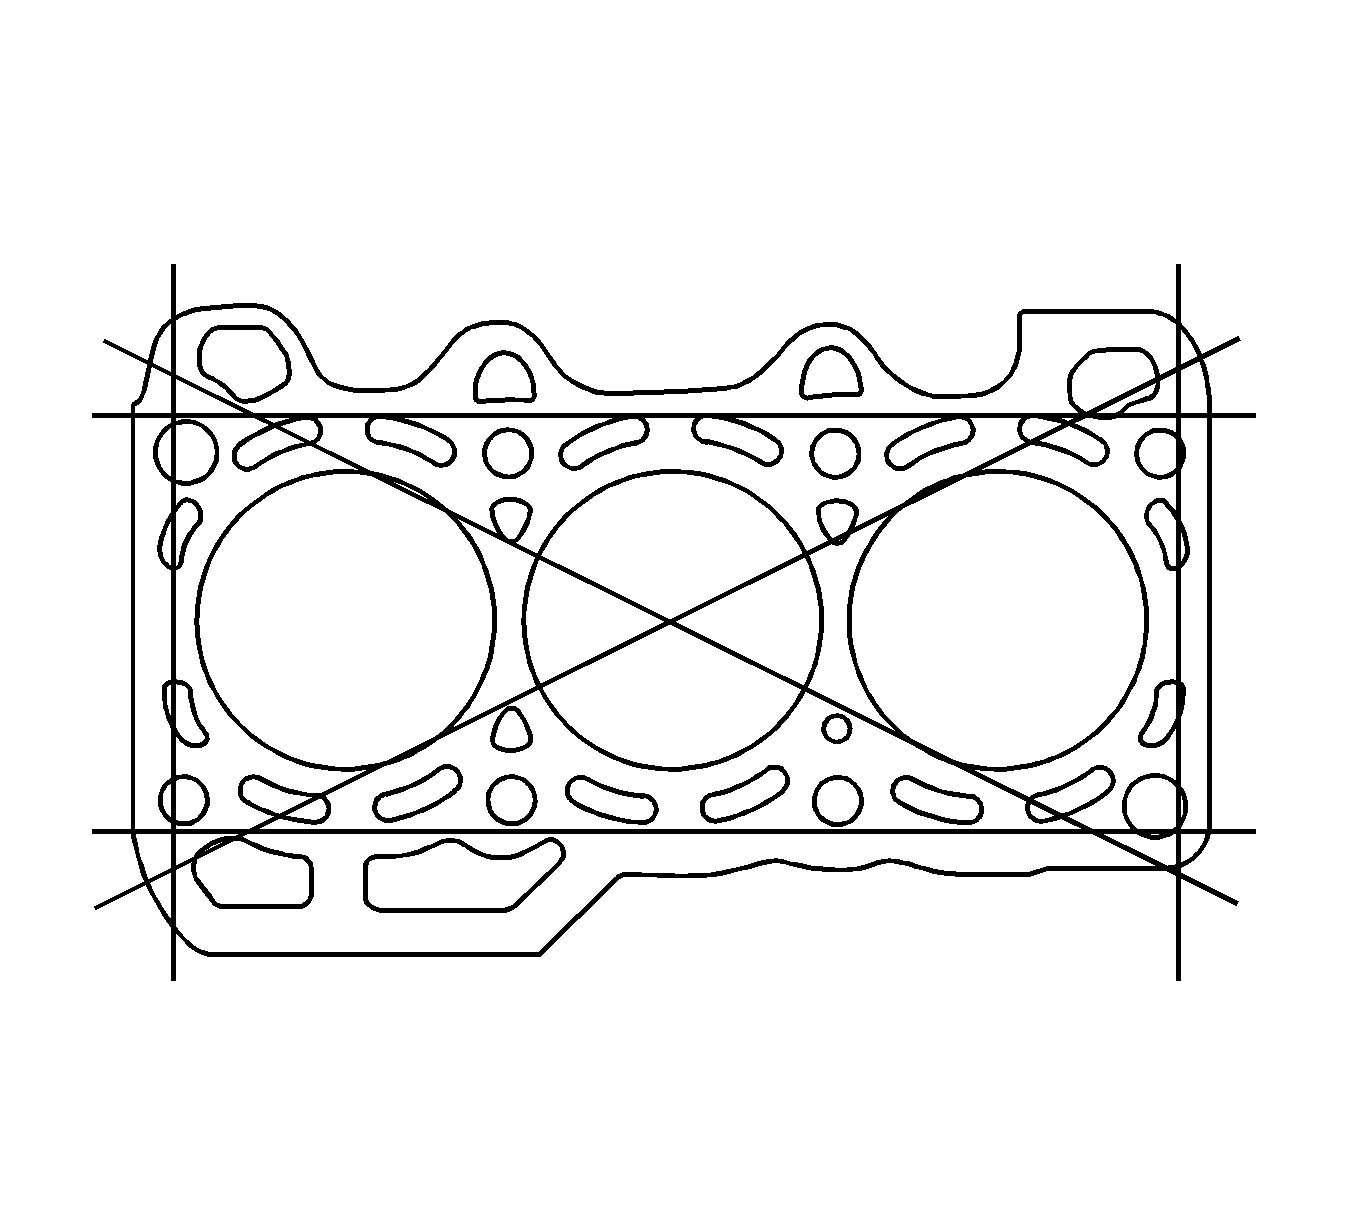
- Measure 6 different places using thickness gage and straight scale in the same method as for the cylinder head (1).
- Polish and repair it, if the distortion, bent or twist exceeds the limit. If polishing needs more than 0.15 mm (0.0059 in), replace it with a new one.
- Measure the flatness of the cylinder head surface in the location of each 4 side and diagonal.

Important: Pay attention to the flatness on the surface between combustion chambers.
Specifications
| • | The limit of the cylinder distortion is 0.05 mm (0.0020 in) |
| • | The standard flatness is 0.03 mm (0.0012 in) |

Notice: The damage of the cylinder head surface may cause the loss of power due to the leakage of the compression.
