Perform the following procedure after all of the repairs are completed and all of the suspension fasteners have been tightened to the specified torque values.
- Place the vehicle on a level floor area. Free and center all of the suspension joints by slowly moving the vehicle back and forth several times without using the brakes.
- Block the front wheels. Ensure that the vehicle brakes are released.
- Securely clamp a 9 ft (3 m) piece of straight bar stock or angle iron across the frame using C-clamps.
- Use a square in order to align a straight edge to the frame.
- Use a trammel bar or its equivalent in order to measure from a straight edge to the center line of the drive axle on both sides of the vehicle.
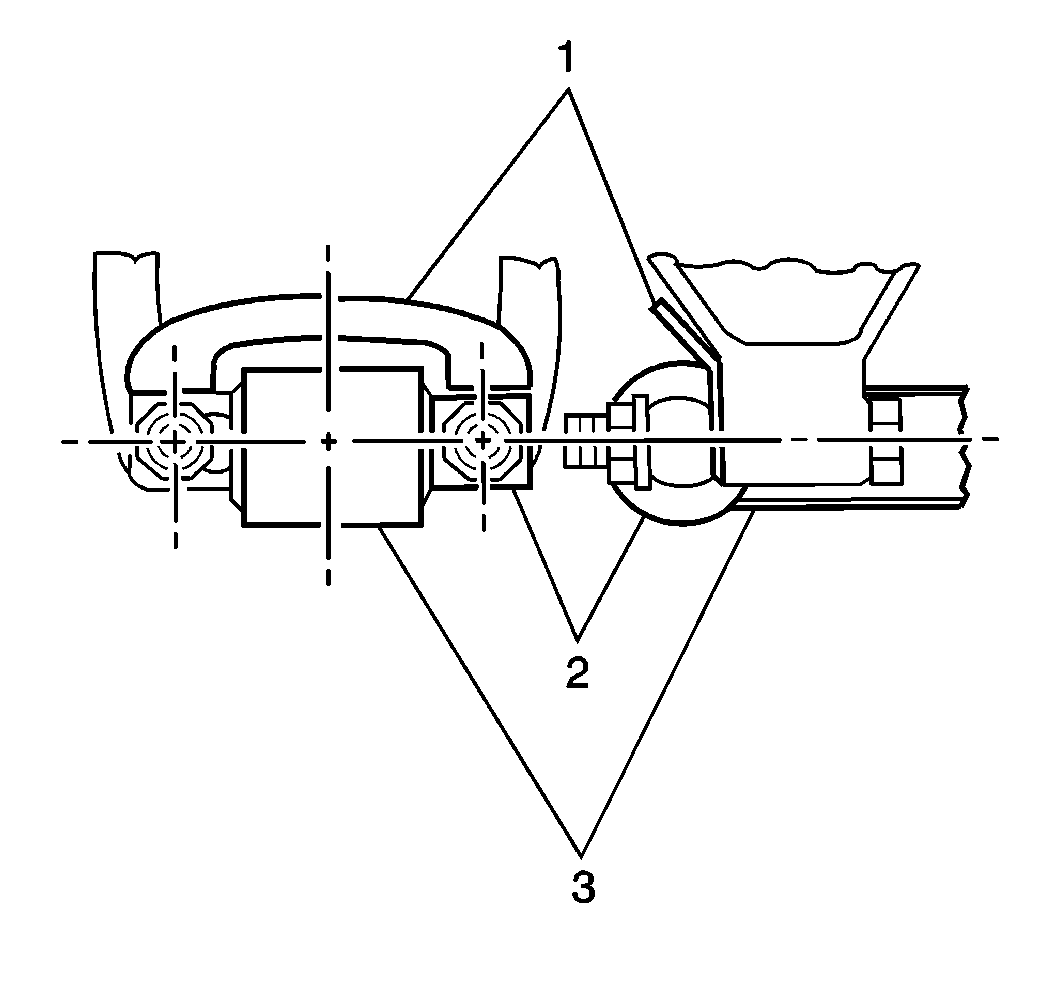
- Mount the torque rod bar pin (2) adjacent to the forward face of the spring hanger legs. Do not use more than 4 shims (1) or 6.0 mm (0.25 in) total thickness.
- Install the torque rod bar pin locknuts. Do not torque the locknuts to specification.
- Follow the alignment of the drive axle and move the vehicle back and forth several times prior to removing the straight edge from the frame.
- Reinspect the alignment in order to confirm the adjustments.
- Tighten the torque bar rod pin locknuts.
- Tighten the rebound bolt locknuts.
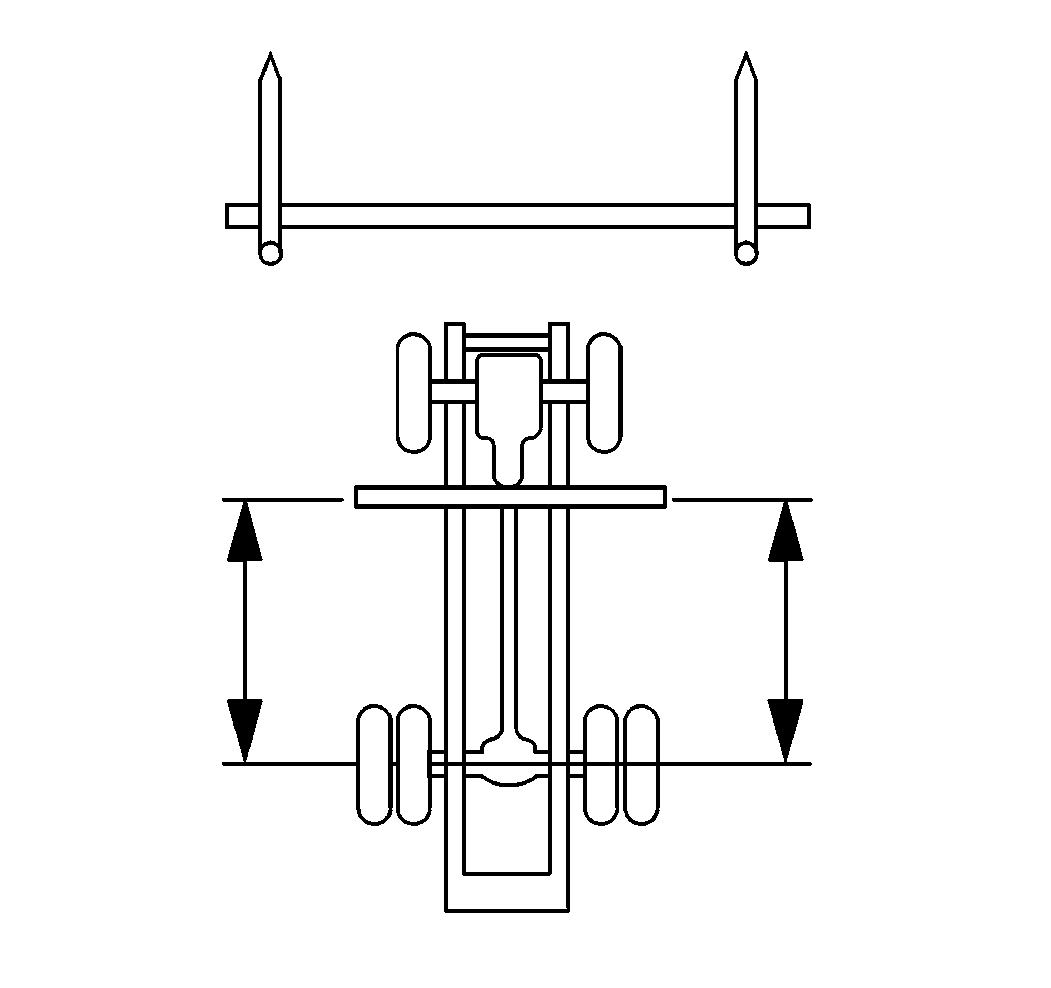
Select a location as far forward of the drive axle as possible.
| 5.1. | If both sides measure within 4.8 mm (0.1875 in) of being equal, alignment of the rear axle is acceptable. |
| 5.2. | If both side measurements differ by more than 4.8 mm (0.1875 in), complete the following steps: |
| 5.2.1. | Loosen the rebound bolt locknut. |
| 5.2.2. | Adjust the rear drive axle by loosening the torque rod bar pin locknuts on the spring hanger and add drop-in shims. |
Notice: Use the correct fastener in the correct location. Replacement fasteners must be the correct part number for that application. Fasteners requiring replacement or fasteners requiring the use of thread locking compound or sealant are identified in the service procedure. Do not use paints, lubricants, or corrosion inhibitors on fasteners or fastener joint surfaces unless specified. These coatings affect fastener torque and joint clamping force and may damage the fastener. Use the correct tightening sequence and specifications when installing fasteners in order to avoid damage to parts and systems.
Tighten
Tighten the locknuts to 241 N·m (178 lb ft).
Tighten
Tighten the locknuts to 82 N·m (61 lb ft).
