Positive Crankcase Ventilation Valve Replacement for Chevrolet Kodiak C-Series (Conventional) C4/C5 2003
Removal Procedure
- Remove air cleaner layer. Refer to Air Cleaner Replacement in Engine Controls .
- If removing the right side, remove the charged air cooler outlet duct from the air cleaner and the turbocharger.
- If removing the right side, loosen both charged air cooler outlet duct to intake hose clamps.
- Remove the charged air cooler outlet duct to intake hose.
- If removing the left side, loosen the charged air cooler inlet duct to turbocharger clamp.
- Remove the charged air cooler inlet duct to turbocharger cool air outlet hose from the turbocharger. The hose can stay on the pipe.
- Remove the screws retaining the PCV diaphragm cover to the valve rocker arm cover.
- Remove the diaphragm cover.
- Remove the diaphragm and the spring.
- Clean the diaphragm cover, spring, and screws.
- Inspect the diaphragm for cuts or damage.
- Discard the diaphragm if damage is found.
Important: After removing the turbocharger air ducts and hoses, cover the turbocharger openings and the ducts with tape to prevent entry of objects.
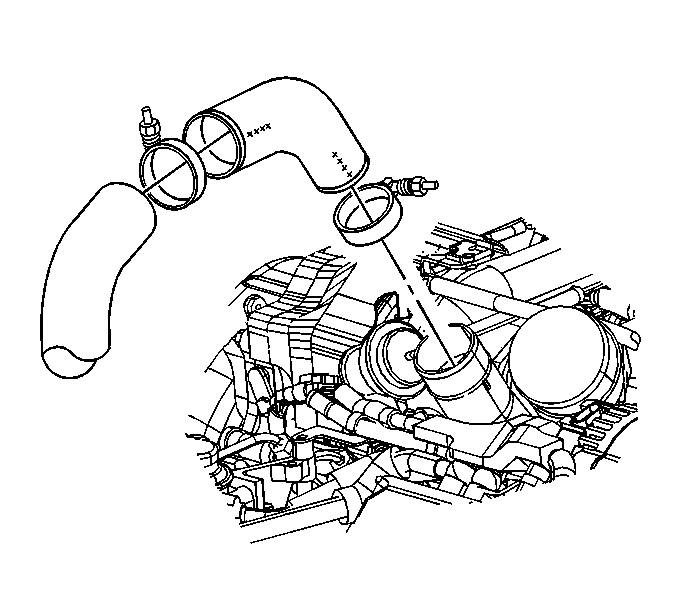
Important: Do not use a screw driver or other tool to pry the hose loose. Loosen the hose by twisting.
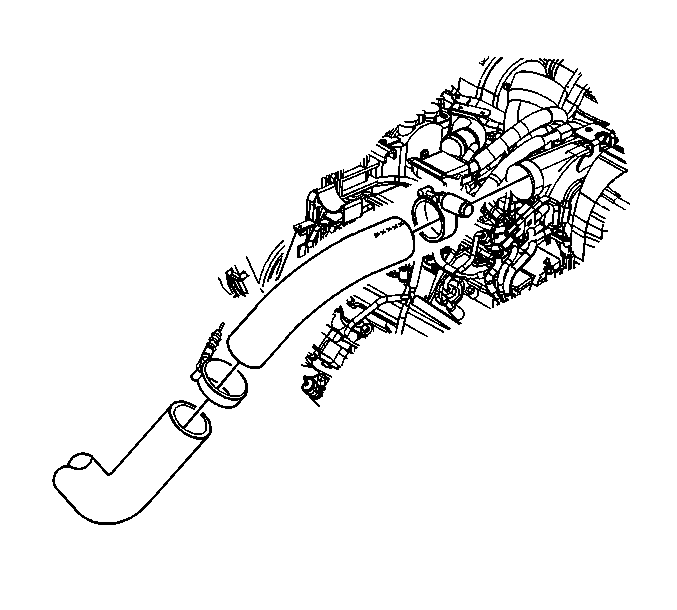
Important: Do not use a screw driver or other tool to pry the hose loose. Loosen the hose by twisting.
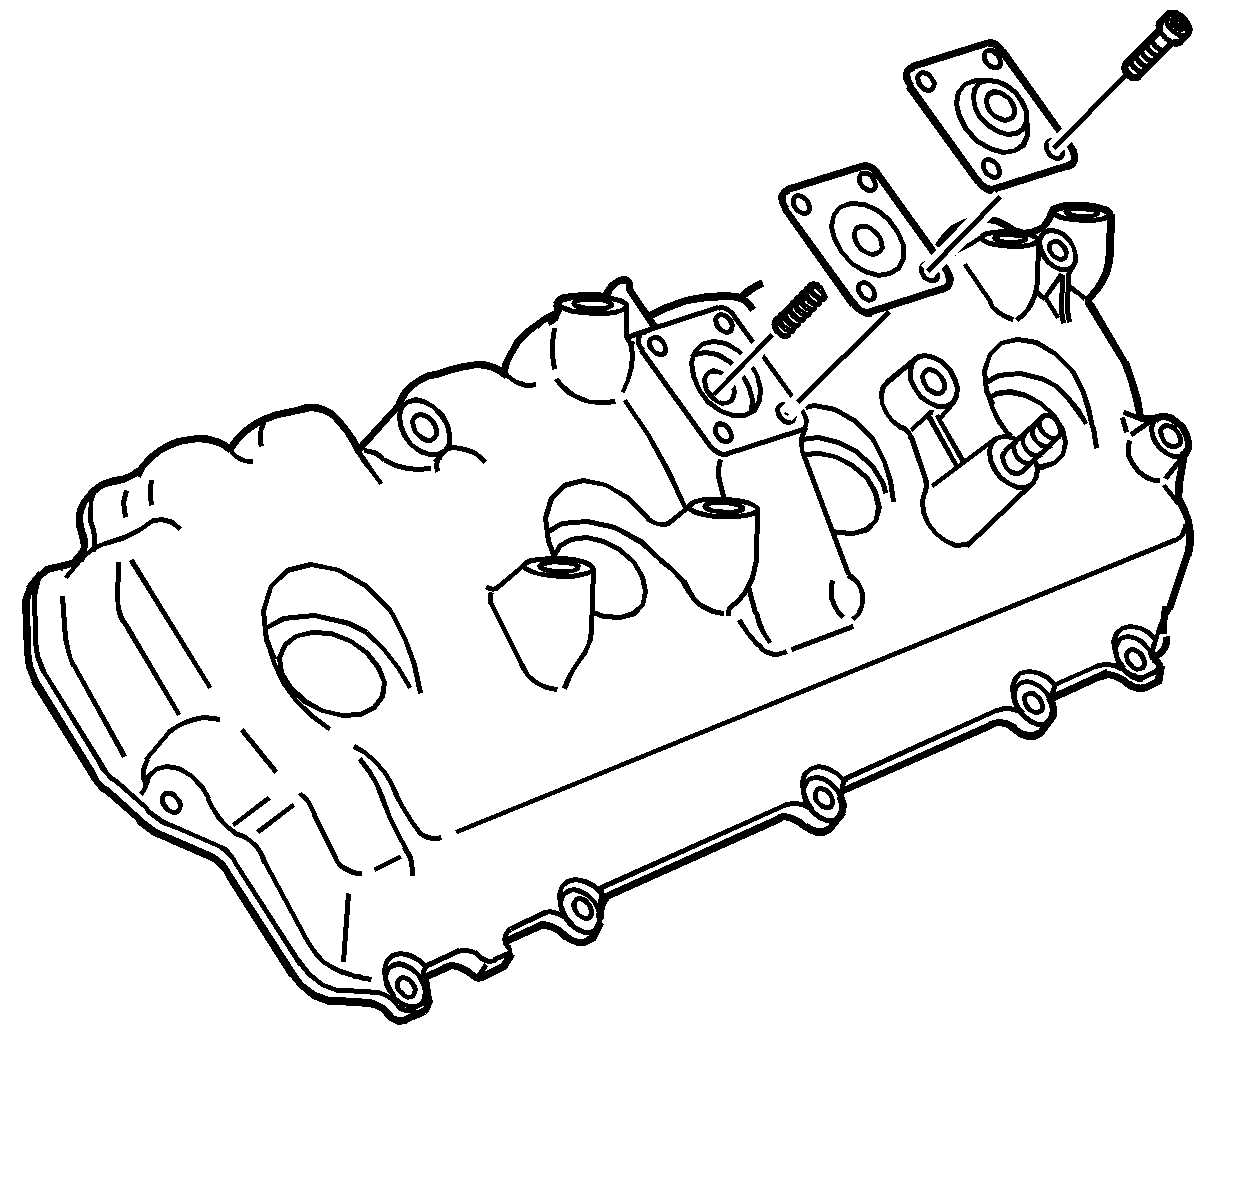
Installation Procedure
- Install the spring, diaphragm and cover to the valve rocker arm cover.
- Install the PCV diaphragm cover screws.
- Install the charged air cooler inlet duct to turbocharger cool air outlet hose to the turbocharger.
- Position the clamp as shown for proper clearance.
- Install the charged air cooler outlet duct to intake hose.
- Position the clamps as shown for proper clearance.
- Install air cleaner layer. Refer to Air Cleaner Replacement in Engine Controls.
Notice: Use the correct fastener in the correct location. Replacement fasteners must be the correct part number for that application. Fasteners requiring replacement or fasteners requiring the use of thread locking compound or sealant are identified in the service procedure. Do not use paints, lubricants, or corrosion inhibitors on fasteners or fastener joint surfaces unless specified. These coatings affect fastener torque and joint clamping force and may damage the fastener. Use the correct tightening sequence and specifications when installing fasteners in order to avoid damage to parts and systems.
Tighten
Tighten the PCV diaphragm cover screws to 4 N·m (35 lb in).
Tighten
Tighten the clamp to 6 N·m (53 lb in).
The hose is marked DUCT which connects to the charged air cooler outlet duct.
The hose is marked ENG which connects to the intake manifold duct.
Align the marks on the hose with the alignment marks on the pipe and duct.
Tighten
Tighten the clamps to 6 N·m (53 lb in).
