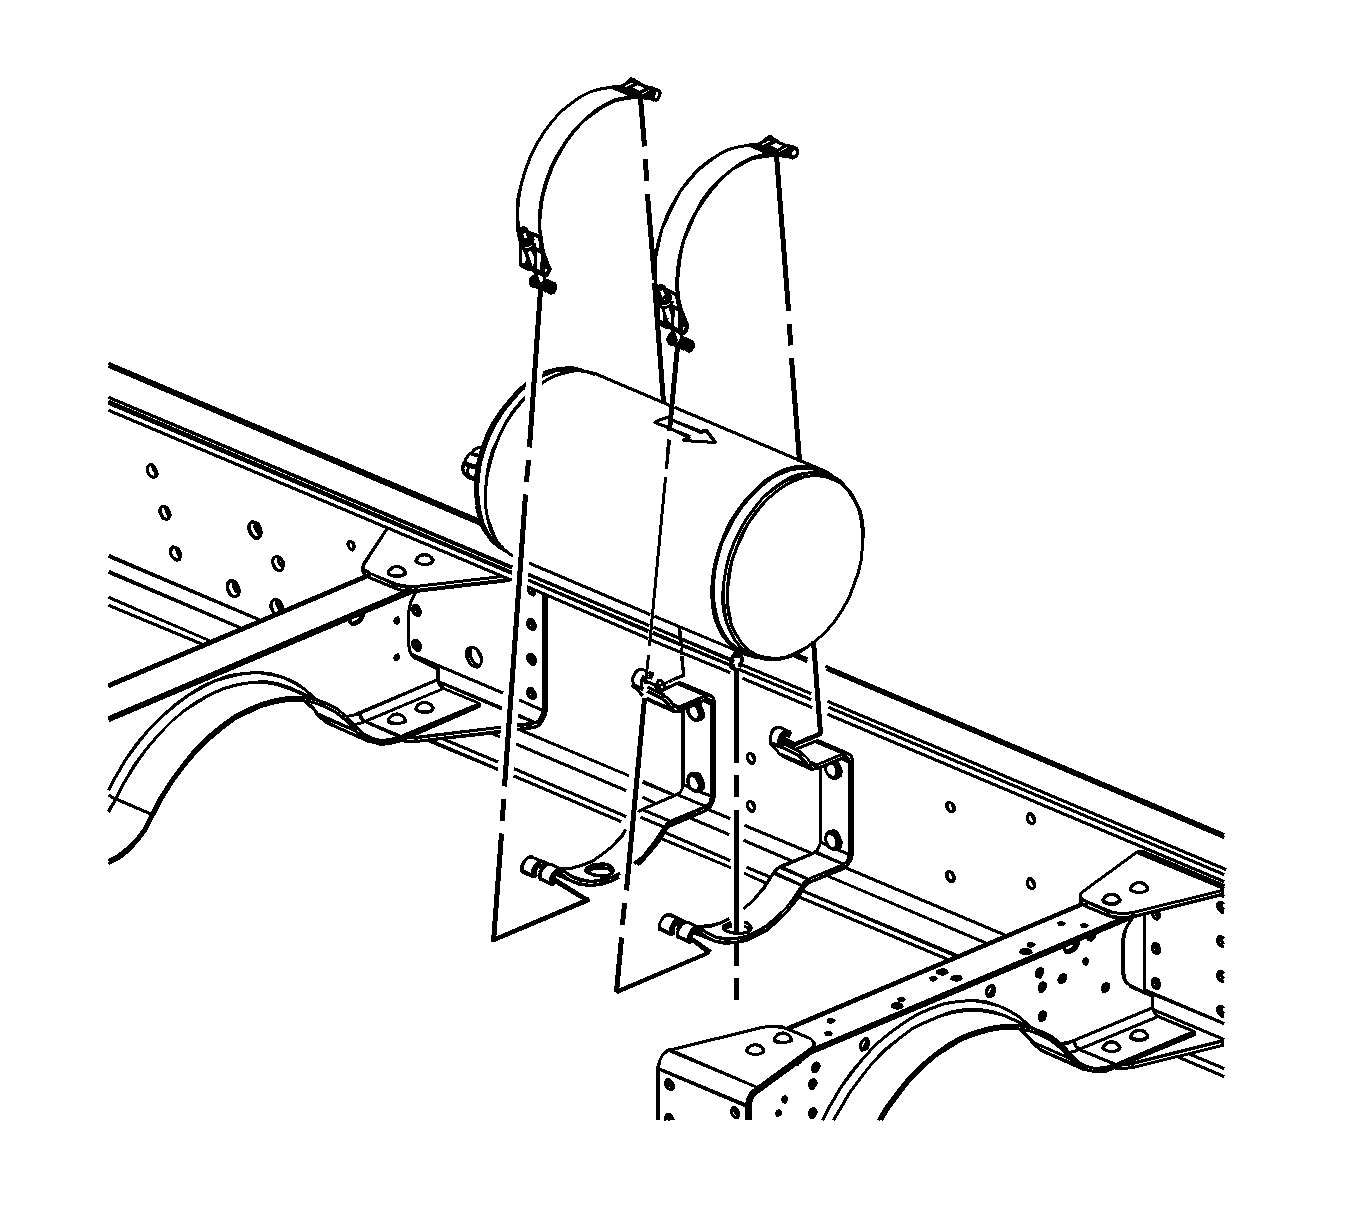
Reservoir Replacement - Rear Axle Front Unit GZK
Removal Procedure
- Apply the parking brake.
- Block the wheels.
- Drain all the reservoirs. Refer to
Air Brake Reservoir Draining
.
- Remove the air lines. Refer to
Hose and Line Replacement - Nylon Push-In Type Fitting
.

- Remove the reservoir support strap nuts.
- Remove the reservoir support straps from the reservoir supports.
- Remove the reservoir.
- Clean the air lines and the fittings with a dry cloth.
- Clean the inside reservoir with steam or hot water.
- Inspect the air lines for the following conditions:
| • | If any of these conditions are present, replace the air lines. |
- Inspect the reservoir for corrosion or damage.
- Replace the reservoir if the reservoir is weakened.
- Inspect the reservoir supports and the straps for damage.
- Replace the supports and the straps, as needed.
Installation Procedure
- Install the reservoir.
- Install the reservoir support straps to the reservoir supports.
Notice: Refer to Fastener Notice in the Preface section.

- Install the reservoir support strap nuts.
Tighten
Tighten the rear axle service reservoir support strap front unit nuts to 13 N·m (10 lb ft).
- Install the air lines. Refer to
Hose and Line Replacement - Nylon Push-In Type Fitting
.
- Start the engine.
- Charge the system air pressure to the governor cut-out point.
- Stop the engine.
- Inspect for leaks with a soap solution. Leakage is not permissible.
- Inspect for proper brake operation.
- Remove the wheel blocks.
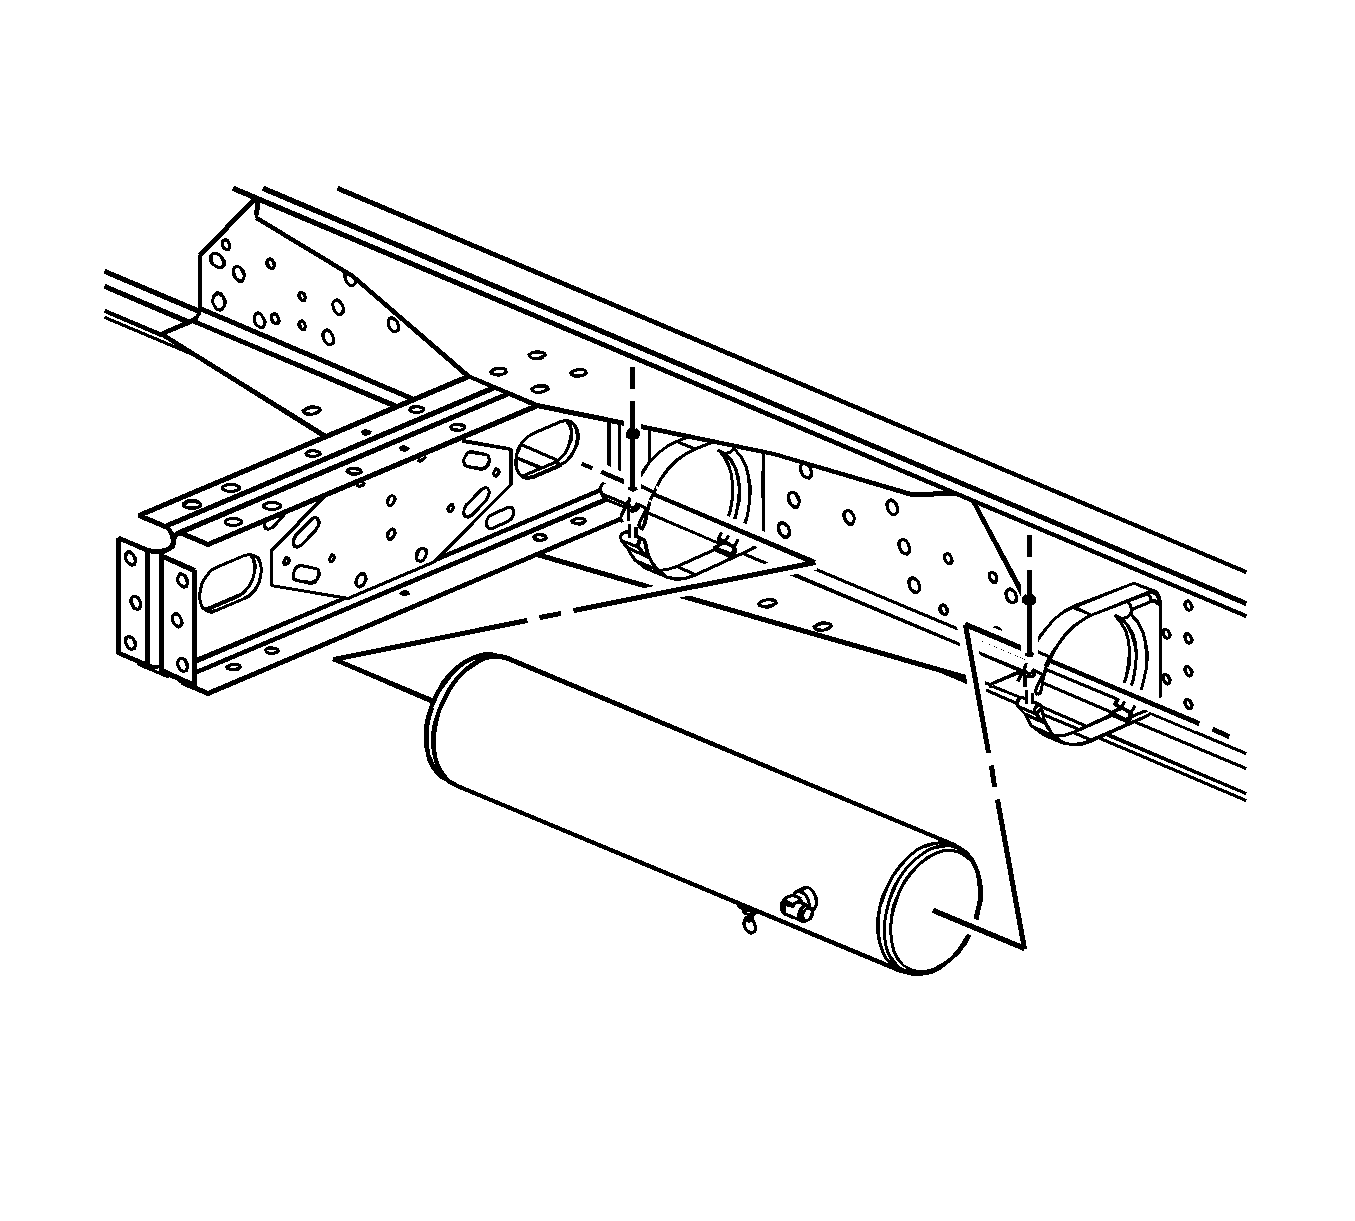
Reservoir Replacement - Rear Axle Front Unit Non-GZK
Removal Procedure
- Apply the parking brake.
- Block the wheels.
- Drain all the reservoirs. Refer to
Air Brake Reservoir Draining
.
- Remove the air lines. Refer to
Hose and Line Replacement - Nylon Push-In Type Fitting
.

- Remove the reservoir support strap nuts.
- Remove the reservoir support straps from the reservoir supports.
- Remove the reservoir.
- Clean the air lines and the fittings with a dry cloth.
- Clean the inside reservoir with steam or hot water.
- Inspect the air lines for the following conditions:
| • | If any of these conditions are present, replace the air lines. |
- Inspect the reservoir for corrosion or damage.
- Replace the reservoir if the reservoir is weakened.
- Inspect the reservoir supports and the straps for damage.
- Replace the supports and the straps, as needed.
Installation Procedure
- Install the reservoir.
- Install the reservoir support straps to the reservoir supports.
Notice: Refer to Fastener Notice in the Preface section.

- Install the reservoir support strap nuts.
Tighten
Tighten the rear axle service reservoir support strap retaining front unit nuts to 13 N·m (10 lb ft).
- Install the air lines. Refer to
Hose and Line Replacement - Nylon Push-In Type Fitting
.
- Start the engine.
- Charge the system air pressure to the governor cut-out point.
- Stop the engine.
- Inspect for leaks with a soap solution. Leakage is not permissible.
- Inspect for proper brake operation.
- Remove the wheel blocks.


