Special Tools
J 36857
Engine Lift Bracket
Removal Procedure
Notice: If the engine is damaged internally and a new engine assembly is installed
in the vehicle, ensure that all foreign material is flushed out of the cooling
system. You must also flush out the oil cooler system. Failure to rid the
oil cooler system of debris can result in engine damage.
Notice: On some vehicles it may be necessary to support the transmission as
the engine is removed to prevent the transmission from falling, causing damage
to the unit.
- Block the wheels.
- If equipped with air brakes, drain the air reservoirs. Refer to
Air Brake Reservoir Draining
.
- Remove the engine cover. Refer to
Engine Cover Replacement
.
- Disconnect the battery negative cables. Refer to
Battery Negative Cable Disconnection and Connection
.
- Remove the air cleaner. Refer to
Air Cleaner Replacement
.
- Remove the cooling layer. Refer to
Cooling Layer Removal
.
- If equipped, remove the modulator valve bracket from the crossmember. Refer to
Front Brake Pressure Modulator Valve Replacement
.
- Remove the front radiator crossmember. Refer to
Radiator Crossmember Replacement
.
- Remove the engine front crossmember. Refer to
Engine Front Crossmember Replacement
.
- Remove the radiator and heater hoses.
- Relieve the fuel system pressure. Refer to
Fuel Pressure Relief
.
- If equipped, remove the air compressor bracket. Refer to
Air Compressor Bracket Replacement - Front
.
- Remove the power steering pump. Refer to
Power Steering Pump Replacement
.
- Remove the ignition coils. Refer to
Ignition Coil Replacement
.
- Remove the oil dipstick tube. Refer to
Oil Level Indicator and Tube Removal
.
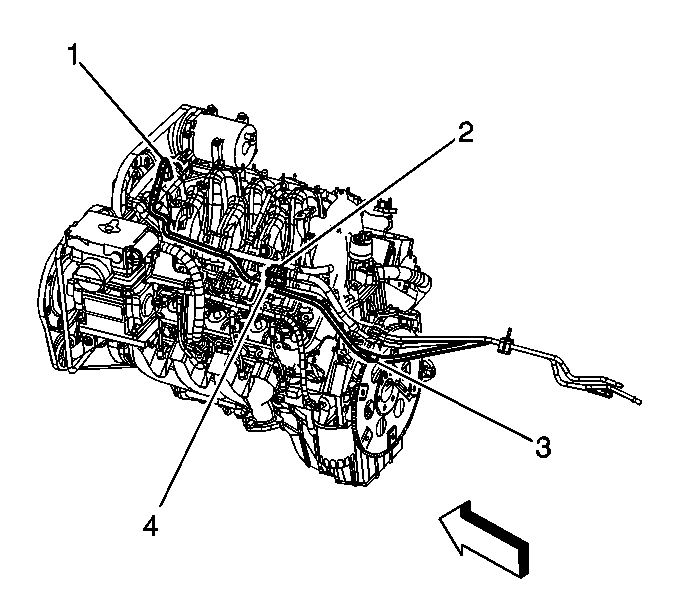
Important: Cap the fuel lines and the fittings to prevent the fuel from leaking and dirt from entering the fuel system.
- Disconnect the fuel feed (2) and fuel return (4) pipes. Refer to
Plastic Collar Quick Connect Fitting Service
.
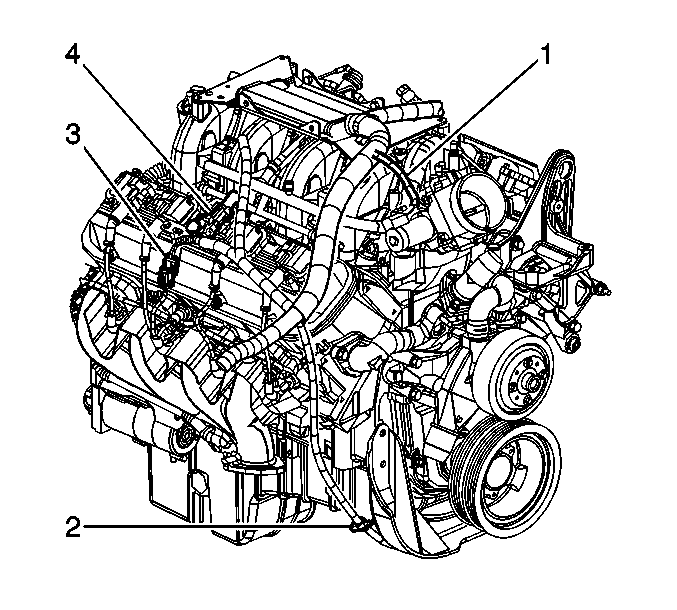
- Disconnect the throttle stepper motor electrical connector (1).
- Remove all ground straps from the engine to the frame.
- Disconnect the vacuum lines from the engine, as required.
- Remove the generator mounting bracket. Refer to
Generator Bracket Replacement
.
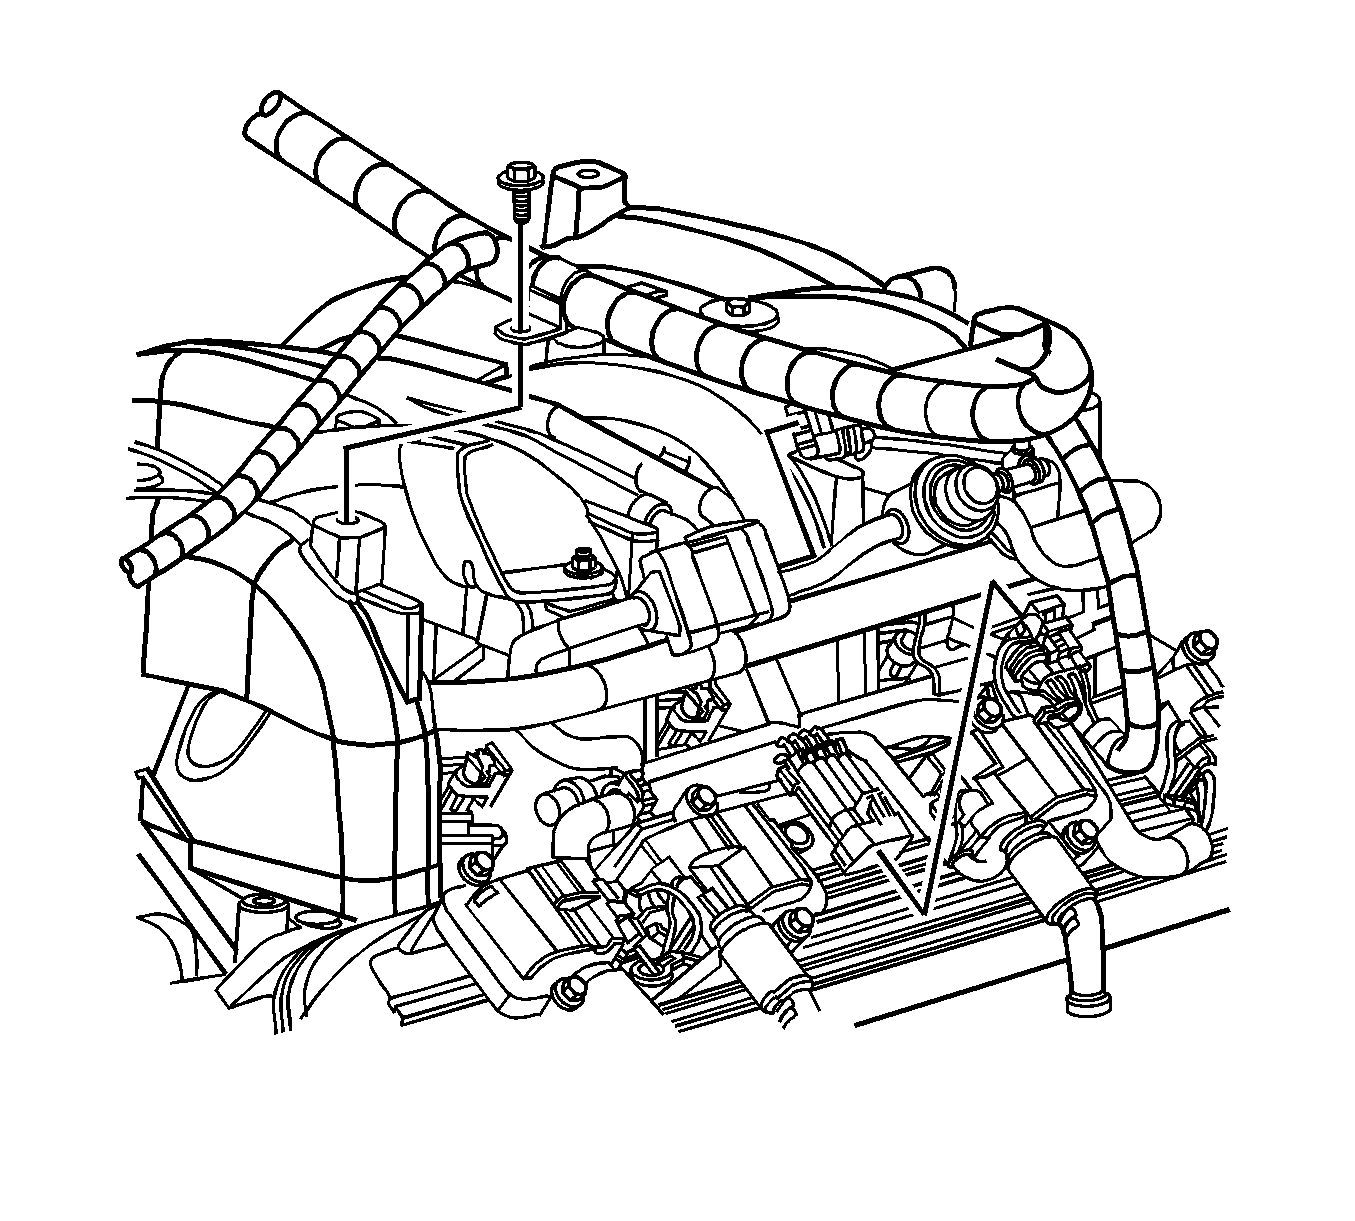
- Remove the engine electrical harness and tie out of the way.
- Raise and suitably support the vehicle with safety stands so that the transmission jack is able to clear the tie rod. Refer to
Lifting and Jacking the Vehicle
.
- Remove the power steering pump leaving the hoses connected. Refer to
Power Steering Pump Replacement
.
- Remove the catalytic converter. Refer to
Catalytic Converter Replacement
.
- Remove the engine oil cooler lines from the engine block. Refer to
Engine Oil Cooler Hose/Pipe Replacement
.
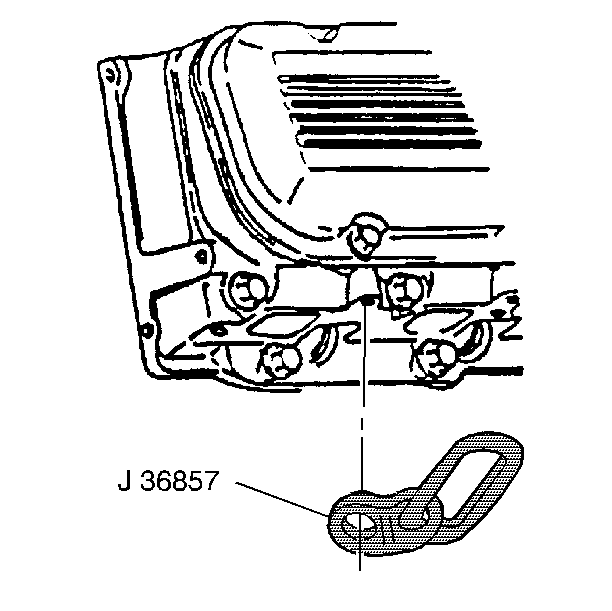
- Attach the
J 36857
to the front and rear of the right cylinder
head and to the front and rear of the left front cylinder head.
Notice: Refer to Fastener Notice in the Preface section.
- Install the attaching bolts and washers. Use GM P/N 9428217 with GM P/N 15650963.
Tighten
Tighten the lift bracket bolts to 40 N·m (30 lb ft).
- Install a short piece of chain to both rear installed
J 36857
tools.
- Install a short piece of chain connecting both front installed
J 36857
tools.
- Remove the crossmember bolts and nuts.
- Remove the propeller shaft. Refer to
One-Piece Rear Propeller Shaft Replacement
,
Two-Piece Rear Propeller Shaft Replacement
or
Three-Piece Rear Propeller Shaft Replacement
.

- If equipped, remove the parking brake cable from the brake drum.
- If equipped, remove the transmission support. Refer to
Transmission Mount Replacement
.
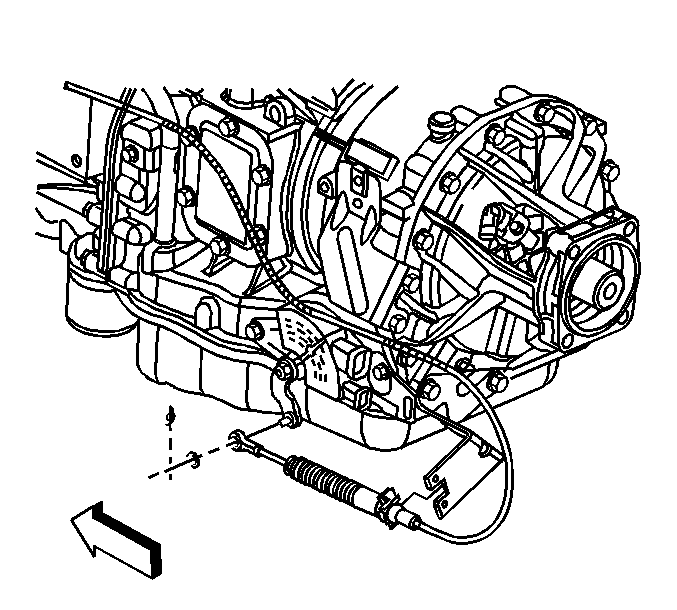
- If equipped with an automatic transmission, perform steps 35-47.
- Drain the transmission oil. Refer to
Automatic Transmission Fluid and Filter Replacement
.
- Remove the transmission oil level indicator and the oil level indicator tube. Refer to
Transmission Fluid Filler Tube and Seal Replacement
.
- If equipped, remove the transmission heat shield fasteners and the heat shield from the transmission.
- Remove the starter. Refer to
Starter Motor Replacement
.
- If equipped, remove the oil cooler lines from the transmission. Refer to
Transmission Fluid Auxiliary Cooler Line Replacement
.
- If equipped, remove the shift cable from the transmission.
- Remove the wiring harness and disconnect the transmission electrical connectors.
- If equipped, remove the flywheel housing access cover.
- Mark the flywheel and torque converter or the flex plate relationship for reassembly purposes.
- Turn the flex plate using a pry bar or the engine harmonic balancer, in order to align the torque converter or flex plate bolts with the access hole or starter hole.
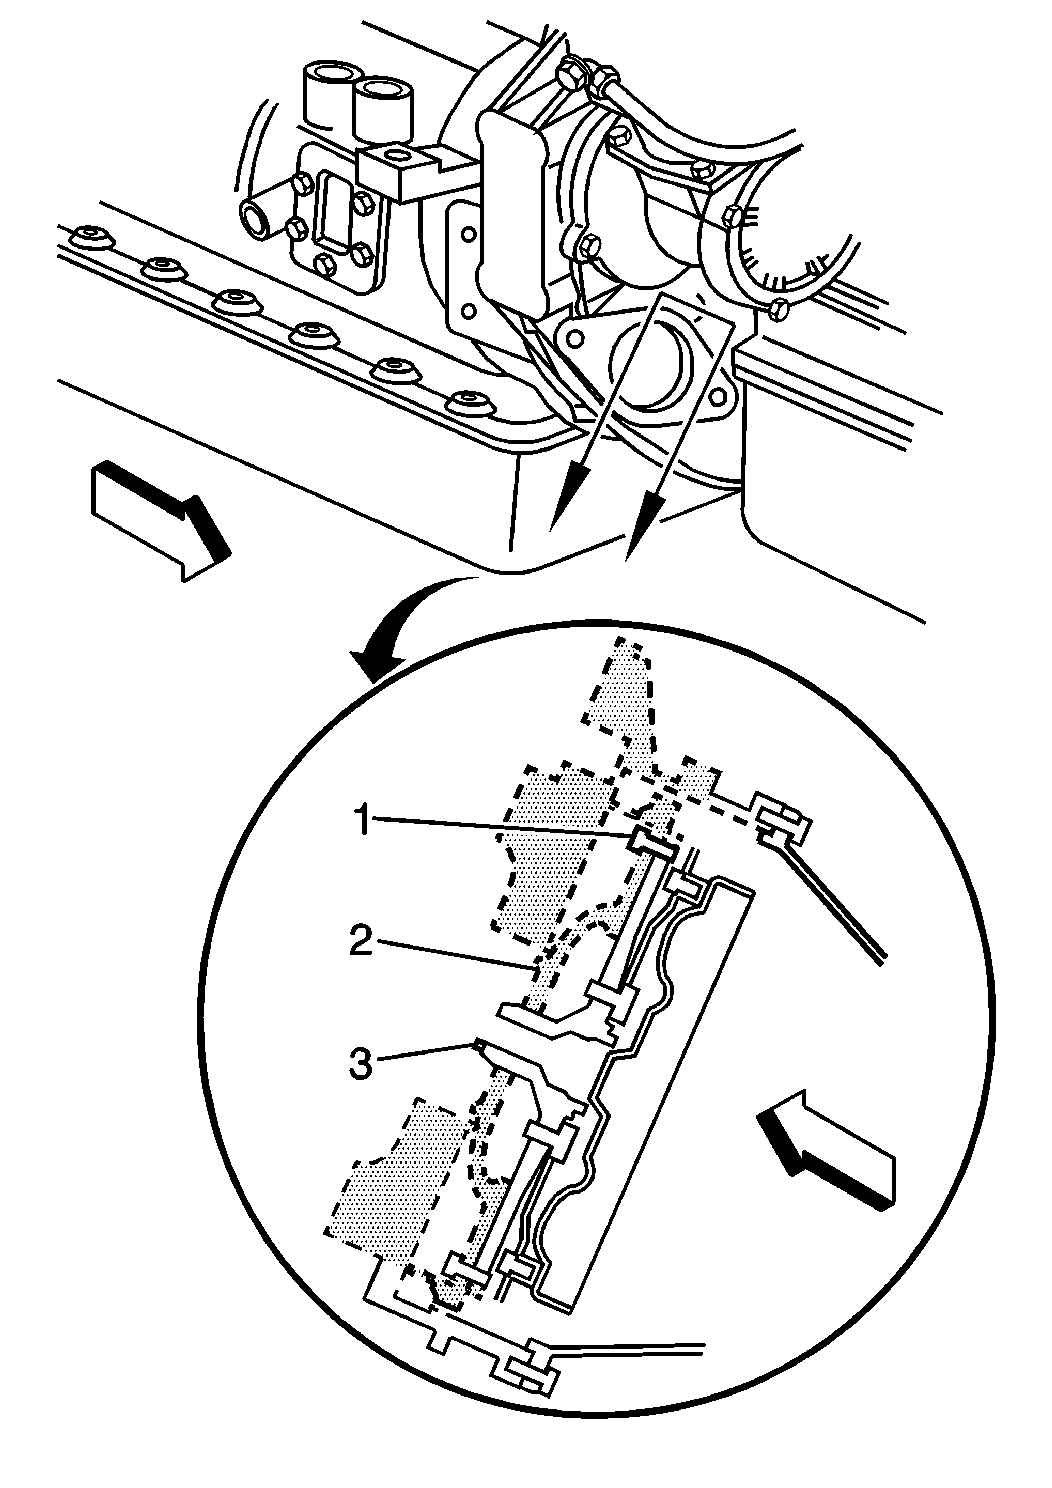
- Remove the flex plate (3) to flywheel (2) bolts (1) or if equipped, the torque converter
bolts.
- If equipped, remove the fuel line from the fuel line bracket.
- If equipped, remove the fuel line retainer bracket from the transmission.
- If equipped with a manual transmission perform the following:
| 48.1. | Remove all electrical connectors from the transmission. |
| 48.2. | Remove all electrical harness retainers from the transmission. |
| 48.6. | If equipped, remove the fuel line retainers from the transmission. |
- Using a transmission jack, support the rear of the transmission.
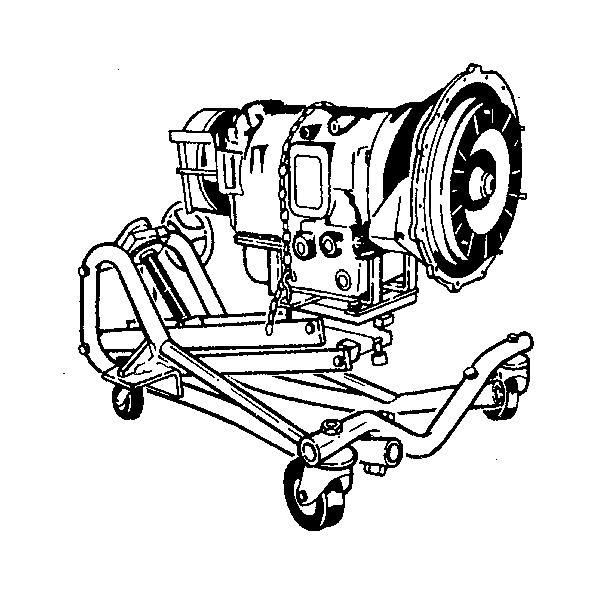
Important: Support the transmission with a transmission jack that can support a load of at least 349 kg (750 lb).
- Install a safety chain to secure the transmission to the transmission jack.
- Using a suitable overhead hoist, attach a load leveling devise to the front engine lifting eye.
- Remove the rear engine mounting bolts. Refer to
Engine Rear Mount Bracket Replacement
.
- Remove the front engine mounting bolts. Refer to
Engine Front Mount Bracket Replacement
.
- Ensure the wiring harness does not become hung up on the engine.
- Pull the engine forward far enough to connect to the rear engine lift eye.
- Attach the load leveling device to the rear engine lift eye.
- Remove the transmission jack.
- Remove the engine and transmission from the vehicle.
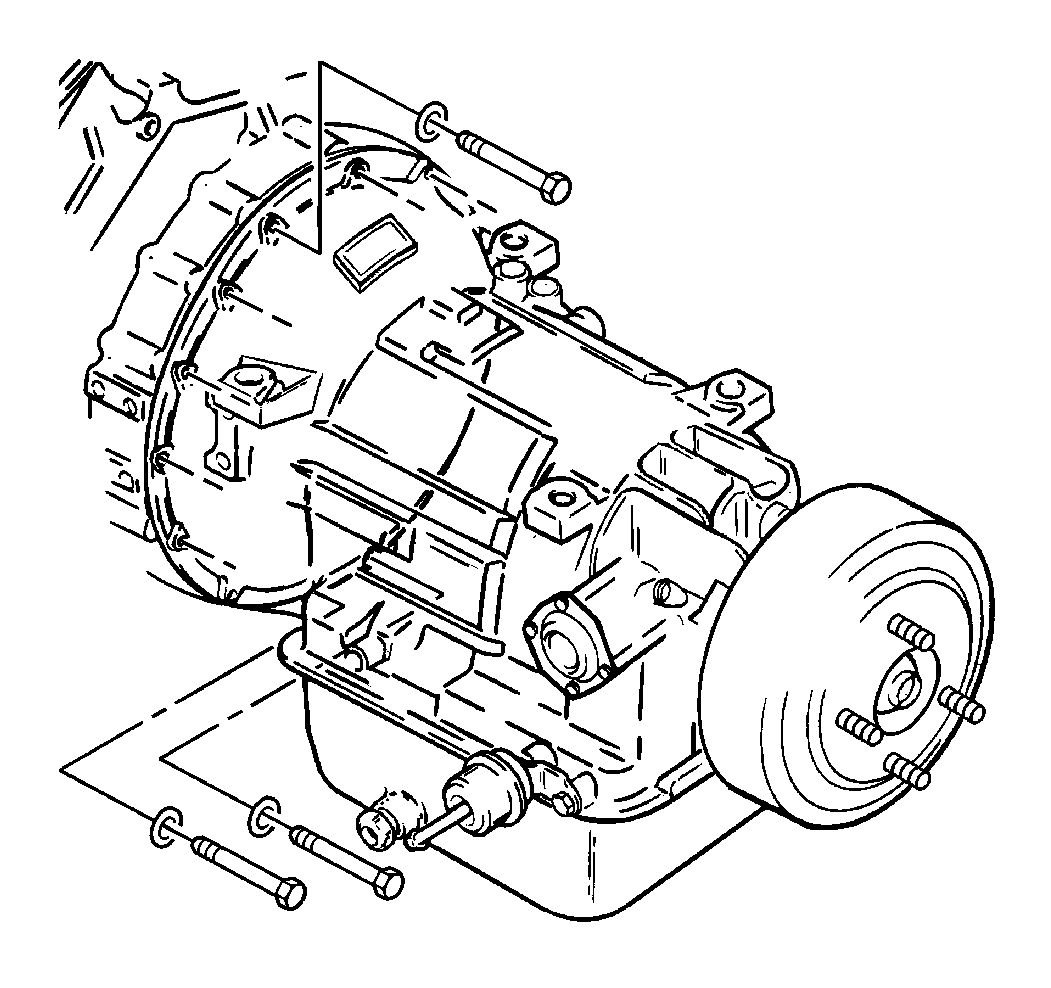
- If equipped with an automatic transmission, perform the following:
| 59.1. | Attach the transmission jack. |
| 59.2. | Remove the bolts securing the transmission to the engine. |
| 59.3. | Remove the transmission from the engine by sliding the transmission rearward. |
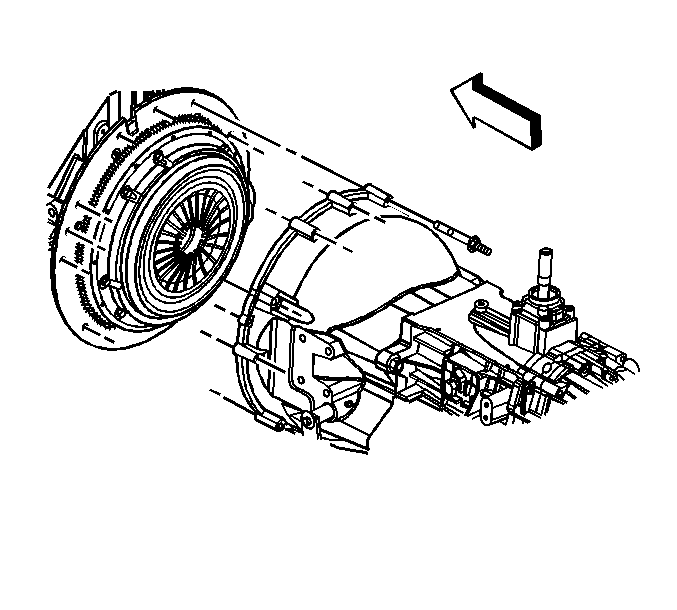
- If equipped with a manual transmission, perform the following:
| 60.1. | Attach the transmission jack. |
| 60.2. | Remove the transmission apron housing bolts. |
| 60.3. | Move the transmission straight back from the engine. Keep the mainshaft in alignment with the clutch disc hub. |
| 60.4. | When the transmission is free from the engine, lower and remove the transmission. |
Installation Procedure

- Attach
J 36857
to the rear of the right cylinder head and
to the front of the left cylinder head.
- Install the attaching bolt and washer. Use GM P/N 9428217 with GM P/N 15650963.
Tighten
Tighten the lift bracket bolts to 40 N·m (30 lb ft).
- Install a short piece of chain between the
J 36857
left brackets.
- If equipped with a manual transmission, perform steps 5-12.
- Shift the transmission into high gear.
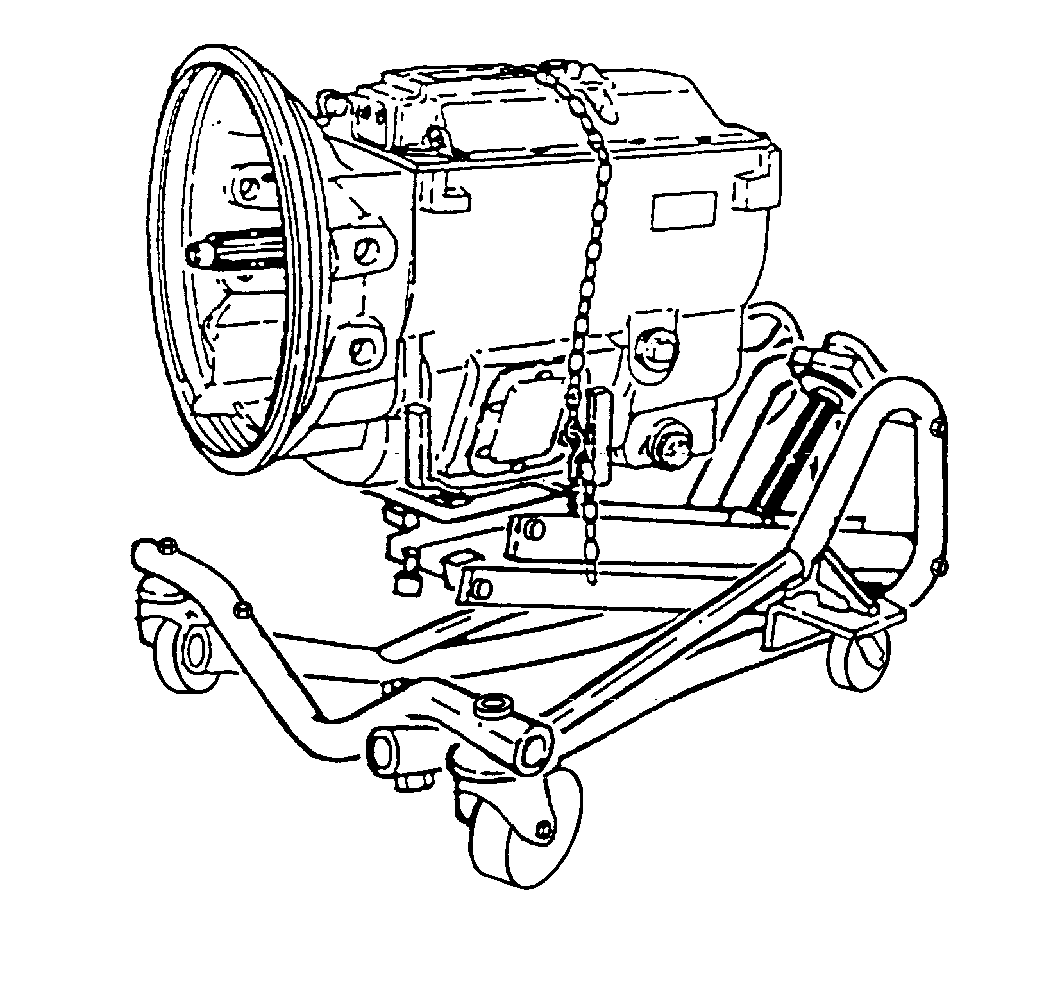
- With the transmission mounted to suitable dolly, move the transmission into position under the vehicle.
- Rotate the output shaft to align the main drive gear shaft with the clutch disc hub.

- Move the transmission forward, guiding the main drive gear shaft into the clutch disc hub.
- Install the transmission.
| • | Avoid springing the clutch when installing the transmission. |
| • | Do not allow the transmission to drop or hang unsupported in the splined hub of the clutch disc. |
- Install the transmission apron housing bolts.
Tighten
Tighten the transmission apron housing bolts to 50 N·m (37 lb ft).
- If equipped, install the exhaust manifold front pipe bracket and transmission bolts.
- Remove the transmission jack.

- If equipped with an automatic transmission, perform the following:
| 13.1. | Reattach the transmission jack. |
| 13.2. | Raise the transmission to the engine. |
| 13.3. | Install the transmission to the engine while aligning the torque converter with the engine flex plate. |
| 13.4. | Install the transmission to the engine bolts. |
Tighten
Tighten the transmission to engine bolts to 50 N·m (37 lb ft).
| 13.5. | Remove the transmission jack. |
- Position the engine and transmission into the vehicle as far as possible.

- Install the transmission jack.
Important: Support the transmission with a transmission jack that can support a load of at least 349 kg (750 lb).
- Install a safety chain to secure the transmission to the transmission jack.
- Remove the leveling device from the rear engine lift eye only.
- Install the engine and transmission to the engine mounts.
- Install the left and right front engine mount bolts. Refer to
Engine Front Mount Bracket Replacement
.
- Install the rear transmission mount bolts. Refer to
Engine Rear Mount Bracket Replacement
.
- If equipped, install the transmission rear support. Refer to
Transmission Mount Replacement
.
- If equipped with an automatic transmission, perform the following:
| 22.1. | Turn the engine flex plate using a pry bar or engine at the harmonic balancer in order to install the torque converter to the flywheel bolts. |
| 22.2. | When reusing the torque converter bolts, clean the bolts and apply LOCTITE™. |
| 22.3. | Install the torque converter bolts. |
Tighten
Tighten the torque converter to flywheel bolts to 60 N·m (44 lb ft).
| 22.4. | If equipped, install the flywheel housing access cover. |
- Remove the overhead hoist.
- Remove the transmission jack.
- Install the starter assembly. Refer to
Starter Motor Replacement
.

- If equipped, install the parking brake cable to the park brake drum.
- If equipped, install the oil cooler lines to the transmission. Refer to
Transmission Fluid Auxiliary Cooler Line Replacement
.
- Install the oil level indicator tube. Refer to
Transmission Fluid Filler Tube and Seal Replacement
.
- Connect the transmission electrical connectors and install the wiring harness to the transmission.
- If equipped, install the fuel line brackets.
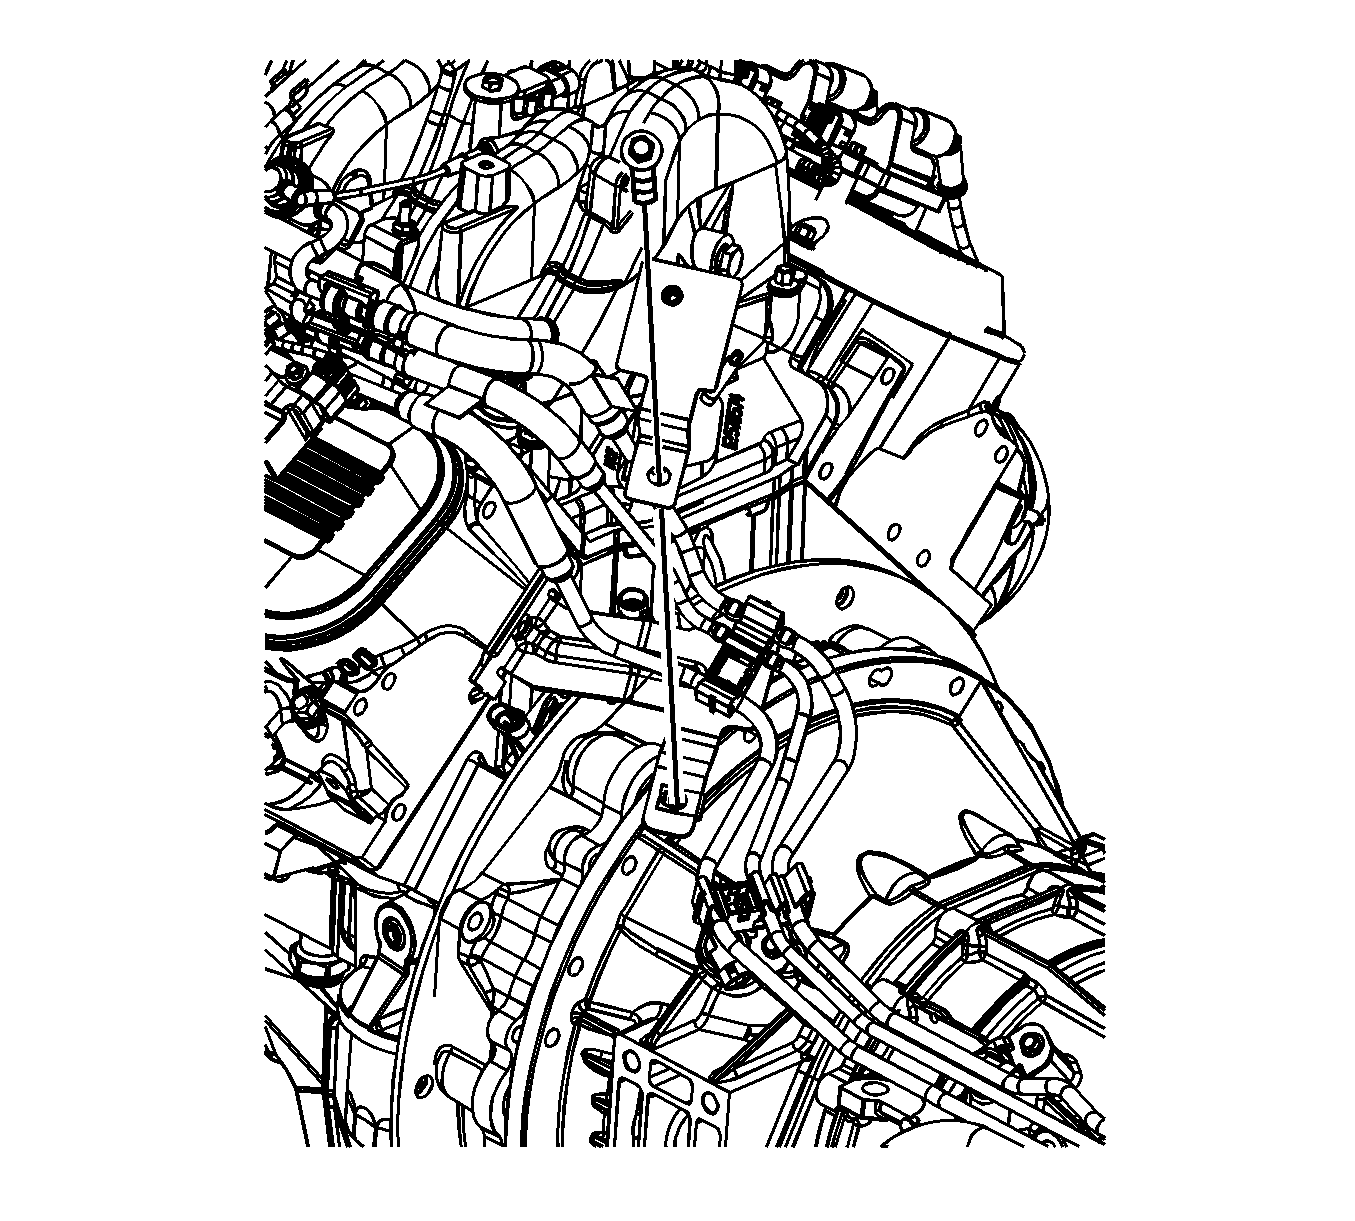
- If equipped, install the fuel lines to the fuel line brackets.
- Install the propeller shaft to the transmission. Refer to
One-Piece Rear Propeller Shaft Replacement
,
Two-Piece Rear Propeller Shaft Replacement
or
Three-Piece Rear Propeller Shaft Replacement
.

- If equipped, install the shift cable to the transmission.
- If equipped, install the transmission heat shield with 2 bolts.
Tighten
Tighten the transmission heat shield bolts to 15 N·m (11 lb ft).
- Lower the vehicle, if required.
- Install the front engine crossmember. Refer to
Engine Front Crossmember Replacement
.
- Install the radiator crossmember. Refer to
Radiator Crossmember Replacement
.
- If equipped, install the air compressor bracket. Refer to
Air Compressor Bracket Replacement - Front
.
- If equipped, install the air compressor and lines. Refer to
Air Compressor Replacement
.
- Install the engine oil cooler lines to the engine block. Refer to
Engine Oil Cooler Hose/Pipe Replacement
.
- Install the catalytic converter. Refer to
Catalytic Converter Replacement
.
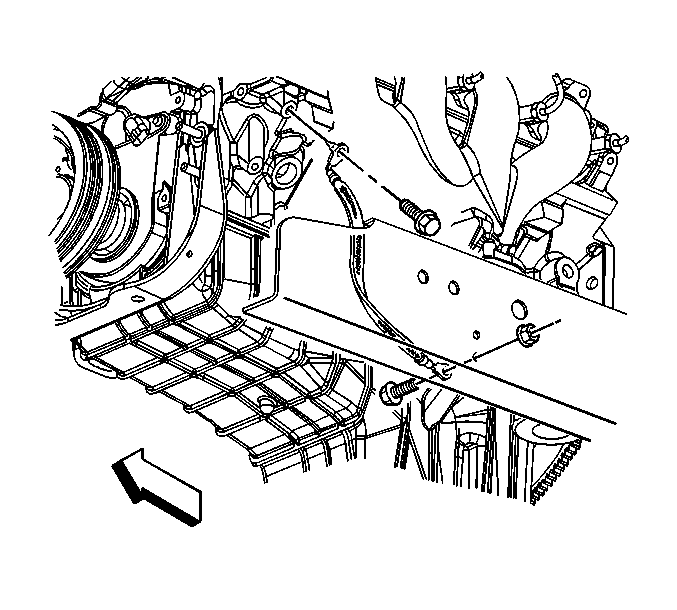
- Install the ground strap bolt at the engine block.
Tighten
Tighten the ground bolt to 50 N·m (37 lb ft).
- Install the power steering pump. Refer to
Power Steering Pump Replacement
.
- Lower the vehicle, if required.
- Position the engine electrical harness.
- Install the generator mounting bracket. Refer to
Generator Bracket Replacement
.
- Connect the vacuum lines to the engine, as required.

- Connect the throttle stepper motor electrical connector (1).

- Connect the fuel feed (2) and fuel return (4) pipes.
- Install the ignition coils. Refer to
Ignition Coil Replacement
.
- Install the oil level indicator and tube. Refer to
Oil Level Indicator and Tube Installation
.
- Install the cooling layer. Refer to
Cooling Layer Installation
.
- Install the air cleaner. Refer to
Air Cleaner Replacement
.
- Connect the negative battery cable. Refer to
Battery Negative Cable Disconnection and Connection
.
- Before starting a new engine or one that has been repaired, complete the following procedure:
| 55.1. | Fill the engine with the proper quantity and grade of oil. |
| 55.2. | Add engine oil supplement GM P/N 1052367 (Canadian P/N 992869) or equivalent to the engine oil. |
| 55.3. | Remove the fuel pump fuse and disconnect the coil harness connectors, then crank the engine until oil pressure is present. |
| 55.4. | Crank the engine several times. Listen for any unusual noises or evidence that any of the parts are binding. |
| 55.5. | Install the fuel pump fuse and connect the coil harness connectors and start the engine and listen for unusual noises. |
| 55.6. | Check the vehicle oil pressure gage or light and confirm that the engine has acceptable oil pressure. If necessary install an oil pressure gage and measure the oil pressure. |
| 55.7. | Run the engine at about 1,000 RPM until the engine has reached normal operating temperature. |
| 55.8. | Inspect for oil and or coolant leaks while the engine is running. |
| 55.9. | Stop the engine and perform a final inspection for the proper engine oil and coolant levels. |
| 55.10. | The final step is to perform the crankshaft position (CKP) sensor variation learn procedure |


