For 1990-2009 cars only
Perform the following procedure after all of the repairs are completed and all of the suspension fasteners have been tightened to the specified torque values.
- Place the vehicle on a level floor area. Free and center all of the suspension joints by slowly moving the vehicle back and forth several times without using the brakes.
- Block the front wheels. Ensure that the vehicle brakes are released.
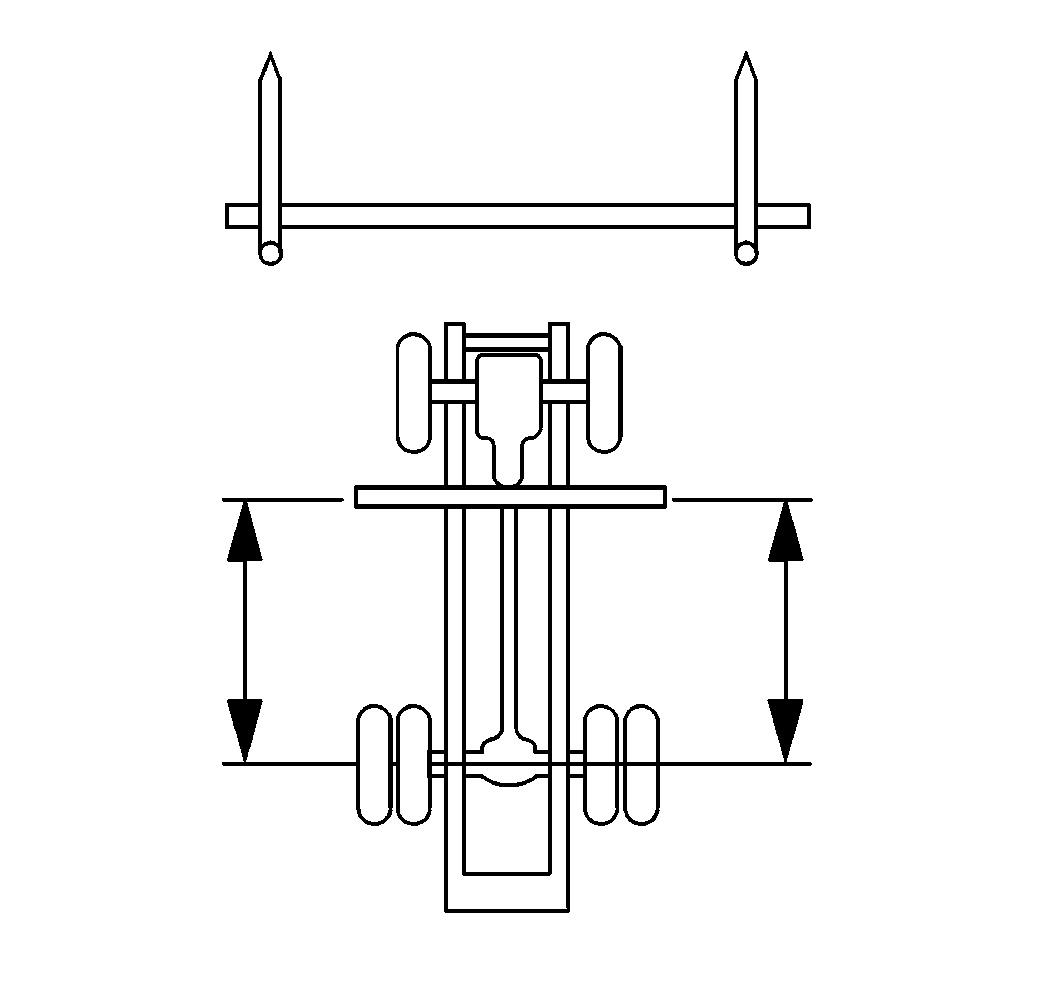
- Securely clamp a 9 ft (3 m) piece of straight bar stock or angle iron across the frame using C-clamps.
- Use a square in order to align a straight edge to the frame.
- Use a trammel bar or its equivalent in order to measure from a straight edge to the center line of the drive axle on both sides of the vehicle.
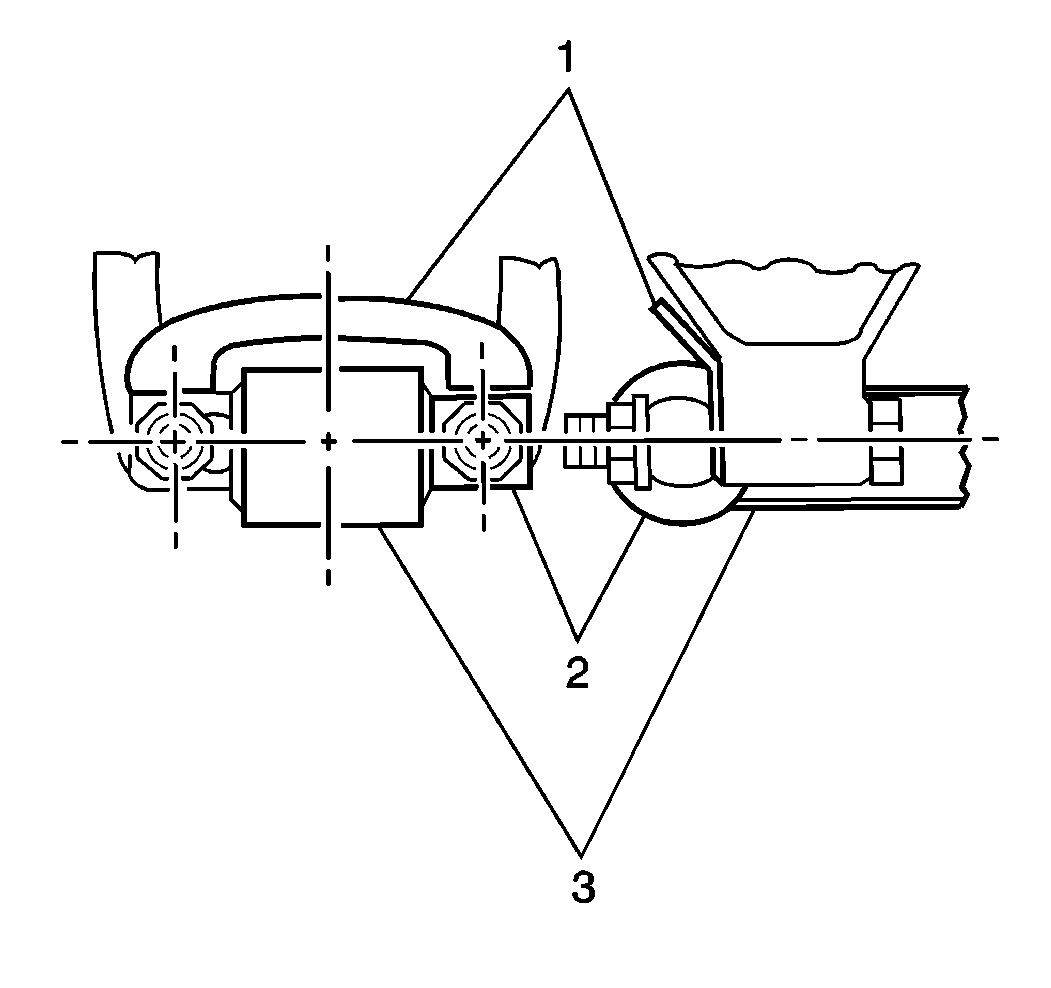
- Mount the torque rod bar pin (2) adjacent to the forward face of the spring hanger legs. Do not use more than 4 shims (1) or 6.0 mm (0.25 in) total thickness.
- Install the torque rod bar pin locknuts. Do not torque the locknuts to specification.
- Follow the alignment of the drive axle and move the vehicle back and forth several times prior to removing the straight edge from the frame.
- Reinspect the alignment in order to confirm the adjustments.
- Tighten the torque bar rod pin locknuts.
- Tighten the rebound bolt locknuts.

Select a location as far forward of the drive axle as possible.
| 5.1. | If both sides measure within 4.8 mm (0.1875 in) of being equal, alignment of the rear axle is acceptable. |
| 5.2. | If both side measurements differ by more than 4.8 mm (0.1875 in), complete the following steps: |
| 5.2.1. | Loosen the rebound bolt locknut. |
| 5.2.2. | Adjust the rear drive axle by loosening the torque rod bar pin locknuts on the spring hanger and add drop-in shims. |

Caution: Refer to Fastener Caution in the Preface section.
Tighten
Tighten the locknuts to 241 N·m (178 lb ft).
Tighten
Tighten the locknuts to 82 N·m (61 lb ft).
