For 1990-2009 cars only
Removal Procedure
- Raise and suitably support the vehicle. Refer to Lifting and Jacking the Vehicle.
- Position a suitable container under the oil drain plug in order to catch the transmission fluid.
- Clean the area around the drain and fill plugs.
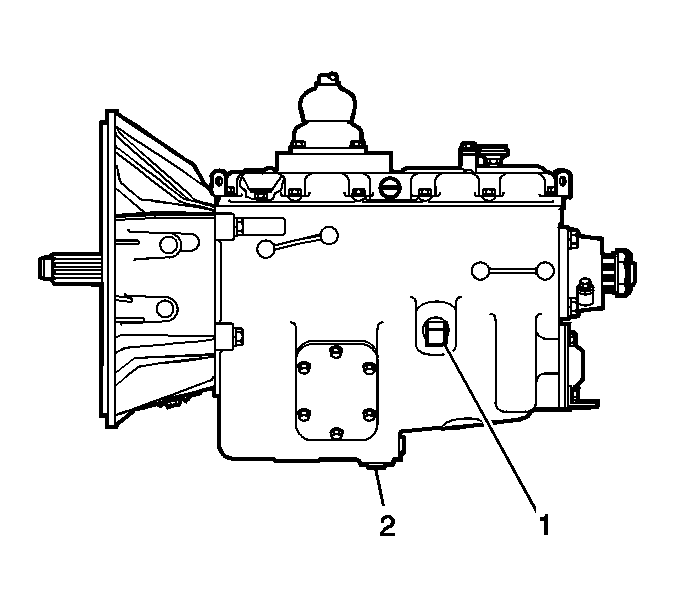
- If equipped with a Eaton® Fuller® FS series transmission, remove the oil fill plug (1).
- Remove the oil drain plug (2).
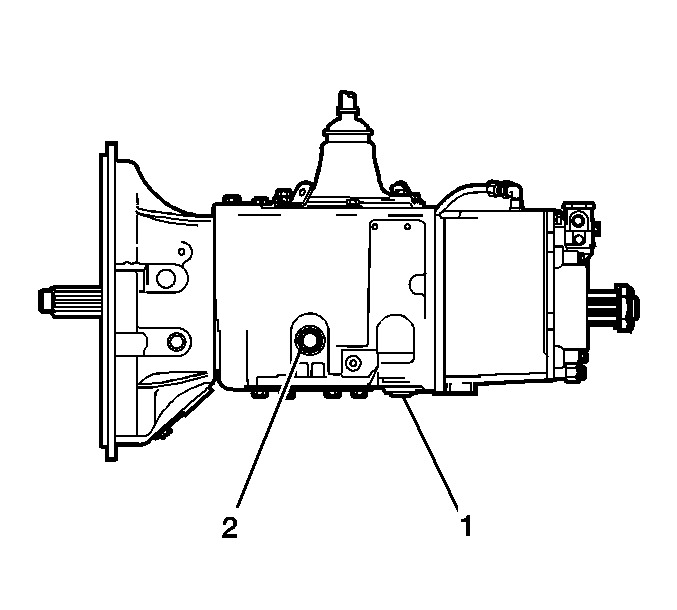
- If equipped with a Eaton® Fuller® RT series transmission, remove the oil fill plug (2).
- Remove the oil drain plug (1).
- If equipped with a Spicer® ES series transmission, remove the oil fill plug.
- Remove the oil drain plug.


Installation Procedure
- Ensure that the fluid is completely drained.
- Wipe the clean area around the drain plug.
- Install the oil drain plug.
- Tighten the Eaton® Fuller® transmission oil drain plug to 61 N·m (45 lb ft).
- Tighten the Spicer® transmission oil drain plug to 45 N·m (33 lb ft).
- Remove the drain pan.
- Fill the transmission to the correct level, using the correct type fluid, refer to Lubrication Specifications.
- If equipped with a Spicer® ES series transmission, install the oil fill plug.
- If equipped with a Eaton® Fuller® RT series transmission, install the oil fill plug (2).
- If equipped with a Eaton® Fuller® FS series transmission, install the oil fill plug (1).
- Lower the vehicle.

Caution: Refer to Fastener Caution in the Preface section.
Tighten
Tighten
Tighten the Spicer® ES series transmission oil fill plug to 45 N·m (33 lb ft).

Tighten
Tighten the Eaton® Fuller® transmission oil fill plug to 82 N·m (60 lb ft).

Tighten
Tighten the Eaton® Fuller® transmission oil fill plug to 82 N·m (60 lb ft).
