Special Tools
| • | J 8037 Piston Ring Compressor
|
| • | J 8087 Cylinder Bore Gage
|
Piston Selection
Note: The coating on the piston allows for an interference fit between the cylinder and the bore. The piston diameter can NOT be measured accurately because the piston coating is not a consistent thickness. DO NOT measure the piston
diameter.
To select the correct piston for installation, the cylinder bore must be measured. If the cylinder bore diameter is within service specifications, install the original piston/connecting rod assembly or a new, standard size piston/connecting
rod assembly. A used piston/connecting rod assembly may be installed if, after cleaning and inspection, the piston is not damaged. If the cylinder bore is NOT within specifications, the cylinder must be resized to accept a new, oversized piston.
For proper piston fit, the engine block cylinder bores should not have excessive wear or taper.
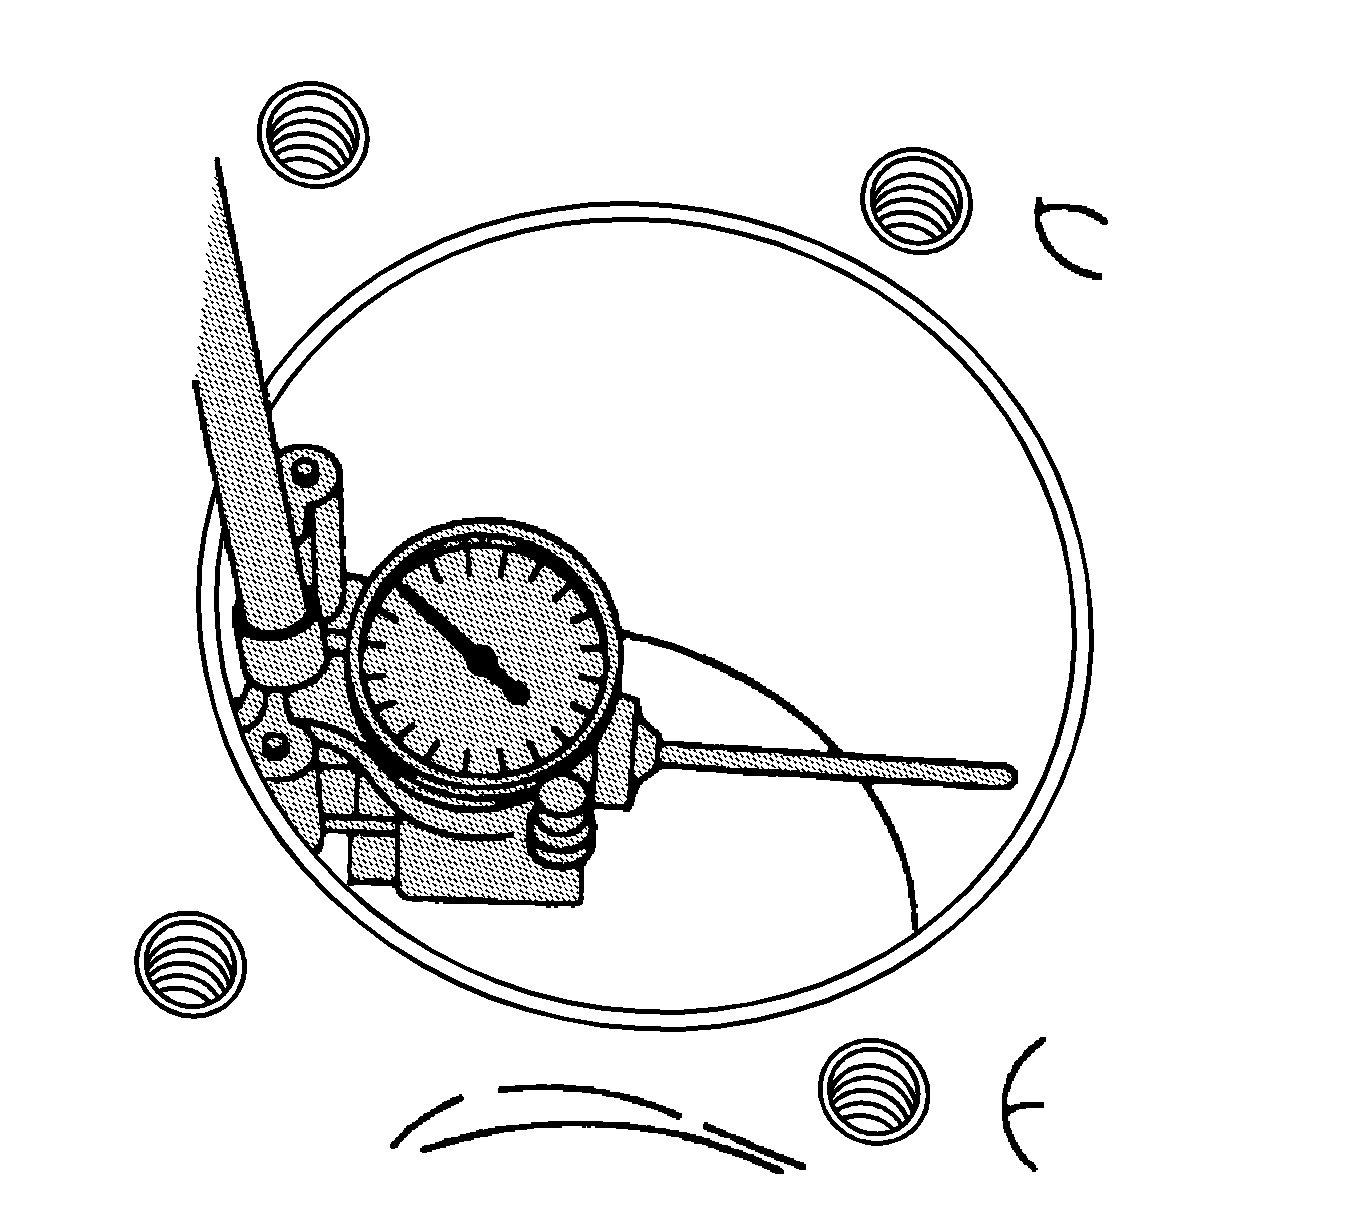
- Inspect the engine block cylinder bore. Refer to
Engine Block Cleaning and Inspection.
- Inspect the piston/connecting rod assembly for damage. Refer to
Piston, Connecting Rod, and Bearing Cleaning and Inspection.
- Use the
J 8087 gage
in order to measure the cylinder bore diameter. Refer to
Engine Block Cleaning and Inspection.
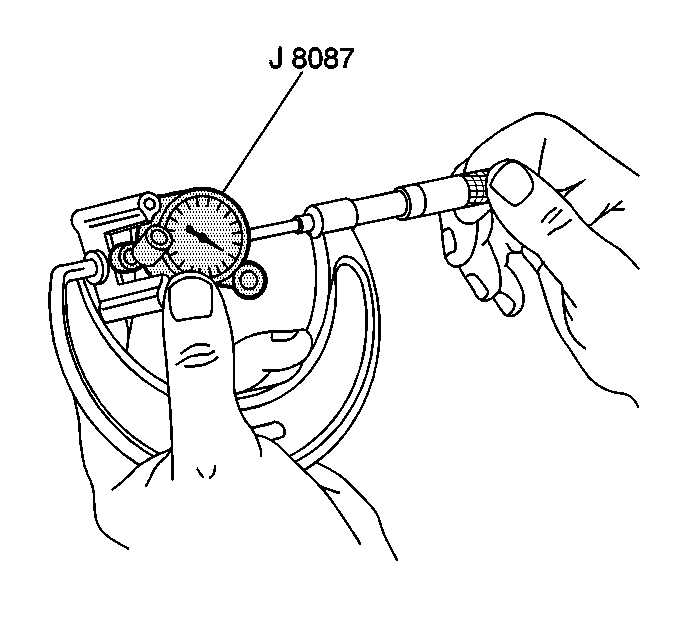
- Measure the
J 8087 gage
with a micrometer.
Record the reading.
- Compare the cylinder bore measurement to the specifications. Refer to
Engine Mechanical Specifications.
| 5.1. | If the cylinder bore is within specifications, select the original piston or a new, original size piston. |
| 5.2. | If the cylinder bore is not within specifications, select the next oversized piston/connecting rod assembly, then bore and hone the cylinder bore to fit the oversize piston. |
Piston Installation
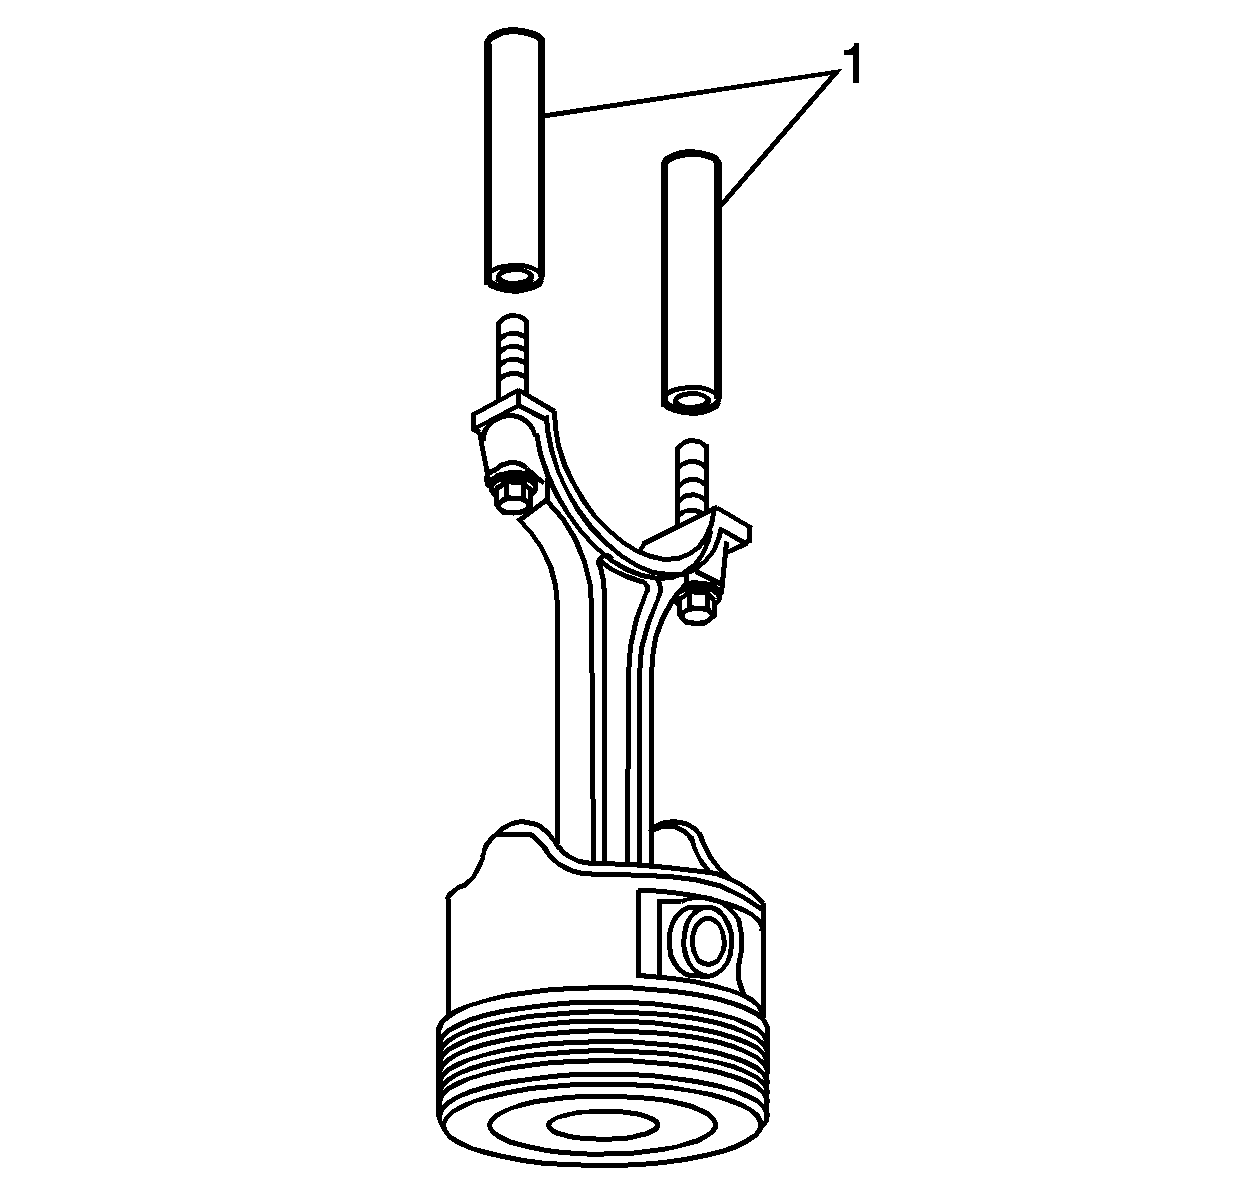
- Coat the following components with clean engine oil:
- Install rubber fuel lines (1) onto the connecting rod bolts.
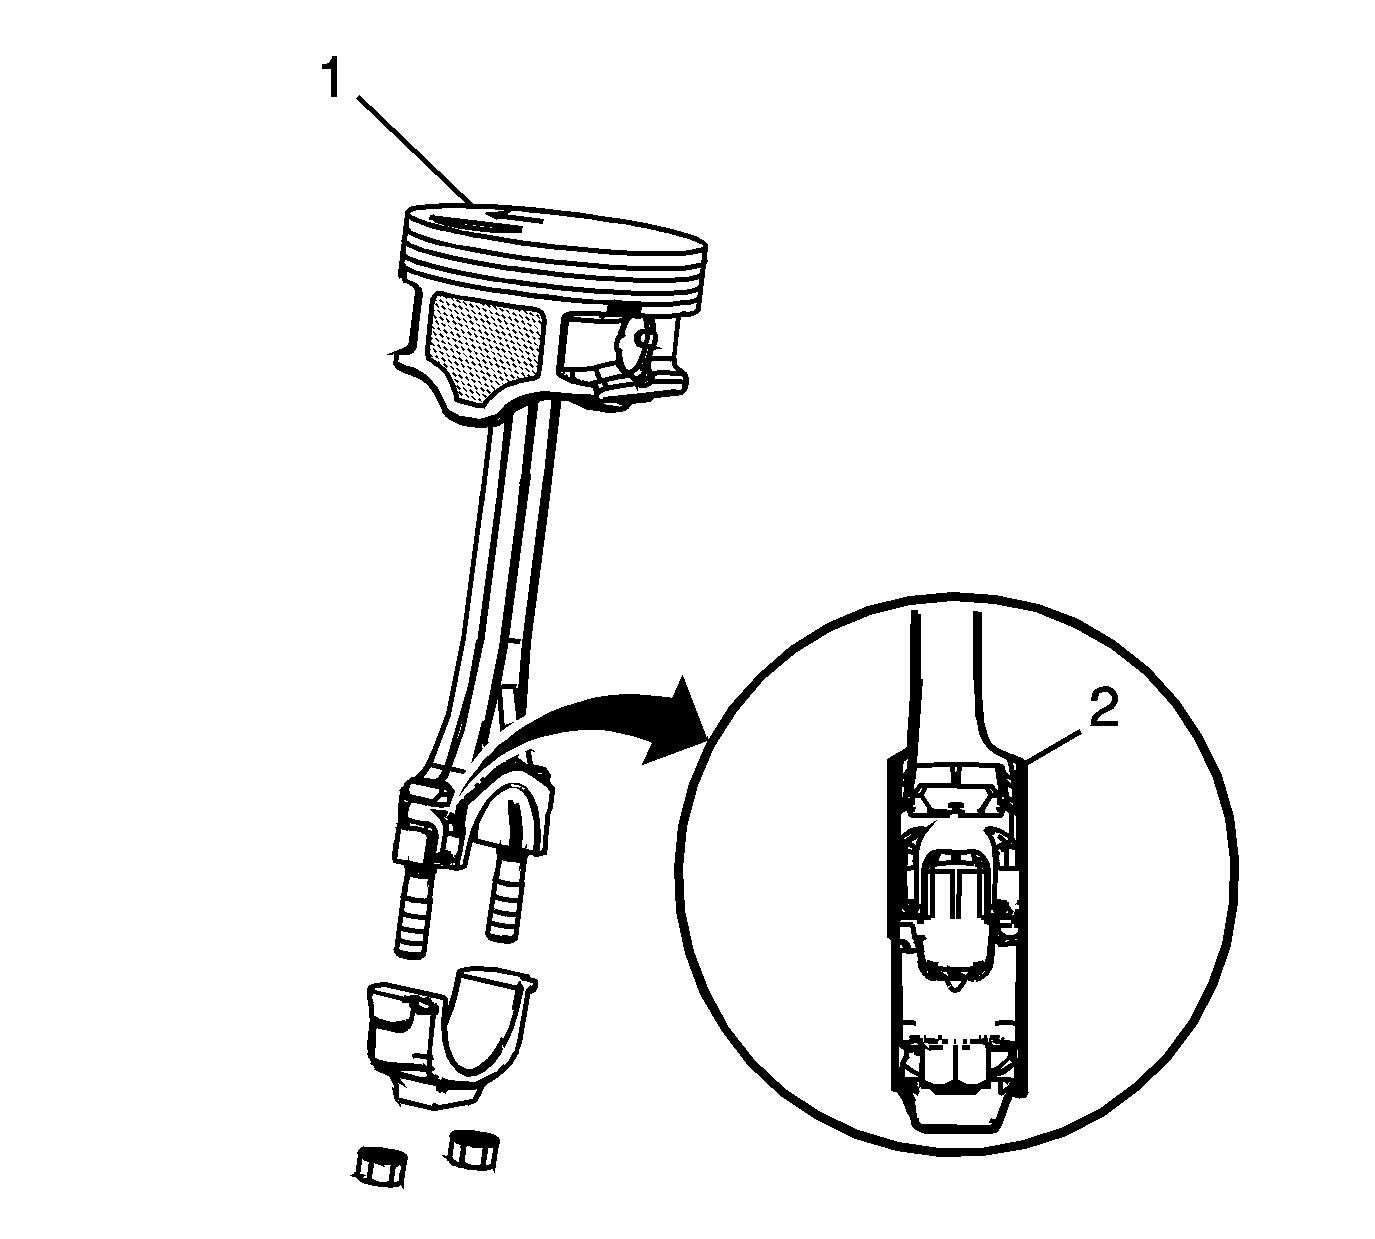
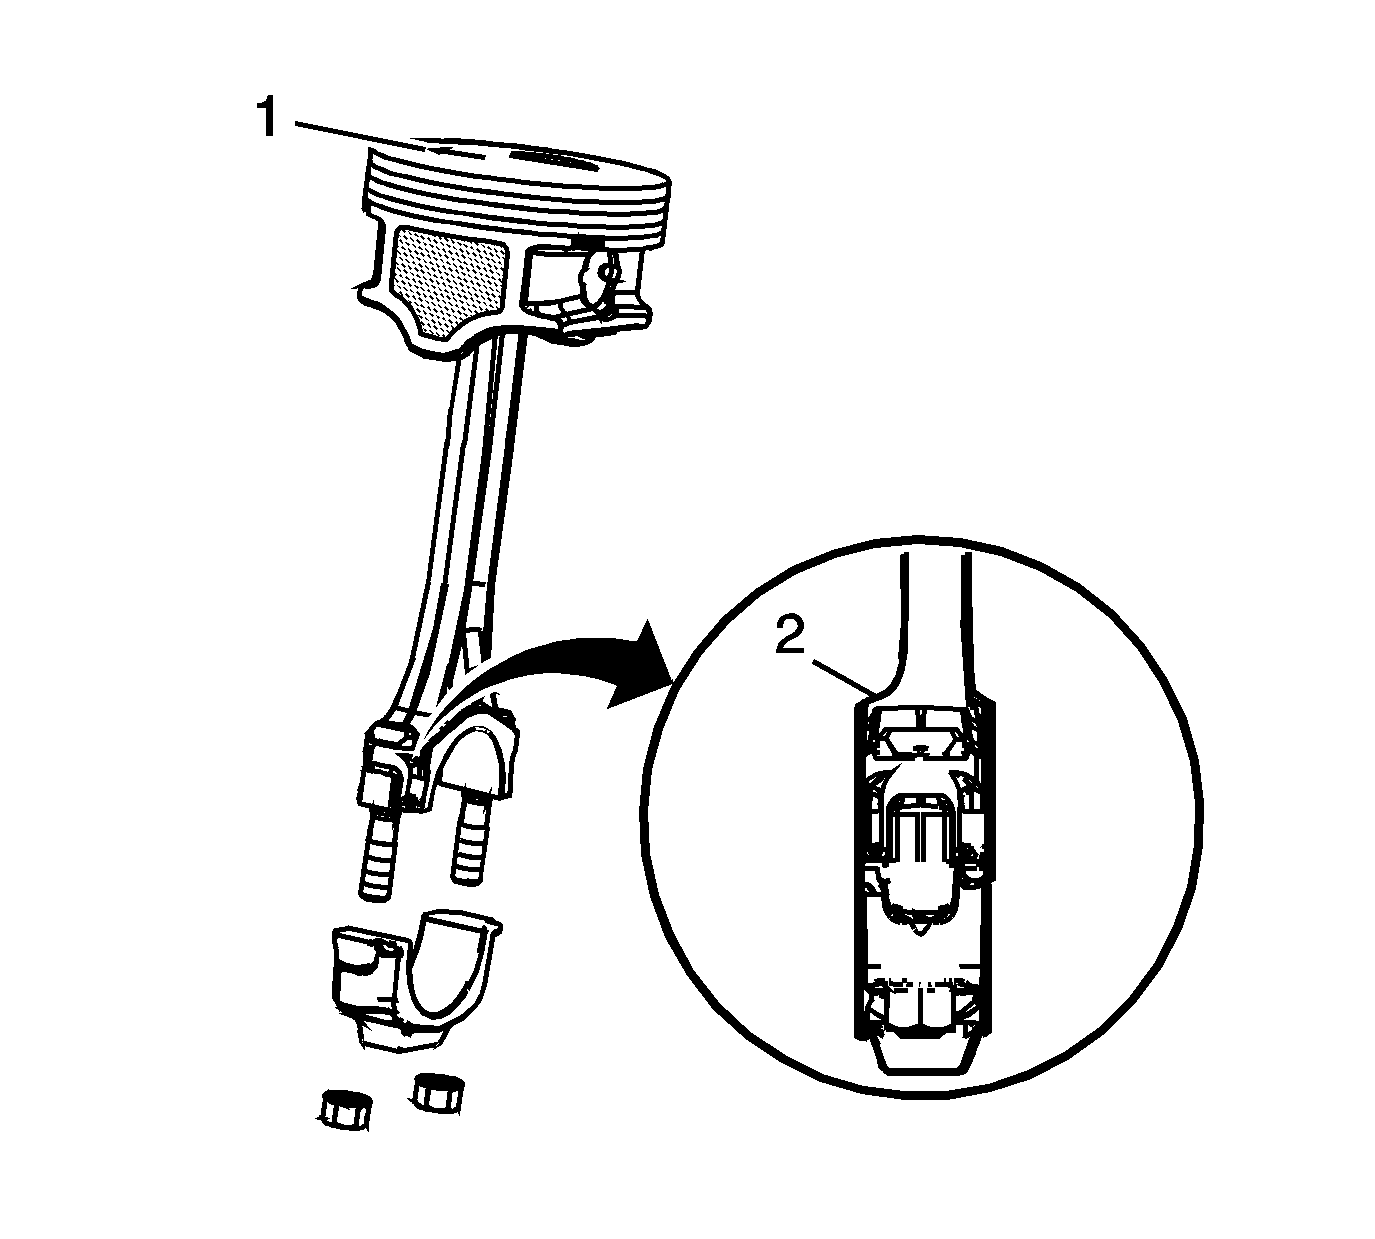
- Position the right bank piston and
connecting rod assemblies for proper installation. The arrow (1) on the top of the piston should be facing the front of the engine and the master or larger flange (2) of the connecting rod facing rear of engine.
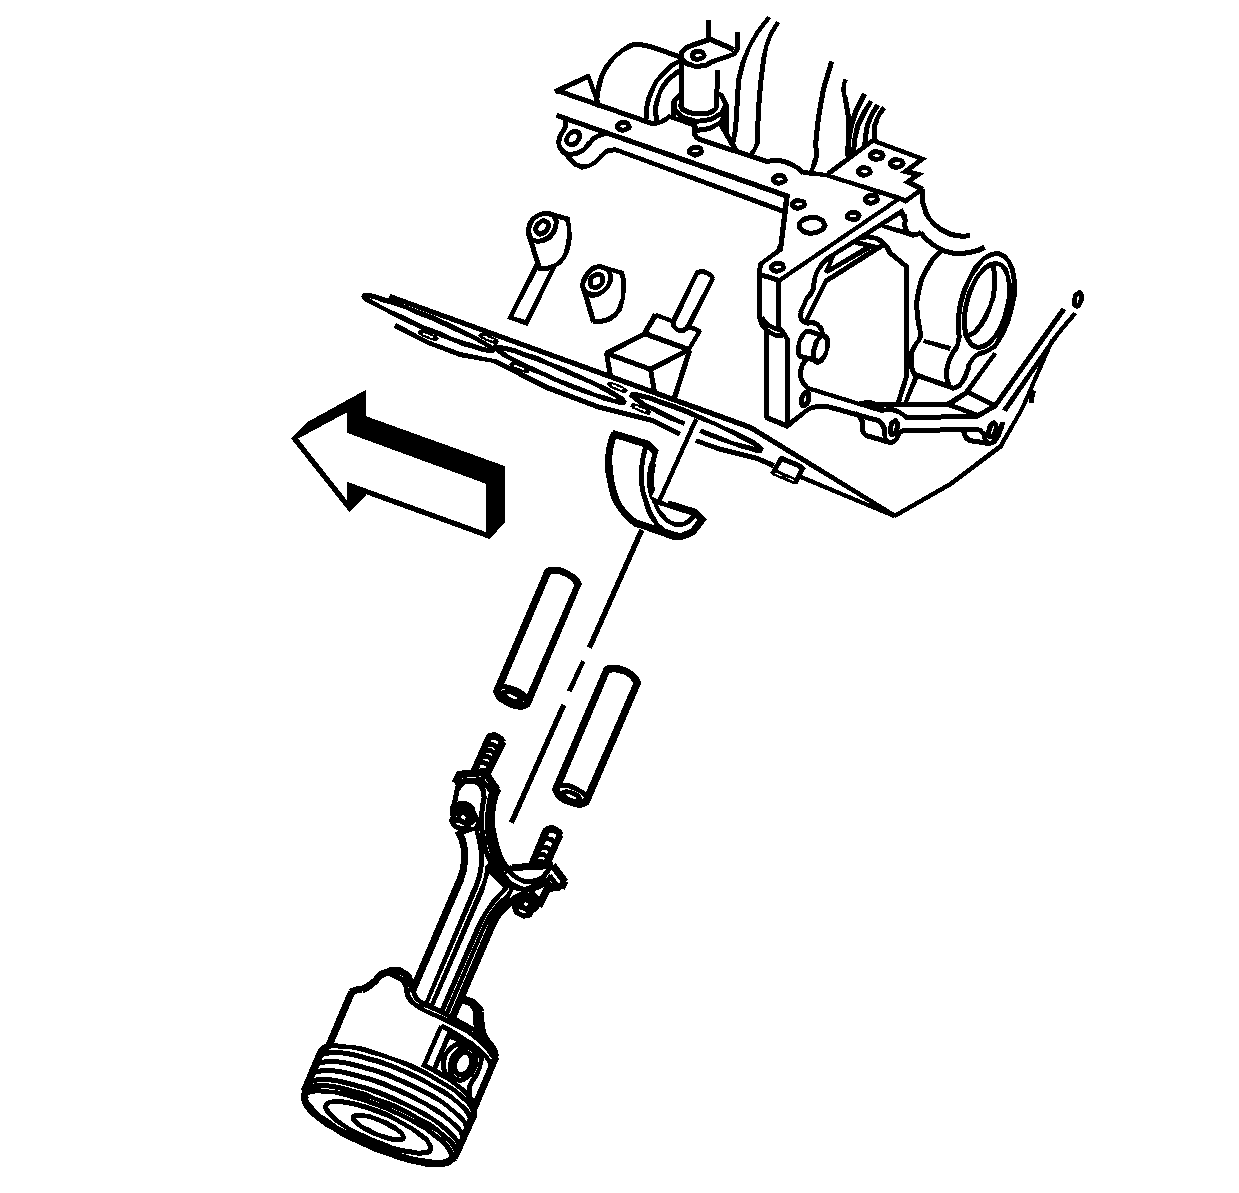
- Position the left bank piston and connecting
rod assemblies for proper installation. The arrow (1) on the top of the piston should be facing the front of the engine and the master or larger flange (2) of the connecting rod facing front of engine.
- Install the piston, connecting rod, and upper connecting
rod bearing through the top of the engine block.
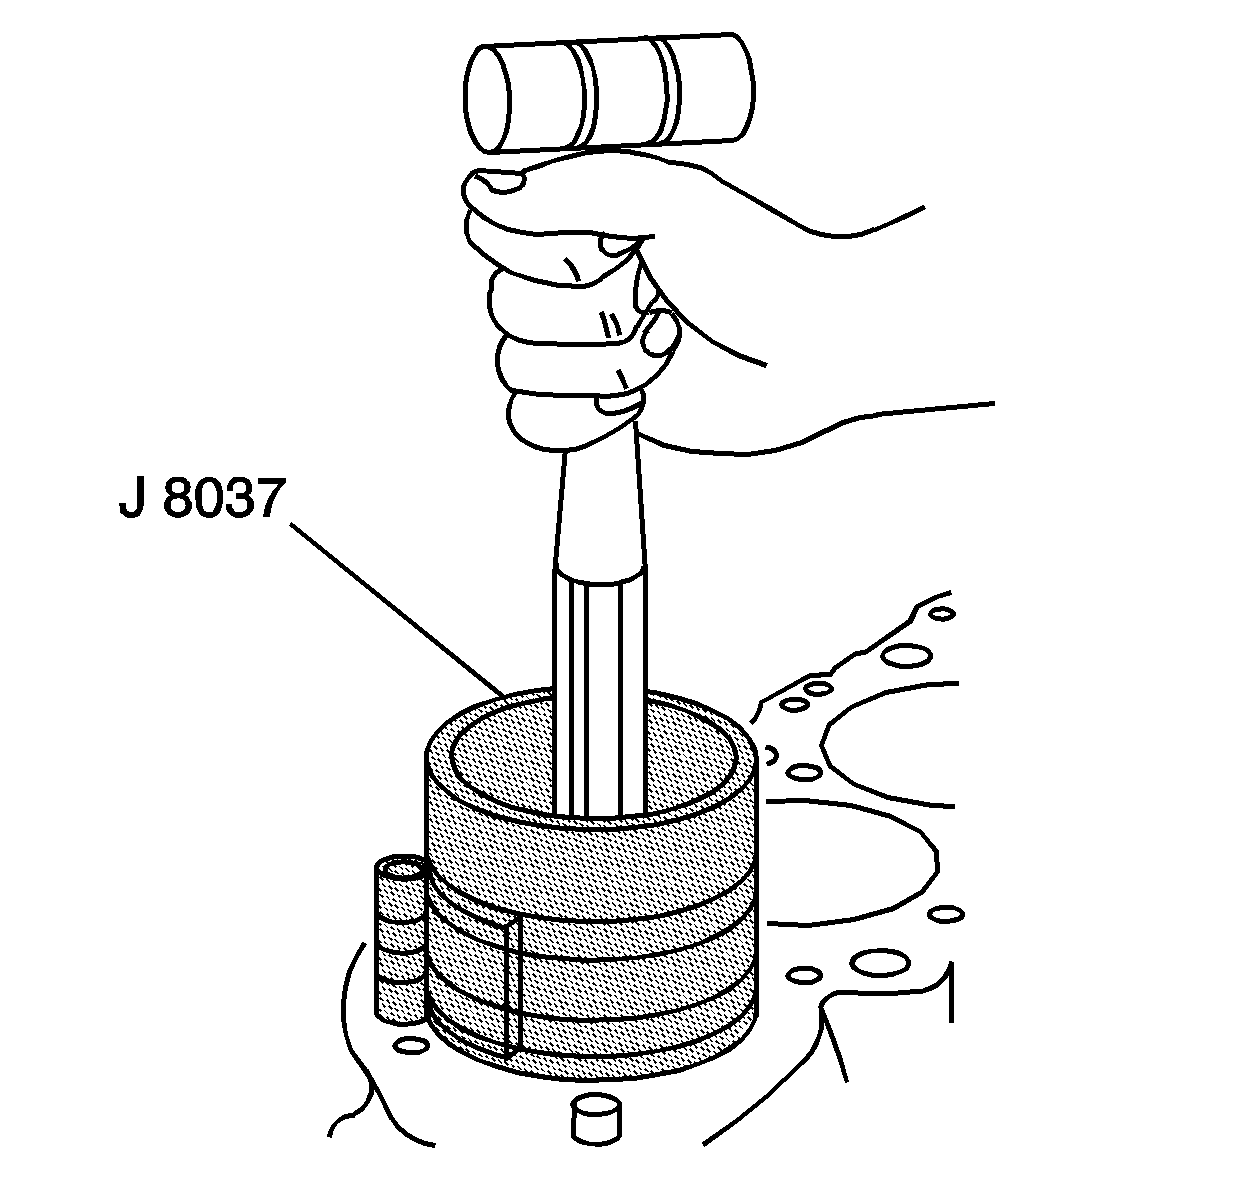
- Install the
J 8037 compressor
onto the piston and compress the piston rings.
- Use the
J 8037 compressor
and lightly tap the top of the piston with a wooden hammer handle.
- Hold the
J 8037 compressor
firmly against the engine block until all of the piston rings have entered the cylinder bore.
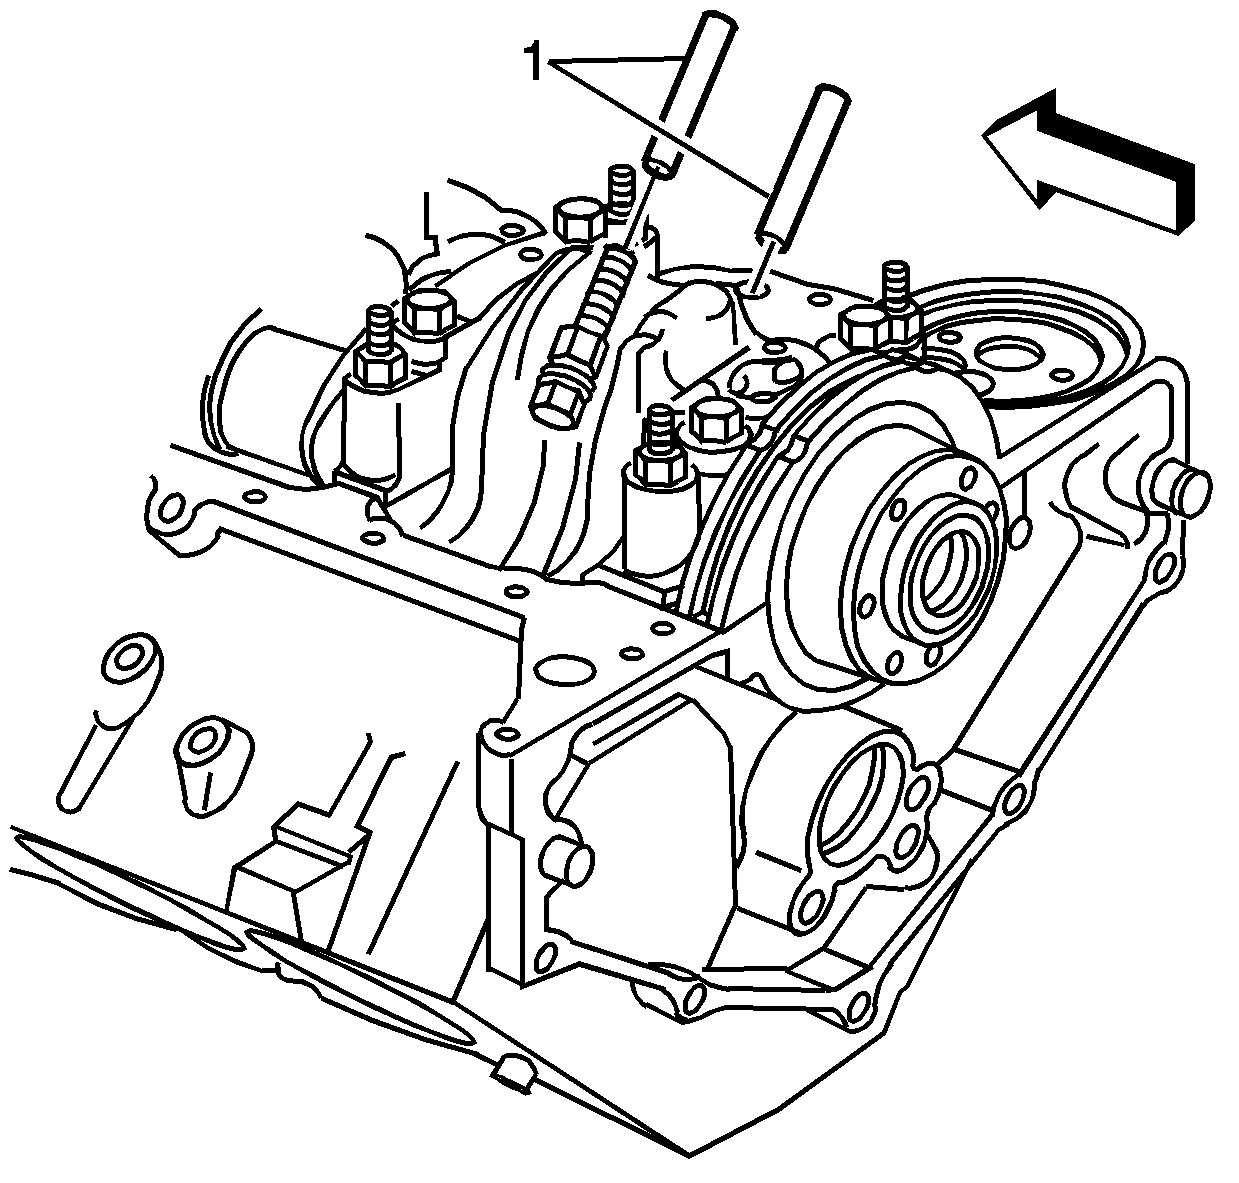
- Use the rubber fuel lines (1) in order to guide
the connecting rod onto the crankshaft journal.
- Remove the rubber fuel lines.
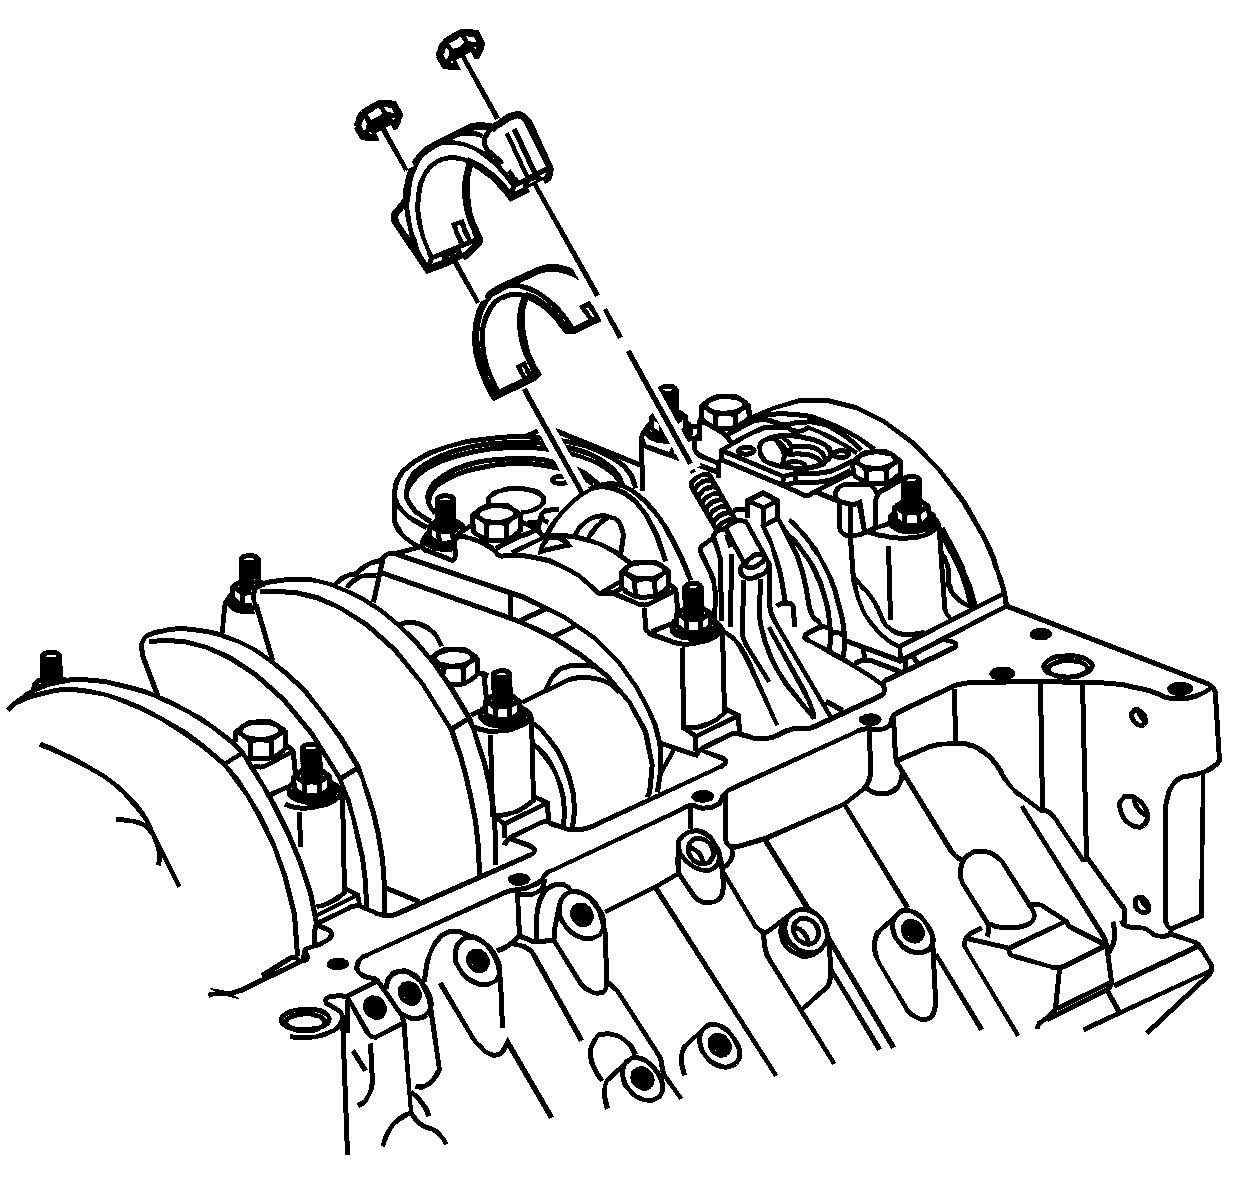
- Install the connecting rod cap and lower connecting rod bearing.
Caution: Refer to Fastener Caution in the Preface section.
Note: When installing the piston and connecting rod assembly, NEW connecting rod nuts must be installed.
- Install the NEW connecting rod nuts.
| 12.1. | Tighten the connecting rod nuts a first pass to
30 N·m (22 lb ft). |
| 12.2. | Tighten the connecting rod nuts a final pass an additional
90 degrees, using the
J 45059 meter
. |
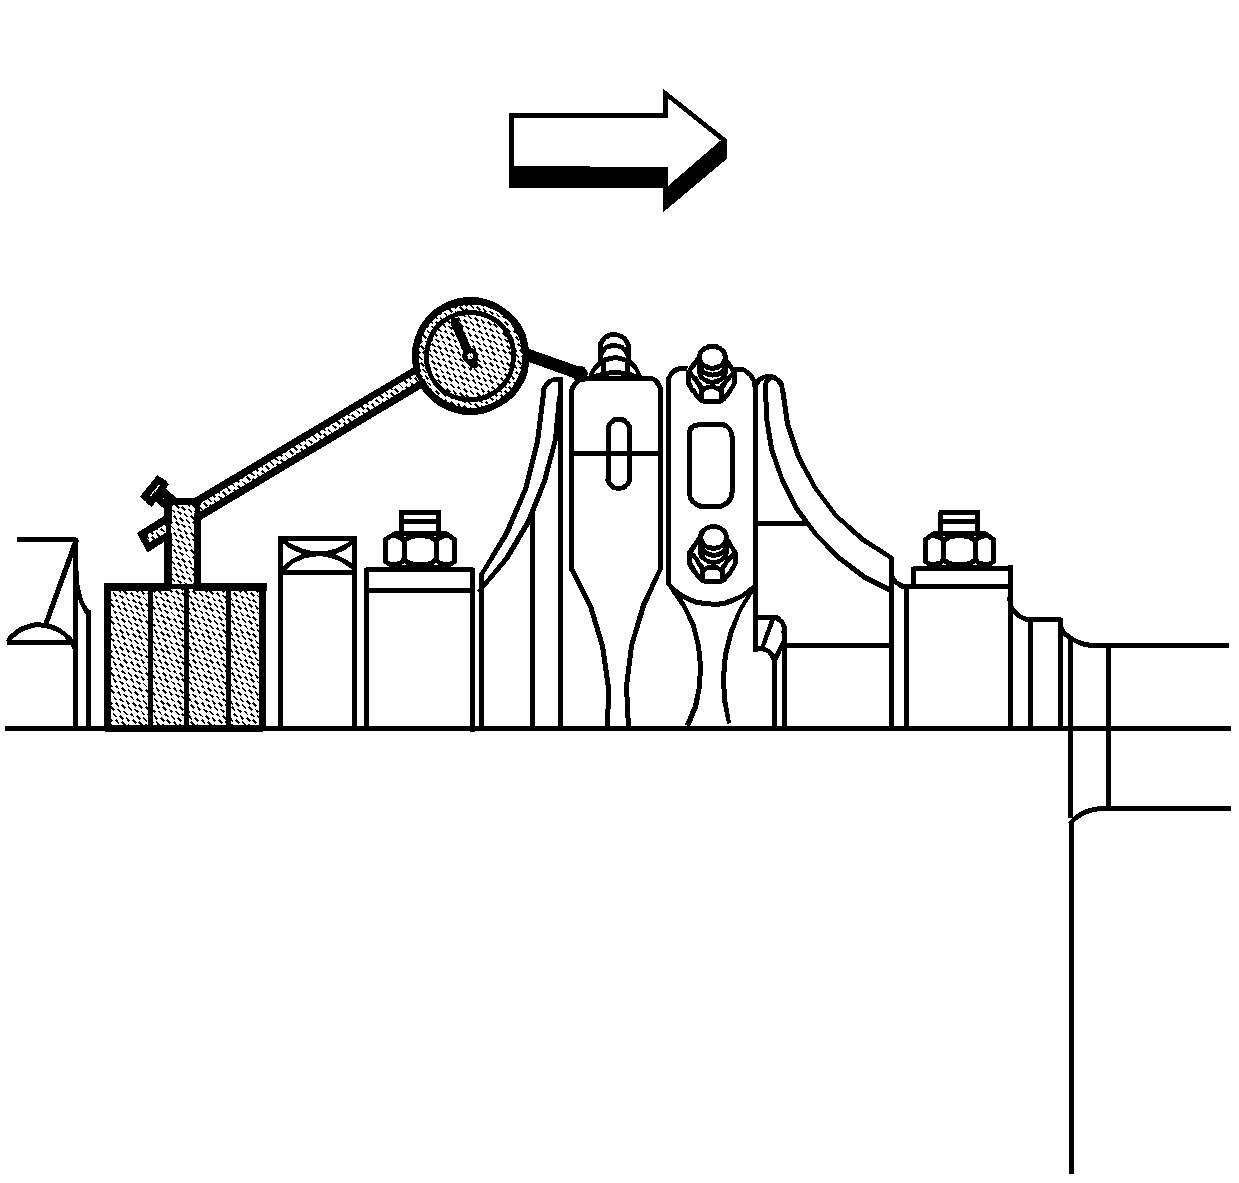
- Once the piston and connecting rod assemblies have been installed, lightly tap each connecting rod assembly, parallel to the crankpin, in order to ensure
they have side clearance.
- Use a feeler gage or a dial indicator in order to measure the side clearance between the connecting rod caps. The rod side clearance should be 0.384-0.686 mm (0.0151-0.0270 in).


