For 1990-2009 cars only
Tools Required
J 38185 Hose Clamp Pliers
Installation Procedure
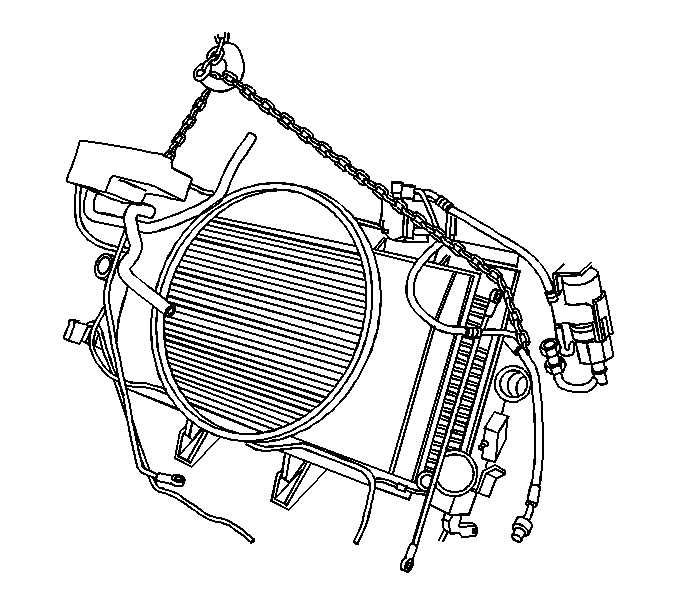
- Install the cooling layer using a suitable lifting device.
- Install the lower radiator support nuts.
- Connect the vacuum hose to the vacuum connection (1).
- Connect the transmission oil cooler lines. Refer to Transmission Fluid Cooler Hose/Pipe Quick-Connect Fitting Disconnection and Connection for the automatic transmission.
- Connect the auxiliary transmission oil cooler lines to the auxiliary transmission oil cooler. Refer to Transmission Fluid Cooler Hose/Pipe Quick-Connect Fitting Disconnection and Connection for the automatic transmission.
- Connect the auxiliary transmission oil cooler line retaining nuts.
- Connect the auxiliary engine oil cooler hoses. Refer to Engine Oil Cooler Hose/Pipe Replacement .
- Install the front bumper. Refer to Front Bumper Replacement .
- Install the accumulator (5) to the bracket.
- Install the nuts (3) to the accumulator retaining bracket.
- Install the A/C coupling (4) to (2).
- Install the A/C coupling (3) to (2).
- Connect the low pressure sensor electrical connector.
- Install the compressor (2).
- Install the compressor mounting bolts.
- Connect the compressor clutch electrical connector.
- Connect the high pressure switch electrical connector.
- Install the drive belt to the A/C compressor pulley. Refer to the appropriate procedure:
- Install the radiator inlet hose to the radiator.
- Install the hose clamp at the radiator inlet housing using the J 38185 .
- Install the radiator outlet hose to the radiator.
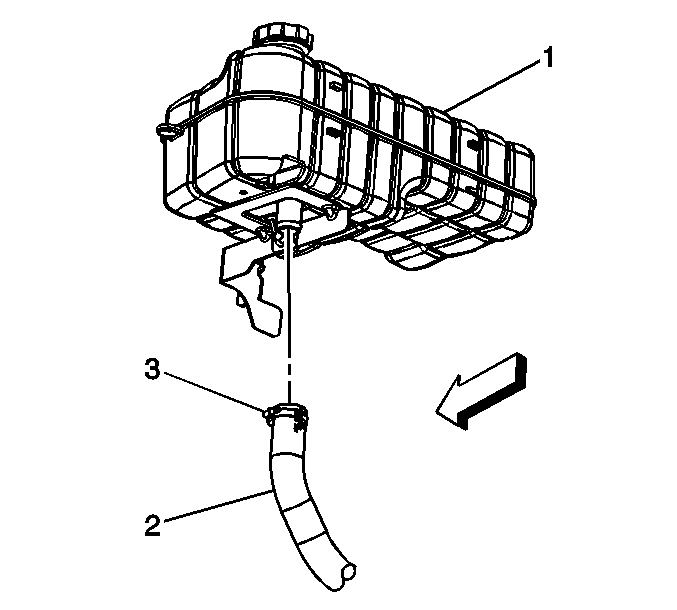
- Install the radiator hose (2) to the surge tank.
- Install the radiator hose retainers to the fan shroud.
- Install the radiator outlet hose clamp to the surge tank using the J 38185 .
- Install the radiator outlet clamp to the radiator outlet using the J 38185 .
- Install the outlet heater hose.
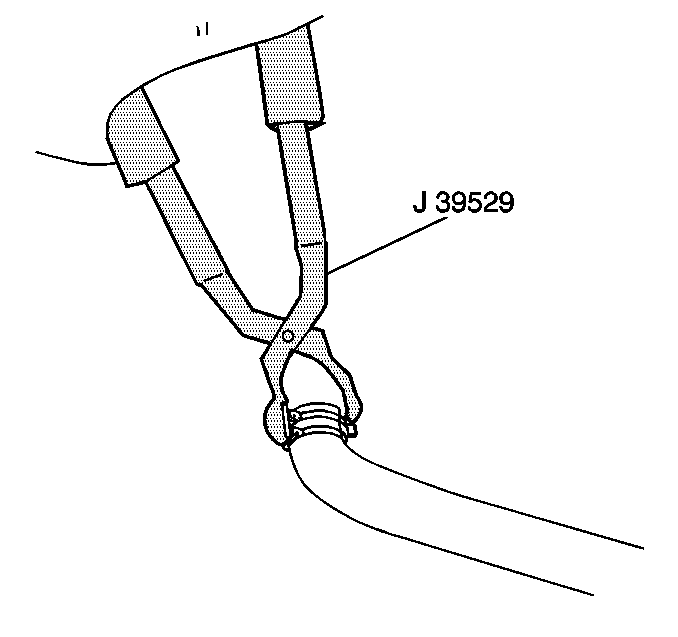
- Install the outlet heater hose clamp using the J 39529 .
- Connect the surge tank level sensor electrical connector.
- Fill the cooling system. Refer to Cooling System Draining and Filling .
- Inspect the automatic transmission fluid level. Refer to Approximate Fluid Capacities .
- Inspect the engine oil level. Refer to Approximate Fluid Capacities .
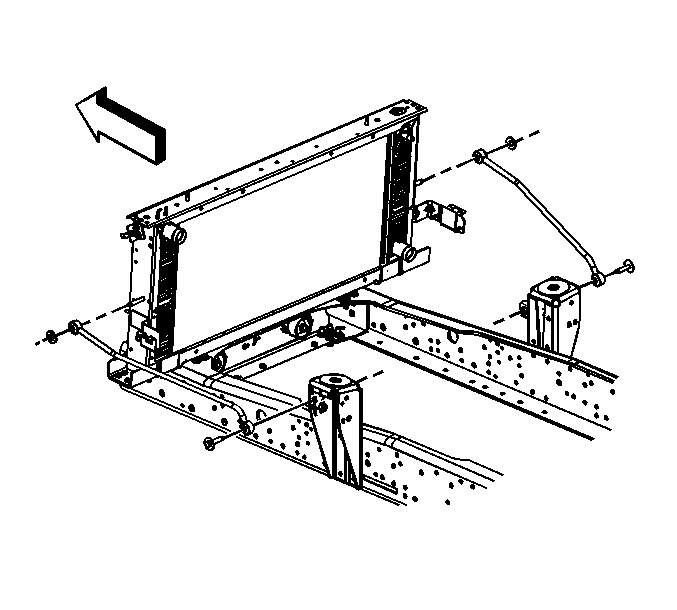
- Install the right and left radiator support brace bolt and nut to the shock bracket.
- Install the charged air cooler hoses to the charged air cooler. Refer to Charged Air Cooler Hoses/Pipes Replacement for the 7.8L engine.
- Install the Hood. Refer to Hood Layer Installation .
- Install the air cleaner layer. Refer to the appropriate procedure:
- Install the headlight harness. Refer to Sealed Beam Headlamp Replacement .
Notice: Refer to Fastener Notice in the Preface section.
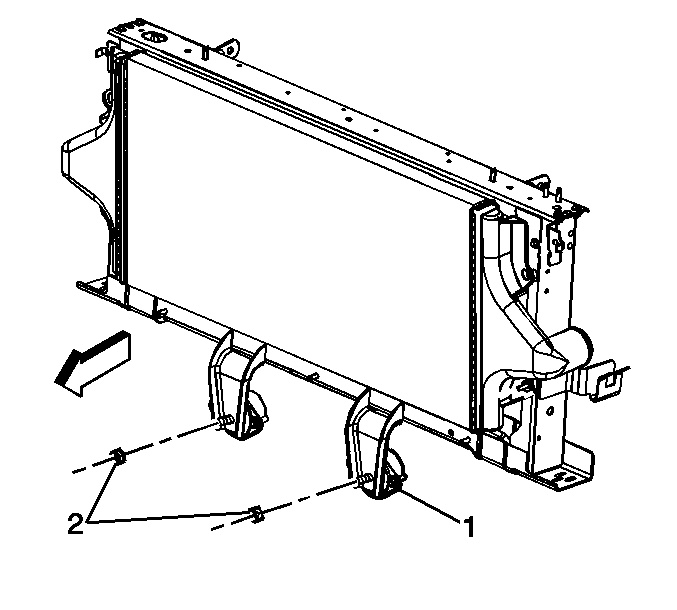
Tighten
Tighten the nuts to 60 N·m (44 lb ft).
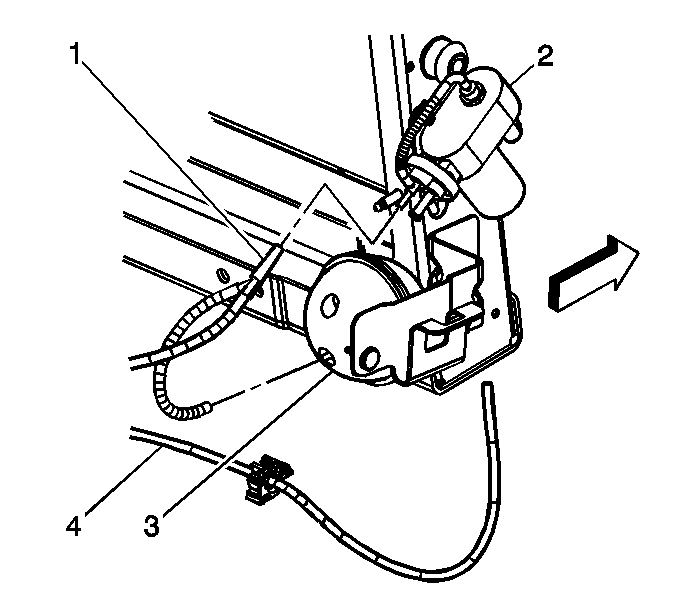
Tighten
Tighten the nuts to 18 N·m (13 lb ft).
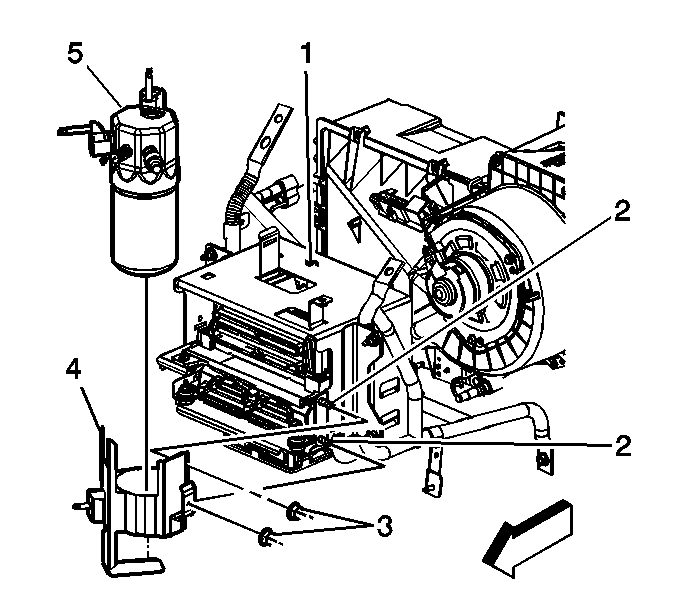
Tighten
Tighten the nuts to 9 N·m (80 lb in).
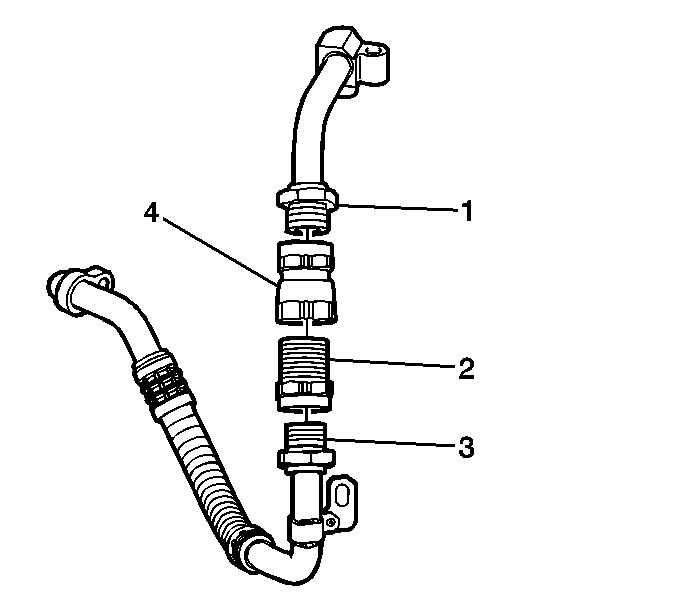
Tighten
Tighten the fitting to 45 N·m (33 lb ft).
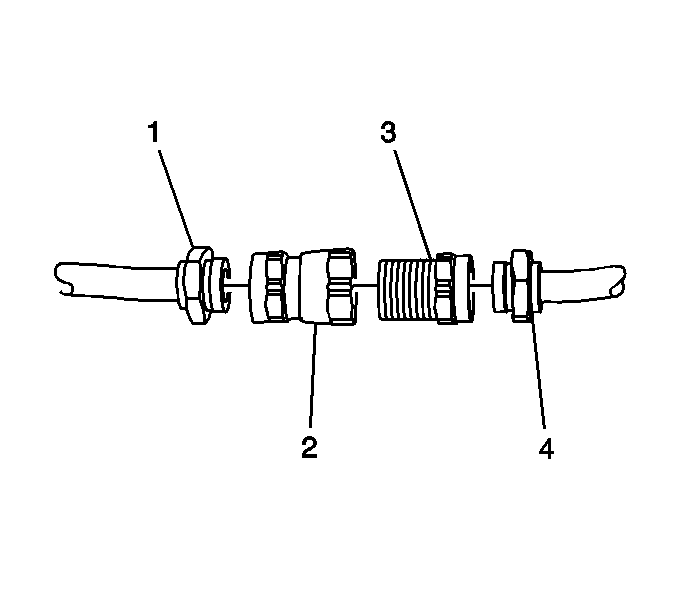
Tighten
Tighten the fitting to 35 N·m (26 lb ft).
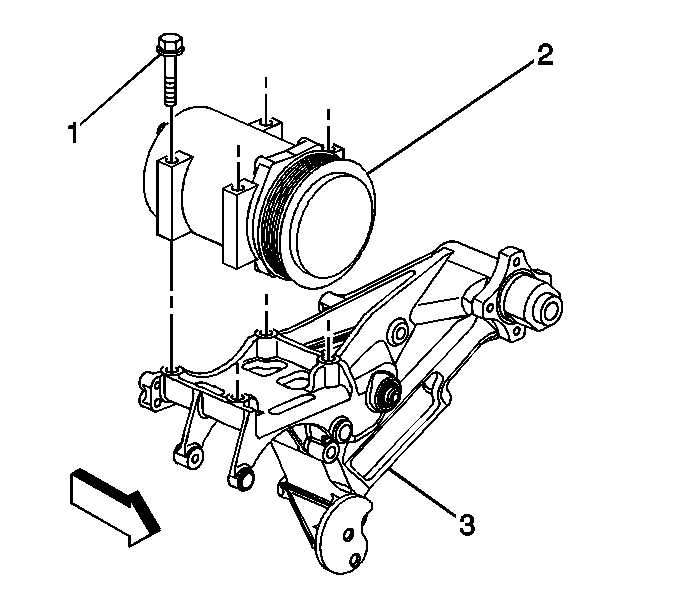
Tighten
Tighten the bolts to 50 N·m (37 lb ft).
| • | Drive Belt Replacement for the 6.6L engine |
| • | Drive Belt Replacement for the 7.8L engine |
| • | Drive Belt Replacement for the 8.1L engine |
| • | Caterpillar® 3126 Unit Repair Manual |
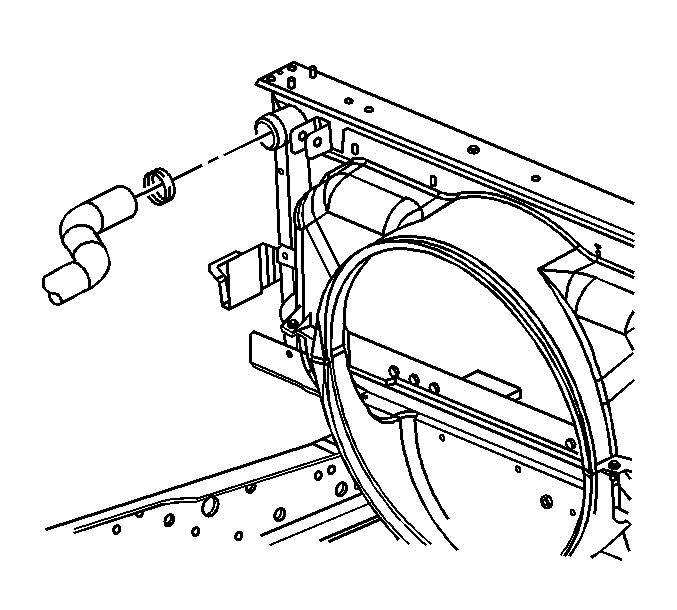
Tighten
Tighten the bolts to 30 N·m (22 lb ft).
| • | Air Cleaner Replacement for the 6.6L engine |
| • | Air Cleaner Replacement for the 7.8L engine |
| • | Air Cleaner Replacement for the 8.1L engine |
| • | Caterpillar® 3126 Unit Repair Manual |
