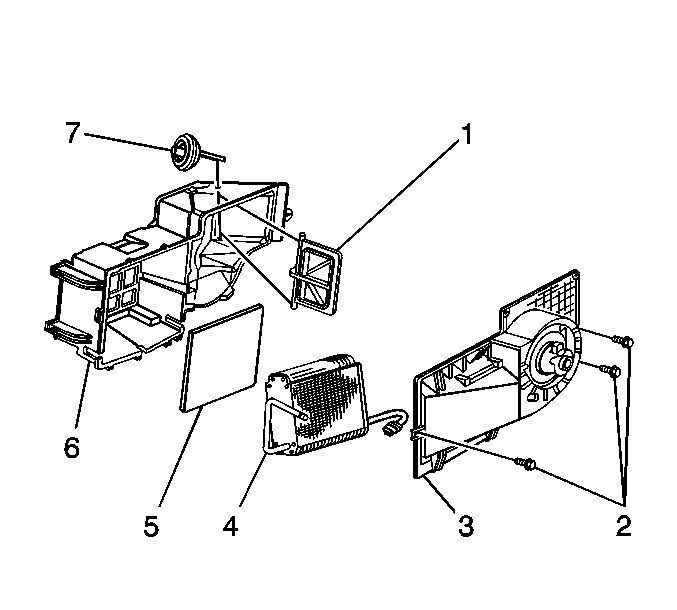
- Install the recirculation door actuator (7)
and the linkage.
- Install the evaporator and blower module assembly cover (3).
Notice: Use the correct fastener in the correct location. Replacement fasteners
must be the correct part number for that application. Fasteners requiring
replacement or fasteners requiring the use of thread locking compound or sealant
are identified in the service procedure. Do not use paints, lubricants, or
corrosion inhibitors on fasteners or fastener joint surfaces unless specified.
These coatings affect fastener torque and joint clamping force and may damage
the fastener. Use the correct tightening sequence and specifications when
installing fasteners in order to avoid damage to parts and systems.
- Install the screws.
Tighten
Tighten the screws to 1.9 N·m (17 lb in).
- Install new sealing washers to the evaporator inlet and outlet tubes.
Refer to
Sealing Washer Replacement
.
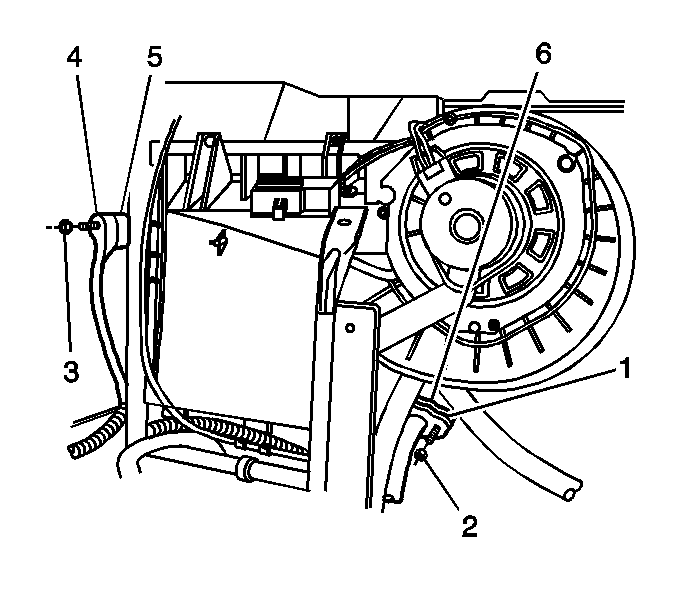
- Install the evaporator inlet tube (4)
to the evaporator.
- Install the evaporator inlet tube retaining nut (3).
Tighten
Tighten the nut to 16 N·m (12 lb ft).
- Install the multi-use module bracket. Refer to the appropriate procedure:
| • | Caterpillar® 3126 Unit Repair Manual |
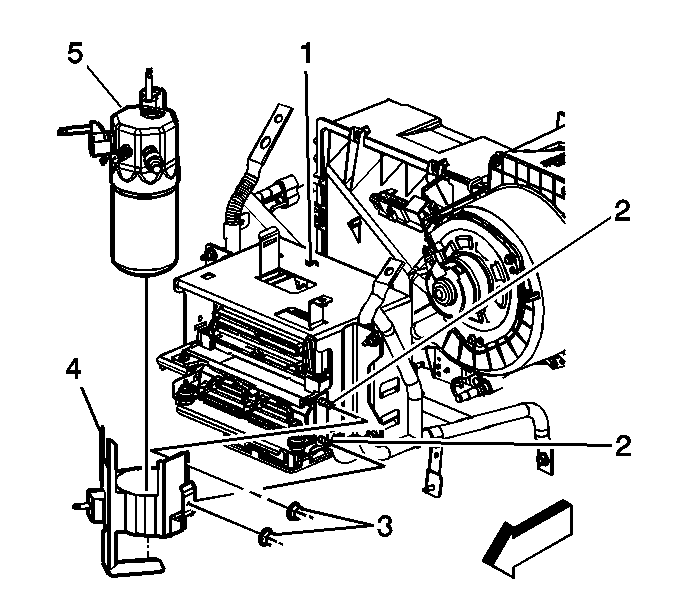
- Install the accumulator (5) to the bracket.
- Install the nuts (3) to the accumulator retaining bracket.
Tighten
Tighten the nuts to 9 N·m (80 lb in).
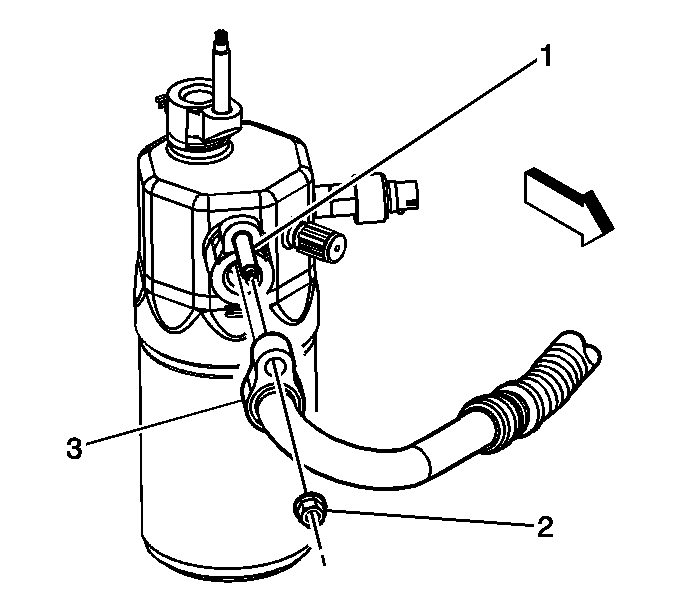
- Install the compressor inlet hose and retaining nut (2) to the accumulator.
Tighten
Tighten the nut to 16 N·m (12 lb ft).
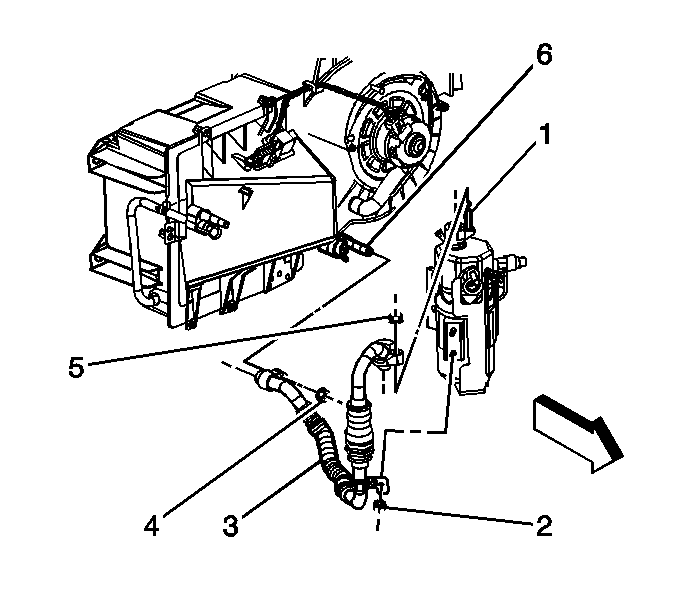
- Install the evaporator outlet hose and
retaining nuts (4,5).
Tighten
Tighten the nut to 18 N·m (13 lb ft).
- Connect the low pressure sensor electrical connector.
- Connect the blower motor electrical connector.
- Connect the blower motor resistor assembly electrical connector.
- Install the air cleaner layer. Refer to the appropriate procedure:
| • | Caterpillar® 3126 Unit Repair Manual |
- Install the right wheelhouse panel. Refer to
Wheelhouse Panel Replacement
in Body Front End.
- Evacuate and recharge the A/C system. Refer to
Refrigerant Recovery and Recharging
.


