Removal Procedure
- Set the parking brake.
- Block the vehicles rear wheels.
- Raise the frame until the front tires clear the floor.
Important: Raise the frame high enough in order to allow the spring to clear the rear spring bracket when you lower the axle.
- Remove the front wheel if necessary.
Notice: Refer to Crossmember Support Notice in the Preface section.
- Support the frame using suitable safety stands.
- Support the axle with a jack.

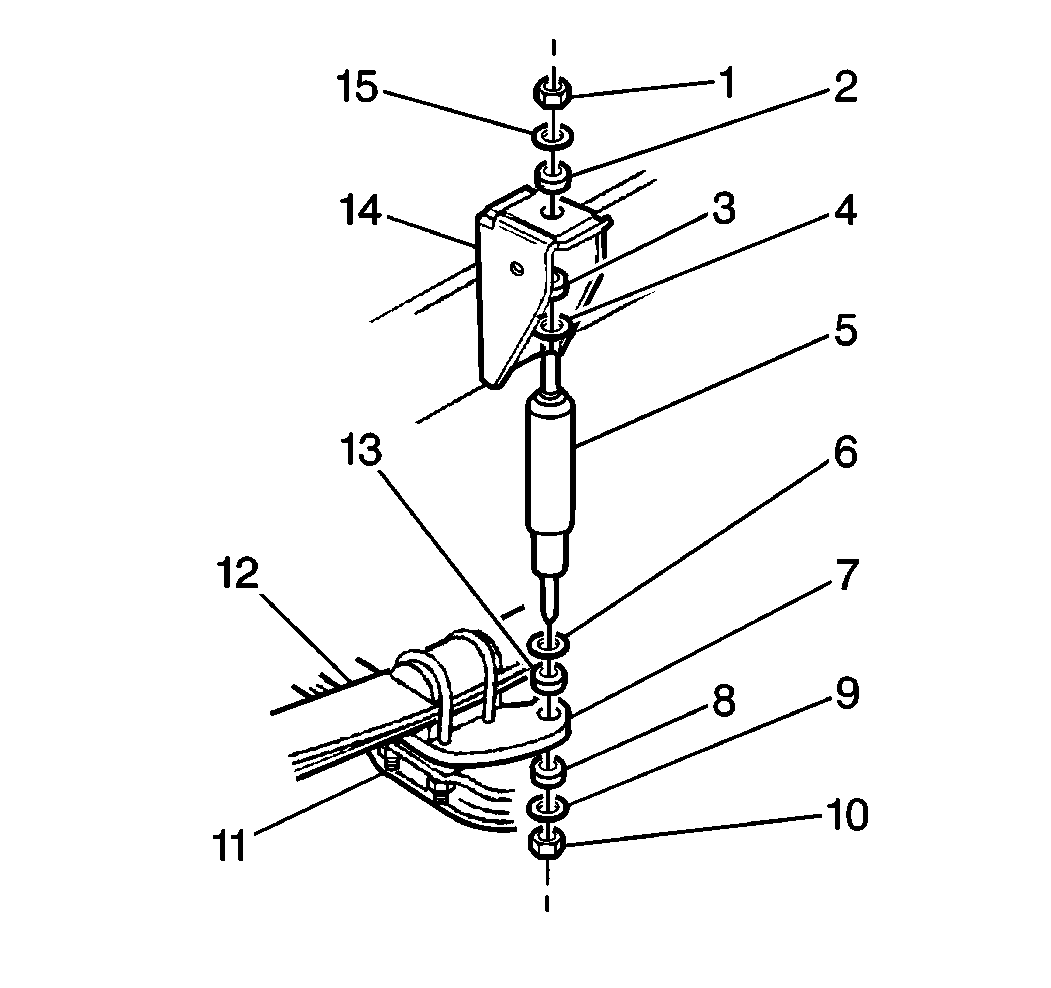
- Remove the following components from the lower mounting brackets (7):
- Remove the shock absorbers (5) from the lower mounting brackets (7). Push the shock absorbers into the fully retracted position.

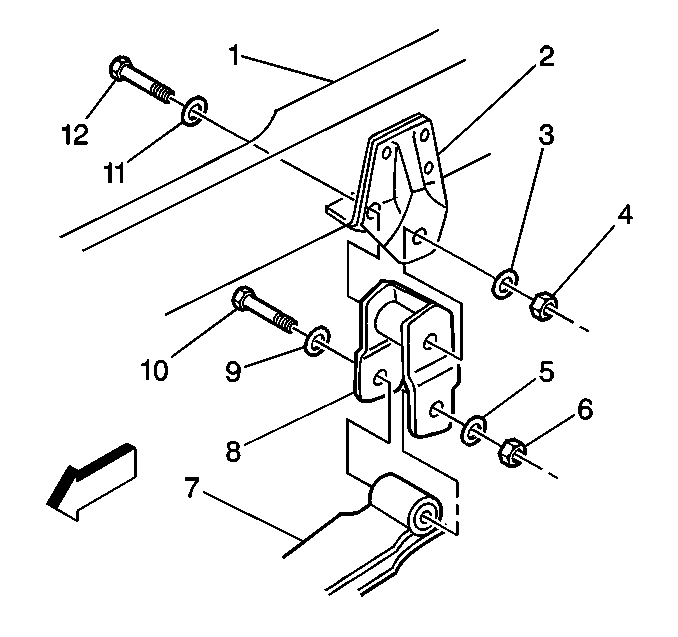
- Remove the following components from the hanger (2):
| • | The hanger eye bolt nut (4) |
- Lower the axle far enough to allow the spring shackle (8) to clear the hanger and allow removal of the bracket (2).

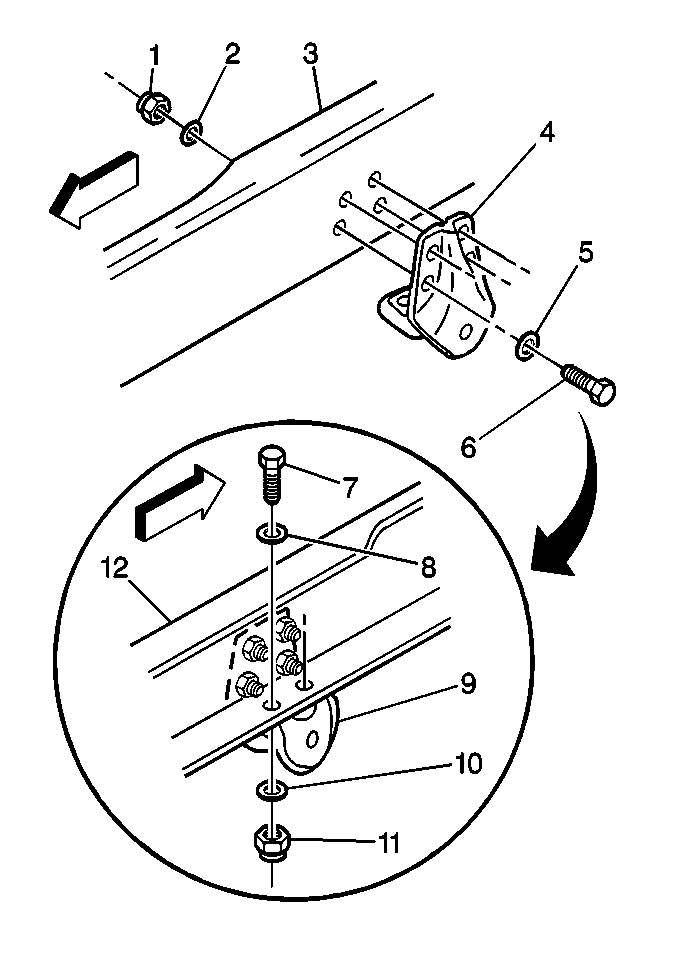
- Remove the following components from the side member (3):
| • | The spring hanger nuts (1, 11) |
Installation Procedure
Notice: Refer to Fastener Notice in the Preface section.

- Install the hanger (4) to the side member with the following parts:
Tighten
| • | F02: Tighten the spring hanger nuts to 70 N·m (52 lb ft). |
| • | Non F02: Tighten the spring hanger nuts to 100 N·m (74 lb ft). |

- Raise the spring.
- Guide the shackle assembly (8) into the hanger aligning the holes.
- Install the following components:
Tighten
Tighten the rear spring hanger shackle assembly nut to 330 N·m (243 lb ft).

- Install the washer (6) and the insulator (13) if removed.
- Install the shock absorber (5) into the lower mounting bracket (7)
- Install the following components:
Tighten
Tighten the lower shock absorber nut to 85 N·m (63 lb ft).
- Install the front wheel if removed.
- Lower the vehicle.
- Remove the blocks from the wheels.


