Pitman Arm Replacement 4WD
Special Tools
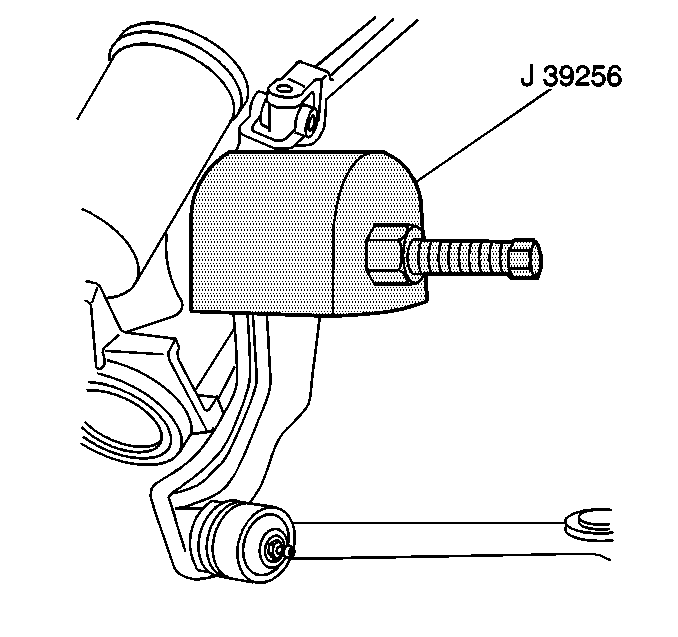
J 39256 Pitman Arm Puller
Removal Procedure
- Loosen the pitman arm nut (1) approximately one turn.
- Remove the relay rod from the pitman arm. Refer to Relay Rod Replacement.
- Mark the position of the pitman arm on the pitman shaft.
- Remove the pitman arm nut.
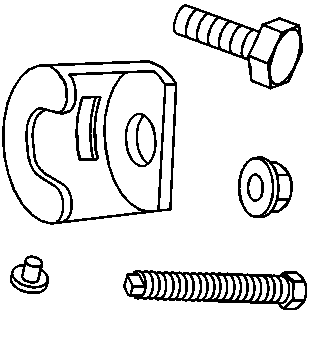
- Remove the flat washer, if equipped.
- Use J 39256 in order to remove the pitman arm from the power steering gear. Place a prybar or similar tool between the pitman arm and the frame to prevent the pitman arm from turning when the bolt is tightened on J 39256 .
Caution: Do not hammer on the pitman arm, pitman arm shaft or puller. Damage to the pitman arm or steering gear may result.
Note: Pitman arms are non-repairable. Replace the pitman arm when the arm becomes damaged or worn.
Installation Procedure
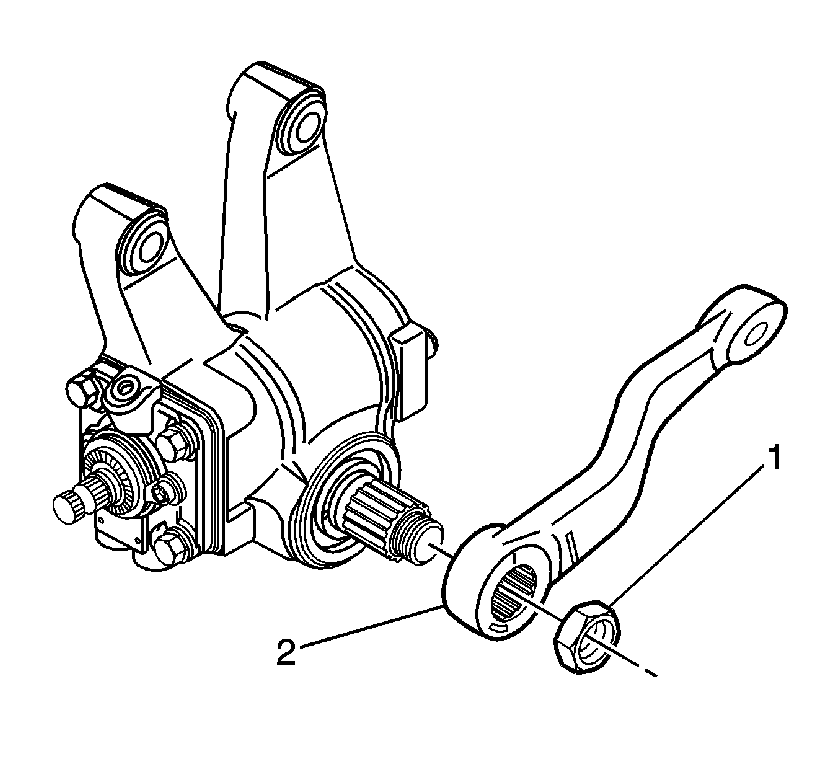
- Align the position marks made during the removal.
- Install the pitman arm (2) to the power steering gear.
- Install the flat washer, if equipped.
- Install the pitman arm nut (1).
- Install the relay rod to the pitman arm.
- Install the relay rod to pitman arm nut.
Caution: Refer to Fastener Caution in the Preface section.
Tighten
Tighten the nut to 350 N·m (258 lb ft).
Tighten
Tighten the nut to 350 N·m (258 lb ft).
Pitman Arm Replacement C4500/C5500
Special Tools
J 39256 Pitman Arm Puller
Removal Procedure
- Loosen the pitman arm nut (1) approximately one turn.
- Remove the relay rod from the pitman arm. Refer to Relay Rod Replacement
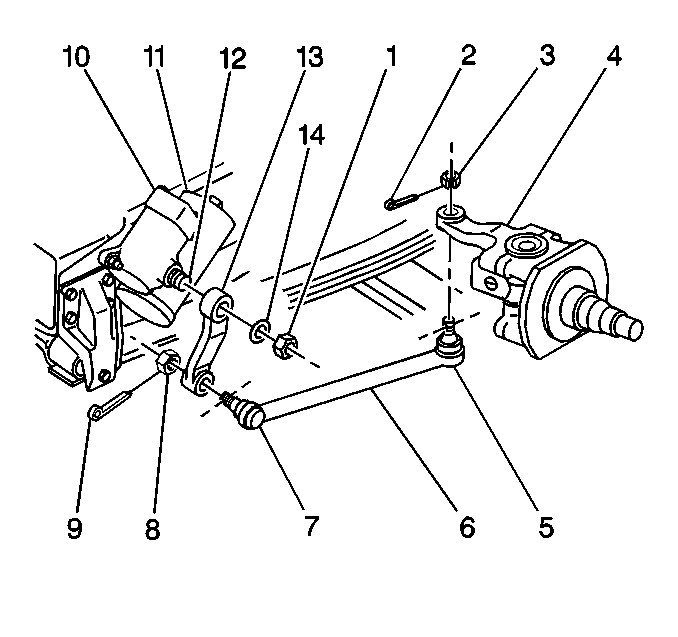
- Mark the position of the pitman arm (13) on the pitman shaft (12).
- Remove the pitman arm nut (1).
- Remove the flat washer (14), if equipped.
- Use J 39256 in order to remove the pitman arm. Place a prybar or similar tool between the pitman arm and the frame to prevent the pitman arm from turning when the bolt is tightened on J 39256 .
Caution: Do not hammer on the pitman arm, pitman arm shaft or puller. Damage to the pitman arm or steering gear may result.
Note: Pitman arms are non-repairable. Replace the pitman arm when the arm becomes damaged or worn.
Installation Procedure
- Align the position marks made during the removal.
- Install the pitman arm (13).
- Install the flat washer, if equipped (14).
- Install the pitman arm nut (1).
- Install the relay rod assembly. Refer to Relay Rod Replacement.
Caution: Refer to Fastener Caution in the Preface section.
Tighten
Tighten the pitman arm nut to 325 N·m (240 lb ft).
Pitman Arm Replacement C6500/C7500/C8500
Special Tools
J 39256 Pitman Arm Puller
Removal Procedure
- Loosen the pitman arm nut (1) approximately one turn.
- Remove the relay rod from the pitman arm. Refer to Relay Rod Replacement.
- Mark the position of the pitman arm (13) on the pitman shaft (12).
- Remove the pitman arm nut (1).
- Remove the flat washer, if equipped (14).
- Use J 39256 in order to remove the pitman arm. Place a prybar or similar tool between the pitman arm and the frame to prevent the pitman arm from turning when the bolt is tightened on J 39256 .
Caution: Do not hammer on the pitman arm, pitman arm shaft or puller. Damage to the pitman arm or steering gear may result.
Note: Pitman arms are non-repairable. Replace the pitman arm when the arm becomes damaged or worn.
Installation Procedure
- Align the position marks made during the removal.
- Install the pitman arm (13).
- Install the flat washer, if equipped (14).
- Install the pitman arm nut (1).
- Install the relay rod assembly. Refer to Relay Rod Replacement.
Caution: Refer to Fastener Caution in the Preface section.
Tighten
Tighten the pitman arm nut to 370 N·m (275 lb ft).
